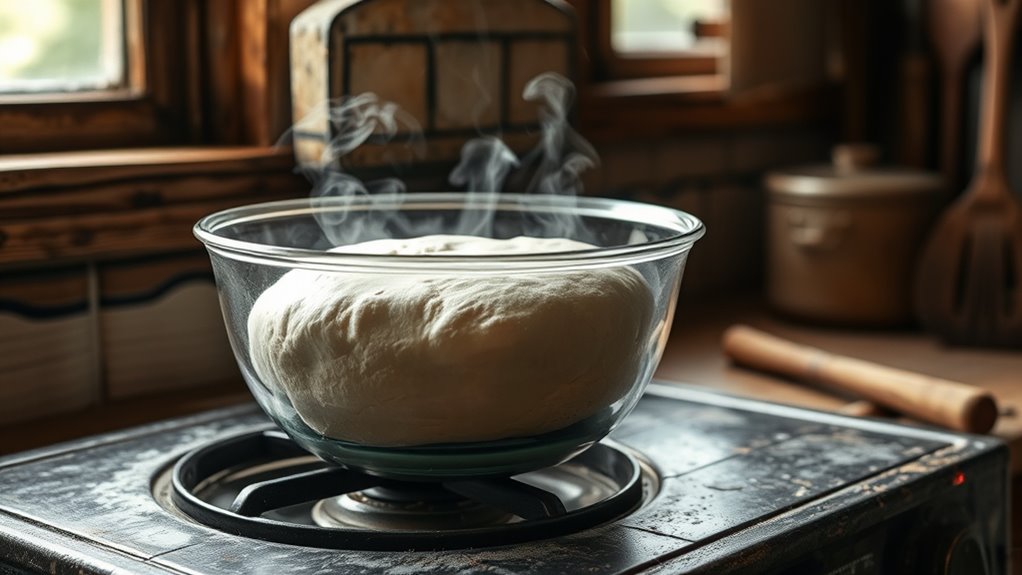
To proof dough using residual heat, turn off your oven after preheating it briefly, then place your dough inside or near warm spots like the turned-off oven or cozy corners. Cover your dough with a damp cloth or plastic wrap to keep moisture in. This method maintains a gentle, consistent temperature that encourages yeast activity without overproofing. If you’re curious to master all the tips and tricks, there’s more to discover that can help you perfect your proofing process.
Key Takeaways
- Use turned-off ovens, warm spots, or proofing boxes to harness residual heat for consistent dough fermentation.
- Cover dough with damp cloths or plastic wrap to retain moisture and warmth during residual proofing.
- Preheat your oven briefly, then turn it off and place dough inside to utilize residual heat effectively.
- Select appliances with precise temperature controls and humidity settings for optimal residual heat proofing.
- Monitor dough’s size and elasticity to avoid overproofing or underproofing during residual heat fermentation.

OLESBUR Air Fryer Liners Disposable, 200Pcs 8 Inch Airfryer Paper Liners, Unbleached Parchment Paper for Air Fryer Basket, Non-Stick Air Fryer Accessories, Liners for Baking, Parchment Paper Sheets
- Premium Food-Grade Materials: Unbleached, BPA-free, non-stick, heat-resistant
- Mess-Free Cooking: Catches grease and crumbs, keeps air fryer clean
- Versatile Usage: Suitable for ovens, microwaves, baking, and frying
As an affiliate, we earn on qualifying purchases.
Understanding Residual Heat and Its Benefits

Residual heat refers to the warmth remaining in your environment or tools after they’ve been used or turned off, and harnessing this heat can be highly beneficial when proofing dough. Understanding residual heat science helps you optimize proofing temperature without extra energy. When you turn off your oven or stove, the lingering warmth can create a stable environment ideal for dough fermentation. Maintaining the right proofing temperature is vital because it influences yeast activity and dough rise. By utilizing residual heat, you avoid overproofing or underproofing, ensuring perfect texture and flavor. This method is energy-efficient and can save you time and effort. Knowing how residual heat works allows you to control your proofing environment more precisely, resulting in better, more consistent baked goods. Additionally, understanding proofing environments can help you adapt to different recipes and conditions more effectively. Recognizing the thermal retention properties of your proofing space further enhances your ability to maintain a consistent temperature without external heat sources. For example, using insulated containers or covers can help trap residual warmth and create an ideal proofing climate. Incorporating the effectiveness of natural heat can optimize your proofing process even further, making the most of available residual warmth. Implementing environmental factors like ambient room temperature can further optimize the proofing process.
Identifying Suitable Appliances for Residual Proofing
To effectively use residual heat for proofing, you need appliances with specific features. Look for ovens that offer low-temperature or proof modes, as these settings help safeguard the ideal environment for your dough. Choosing the right appliance ensures your proofing process is consistent and efficient. Additionally, some modern appliances designed for baking include dedicated proofing settings, which can further optimize your results. Incorporating appliances with precise temperature control can enhance the proofing environment and improve overall results. Proper temperature regulation is crucial for creating the optimal conditions needed for successful dough proofing. As automation and intelligent systems become more prevalent in kitchen appliances, selecting equipment with advanced control options can further improve your proofing process.
Identifying Suitable Appliances for Residual Proofing
Choosing the right appliances for residual proofing is essential to achieving the perfect rise without overproofing your dough. You need appliances that provide gentle, consistent warmth to support dough fermentation and yeast activity. Consider these options:
- Oven with a proofing setting – Offers controlled heat, ideal for maintaining steady temperatures.
- Bread proofing box – Specifically designed to create a stable environment for dough.
- Warm spot in your kitchen – A cozy corner away from drafts, perfect for natural residual heat.
- Cooling drawer or warming drawer – Maintains a gentle, uniform temperature for ideal fermentation.
These appliances help you harness residual heat effectively, ensuring your dough ferments properly without risking overproofing.
1. Oven Settings and Features
Many ovens come equipped with specific settings that make them ideal for proofing dough using residual heat. Look for features like a proof or warm mode, which maintains a gentle, consistent temperature perfect for yeast activation. These settings are especially helpful when working with different flour types, as each may require slightly varied conditions for best rising. An oven with precise temperature controls allows you to set a low heat that activates yeast without risking overproofing. Some models also have a low-temperature or convection setting, which can be beneficial for evenly distributing residual heat. Using these features guarantees your dough gets the right environment for proper fermentation, whether you’re proofing wheat, rye, or gluten-free flours. Additionally, understanding contrast ratio can help you optimize the oven’s lighting to monitor the dough without opening the door frequently. Moreover, the integration of AI-driven solutions in modern appliances can further assist in maintaining optimal proofing conditions automatically.
Choose Ovens With Low-Temperature or Proof Modes
Selecting an oven with low-temperature or proof modes guarantees you can reliably create the ideal environment for dough fermentation. Look for ovens with adjustable proofing temperature settings to maintain consistent heat. Confirm the oven is properly calibrated so the temperature stays within the suitable range. Imagine:
- A gentle, steady warmth that surrounds your dough like a light blanket.
- A digital display showing precise proofing temperatures.
- An oven that automatically adjusts to maintain consistent heat.
- A dedicated proof mode that prevents overheating and ensures uniform fermentation.
- Incorporating natural materials such as stone or wood components can enhance heat retention and help maintain a stable proofing environment. Modern ovens often include specialized proofing features that optimize humidity levels, contributing to better dough rise.
These features help you control residual heat effectively, making proofing more predictable. Choosing an oven with these qualities simplifies the process and improves your dough’s rise, ensuring perfect results every time.
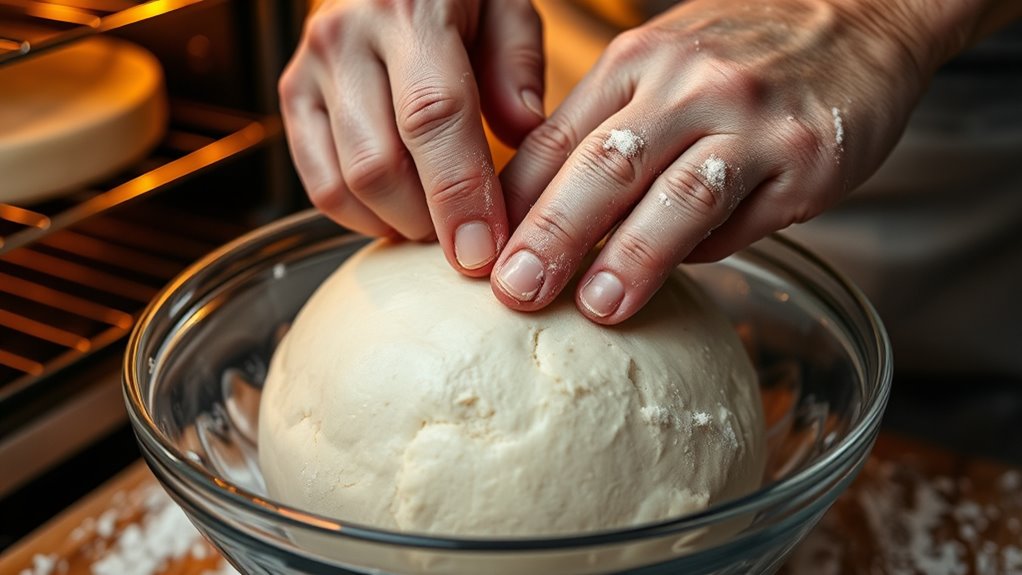
Preparing Your Dough for the Residual Heat Method

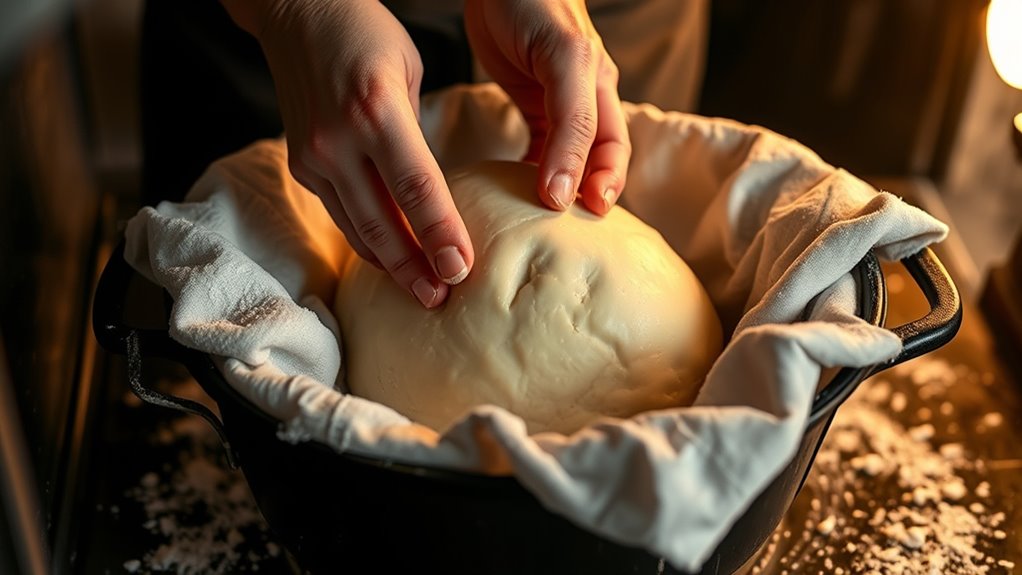
To effectively use residual heat for proofing, you need to prepare your dough properly beforehand. Start by guaranteeing your dough has sufficient gluten development, which gives it strength and elasticity for a good rise. Knead the dough thoroughly, but avoid overworking it, to create a smooth, cohesive texture. Next, focus on yeast activation; use warm water and a small amount of sugar to jump-start fermentation. This helps the yeast produce carbon dioxide efficiently, promoting ideal proofing during residual heat. Cover your dough with a damp cloth or plastic wrap to prevent drying out. Proper preparation ensures your dough is ready to rise gently with residual warmth, resulting in a well-proofed, airy loaf. Using a self watering plant pot can help maintain consistent moisture around your dough during proofing, preventing it from drying out and supporting optimal fermentation. Additionally, controlling the proofing environment temperature can significantly improve the final rise and texture of your bread. Employing techniques like temperature regulation can further optimize proofing conditions for best results. Regularly monitoring AI-powered tools can also assist in maintaining ideal proofing conditions, ensuring consistent results.
Creating the Right Environment Inside Your Oven

Creating the right environment inside your oven is essential for successful proofing with residual heat. A warm, moist setting encourages yeast activity and maintains dough hydration, pivotal for proper rise. To achieve this, consider these steps:
- Preheat your oven briefly, then turn it off to trap residual heat.
- Place a shallow dish of water inside to create humidity.
- Cover your dough with a damp cloth or plastic wrap to retain moisture.
- Position the dough in the oven’s center, away from drafts, ensuring consistent warmth.
This environment promotes gentle heat transfer, boosting yeast activity without drying out the dough. Proper dough hydration combined with the right warmth helps develop a soft, airy texture, setting the stage for perfect proofing.
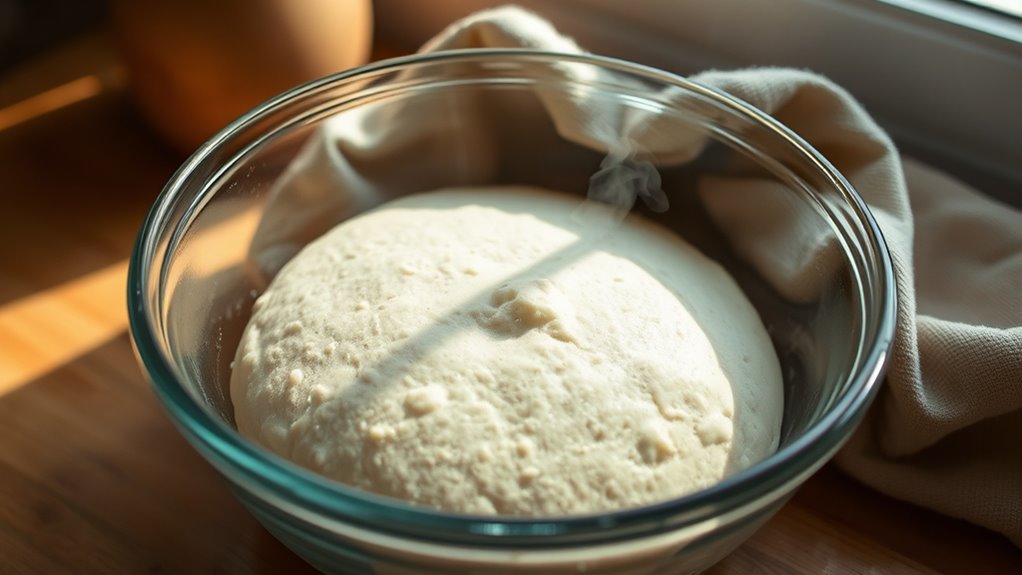
Timing and Monitoring the Proofing Process

Monitoring the proofing process closely guarantees your dough rises perfectly. Timing is vital because over-proofing can weaken gluten structure, while under-proofing leaves the dough dense. Keep a close eye on dough fermentation and check for the right size increase—usually doubling in volume. Use this simple table to track your progress:
| Proofing Stage | Visual Cues | Time Estimate |
|---|---|---|
| Initial Rise | Slightly puffy, bubbles | 30–60 minutes |
| Final Rise | Doubling in size | 1–2 hours |
| Over-proofed | Flattened, overly bubbly | 2+ hours |
Adjust based on the proofing environment, humidity, and dough type for best results. Consistent monitoring ensures ideal fermentation and proper dough development. Additionally, understanding how residual heat impacts the proofing process can help fine-tune your timing for perfect dough. Recognizing the signs of over-proofing early can prevent structural issues and ensure optimal texture.
Adjusting for Different Types of Dough
Different types of dough respond differently to proofing conditions, so adjusting your approach guarantees ideal results. For high-hydration doughs, like ciabatta, you need a slightly longer proof to allow yeast activity to develop fully. Conversely, stiffer doughs, such as bagels, require less proofing time to prevent over-fermentation. Consider these factors:
Adjust proofing times based on dough type; high-hydration needs longer, stiffer doughs less.
- Dough hydration levels – wetter doughs need more careful monitoring to avoid over-proofing.
- Yeast activity – active yeast speeds up fermentation, so reduce proofing time for highly active yeast.
- Dough elasticity – softer doughs may need a gentler, shorter proof to maintain structure.
- Type of bread – delicate pastries vs. dense bread doughs require different proofing adjustments.
- Residual heat can be used to control fermentation and optimize proofing times, especially in cooler environments.
Tailoring your proofing based on dough hydration and yeast activity ensures consistent, perfect results.
Troubleshooting Common Issues During Residual Proofing
Residual proofing can sometimes lead to common issues that affect your bread’s final quality. One problem is uneven proofing caused by inconsistent proofing temperature, which can result in under- or over-proofed dough. If your dough doesn’t rise enough, it may lack dough elasticity, making it dense or flat. Conversely, if it over-proofs, it can become overly slack and lose structure. To troubleshoot, check the residual heat carefully; too much heat speeds up proofing and weakens gluten, while too little slows fermentation. Adjust your environment or proofing container to maintain a stable proofing temperature. Also, monitor the dough’s elasticity; if it feels overly loose, give it more time or adjust the temperature to promote proper gluten development.
Enhancing Results With Additional Tips and Tricks
To get the best results from residual proofing, consider using some simple tips and tricks that can make a significant difference. First, maintain consistent ambient temperatures to support fermentation science, ensuring steady yeast activity. Second, lightly mist the dough with water before covering it; this preserves moisture, promoting better dough elasticity. Third, avoid over-proofing by setting a timer; over-fermentation weakens gluten structure. Fourth, gently punch down the dough after initial proofing to redistribute gases, boosting elasticity and fermentation efficiency. By applying these techniques, you optimize residual heat’s effect, encouraging even fermentation and a better rise. These small adjustments can dramatically improve your dough’s texture, ensuring a perfect proof every time.
Safety Precautions When Using Residual Heat

When using residual heat to proof dough, you need to handle everything carefully to make certain of burns. Keep heat sources away from your skin and use tools designed for hot surfaces. Always choose proper equipment to ensure safety and prevent accidents.
Handle With Care
Although it’s tempting to handle the dough immediately after turning off the heat, you should always exercise caution. Residual heat can cause burns or uneven dough hydration if mishandled. Be mindful of the temperature to prevent disrupting yeast activity or damaging the dough’s structure. To stay safe, follow these tips:
- Visualize the steam rising, indicating heat still lingers.
- Use a thermometer to check if the dough’s surface is too hot.
- Wear oven mitts when touching the container or dough.
- Gently move or cover the dough without rushing, ensuring even proofing.
Handling carefully helps maintain proper dough hydration and preserves yeast activity, resulting in a better rise and texture. Always respect residual heat to avoid accidents and achieve ideal proofing results.
Keep Heat Away
Handling dough with care is essential, but equally important is keeping heat away to prevent accidents. Excess heat can accelerate dough fermentation or activate yeast prematurely, leading to over-proofing or uneven rising. To avoid this, create a cool environment, like a shaded corner or a room with good air circulation. Imagine a space where warmth gently surrounds your dough but never overheats it:
| Cool Spot | Slight Warmth | Overheated Area |
|---|---|---|
| Ideal for fermentation | Risks yeast activation | Risks dough over-proofing |
| Keeps temperature steady | Speeds up fermentation | Causes uneven rise |
| Prevents accidents | Maintains dough quality | Could cause burns or fires |
Use Proper Equipment
Using proper equipment is essential to safely utilize residual heat for proofing dough. You need tools that can handle the gentle warmth required for *ideal* dough fermentation and yeast activation. First, select a clean, heatproof bowl or container that retains heat evenly. Second, use a proofing box or oven with a temperature setting to prevent overheating. Third, keep a reliable thermometer nearby to monitor the temperature, *guaranteeing* it stays within the *perfect* range. Fourth, cover your dough with a damp cloth or plastic wrap to trap the residual heat without direct contact. These items help maintain consistent warmth, prevent accidents, and promote proper yeast activation. Proper equipment *guarantees* safe proofing, avoids overheating, and supports consistent dough fermentation.
Incorporating Residual Heat Proofing Into Your Baking Routine

Incorporating residual heat proofing into your baking routine is a simple way to give your dough the perfect environment to rise. By using residual warmth, you help maintain dough elasticity and promote yeast activation without extra effort. To do this, after mixing your dough, turn off your oven or heat source and create a warm spot, such as placing the dough near a warm spot or inside a turned-off oven. This gentle heat encourages the dough to rise steadily, reducing over-proofing risks. Keep an eye on temperature and humidity for ideal results. Here’s a quick comparison:
| Method | Effect |
|---|---|
| Using residual heat | Enhances dough elasticity and yeast activation |
| Covering dough | Maintains moisture, aids rising |
| Warm environment | Promotes consistent fermentation |
| Avoid direct heat | Prevents over-proofing |
| Patience | Ensures thorough proofing, better texture |
Frequently Asked Questions
Can Residual Heat Proofing Be Used for Gluten-Free Dough?
You might wonder if residual heat techniques can be used for gluten-free fermentation. While residual heat helps proof traditional dough, gluten-free dough needs a different approach because it lacks gluten’s structure. Using residual heat for gluten-free proofing can be tricky, as it may not provide consistent fermentation. It’s better to control temperature with warm, humid environments, ensuring your gluten-free dough ferments properly without overproofing.
How Does Humidity Affect Residual Heat Proofing?
Think of humidity as a hidden conductor in your proofing symphony, subtly guiding the process. High humidity can increase moisture levels, impacting the humidity impact on your dough’s proofing consistency. It may slow fermentation or cause uneven proofing, making your dough less predictable. Low humidity, on the other hand, can dry out dough quickly. Keep an eye on humidity to maintain steady proofing conditions, ensuring your dough rises beautifully every time.
Is Residual Heat Proofing Suitable for Large Batches of Dough?
When considering batch size, residual heat proofing might not be ideal for large batches because maintaining consistent temperature control becomes challenging. Larger quantities cool down unevenly, risking under-proofing or over-proofing sections of dough. For bigger batches, you should use controlled proofing environments like proofers or warm, humid spaces to ensure even rising. Residual heat works best for small batches where temperature regulation is simpler, ensuring consistent results.
Can I Proof Dough Using Residual Heat Overnight?
You can proof dough using residual heat overnight if you maintain proper temperature control. Just make certain the environment stays warm enough for fermentation but not too hot, ideally around 75-80°F. This allows the dough to ferment slowly and develop flavor. Keep an eye on fermentation timing, as extended proofing can overproof the dough. Using residual heat can save energy, but careful monitoring is key for successful overnight proofing.
What Are the Signs of Over-Proofed Dough Using Residual Heat?
When checking for over-proofed dough, look for fermentation indicators like a sour smell or overly bubbly surface. You’ll notice decreased dough elasticity, making it feel slack and weaker. The dough might also spread out too much or collapse easily when touched. If these signs appear, your dough has likely over-proofed, even with residual heat, and may need a gentle punch-down before shaping to restore its structure.
Conclusion
Think of residual heat proofing as a gentle hug for your dough, nurturing it to rise just right. By understanding your appliances and creating a cozy environment, you’ll unleash bakery-quality results at home. Embrace this warm embrace, and watch your bread blossom with life. With patience and care, residual heat becomes your secret ingredient—transforming simple ingredients into a masterpiece. Happy baking, and let your dough rise to new heights!