
Use this guide to prepare a meal in an air fryer with multiple racks, arrange food so hot air can circulate, and check that every item is cooked through. It is for first-time users and anyone adjusting from a single-basket air fryer. Allow 30-60 minutes, depending on the food and appliance.

Get kitchen gear delivered free — and shop member deals
- Fast, free delivery on millions of items
- Access to Prime Big Deal Days deals on October 6–7
- Prime Video, Amazon Music and more included

Chefman 14-Quart 6-in-1 Air Fryer Oven with Rotisserie
- ✔ Capacity: 14 quarts
- ✔ Functions: Air fry, bake, broil, reheat, dehydrate
- ✔ Temperature range: 90°F–400°F

Chefman 12-Quart 5-in-1 Air Fryer Oven
- ✔ Capacity: 12 quarts
- ✔ Functions: Air fry, bake, dehydrate, rotisserie, roast, reheat
- ✔ Temperature range: 95°F–400°F

Chefman Multifunctional Digital Air Fryer with Rotisserie, 10-Quart
- ✔ Capacity: 10 quarts
- ✔ Wattage: 1700 watts
- ✔ Voltage: 120 volts
Difficulty: Beginner | Time: 30-60 minutes
What You’ll Need
Tools & Materials:
- Air fryer with multiple racks and its user manual
- Heat-safe tongs or oven mitts
- Food thermometer for checking meat and poultry
- Oil and seasonings, if needed for your recipe
Knowledge:
- Basic food-safety handling
- How to identify the air fryer’s rack positions and controls
Check the appliance manual for rack limits, preheating instructions, and whether racks can be used together. Cooking time and airflow vary by model. Start with a recipe written for your appliance when available.
Chefman 14-Quart 6-in-1 Air Fryer Oven with Rotisserie
For shoppers whose first priority is fitting more into an oven-style air fryer, the 14-quart capacity gives this model the clearest edge in the lineup. It has three rack positions, which gives us options for arranging food at different heights, and its windowed door lets us check progress without opening the appliance. The removable rotisserie spit adds another way to cook a main dish beyond rack-based air frying.Compared with the 12-quart Chefman, this model offers two additional quarts of stated capacity, but the 12-quart listing is more specific about included accessories: it names three cooking racks, a retrieval tool, and a drip tray. The 14-quart description gives rack positions rather than confirming the number of racks included, so buyers who want a ready-to-use set of multiple racks should check the package details. It also lists five cooking functions, while the 12-quart model describes six, including roast and rotisserie cooking.We place this option first for capacity and rack-position flexibility, not because every practical detail is settled. No dimensions or weight are listed, making counter fit harder to plan than with the 10-quart model, which has stated dimensions. The 90°F–400°F range covers low-temperature dehydration through higher-heat cooking, but the available description does not specify presets or dishwasher-safe parts. It suits cooks who want room and multiple positions; shoppers with tight counters or a preference for documented accessories may find the 12-quart pick easier to assess.
Pros:
- 14-quart capacity is the largest stated in this comparison.
- Three rack positions allow more flexible placement.
- Includes air frying, baking, broiling, reheating, and dehydrating.
- Removable rotating spit and windowed door add cooking and monitoring options.
Cons:
- Dimensions and weight are not provided, complicating counter-fit checks.
- The description lists rack positions but does not specify how many racks are included.
- Preset count and dishwasher-safe cleanup details are not stated.
Best for: Households prioritizing the largest stated capacity and multiple rack positions for varied oven-style cooking.
Not ideal for: Buyers with limited counter space or anyone who needs confirmed dimensions and a specifically itemized set of included racks before purchasing.
Bottom line: We recommend it for buyers who want the most stated capacity and three rack positions, provided they confirm the appliance’s footprint and included rack accessories.
“We recommend it for buyers who want the most stated capacity and three rack positions, provided they confirm the appliance’s footprint and included rack accessories.”
Chefman 12-Quart 5-in-1 Air Fryer Oven
The 12-quart model is the most straightforward choice for buyers who want a defined multi-rack package: it explicitly includes three cooking racks, alongside a rotisserie spit and forks, retrieval tool, and drip tray. Its viewing window and interior lights help us keep an eye on food as it cooks, a useful detail when working with several levels and checking whether items are ready at the same time.Against the 14-quart model, this one gives up two quarts of stated capacity but provides a more complete list of included rack accessories and six named functions: air fry, bake, dehydrate, rotisserie, roast, and reheat. It also specifies 12 presets and a 1-year warranty. The 10-quart Chefman, by comparison, lists 17 presets and exact dimensions, so it may suit buyers who value guided settings or want more certainty about its footprint. The 12-quart description does not provide dimensions, so we cannot make the same counter-fit assessment.Its Hi-Fry setting reaches 450°F only for the final two minutes, which offers a brief high-heat finish rather than a full-cycle temperature option. That limit matters if we expect sustained cooking at that level. The 95°F–400°F standard range and multiple included racks make it a flexible middle choice, while dishwasher-safe removable parts and the drip tray support cleanup. We rank it below the 14-quart model for capacity, but above the 10-quart model for buyers who want explicit rack accessories and useful visibility.
Pros:
- Three cooking racks are explicitly included.
- Viewing window and interior lights support visual monitoring.
- Six listed functions include roast and rotisserie cooking.
- Removable dishwasher-safe parts and drip tray ease cleanup.
Cons:
- At 12 quarts, it has less stated capacity than the 14-quart option.
- The 450°F Hi-Fry setting is limited to the final two minutes.
- Dimensions and weight are not specified.
Best for: Cooks who want three included racks, a full accessory list, and a window with interior lights for monitoring food.
Not ideal for: Shoppers needing a confirmed compact footprint or sustained cooking at 450°F.
Bottom line: We favor this model when confirmed rack accessories and visibility matter more than having the lineup’s largest stated capacity.
“We favor this model when confirmed rack accessories and visibility matter more than having the lineup’s largest stated capacity.”
Chefman Multifunctional Digital Air Fryer with Rotisserie, 10-Quart
Among these oven-style options, the 10-quart model is the one we can assess most easily for counter fit: its dimensions are listed as 12 × 12 × 15 inches. It includes three air flow racks and 17 touchscreen presets, the highest preset count in this comparison. Those details make it appealing to buyers who want guided cooking choices and a specified rack set without moving up to the 12- or 14-quart capacities.The tradeoff is room. It has the smallest listed capacity, so it gives up batch size to both larger Chefman models. The 12-quart version also includes three racks, but its listing adds interior lights and explicitly calls out six functions, including reheat and roast. The 14-quart model offers the most stated capacity and three rack positions. The 10-quart’s differentiator is its 17 presets and measured footprint, rather than maximum volume or a particularly detailed rack-placement description.Its functions include air frying, baking, dehydrating, roasting, and rotisserie cooking, and the included spit, retrieval tool, and drip tray broaden its use beyond rack cooking. The specified temperature span starts at 93.33°C and tops out at 400°F; the unusual mixed units are worth noting when comparing settings. Dishwasher-safe parts support cleanup, but the listing still warns of a large countertop footprint, so we should measure the intended spot rather than assume that a 10-quart oven is compact. Choose it for presets, known dimensions, and versatile accessories; skip it if capacity is the deciding factor.
Pros:
- Includes three air flow racks and rotisserie accessories.
- 17 touchscreen presets provide the largest preset selection here.
- Listed dimensions help with counter-fit planning.
- Dishwasher-safe parts simplify cleanup.
Cons:
- Its 10-quart capacity is the smallest in this comparison.
- The listing describes a large countertop footprint despite its lower capacity.
- Temperature range is presented with mixed Celsius and Fahrenheit units.
Best for: Buyers who value a large preset selection, three specified racks, and listed dimensions for planning counter space.
Not ideal for: Families prioritizing maximum batch capacity or shoppers seeking the lineup’s clearest documented rack-position layout.
Bottom line: We choose it for guided preset cooking and a documented three-rack kit when the largest possible capacity is not the priority.
“We choose it for guided preset cooking and a documented three-rack kit when the largest possible capacity is not the priority.”
As an Amazon Associate we earn from qualifying purchases.
Before You Start
Keep raw meat and poultry separate from ready-to-eat foods. Wash hands and surfaces after handling raw ingredients. Do not cover the rack openings or crowd the food; blocked airflow can leave food unevenly cooked. Use only accessories approved for your model, and handle racks as hot oven trays.
Step-by-Step Instructions
Step 1: Choose foods with compatible cooking times
Group foods that cook at similar temperatures and finish times. Cut ingredients into pieces of similar size. If one food needs much longer than another, plan to add it first and place the quicker-cooking food in later, or cook them in separate batches.
Tip:Thin vegetables and small pieces cook faster than thick cuts. Check recipes for your model because rack position can affect timing.
Check: You have a cooking order that lets each food finish without leaving quick-cooking items in the fryer too long.
Step 2: Prepare the food
Pat wet ingredients dry, season them, and apply only a light coating of oil if the recipe calls for it. Avoid pouring loose batter or excess oil onto the racks. Keep raw and cooked ingredients on separate plates and use separate utensils for each.
Tip:Food that is very wet or heavily coated may drip, smoke, or stick. Follow the appliance manual for foods that need a tray or liner.
Check: Pieces are ready to load, with no excess liquid likely to drip through the rack.
Step 3: Preheat the air fryer if required
Preheat the appliance following the manual or recipe. If the model does not call for preheating, begin with the loading instructions in its manual. Remove the racks during preheating unless the manufacturer says to leave them in.
Tip:Do not assume every model uses the same preheat time or temperature.
Check: The appliance has reached the temperature specified by its controls, manual, or recipe.
Step 4: Arrange food across the racks
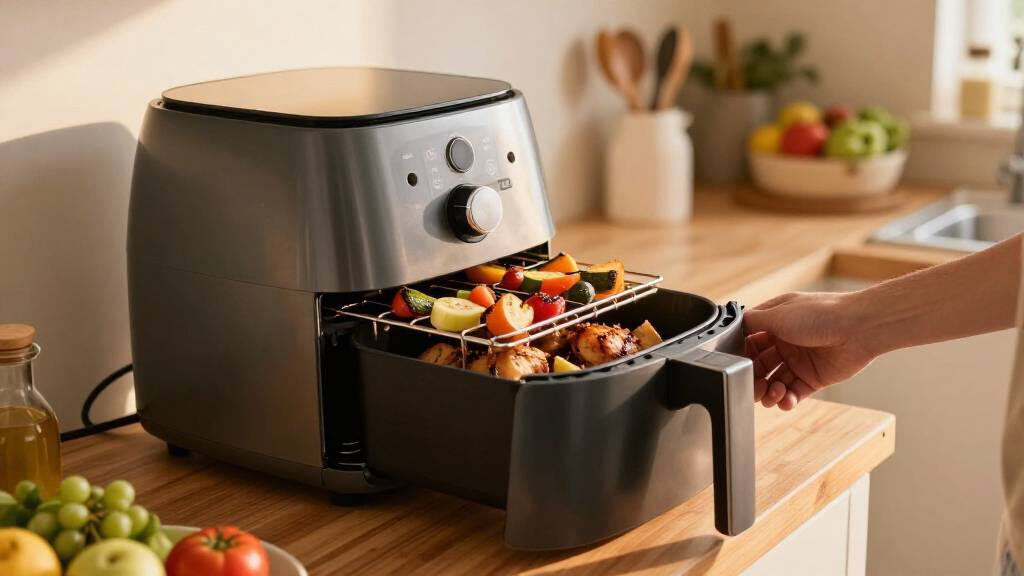
Place food in a single layer where possible, leaving small gaps around pieces so air can move. Position foods that need more browning where the manual recommends; many appliances heat differently at the top and bottom. Slide each rack fully into its slot and keep food clear of the heating element.
Tip:Do not stack food in a deep pile to fit more. If the racks are crowded, cook a second batch.
Check: Food is stable, not touching the heater, and airflow openings remain clear.
Step 5: Set the temperature and start cooking
Set the temperature from a recipe written for your model, or follow the air fryer manual’s guidance for the food. Start the timer for the recipe’s stated cooking period, but plan to check early the first time you cook that food in this appliance.
Tip:Some units cook faster on one rack position than another. Treat the first batch as a check of your appliance’s timing.
Check: The fryer is running at the selected setting and the timer is counting down.
Step 6: Rotate racks and turn food when needed
Pause cooking when the recipe or appliance calls for it, then use heat-safe mitts or tongs to swap rack positions or turn the food. Work quickly, keep your hands clear of hot surfaces, and close the fryer before restarting it.
Tip:Some models pause automatically when opened; others may not. Use the controls as directed by the manual.
Check: Food that needs turning has been repositioned, and each rack is seated correctly before cooking resumes.
Step 7: Check doneness before serving
Insert a food thermometer into the thickest pieces to check color, texture, and safe internal temperature where applicable. Follow current food-safety temperature guidance for meat and poultry. If food is not ready, return it to the fryer for short intervals and check again.
Tip:Appearance alone cannot confirm that meat or poultry is safely cooked. Clean the thermometer between checks if it touches raw or undercooked food.
Check: Every item is cooked to the recipe’s intended texture, and meat or poultry reaches a safe internal temperature.
Step 8: Remove food and clean the appliance
Take out the racks with heat-safe mitts and transfer cooked food to clean serving dishes. Turn off and unplug the appliance if the manual directs you to do so. Let the fryer and racks cool, then clean them as instructed by the manufacturer.
Tip:Do not rinse hot racks or put them into cold water; sudden temperature changes can damage some parts.
Check: Food is served on clean dishes, and cooled racks are cleaned without damage to the appliance’s finish.
Common Mistakes to Avoid
- Filling each rack so tightly that air cannot circulate. — Leave gaps between pieces and cook another batch when the available rack space is full.
- Expecting every rack position to brown food at the same rate. — Check the manual’s rack guidance and inspect food during cooking; rotate positions when the model or recipe recommends it.
- Using one cooking time for foods with different sizes or thicknesses. — Cut pieces evenly, add quicker foods later, and check individual pieces for doneness.
- Judging meat doneness only by its outside color. — Use a food thermometer in the thickest part and follow safe temperature guidance.
Troubleshooting
Problem: Food on one rack browns faster than food on another.
Solution: Swap rack positions partway through cooking if the manual allows it. For the next batch, place the faster-browning food farther from the stronger heat source or reduce crowding.
Problem: Food is pale or soft instead of crisp.
Solution: Spread pieces farther apart, remove excess moisture, and cook in a smaller batch. Add a short cooking interval and check frequently.
Problem: The fryer smokes during cooking.
Solution: Pause the appliance and check the manual before proceeding. Excess oil, drippings, or residue may be smoking; let the unit cool, then clean it as directed. Do not pour water into the appliance.
Problem: The timer ends but thick pieces are still undercooked.
Solution: Continue cooking in short intervals and check the thickest pieces again. For meat or poultry, confirm safe internal temperature with a clean thermometer.
What Success Looks Like
The meal is cooked through, evenly browned to the texture you intended, and safe to eat. Rack openings stayed clear, the racks were secure during cooking, and meat or poultry passed a thermometer check. Record any timing adjustments that worked for your model.
Next Steps
Clean and dry the racks before storing them, and check the fryer for crumbs or drippings after it cools. For your next meal, use the cooking times you observed as a starting point, then adjust for piece size and rack position. If results remain uneven, consult the appliance manual for model-specific rack instructions.
Frequently Asked Questions
Can I cook different foods on different racks at the same time?
Yes, if the foods use compatible temperatures and cooking times and the racks do not block airflow. Keep raw ingredients separate from ready-to-eat foods, and make sure drippings from one food cannot contaminate another.
Do I need to rotate the racks?
Follow your appliance manual and recipe. If food browns unevenly, swapping rack positions partway through may help, provided the manufacturer permits it.
Should I reduce the recipe temperature or time?
Use the instructions for your air fryer model as your starting point. Airflow and heating differ between appliances, so check food early the first time and adjust in small increments.
Can I line the racks with parchment paper or foil?
Only if your manual allows it and the liner is secured under food. A loose liner can lift into the heating element, and covering openings can restrict airflow. Never preheat with loose paper or foil inside.
Fall Picks
fall essentials
As an affiliate, we earn on qualifying purchases.