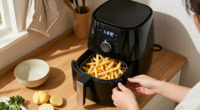
This guide shows beginners how to set up and use an air fryer with a digital display, select a cooking program or set the time and temperature manually, check the food, and clean the appliance afterward. Allow about 30-60 minutes, depending on what you cook. Because buttons and presets vary by model, use your appliance’s manual for model-specific limits and instructions.

Get kitchen gear delivered free with Prime
- Fast, free delivery on millions of items
- Prime Video, Amazon Music and more included
- Member-only deals all year

Gourmia 7-Quart Digital Air Fryer with 12 Presets
- ✔ Capacity: 7 quarts
- ✔ Presets: 12
- ✔ Temperature: 90°F–400°F

Chefman Multifunctional Digital Air Fryer with Rotisserie and Dehydrator, 10-Quart, Black
- ✔ Capacity: 10 quarts (10 liters)
- ✔ Presets: 17
- ✔ Cooking functions: Air fry, bake, dehydrate, roast, rotisserie

Chefman 14-Quart Multifunctional Air Fryer Oven with Rotisserie
- ✔ Capacity: 14 quarts
- ✔ Functions: Air fry, bake, broil, reheat, dehydrate
- ✔ Temperature: 90°F–400°F; Hi-Fry reaches 450°F
Difficulty: Beginner | Time: 30-60 minutes, including setup and cooking
What You’ll Need
Tools & Materials:
- Digital-display air fryer with its basket and cooking tray or crisper plate
- Appliance manual
- Heat-safe tongs or oven mitts
- Food suitable for air frying
- Food thermometer for meat, poultry, or seafood
Knowledge:
- Basic kitchen handling and food-safety practices
- How to read the appliance’s temperature and timer display
Read the manual before the first use. Check the maximum fill line, approved accessories, and cleaning instructions. Place the fryer on a stable, heat-resistant surface with open space around its air vents. Keep it away from water, curtains, and the edge of the counter.
Gourmia 7-Quart Digital Air Fryer with 12 Presets
The Gourmia 7-Quart is our top pick for shoppers who want a digital display to make routine cooking more approachable. Its touch controls and 12 presets cover multiple cooking tasks, while adjustable settings from 90°F to 400°F leave room to move beyond preset programs. Compared with the two Chefman oven-style models, the Gourmia keeps food in one basket instead of spreading it across racks or adding a rotisserie assembly. That makes its format the simpler match for typical basket-style meals, although it gives up the Chefman models’ rotisserie cooking and viewing windows.The 7-quart capacity can suit family meals or meal prep, but shoppers should account for its listed 13-by-10.5-by-13.5-inch footprint. Its 1700-watt rating matches both Chefman models, so the differentiator here is the basket and controls rather than a higher stated power figure. The basket and crisper tray are listed as top-rack dishwasher safe, a practical cleanup advantage over the less-specific care information for the Chefman oven accessories. Nonstick surfaces still call for care, and hand washing is included as an option. Choose this model when you want preset guidance and a roomy basket; skip it if rotisserie cooking, several rack levels, or an oven-style window matter more.
Pros:
- Seven-quart basket supports family meals and meal prep.
- Twelve presets offer guided options across several cooking tasks.
- Adjustable 90°F–400°F temperature range gives control beyond presets.
- Basket and crisper tray are listed as top-rack dishwasher safe.
Cons:
- The listed footprint may be substantial for a small counter.
- Nonstick components need suitable care, with hand washing also listed as an option.
- Does not include the rotisserie and multi-rack setup found on the Chefman models.
Best for: Buyers who want a large basket, touchscreen controls, and presets for everyday cooking.
Not ideal for: Shoppers who need rotisserie cooking, a windowed oven format, or multiple rack positions.
Bottom line: We recommend the Gourmia for buyers who want the most straightforward mix of digital guidance, basket capacity, and stated cleanup convenience.
“We recommend the Gourmia for buyers who want the most straightforward mix of digital guidance, basket capacity, and stated cleanup convenience.”
Chefman Multifunctional Digital Air Fryer with Rotisserie and Dehydrator, 10-Quart, Black
For shoppers who want their display to guide more than air frying, the Chefman 10-Quart offers a useful middle ground. Its touch screen provides access to 17 presets, and the oven-style design combines air frying with baking, dehydrating, roasting, and rotisserie cooking. A viewing window and interior lights let us monitor food without opening the door, a practical difference from the Gourmia’s basket format. Compared with the 14-quart Chefman, this model has less listed capacity but many of the same core oven-style functions.Three air-flow racks, a rotisserie spit, retrieval tool, and removable drip tray make the package capable of handling varied cooking setups. Those parts also mean more accessories to store and clean than the Gourmia’s basket and crisper tray. At 14.2 pounds and 12 by 12 by 15 inches, it needs a committed countertop spot and may be cumbersome to move. The listed temperature range is inconsistently expressed as 93.33°C to 400°F, so we would verify the manual for a clear Fahrenheit lower limit before relying on low-temperature settings. Choose this model when presets, visibility, and rotisserie matter more than a simpler basket; the larger 14-quart Chefman is the better fit when rack capacity takes priority.
Pros:
- Seventeen presets support a broad range of cooking choices.
- Combines air frying, baking, dehydrating, roasting, and rotisserie cooking.
- Window and interior lights help monitor food during cooking.
- Includes three racks, rotisserie tools, and a removable drip tray.
Cons:
- At 14.2 pounds, moving it may be cumbersome.
- The listed dimensions call for substantial counter space.
- Temperature range is presented with mixed Celsius and Fahrenheit units.
Best for: Cooks who want an oven-style air fryer with many presets, a viewing window, and rotisserie capability.
Not ideal for: Buyers prioritizing a lighter appliance, minimal accessories, or the easiest compact-counter fit.
Bottom line: We would choose the Chefman 10-Quart when oven-style functions and preset variety matter more than basket simplicity or the larger 14-quart capacity.
“We would choose the Chefman 10-Quart when oven-style functions and preset variety matter more than basket simplicity or the larger 14-quart capacity.”
Chefman 14-Quart Multifunctional Air Fryer Oven with Rotisserie
The Chefman 14-Quart is the largest-capacity option here, and its digital touchscreen serves an oven layout built around flexibility. Three rack positions let us arrange different foods across the cooking chamber, while the five listed functions cover air frying, baking, broiling, reheating, and dehydrating. A rotisserie spit adds another cooking method. Compared with the 10-quart Chefman, this model lists four more quarts and three rack positions; compared with the Gourmia, it trades a simple pull-out basket for a windowed door and a more involved accessory set.That extra space is useful for shoppers who routinely cook multiple items, but capacity alone does not guarantee that everything will finish at the same time. The listed standard temperature range ends at 400°F; 450°F is available only through the Hi-Fry button, so shoppers seeking a routinely adjustable higher setting should understand that distinction. Its 13.2-by-13.9-by-14.5-inch dimensions also need room on the counter. The three wire racks are specified as top-rack dishwasher safe, while the care guidance does not specify dishwasher use for the other components. Pick it when rack positions and rotisserie justify the larger oven format. If preset count is your deciding factor, the 10-quart Chefman lists 17; if basket convenience matters more, the Gourmia is the cleaner fit.
Pros:
- Fourteen-quart capacity is the largest listed in this comparison.
- Three rack positions allow more flexible cooking arrangements.
- Five stated functions include air fry, bake, broil, reheat, and dehydrate.
- Rotisserie spit includes a fetch tool for handling the accessory.
Cons:
- 450°F is available only through the Hi-Fry button.
- Only the cooking racks are specified as top-rack dishwasher safe.
- Its oven-style body and accessories need counter and storage space.
Best for: Households that want oven-style cooking space, three rack positions, and a rotisserie spit.
Not ideal for: Buyers who prefer a compact basket, clearly specified dishwasher care for every part, or standard settings above 400°F.
Bottom line: We recommend the 14-quart Chefman when multi-rack capacity is the priority and its more involved oven-style setup fits the kitchen.
“We recommend the 14-quart Chefman when multi-rack capacity is the priority and its more involved oven-style setup fits the kitchen.”
As an Amazon Associate we earn from qualifying purchases.
Before You Start
Unplug the fryer before assembling or cleaning it. Remove packaging, stickers, and accessories that are not meant to stay inside during cooking. Wash the basket and removable tray as directed, then dry them fully. Some manufacturers recommend running the empty fryer briefly to clear a new-appliance smell; follow the manual’s instructions and ventilate the room if you do this.
Keep the fryer’s exhaust area clear while it runs. Do not put cooking oil into the drawer or fill the basket with liquid. A small amount of oil brushed or sprayed onto food may be suitable, but check the manual and avoid aerosol sprays if the manufacturer warns they can damage the coating.
Step-by-Step Instructions
Step 1: Set up the fryer
Place the fryer on a level, heat-resistant counter. Leave the clearance specified in the manual around the appliance, especially near the rear or top exhaust vent. Fit the clean, dry crisper plate or tray into the basket, then slide the basket into the unit.
Tip: Do not place the fryer under low cabinets if hot exhaust could damage them. Never cover the vents.
Check: The fryer sits flat, the basket slides in securely, and the vents have open space.
Step 2: Prepare the food
Cut food into pieces of similar size so they cook at a similar rate. Pat wet ingredients dry, season them, and add only a light coating of oil when appropriate. Arrange food so hot air can circulate; leave space between pieces and stay below the basket’s maximum fill line.
Tip: For frozen packaged foods, follow package guidance as a starting point and check the food early. Avoid overcrowding, which can leave food pale or unevenly cooked.
Check: Food is in an even layer or a loose arrangement with visible gaps for airflow.
Step 3: Power on and choose a setting
Plug in the fryer and press the power button. Select a preset that matches the food if your model offers one, such as fries, vegetables, or poultry. Treat presets as starting points: check the manual to see what temperature and time each preset uses. To set the controls yourself, press the temperature control and use the plus or minus buttons, dial, or touchscreen to choose a suitable temperature.
Tip: Button names differ by model. If the display flashes or will not accept a selection, check that the basket is fully inserted and consult the manual’s control panel diagram.
Check: The display shows your selected program or temperature and is ready for a time setting.
Step 4: Set the cooking time
Use the timer control to select the cooking duration recommended by your recipe or appliance manual. For a new recipe, start with a shorter time than the guide suggests, since air fryer sizes and heating strength vary. Press start or confirm to begin. If the manual calls for preheating, run the preheat cycle first, then add the food when prompted or when the display indicates it is ready.
Tip: Some models start cooking as soon as you change a setting; others require a separate start button. Confirm the behavior in the manual before loading food into a hot basket.
Check: The display counts down or shows a clear preheat or cooking status.
Step 5: Turn or shake food when needed
When the timer reaches the midpoint, pause or pull out the basket if the manual says this is safe. Use heat-safe tongs to turn larger pieces, or carefully shake smaller foods such as fries. Slide the basket back in and resume cooking if the fryer does not restart automatically.
Tip: Hot air and steam can escape when you open the drawer. Keep your face and hands clear of the opening, and place the hot basket on a heat-resistant surface.
Check: Food is rearranged without spilling, and the fryer resumes its countdown.
Step 6: Check doneness before serving
When cooking ends, carefully remove the basket and inspect the food. If it needs more color or crispness, return it for a few additional minutes and check again. For meat, poultry, and seafood, use a food thermometer at the thickest part and compare the reading with current food-safety guidance for that food. Do not rely on browning alone to judge safe doneness.
Tip: The basket, tray, and food are hot even when the display has turned off. Use mitts or tongs and avoid touching heating elements.
Check: Food has the desired texture and color, and any food requiring a temperature check reaches the safe temperature for its type.
Step 7: Switch off and clean the fryer
Turn off and unplug the fryer. Let the appliance and removable parts cool. Empty crumbs and grease, then wash the basket and tray according to the manual; use a soft sponge rather than an abrasive scrubber if the parts have a nonstick finish. Wipe the exterior and interior with a damp cloth, keeping water away from electrical parts and the heating element. Dry all parts before reassembly or storage.
Tip: Do not immerse the main unit in water or use oven cleaner unless the manufacturer specifically permits it.
Check: The fryer is unplugged, clean, dry, and free of visible food residue or pooled grease.
Common Mistakes to Avoid
- Filling the basket tightly or piling food into a deep layer. — Cook in batches when necessary and leave gaps so hot air reaches the food. Shake or turn food as directed.
- Assuming a preset guarantees the food is done. — Use the preset as a starting point, then inspect the food and check internal temperature when food safety requires it.
- Adding oil or liquid directly to the drawer. — Use only the amount and method allowed by the manual. Do not fill the drawer with liquid or cooking oil.
- Washing the appliance before it has cooled or immersing the main unit. — Unplug the fryer, let it cool, and wash only the removable parts as the manual directs.
Troubleshooting
Problem: The display lights up, but the fryer will not start.
Solution: Push the basket fully into place, check that a time and temperature are set, and press start or confirm. If the display shows an error code, look it up in the manual.
Problem: Food cooks unevenly or stays soft.
Solution: Reduce the amount in the basket, use pieces of similar size, and shake or turn food during cooking. Add a few minutes and check again.
Problem: Smoke appears during cooking.
Solution: Pause the fryer and check for excess grease, food debris, or oil dripping onto hot surfaces. Let the unit cool before cleaning. If smoke continues or smells electrical, unplug it and contact the manufacturer.
Problem: The fryer smells unusual or gives off a new-appliance odor.
Solution: Stop cooking if the smell is strong, chemical, or accompanied by smoke. Check for leftover packaging and follow the manual’s first-use cleaning or empty-run instructions. Contact the manufacturer if the odor persists.
What Success Looks Like
The fryer starts with the intended program or settings, cooks food without blocked vents or an overfilled basket, and finishes with food that meets your texture and doneness needs. Meat, poultry, and seafood reach the safe internal temperature for their type. After cooking, the unit is unplugged, cooled, and cleaned according to its manual.
Next Steps
Use the cooking time and temperature that worked as a starting point for your next batch, adjusting for food size and quantity. Clean the basket and tray after each use, and check the vents periodically for grease or crumbs. If you see damage to the cord, plug, basket coating, or housing, stop using the fryer and contact the manufacturer.
Frequently Asked Questions
Do I need to preheat a digital-display air fryer?
Follow the manual and recipe. Some models and foods benefit from preheating; others are designed to start with food already in the basket. If you preheat, use the appliance’s preheat setting or the method specified by its manufacturer.
Can I open the basket while the fryer is running?
Usually you can pause or pull out the basket to check or turn food, but the exact behavior depends on the model. Follow the manual, keep clear of escaping steam, and confirm that the countdown resumes afterward.
Should I use the preset or set the temperature and time myself?
Either can work. A preset is a convenient starting point; manual settings give you more control. In both cases, check doneness because food size, starting temperature, and fryer models affect cooking time.
Can I put foil or parchment paper in the basket?
Only if the manual allows it and the material is rated for the cooking temperature. Keep it secured beneath food and away from the heating element. Loose paper or foil can block airflow or contact hot parts.
Why does the timer pause when I remove the basket?
Many fryers pause automatically as a safety feature. Reinsert the basket fully; the unit may resume on its own or require you to press start. Check your manual for the expected behavior.