
To dehydrate fruit for trail snacks without fancy equipment, choose firm, ripe fruits like apples or berries, then wash and slice them uniformly about 1/8 to 1/4 inch thick. Arrange the slices on a baking sheet or rack in a single layer, and use your oven set to around 140°F or place them in a sunny spot for air-drying. Regularly check to prevent over-drying or burning. For extra flavor, add spices or lemon before drying. Keep your dried snacks fresh and tasty by storing in airtight containers—continue to learn simple tips to perfect your homemade trail treats.
Key Takeaways
- Use a sharp knife or mandoline to slice fruits uniformly at 1/8 to 1/4 inch thickness for even drying.
- Dry fruits on a baking sheet or rack in a low-temperature oven (around 140°F) or sun-dried in a well-ventilated area.
- Pre-treat slices with lemon juice or sugar solutions to prevent browning and preserve color during dehydration.
- Rotate or flip slices periodically to ensure even dehydration and prevent sticking or burning.
- Store dried fruits in airtight containers in a cool, dark place, and add spices or flavors beforehand for variety.
Choosing the Right Fruits for Dehydrating

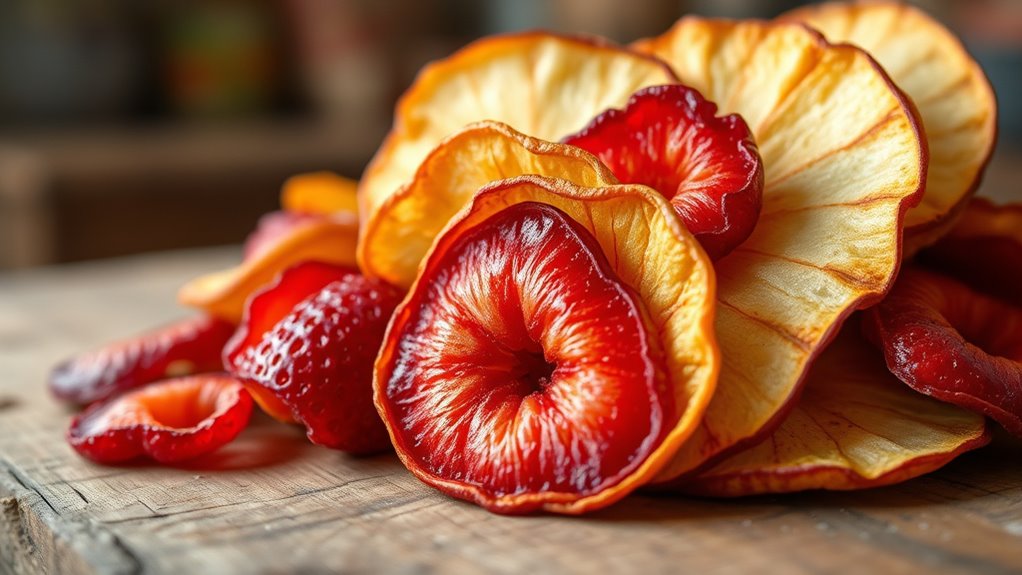
When selecting fruits for dehydration, it’s important to choose varieties that are naturally sweet, firm, and free of bruises or blemishes. Good fruit selection guarantees your dried snacks will taste great and last longer. Opt for seasonal options whenever possible, as they tend to be fresher and more flavorful. For example, summer berries or fall apples are ideal choices because they’re ripe and at their peak. Avoid fruits that are overly soft or damaged, since they won’t dehydrate evenly and could spoil faster. Look for varieties with vibrant color and firm texture. Properly prepared fruits can also benefit from pre-treatment methods to prevent spoilage and preserve color during dehydration. This careful selection process helps produce high-quality dried fruit that’s sweet, chewy, and perfect for trail snacks. By choosing wisely, you set yourself up for delicious, nutritious results.
Preparing Your Fruit Before Dehydration
Before dehydrating, you need to start with fresh, high-quality fruits. Make sure to wash them thoroughly using proper techniques to remove dirt and residues. You might also consider pre-treating some fruits to prevent browning and preserve their flavor during dehydration.
Selecting Fresh Fruits
Have you chosen the best fruits for dehydration? Your fruit selection makes all the difference in flavor and texture. Opt for ripe, fresh fruits that aren’t overly soft or bruised. Seasonality considerations help you pick fruits at their peak, ensuring better taste and longer shelf life. For example, strawberries and cherries are best in spring and early summer, while apples and pears shine in fall. Avoid fruits that are too watery or fibrous, as they may not dehydrate evenly. Wash and prep your fruits properly before slicing to promote even dehydration. Choosing seasonal, ripe fruits not only improves flavor but also reduces spoilage and waste. Incorporating proper dehydration techniques can ensure your trail snacks are safe, tasty, and shelf-stable every time.
Proper Washing Techniques
Properly washing your fruit guarantees it’s clean and safe for dehydration, which helps preserve flavor and quality. Start by rinsing each piece under cold running water, using your hands or a soft brush to gently scrub away dirt and residues. This step is essential for maintaining good kitchen sanitation and preventing bacteria from affecting your fruit preservation process. Avoid using soap or chemicals, as they can linger and alter taste. Pat the fruit dry with a clean towel or paper towels to remove excess moisture, reducing the risk of spoilage during dehydration. Proper washing not only ensures your trail snacks are safe but also maximizes shelf life and flavor. Implementing effective data privacy practices ensures that your food preservation methods remain secure and trustworthy. Taking these simple steps sets a strong foundation for effective fruit preservation before drying.
Pre-Treatment Methods
Preparing your fruit with pre-treatment methods helps guarantee it dehydrates evenly and retains its best flavor. Start by choosing the right fruit selection—ripe, firm, and free of bruises or blemishes. Pre-treatment can include soaking fruit in lemon juice or a sugar solution to prevent browning and preserve color. Blanching is also effective for certain fruits, softening tissue and speeding up dehydration. These methods help your dehydration equipment work more efficiently, ensuring consistent results. For softer fruits like berries, a quick dip in lemon water works best, while thicker fruits like apples may require blanching. Using proper pre-treatment techniques enhances flavor, texture, and shelf life, making your homemade trail snacks both delicious and nutritious. Additionally, utilizing advanced AI processing can help optimize dehydration times and techniques for different fruit types, ensuring the best quality in your final product.
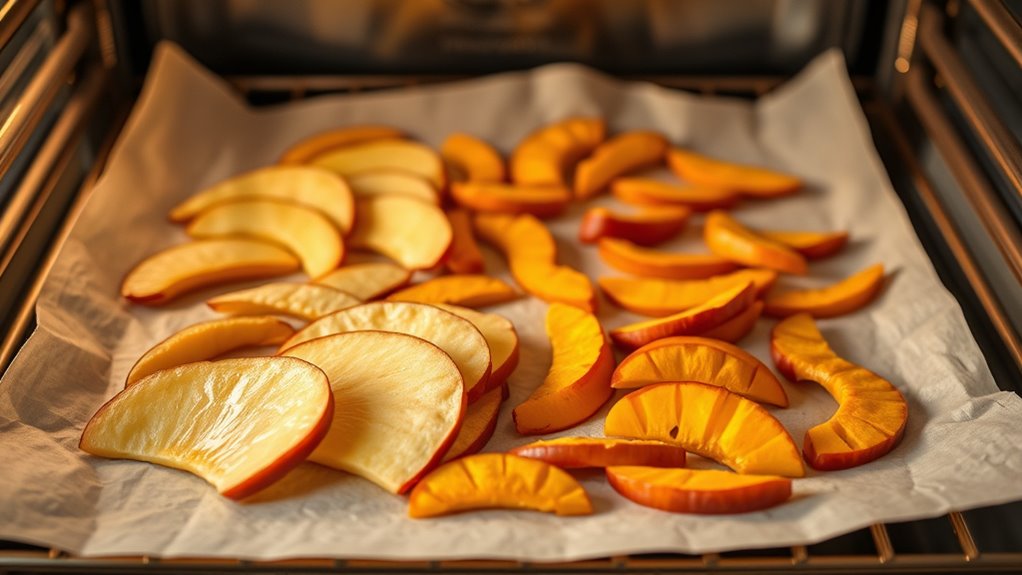
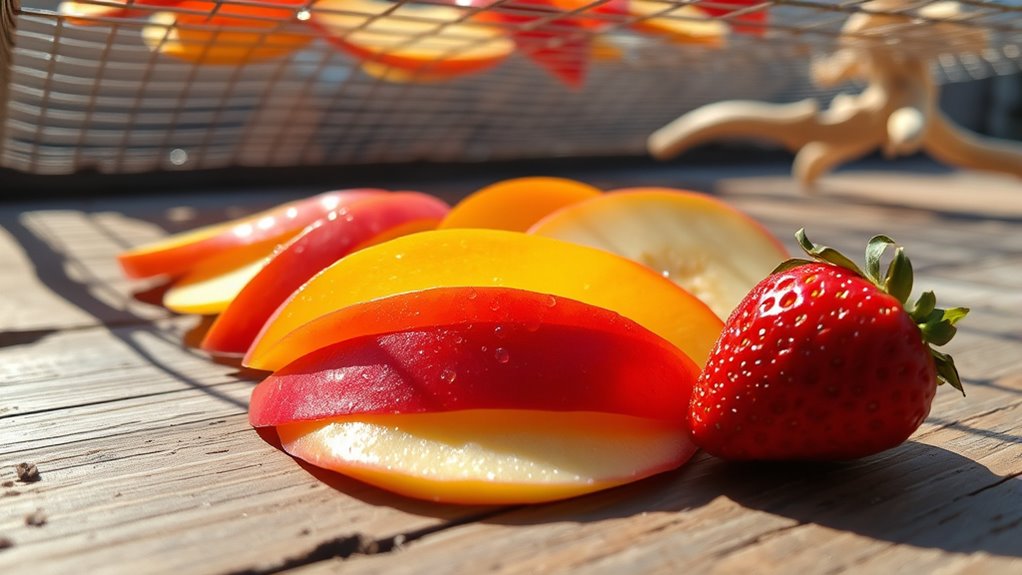
Slicing Techniques for Even Drying

To guarantee your dried fruit is evenly dehydrated, slicing techniques play a vital role. Using proper knife skills and consistent slicing thickness ensures uniform drying and better texture. Aim for slices about 1/8 to 1/4 inch thick; too thick, and the fruit won’t dry evenly, too thin, and it may burn or over-dry. Keep your knife sharp for cleaner cuts and safer handling. Use a steady hand to maintain even slices across all pieces. Here’s a quick guide:
| Slicing Technique | Result |
|---|---|
| Uniform thickness | Even drying, consistent texture |
| Varying thickness | Uneven drying, inconsistent texture |
| Sharp knife | Clean cuts, safer slicing |
| Dull knife | Rough edges, uneven slices |
| Hand-held slicing | Better control, precision |
Mastering these techniques ensures perfect trail snacks every time. For optimal results, consider preparing your fruit with uniform slices to enhance dehydration efficiency.
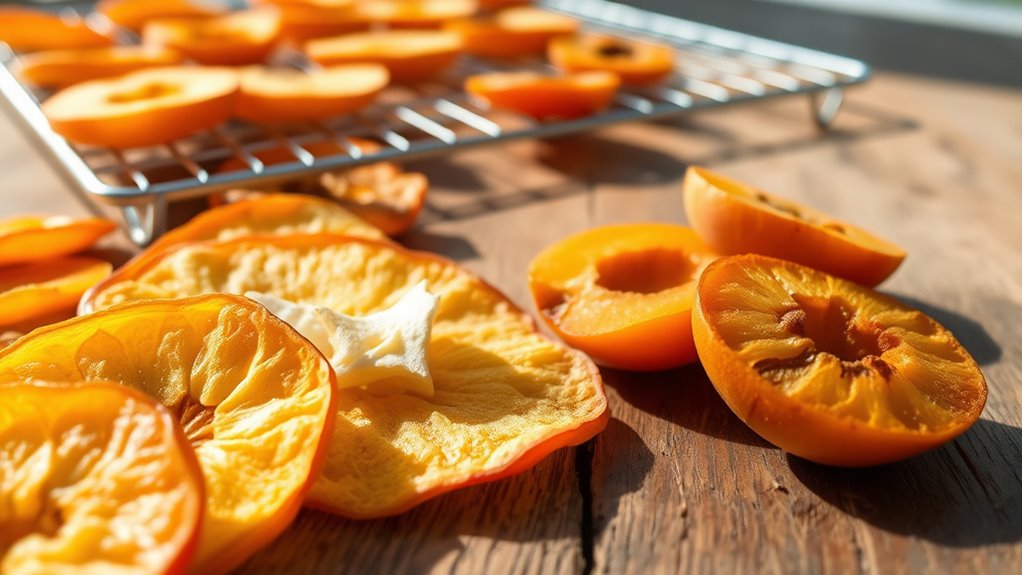
Using an Oven to Dehydrate Fruit
Using an oven to dehydrate fruit is an effective way to preserve your harvest and create tasty trail snacks. To start, select ripe, firm fruit with minimal bruising for even drying. Adjust your oven to a low temperature, around 140°F (60°C), to prevent overcooking. Keep these tips in mind:
Dehydrate fruit at 140°F for tasty, preserved trail snacks with even drying.
- Use a sharp knife or mandoline for consistent, thin slices
- Arrange fruit pieces in a single layer on a baking sheet or parchment-lined tray
- Leave space between slices to allow airflow and even dehydration
- Check periodically to avoid burning or uneven drying
- Understanding dehydration techniques can improve your results and ensure the best texture and flavor.
Monitoring oven temperature is key to successful dehydration, ensuring your fruit retains flavor without becoming overly crispy. With patience and attention, you’ll end up with perfectly dried fruit ready for trail snacks.
Air-Drying Methods With Solar Energy

Harnessing solar energy for air-drying fruit offers an eco-friendly and cost-effective way to preserve your harvest. Solar drying utilizes direct sunlight and natural airflow to dehydrate fruit efficiently. You can set up a simple rack or mesh in a sunny, ventilated area, allowing wind evaporation to speed up the process. Proper placement guarantees maximum sunlight exposure and airflow, reducing drying time. To help visualize, here’s a quick reference:
| Step | Material Needed | Key Tip |
|---|---|---|
| Prepare the fruit | Knife, cutting board | Slice evenly for uniform drying |
| Arrange on rack | Mesh or screen | Avoid overlapping slices |
| Position in sun | Open, sunny spot | Ensure good airflow and sunlight |
| Monitor & turn | None | Rotate slices for even drying |
This method leverages natural elements, making it simple and sustainable. Additionally, understanding dehydration techniques can help optimize the process for better preservation and flavor retention.
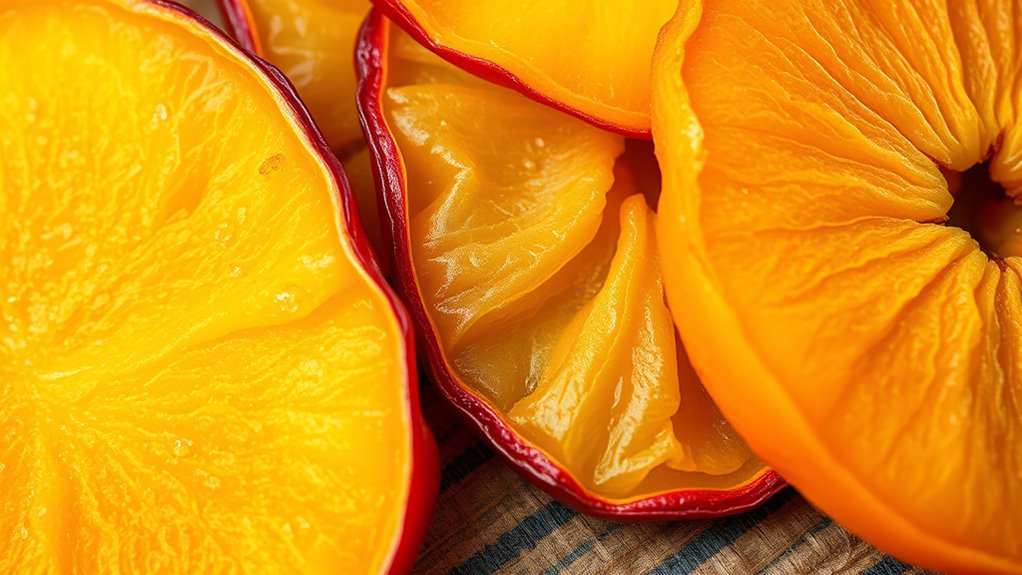
Tips for Preventing Browning and Preserving Color

Preventing browning and preserving the vibrant color of dried fruit starts with proper preparation and handling. To achieve ideal color preservation and browning prevention, act quickly after slicing and take steps to minimize oxidation.
- Dip sliced fruit in lemon juice or ascorbic acid solution to block enzymes responsible for browning.
- Use fresh, high-quality fruit to reduce discoloration.
- Keep fruit slices thin and uniform for even drying and better color retention.
- Store dried fruit in airtight containers away from light and heat, preventing color degradation.
These simple tips help maintain the natural hue of your dried fruit, making your trail snacks more appealing and enjoyable. Proper handling and storage are key to effective color preservation and browning prevention, ensuring your dried fruit looks as good as it tastes.
Ensuring Proper Drying and Texture
To get the best results, make certain your fruit dries evenly by arranging slices in a single layer without overlapping. Keep an eye on the texture; it should be leathery but not brittle. Achieving these points ensures your trail snacks are both tasty and portable. Additionally, monitoring the shelf life of dried fruit helps prevent spoilage and ensures freshness.
Achieve Even Drying
Achieving even drying is essential to guarantee your fruit snacks have the right texture and shelf life. Uneven drying can cause inconsistent fruit flavor and affect the drying speed, leading to spoiled or overly tough pieces. To ensure uniformity:
- Arrange fruit slices in a single layer on your drying surface
- Turn or rotate slices periodically for consistent exposure
- Use similar-sized pieces to promote even drying
- Keep the drying environment well-ventilated and at a steady temperature
- Monitoring humidity levels helps prevent excess moisture that can hinder proper drying techniques.
These steps help maintain balanced drying, preventing moisture pockets. Proper airflow and rotation ensure each piece dries at the same rate, preserving flavor integrity and preventing spoilage. Focus on even drying to produce high-quality, shelf-stable fruit snacks with ideal texture.
Maintain Ideal Texture
Maintaining the ideal texture in dried fruit requires careful attention to the drying process. If you dry the fruit too quickly or unevenly, it can become tough or overly brittle, compromising fruit preservation and flavor enhancement. To guarantee proper drying, monitor the fruit regularly and adjust airflow or temperature as needed. Aim for a leathery, pliable texture without sticky or moist spots. Properly dried fruit retains its natural sweetness and nutrients, making it more enjoyable and long-lasting. Avoid over-drying, which can lead to a hard, chewy texture, or under-drying, which risks spoilage. Consistent, even drying preserves the fruit’s flavor and texture, creating a satisfying snack perfect for trail use. Focus on gentle, steady drying to achieve the best results. Additionally, understanding the dehydration process can help you optimize your drying technique for better texture and flavor.
Storing Your Dehydrated Fruit for Maximum Freshness

Proper storage is key to keeping your dehydrated fruit fresh and flavorful for longer periods. To maintain peak quality, choose the right storage containers with airtight seals to prevent moisture and air from spoiling your snacks. Store your dried fruit in a cool, dark place away from direct sunlight, which can degrade flavor and texture. Consider these tips:
Store dehydrated fruit in airtight containers in a cool, dark place for lasting freshness.
- Use high-quality, airtight containers to lock in freshness
- Keep containers in a cool, dry location
- Avoid stacking heavy items on top to prevent crushing
- Label containers with the drying date for easy tracking
Creative Ways to Spice Up Your Dried Fruit
Once you’ve stored your dehydrated fruit perfectly, it’s time to add some exciting flavors to make your snacks even more appealing. Experiment with fruit flavor combinations by mixing sweet and tangy elements, like apple with cinnamon or mango with chili powder. Spice infusions can elevate your dried fruit, adding warmth and depth—try coating slices with a touch of ginger, vanilla, or nutmeg before drying. You can also create your own spice blends, such as citrus zest with cayenne or cardamom with honey. These simple adjustments turn plain dried fruit into gourmet trail snacks. Keep it creative and tailored to your taste, making each bite uniquely flavorful and more satisfying on your outdoor adventures.
Enjoying Your Homemade Trail Snacks

After you’ve prepared and packed your homemade trail snacks, it’s time to enjoy them during your outdoor adventures. To keep your fruit flavorings fresh, choose the right packaging solutions like resealable bags or airtight containers. These help prevent moisture and preserve flavor. When snacking on the trail, take a moment to appreciate the natural sweetness and vibrant taste of your dehydrated fruit. Feel free to experiment with different fruit combinations and flavorings to keep things exciting. Remember to store snacks in a cool, dry place to maintain quality. Pack some variety so you always have a satisfying option. Whether you prefer a quick handful or a more substantial snack, your homemade dried fruit is a delicious, healthy fuel for any outdoor activity.
Frequently Asked Questions
How Long Can I Store Dehydrated Fruit Before It Spoils?
You might wonder how long dehydrated fruit stays good before spoilage sets in. Typically, if you store it properly in an airtight container in a cool, dark place, it can last 6 to 12 months. To prevent spoilage, make sure the fruit is fully dried and keep moisture out. Proper storage duration helps you enjoy your trail snacks longer without risking spoilage or loss of flavor.
Can I Dehydrate Fruits With Added Sugars or Preservatives?
Sure, go ahead and add sugars or preservatives to your fruit before dehydrating—because nothing says “healthy trail snack” like extra sugar, right? While it might enhance flavor and preserve the fruit, it also increases sugar content and can affect preservative effects. Keep in mind, too much sugar may lead to quicker spoilage or a sticky snack. So, enjoy your sweet, preserved treat, but don’t forget to balance health and taste!
What’S the Best Way to Rehydrate Dried Fruit for Recipes?
To rehydrate dried fruit for recipes, you should use simple rehydration techniques like soaking it in warm water or juice. This method softens the fruit and enhances its flavor, making it perfect for baking, compotes, or salads. For added flavor enhancement, consider using flavored liquids like fruit-infused water or a splash of alcohol. Let the fruit soak until it reaches your desired consistency, then drain and incorporate it into your dish.
Are There Any Fruits That Don’T Dehydrate Well?
Some fruits don’t dehydrate well due to their high water content or natural sugars, which create dehydration challenges. For instance, melons, berries, and citrus fruits tend to become too sticky or lose flavor. When selecting fruit for dehydration, choose firmer varieties like apples or bananas, as they handle the process better. Avoid overly juicy or delicate fruits if you want consistent results in your dried snacks.
How Do I Prevent Mold Growth During Air Drying?
Think of air drying like a gentle breeze guiding your fruit to dryness. To prevent mold growth during air drying, make certain your fruit slices are thin and evenly spaced, allowing good air circulation. Keep them in a dry, cool, and well-ventilated area, and turn the slices regularly. Using a fan can also help promote airflow, reducing moisture and mold risk, so your dried fruit stays safe and delicious.
Conclusion
Now that you’ve mastered the art of dehydrating fruit without fancy gadgets, you’re all set to become the trail snack hero everyone envies. Imagine impressing friends with your perfectly dried mango slices or spicy apple rings—no industrial machines needed, just your resourcefulness. Soon, you’ll be the legend of hiking trips, handing out homemade treats while others savor bland store-bought bars. Who knew dehydrating fruit could turn you into the snack king of the wilderness?