To photograph air-fried food like a pro, start by using natural daylight or soft diffused lighting to highlight its crispy texture and vibrant color. Style your dishes with appealing arrangement, garnishes, and clean backgrounds to make them look inviting. Capture hot food for the best shape and vibrancy, and choose angles like flat lay or 45 degrees to showcase textures. Mastering lighting, props, and subtle post-processing will transform your images — explore these tips to boost your skills further.
Key Takeaways
- Use natural, diffused daylight and reflectors to highlight crispy textures and vibrant colors of air-fried dishes.
- Style and arrange food to look full, layered, and inviting, adding garnishes for visual appeal.
- Capture while the food is hot, employing angles like top-down or 45° to showcase texture and depth.
- Set your camera to RAW, adjust white balance accurately, and keep post-processing minimal for true-to-life images.
- Incorporate simple props and backgrounds, focusing on clean composition to emphasize the food’s crispiness and freshness.
Understanding the Unique Challenges of Air-Fried Food Photography
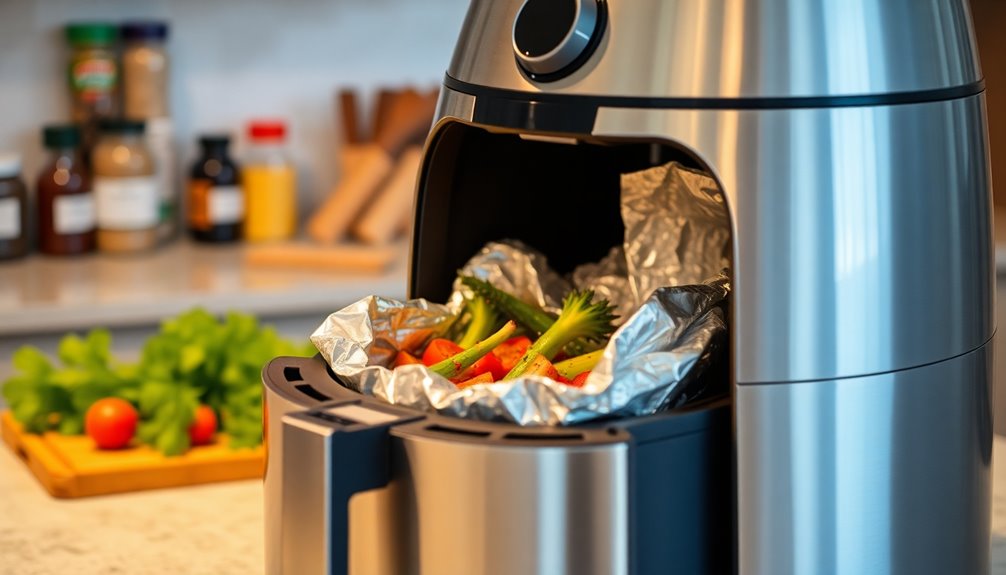
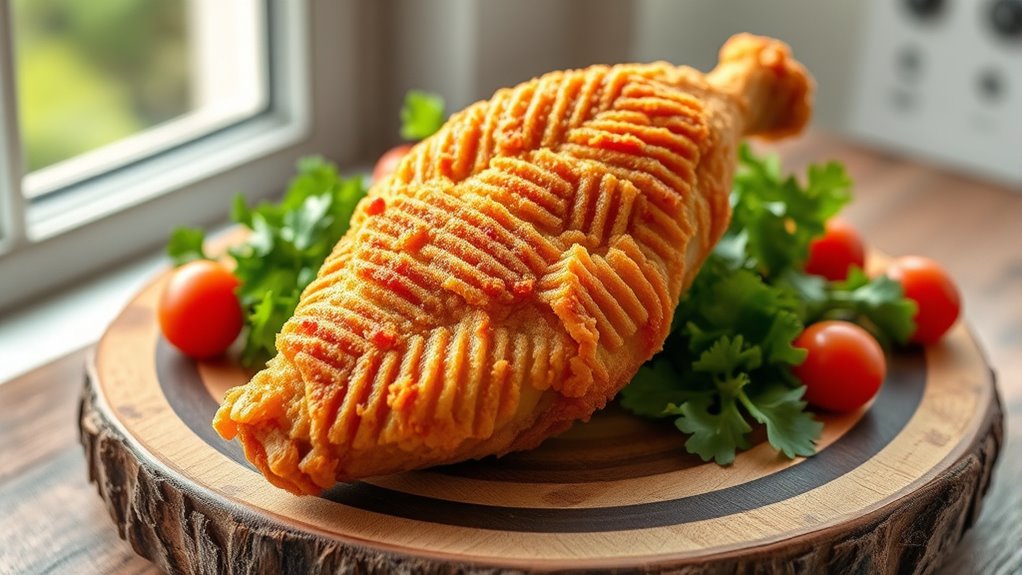
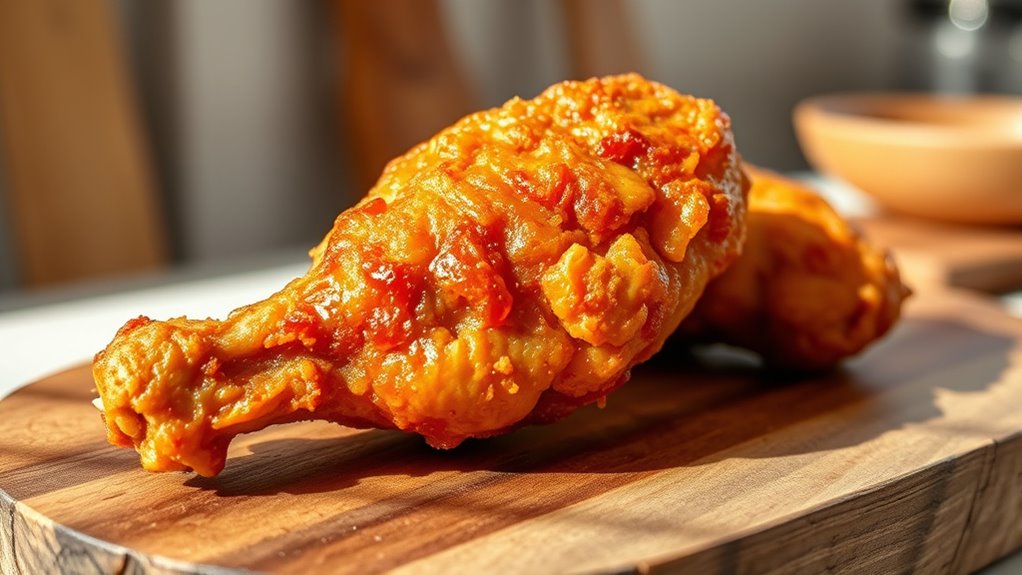
Capturing the appeal of air-fried food can be tricky because it often looks less enticing than traditionally fried dishes. The key challenge is lighting—without proper illumination, the golden-brown crust can appear dull and flat. Natural daylight is your best ally, as it helps bring out the food’s true colors and highlights its crispiness. Food styling also plays a vital role; arranging your dish to showcase its texture and shape can make a significant difference. Since air-fried foods tend to look less oily and shiny, avoid over-relying on natural gloss and instead use lighting to create subtle highlights that emphasize texture. Timing matters too—shoot while the food is still hot to preserve its shape and vibrancy, but be mindful of how heat affects appearance. Additionally, understanding food presentation can help you arrange air-fried foods more appealingly, making them look more enticing in photographs. Paying attention to color accuracy ensures the hues in your photos are true to life, enhancing the overall appeal. Using lighting techniques effectively can further elevate your food photography and make your air-fried dishes stand out, especially when you incorporate proper equipment like reflectors and diffusers to control shadows and highlights. Being aware of photography composition principles can also help you frame your shots for maximum impact.
Styling and Preparing Your Air-Fried Dishes for Stunning Shots
To make your air-fried dishes truly stand out in photos, focus on how you style and prepare them before shooting. Effective food styling involves building your dish to look full and inviting by stacking or layering ingredients, avoiding sparse presentations. Use natural light to highlight vibrant colors and textures; shoot while the food is hot and fresh to preserve its appeal. For greens, soaking them in ice water before photographing helps achieve a crisp, bright look. Brush hot foods lightly with oil to add shine, making them more appetizing. When plating, ensure all surfaces are spotless, removing any spots or debris that could distract from the food. Incorporating food styling techniques such as garnishes or decorative elements can enhance the overall aesthetic of your presentation and create a cozy, farmhouse-inspired vibe. Paying attention to presentation quality can significantly elevate your food photos and attract more viewers. Additionally, using dedicated props and backgrounds can help set the mood and complement the dish’s theme, making your photos more engaging. Recognizing the importance of visual storytelling can help you craft compelling food images that tell a delicious story. Thoughtful styling and preparation set the stage for stunning, professional-looking photos.
Choosing the Right Angles and Composition Techniques

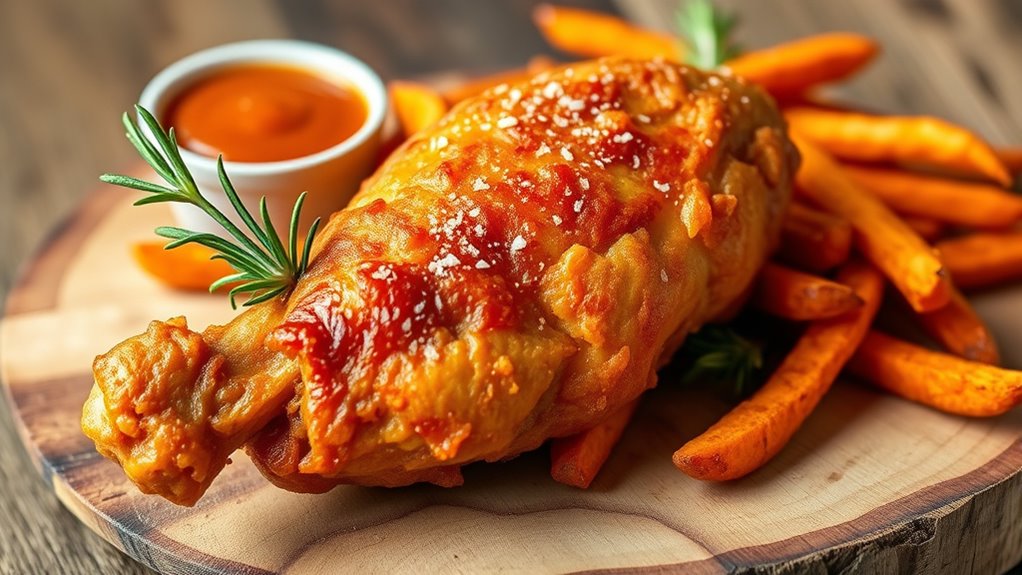
Choosing the right angles and composition techniques can substantially enhance the visual impact of your air-fried food photos. Shooting from directly above (flat lay) effectively showcases multiple items and ingredients, highlighting textures and colors that make the dish pop. Angles at 45 degrees are perfect for capturing the crispy exterior and interior details, adding depth and dimension to your shot. Incorporate foreground and background elements, like utensils or garnishes, to guide the viewer’s eye and tell a compelling visual story. Use lines and layered arrangements within your scene to create movement and balance, making your composition more dynamic. Keep the background clean and free of clutter to focus attention on the food’s appeal and maintain a professional, polished look.
Mastering Natural and Artificial Lighting for Crispy Details
Using natural daylight, especially diffused window light, makes your air-fried food look vibrant and crispy without harsh shadows. Reflectors and diffusers help bounce and soften light, highlighting textures and reducing glare. Balancing artificial lights with ambient light guarantees even illumination that emphasizes crispiness and rich color. Being aware of the pinball machine weight can also inspire you to experiment with different lighting setups to best showcase your crispy dishes from various angles. Additionally, understanding celebrity lifestyle insights can provide creative ideas for arranging your food presentation to mimic professional styling. Incorporating unique and wicked planters into your food staging area can add a quirky, attractive backdrop that enhances visual appeal and creates an engaging scene. Exploring the use of best gelato in Laguna Beach can inspire colorful and appealing food props or backgrounds to elevate your food photography. Paying attention to air purifier features such as HEPA filtration and multi-functionality can also inspire you to think about the details that make a scene more realistic and appealing.
Emphasize Natural Daylight
Natural daylight is your best ally for capturing air-fried foods with vibrant, crispy details. It provides soft, diffuse illumination that enhances the golden color and texture without harsh shadows. Position your dish near a large window on an overcast day or use sheer curtains to soften the sunlight, ensuring even lighting that highlights intricate details. Shooting during the morning or late afternoon maximizes ambient light and minimizes the need for artificial sources. Be mindful to avoid direct sunlight, which can create bright spots and harsh shadows. Instead, angle your dish to utilize indirect natural light, creating a balanced, professional look. Using natural light emphasizes the crispiness and appealing textures of your air-fried food, making your photos truly stand out. Incorporating timeless culinary techniques can further help you achieve stunning results. Paying attention to lighting quality ensures your images look professional and appetizing. Additionally, understanding lighting control can help you manipulate natural light to match your desired mood and effect. For optimal results, consider the quality of natural light available during different times of day to capture the most appealing image.
Use Reflectors and Diffusers
To make the most of your lighting setup, incorporate reflectors and diffusers to control and enhance the illumination on your air-fried foods. Reflectors, like white foam boards or aluminum foil, bounce natural or artificial light to highlight crispy textures and vibrant colors. Position them opposite your light source to fill shadows and create even lighting. Diffusers, such as white fabric or frosted shower curtains, soften harsh light from sunlight or studio lamps, reducing glare and emphasizing surface textures. Adjust their angles to balance contrast and detail. Here’s a quick overview:
| Tool | Purpose | Best Placement |
|---|---|---|
| Reflectors | Bounce light for even illumination | Opposite the light source |
| Diffusers | Soften and spread light evenly | Between light and food |
| Natural Light | Enhance crispy details with soft glow | Use during daylight hours |
Additionally, controlling lighting quality through the use of reflectors and diffusers ensures your crispy air-fried dishes look as appetizing as they taste. A well-balanced lighting setup, utilizing lighting control techniques, can significantly improve the visual appeal of your crispy air-fried dishes. Incorporating color temperature adjustments can further refine the warmth and tone of your images, making the food appear more irresistible.
Balance Artificial and Ambient Light
Achieving perfectly crispy details in your food photography often requires balancing both ambient and artificial light sources. Natural ambient light from windows provides soft, even illumination that highlights crispy textures without harsh shadows. Use reflectors like white foam boards to bounce ambient light onto your air-fried food, reducing shadows and enhancing surface details. When natural light isn’t enough, incorporate artificial light, such as softboxes or bounce flash, to fill in shadows and ensure consistent exposure. Position artificial lights at a 45-degree angle to emulate natural sunlight, emphasizing crispy edges and surface intricacies. The key to a vibrant, appetizing look is adjusting the balance between artificial and ambient light, so your food appears naturally illuminated and delicious without overexposure or dullness. Additionally, understanding lighting techniques can help you craft images that truly showcase the crispy perfection of your air-fried dishes. For example, exploring lighting ratios can help you fine-tune how much artificial light is used relative to natural light to achieve the desired effect. Incorporating diffusers can further soften harsh light, making your food look even more enticing.
Managing White Balance and ISO Settings for Vivid Colors

To get vibrant colors in your air-fried food photos, you need to manage white balance and ISO settings carefully. Shooting in RAW format makes it easier to correct indoor yellow tones later, ensuring accurate colors. Adjusting your ISO appropriately helps keep your images sharp even in low light without sacrificing clarity.
Correcting Indoor Yellow Tones
When shooting indoor air-fried food, yellow lighting can cast unwanted color casts that dull your images. To fix this, adjust your camera’s white balance to settings like “Daylight” or “Cloudy,” or manually set it around 5000–6500K for better color correction. Using a gray card or white balance card helps guarantee accurate adjustments in post-processing. Increasing ISO (to 1600 or 3200) can brighten low-light scenes, but watch for noise that may need removal later. Shooting in RAW allows you to fine-tune white balance after capturing, making colors more vivid.
| Indoor Lighting Type | Best White Balance Setting | Effect on Color Correction |
|---|---|---|
| Yellow incandescent | Daylight or 5500K–6500K presets | Warms or neutralizes tones |
| Fluorescent | Cloudy or custom Kelvin setting | Balances cool hues |
| Natural light | Auto or daylight settings | Preserves true colors |
Shooting in RAW Format
Shooting in RAW format gives you the flexibility to fine-tune white balance and exposure after capturing your images, which is especially helpful under indoor yellow or mixed lighting. RAW files store uncompressed image data, allowing you to adjust white balance precisely, ensuring your air-fried food looks vibrant and true-to-life. When editing, you can correct color casts and enhance details without sacrificing quality. Managing exposure in RAW is equally important; you can brighten or darken your shot to achieve ideal brightness and contrast. This control helps prevent overexposed highlights or underexposed shadows, making your food look appetizing. Overall, shooting in RAW empowers you to enhance colors and clarity, resulting in more vivid, professional-looking food photos with minimal post-processing.
Adjusting ISO for Clarity
Adjusting ISO is essential for capturing clear, vibrant images of air-fried food indoors, especially under dim or yellowish lighting. Increasing ISO sensitivity, like setting it to 1600 or 3200, allows more light to reach the sensor, helping you avoid blurry or dull photos without using flash. However, higher ISO can introduce grain or noise, so balance it with aperture and shutter speed to maintain image quality. Shooting in RAW format makes it easier to modify white balance and reduce noise afterward, resulting in more vivid, true-to-life colors. Properly managing ISO ensures your food looks appetizing, highlighting its crispiness and texture even in challenging lighting conditions. With the right ISO settings, you’ll produce sharp, vibrant images that truly showcase your air-fried dishes.
Using Props and Backgrounds to Enhance Your Food Scenes

Enhancing your air-fried food scenes with thoughtfully chosen props and backgrounds can make your images more compelling and inviting. Use props like bowls, utensils, herbs, and sauces to create a balanced, storytelling composition. Layer these elements around your main dish to add depth and interest. Select backgrounds with natural textures such as wooden boards, rusted trays, or concrete surfaces to give your scene character and authenticity. Neutral-colored fabrics or matte-finish props help prevent distracting reflections, keeping the focus on the crispy, golden food. Incorporate simple background elements like parchment paper, cutting boards, or linens to add texture and context. Thoughtful props and backgrounds work together to boost the visual appeal and make your air-fried dishes look irresistible.
Minimizing Post-Processing While Enhancing Visual Appeal
Choosing the right in-camera settings can considerably reduce the need for extensive post-processing. To achieve this, set your white balance correctly or shoot in RAW, minimizing color correction later. Use bright, natural light to highlight your air-fried food’s textures and colors, decreasing the need for editing adjustments. Keep backgrounds simple and props minimal to avoid distracting elements that require correction. Focus on sharpness and proper exposure in-camera to limit the need for brightness, contrast, and sharpness edits. When editing, stick to minimal tools like levels, contrast, and saturation for subtle enhancements. Envision this scene:
| Food Item | Light Source | Background |
|---|---|---|
| Crispy fries | Soft daylight | Plain white |
| Chicken wings | Morning sun | Neutral wood |
| Veggie tempura | Window glow | Clean slate |
| Air-fried shrimp | Overhead natural | Minimal props |
| Sweet potato fries | Morning light | Simple linen |
This approach keeps your images appealing and effortless to fine-tune.
Practical Tips for Shooting Air-Fried Food in Different Settings

When photographing air-fried food in different settings, leveraging natural light and simple compositions makes a big difference. Natural window light or soft diffusers bring out the crispy texture and vibrant colors without harsh shadows. To improve your shots, consider these food photography tips:
Using natural light and simple setups enhances air-fried food photos, highlighting texture and vibrant colors effortlessly.
- Use natural light as much as possible for a fresh, appealing look.
- Capture from high angles, like overhead or 45 degrees, to showcase texture and arrangement.
- Keep props minimal—neutral backgrounds and simple utensils highlight your food.
- Photograph while the food is still hot and freshly cooked to preserve crispiness and visual appeal.
Adjust your camera settings with a low ISO and wide aperture to achieve sharp images with attractive depth of field. Simplicity and proper lighting are key to stunning air-fried food photos.
Frequently Asked Questions
How Do You Photograph Flying Food?
When photographing flying food, you wanna freeze motion with a fast shutter speed, like 1/500s or faster. Anticipate the moment by predicting the food’s trajectory and shoot at its peak flight. Use burst mode to capture multiple shots quickly, increasing your chances of getting that perfect shot. Position your camera at a side or slightly below angle, and make certain bright, natural lighting to highlight the action and prevent blur.
How to Photograph Food Like a Pro?
Did you know that 66% of consumers are more likely to try a dish after seeing a professional photo? To photograph food like a pro, use natural light to bring out vibrant colors and textures. Arrange ingredients with height and garnishes, shoot from angles like 45 degrees or overhead, and keep backgrounds simple. Capture the shot while the food’s hot to showcase its crispness and appeal, making your images irresistibly delicious.
What Camera Settings Are Best for Food Photography?
You should use a wide aperture (f/1.8 to f/5.6) to blur the background and make your food pop. Keep ISO low (100-400) in bright light for sharpness. Adjust shutter speed according to lighting—faster in bright conditions, slower in low light, using a tripod if needed. Shoot in RAW for flexibility, and use manual focus to highlight textures and details, especially in close-up shots.
How to Take Aesthetically Pleasing Pictures of Food?
To take aesthetically pleasing pictures of food, use natural light to highlight textures and colors, avoiding harsh shadows. Experiment with angles—top-down or 45-degree—to find the most appealing view. Incorporate complementary props and backgrounds, keeping everything clean and styled. Get close with a shallow depth of field to emphasize details, and guarantee your plates and surroundings are tidy and thoughtfully arranged to create a visually engaging shot.
Conclusion
Now that you’ve uncovered the secrets to capturing air-fried perfection, your photos will sparkle like golden crumbs in the sunlight. With each shot, you’ll paint a mouthwatering story that beckons viewers to reach through the screen and taste the crispy magic. So grab your camera, embrace your creativity, and let your images sizzle with flavor and flair. Your culinary masterpiece is ready to steal the spotlight—just like the irresistible aroma of freshly air-fried goodness.