To sear steak to medium-rare perfection, start with a well-chosen cut with good marbling, season it generously, and let it sit at room temperature. Preheat your grill or pan until it’s hot enough to cause water droplets to dance. Sear the steak for 2-3 minutes per side without moving it, then let it rest to lock in juices. For detailed tips on timing and avoiding common mistakes, keep exploring the process.
Key Takeaways
- Preheat your pan or grill to high heat until water droplets dance and evaporate.
- Season the steak generously and let it sit at room temperature for even cooking.
- Sear the steak undisturbed for 2-3 minutes per side to develop a flavorful crust.
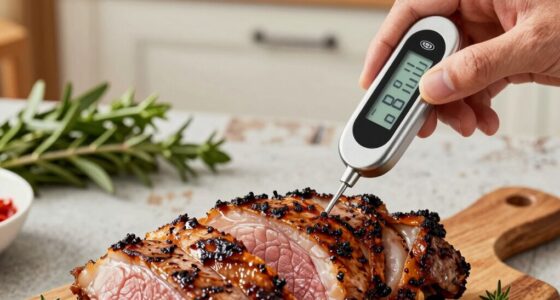
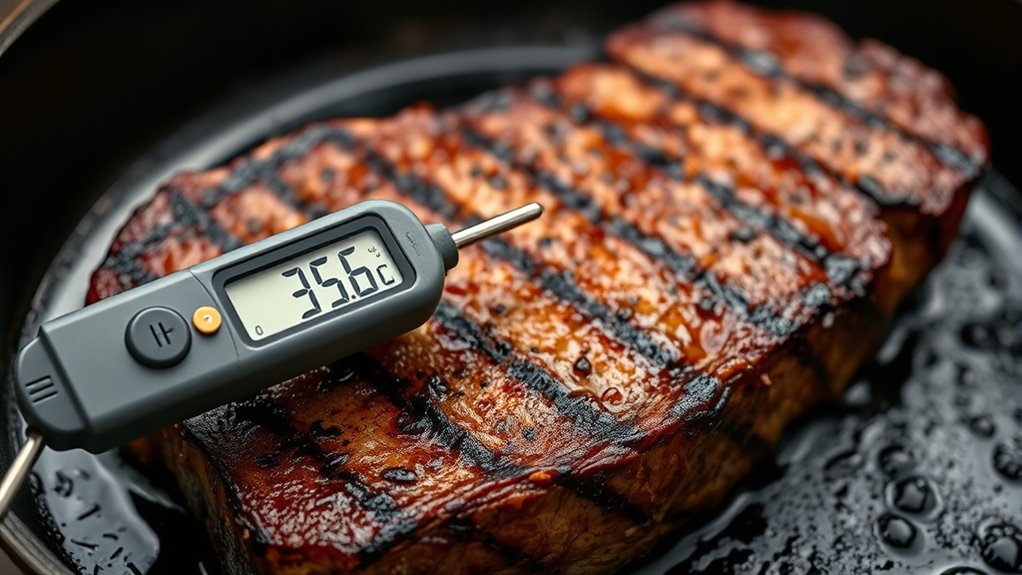
- Use a digital thermometer to check for an internal temperature of 130°F (54°C) for medium-rare.
- Rest the steak loosely tented with foil for 5 minutes to retain juices and finish cooking.

0.5 Sec Instant Read Meat Thermometer Digital with ±0.5℉ Precision, Food Thermometer for Cooking Kitchen Gadgets, Oven Grill Candy BBQ Essentials Accessories, Gifts for Him Dad Men Birthday, Red
- Fast Reading Speed: 0.5 seconds for quick results
- High Precision: ±0.5℉ accuracy with professional sensor
- Temperature Lock: Lock temperature for easy reading
As an affiliate, we earn on qualifying purchases.
As an affiliate, we earn on qualifying purchases.
Choosing the Right Cut of Steak

Choosing the right cut of steak is essential for achieving a perfect medium-rare sear. Look for cuts with good marbling quality, as the intramuscular fat helps retain moisture and enhances flavor during cooking. A well-marbled steak will develop a beautiful crust while staying tender inside. If you’re opting for grass-fed beef, you’ll benefit from leaner meat with a richer, more intense flavor, though it may require careful cooking to prevent dryness. Cuts like ribeye, sirloin, or filet mignon are excellent choices because they balance marbling and tenderness. Remember, selecting a cut with the right marbling quality guarantees your steak sears evenly and stays juicy, giving you that ideal medium-rare finish every time.
Preparing Your Steak Before Cooking

Before you start cooking, make sure your steak is properly prepared. Choose a cut that suits your preference, season it generously, and let it sit at room temperature for about 30 minutes. This guarantees even cooking and maximum flavor when you sear it. For an added touch of flavor, consider applying a coarse salt rub to enhance the seasoning.
Selecting the Right Cut
Ever wondered which steak cut will deliver the best results for your medium-rare masterpiece? The key lies in choosing a cut with good marbling quality, as intramuscular fat adds flavor and tenderness. Look for steaks like ribeye or striploin, which typically have higher marbling. Additionally, consider steak aging—dry-aged or wet-aged steaks develop richer flavors and better texture, making your cooking easier and more satisfying. Freshness also matters; opt for cuts that have been properly stored and handled. When selecting your steak, prioritize quality over size, focusing on marbling and aging process. This ensures your medium-rare will be juicy, tender, and full of flavor, giving you the best possible results for your cooking effort. Understanding the importance of color accuracy in your meat selection and cooking process can further enhance the visual appeal of your steak.
Properly Seasoning the Steak
Once you’ve selected a well-marbled, properly aged steak, the next step is to season it to enhance its natural flavors. Start with a generous sprinkle of salt and freshly ground pepper, pressing them into the meat. To add variety, consider using marinade variations that incorporate ingredients like soy, garlic, or citrus for extra depth. If you prefer dry seasonings, spice blends such as paprika, cumin, or chili powder can create a flavorful crust. Be careful not to over-season; the goal is to complement, not overpower, the meat’s natural taste. Let the seasoning sit for a few minutes before cooking to allow flavors to penetrate. Proper seasoning ensures your steak will be flavorful and well-balanced after searing.
Bringing to Room Temperature
Why is bringing your steak to room temperature an important step? It helps guarantee even cooking by allowing the meat temperature to rise gradually. When your steak starts cold from the fridge, the exterior cooks faster than the interior, risking overcooking the outside while the inside remains underdone. Letting it sit at room temperature for about 30 minutes promotes consistent heat transfer. This not only results in a more evenly cooked steak but also enhances flavor development, as the meat cooks more uniformly. Plus, a properly warmed steak sears better, creating a desirable crust. Overall, bringing your steak to room temperature is a simple yet vital step to achieving perfect searing and a juicy, medium-rare interior.
Seasoning for Maximum Flavor

To maximize the flavor of your steak, proper seasoning is essential. Start by exploring marinade options, which can infuse your meat with depth and tenderness. A simple mixture of olive oil, garlic, and herbs works well, or try a tangy balsamic or soy-based marinade for a different flavor profile. After marinating, apply a balanced spice blend to enhance the crust. Classic combinations like salt, black pepper, and smoked paprika deliver bold taste, while adding garlic powder or chili flakes can add extra complexity. Don’t be afraid to experiment with different spice blends to suit your preferences. Proper seasoning not only elevates the natural flavors of your steak but also creates a delicious, well-rounded crust during searing.
Preheating Your Pan or Grill

Preheating your pan or grill sets the stage for a perfect sear by guaranteeing the surface is hot enough to develop a flavorful crust. Proper pan heating means your skillet reaches the ideal temperature before adding the steak, preventing sticking and uneven cooking. For grilling, setting the right grill temperature is essential; aim for high heat to quickly sear the meat’s surface. You can test if your pan is ready by sprinkling a few drops of water—if they dance and evaporate immediately, it’s hot enough. Similarly, preheat your grill for at least 10-15 minutes. A properly preheated surface helps lock in juices, enhances flavor, and guarantees your steak sears evenly, giving you that perfect medium-rare crust. Ensuring consistent heat is also crucial for machine quality, as higher-quality equipment maintains stable temperatures for better results.
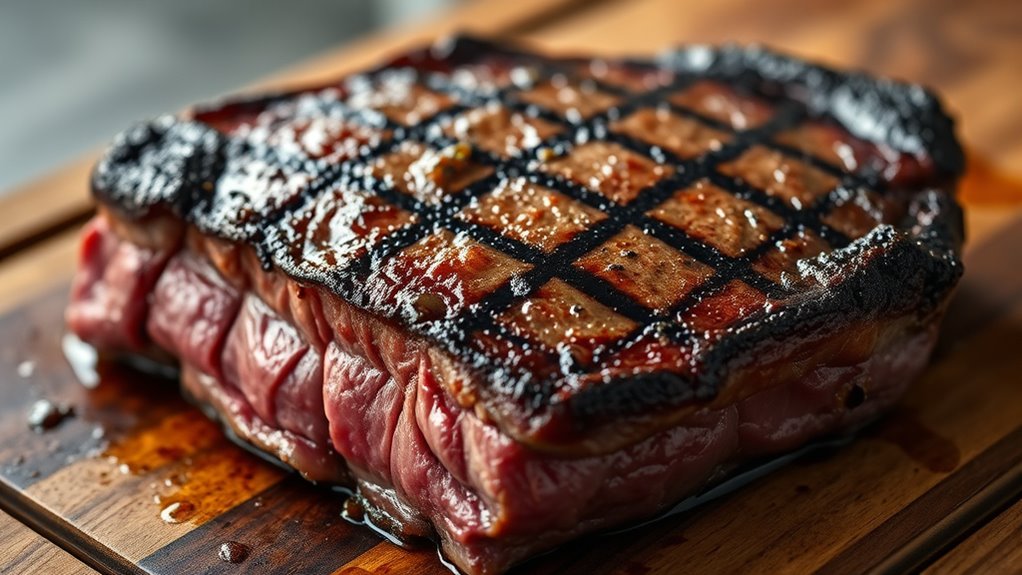
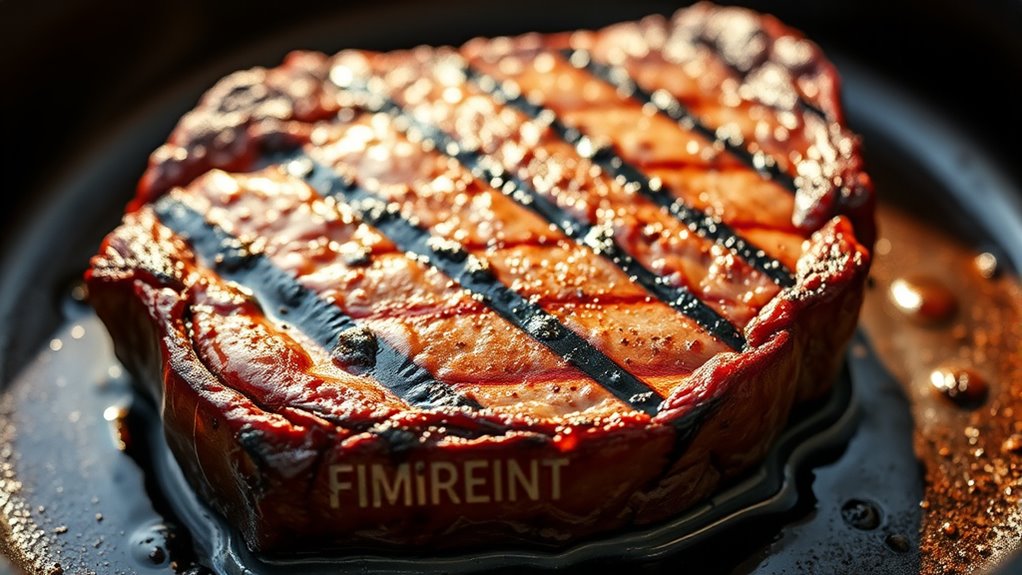
Proper Searing Technique
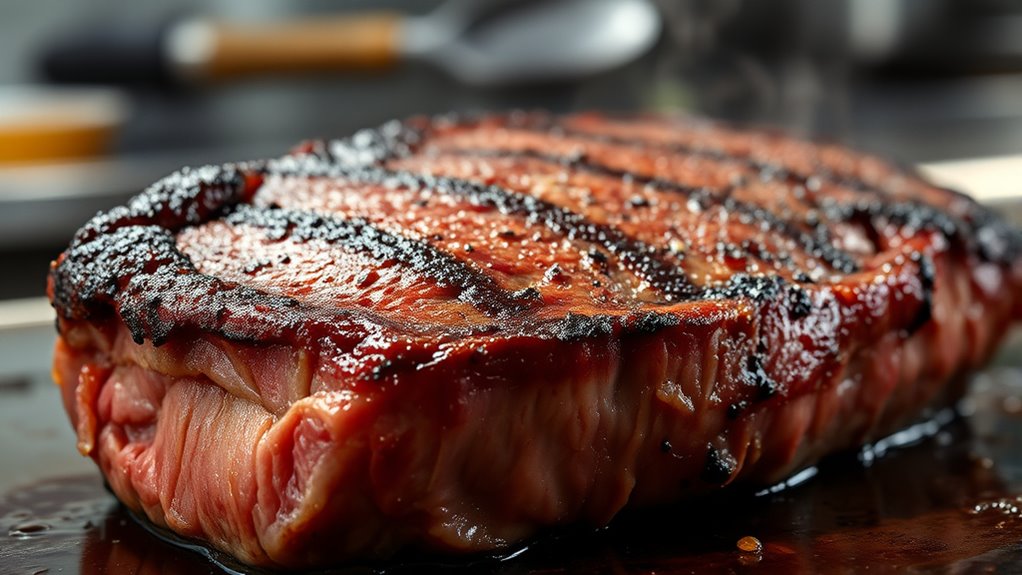
A proper searing technique involves placing the steak onto the hot surface and leaving it undisturbed for a few minutes. This allows the Maillard reaction to develop, creating a flavorful, caramelized crust. Pay attention to marbling patterns—more marbled steaks will sear differently, releasing fat that enhances flavor and juiciness. Ascertain your pan or grill is sufficiently hot before laying down the meat; this prevents sticking and promotes even browning. Additionally, consider steak aging; dry-aged steaks often have a deeper flavor profile, which searing helps to lock in. Resist the urge to move or press the steak during searing. Letting it rest in place ensures a crust with a beautiful color and texture, setting a solid foundation for perfect medium-rare doneness.
Monitoring Cooking Time and Temperature
Keeping an eye on cooking time and temperature guarantees your steak reaches that perfect medium-rare point. To master this, focus on precise timing control and accurate cooking temperature. Here are essential tips:
- Use a digital thermometer to monitor internal temperature, aiming for 130–135°F (54–57°C).
- Keep the heat consistent to avoid overcooking; adjust your stovetop or grill as needed.
- Time your searing—usually 2–3 minutes per side—based on thickness.
- Rest the steak briefly after searing to allow juices to redistribute, ensuring even doneness.
- Incorporating a thermometer helps maintain accurate temperature control throughout the cooking process.
Consistent monitoring allows you to react quickly if the temperature rises too high or drops too low, giving you perfect control over the cooking process. This precision guarantees a tender, medium-rare steak every time.
Resting the Steak After Searing
Once you’ve finished searing your steak, letting it rest is essential for achieving ideal juiciness and even doneness. Resting benefits include redistributing juices throughout the meat, preventing them from spilling out when you cut into it. Proper resting timing usually lasts about 5 to 10 minutes, depending on the steak’s thickness. During this period, the residual heat continues to cook the steak slightly, helping it reach the perfect medium-rare temperature. Skipping or rushing the resting process can result in a drier, less flavorful steak. Keep the steak on a plate or a wire rack, loosely tented with foil if desired, to maintain its temperature without trapping excess moisture. This step guarantees your steak remains juicy, tender, and evenly cooked.
Checking for Doneness Without Cutting
Checking for doneness without cutting into your steak allows you to assess its internal temperature accurately while keeping the juices intact. The touch test is a handy method: gently press the steak’s surface and compare it to the feel of different parts of your hand. Alternatively, a quick thermometer check provides precise results—insert the probe into the thickest part of the meat. To help you gauge doneness, consider these steps:
- Use your finger to compare firmness with the pad of your thumb for rare, medium-rare, and medium.
- Gently press the steak’s surface and note its springiness.
- Insert a digital thermometer into the steak’s center for an exact temperature.
- Trust your touch test for a quick, reliable assessment without piercing the meat.
Serving and Enjoying Your Perfect Steak

Once your steak is perfectly cooked, it’s time to focus on presentation and flavor. You can elevate your meal with simple plating techniques and thoughtful pairing of wines and sides. These finishing touches will make your steak experience truly memorable. Incorporating aesthetic serveware can also enhance the visual appeal of your dish, making it as delightful to look at as it is to taste.
Plating Techniques for Steak
To truly enjoy your perfectly cooked steak, presentation plays a crucial role in elevating the dining experience. Start with plate presentation by choosing a clean, warm plate that highlights the steak’s color and texture. Next, consider these garnish techniques:
- Add fresh herbs like rosemary or thyme for aroma and visual appeal.
- Place a small mound of roasted vegetables or a simple salad on the side.
- Drizzle a finishing sauce, such as a red wine reduction, artfully around or over the steak.
- Use thin slices of lemon or a sprig of parsley as a vibrant, fresh accent.
- Employ effective organization strategies to ensure your garnishes are neatly arranged and visually balanced.
These touches enhance the visual appeal and make the meal more inviting. Remember, the way you plate your steak influences anticipation and enjoyment.
Pairing Wines and Sides
After perfecting your steak’s presentation, the next step is to enhance your dining experience with thoughtful wine and side pairings. When considering wine pairing, choose a red like a juicy Cabernet Sauvignon or a smooth Malbec to complement the rich, savory flavors of your medium-rare steak. Lighter wines, such as Pinot Noir, also work well if you prefer a more subtle pairing. For your side dish selection, opt for roasted vegetables, garlic mashed potatoes, or a fresh greens salad. These sides add texture and balance without overpowering the steak’s tenderness. Remember, the goal is harmony—select wines and sides that enhance your steak’s flavor while creating a satisfying, well-rounded meal. Practicing mindful choices in pairing can bring a sense of inner harmony to your dining experience.
Frequently Asked Questions
What Is the Ideal Thickness for a Medium-Rare Steak?
For a perfect medium-rare steak, the ideal measurement for steak thickness is about 1 to 1.5 inches. This thickness allows you to sear the exterior while keeping the interior tender and juicy. If your steak is too thin, it might overcook quickly; if too thick, it takes longer to reach the perfect temperature. Keep your steak within this ideal measurement to achieve that ideal medium-rare doneness.
Can I Sear Steak Using an Oven Instead of a Pan or Grill?
Sure, you can try oven searing as an alternative method! Start by preheating your oven to a high temperature, like 450°F. Place your steak on a hot, oven-safe skillet or baking sheet, and cook it for about 5-7 minutes per side, depending on thickness. This oven searing technique gives you a beautifully baked crust while maintaining a tender, medium-rare interior. It’s a simple, effective alternative to pan or grill searing.
How Does the Type of Fat in the Steak Affect Searing?
You’ll notice that the type of fat in your steak impacts searing because marbling quality influences flavor and juiciness. Well-marbled steaks have fat that melts at a lower temperature, creating a rich, caramelized crust during searing. If the fat has a high melting point, it may not render as quickly, affecting the sear’s texture and flavor. So, choosing a steak with good marbling helps achieve that perfect sear and tender interior.
What Are Common Mistakes That Ruin the Searing Process?
You might ruin the searing process if you overcrowd the pan, which lowers the temperature and prevents proper browning. Insufficient preheating also causes problems, as the steak won’t develop that desirable crust. Make sure to give your pan enough time to heat up fully and avoid overcrowding, so each piece sears evenly. These mistakes can lead to a less flavorful, less attractive crust on your steak.
How Do Altitude and Weather Impact Searing and Cooking Times?
Altitude effects and weather considerations markedly impact cooking times and searing. At higher altitudes, the lower air pressure causes water to boil faster, which can shorten searing times and require adjustments. Weather influences heat retention; windy or humid conditions can cool your pan or grill, making it harder to reach the right searing temperature. You need to adapt your techniques, perhaps by increasing heat or adjusting cooking duration, to achieve perfect results.
Conclusion
Now that you’ve mastered the art of searing steak to medium-rare perfection, you’re ready to impress your guests and enjoy restaurant-quality results at home. Remember, patience and attention to detail are your best allies, so don’t rush the process—think of it as a culinary quest worthy of a knight’s honor. With these tips, you’ll be flipping steaks like a seasoned pro, even if the only “sword” you’re wielding is a trusty spatula.