Connect with us

How-To Guides

Cooking Frozen Fish Cakes in Air Fryer: Crispy Perfection!

How to achieve crispy perfection with frozen fish cakes in your air fryer? Discover the secrets to elevate your meal experience!

Published

on

crispy air fried fish cakes

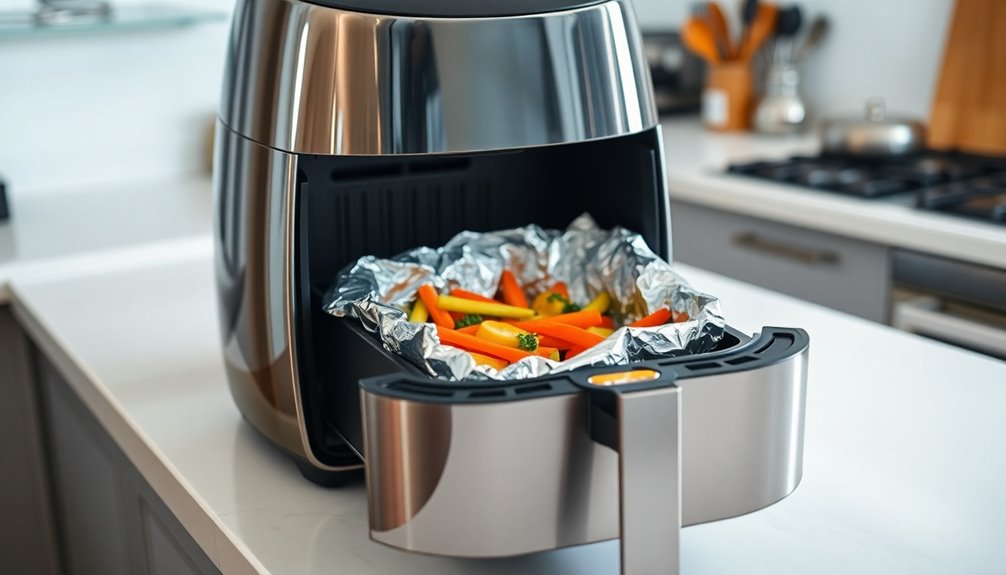
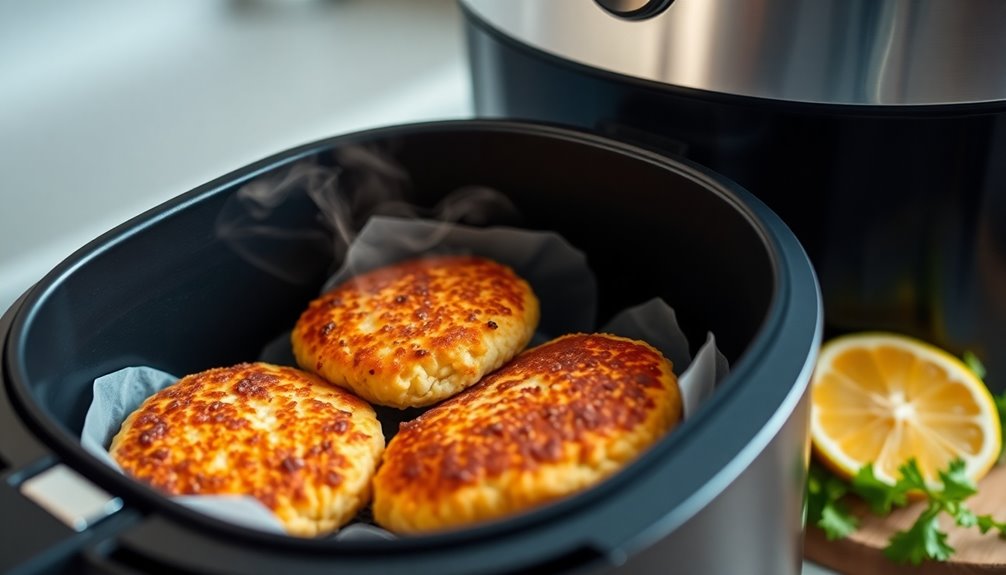
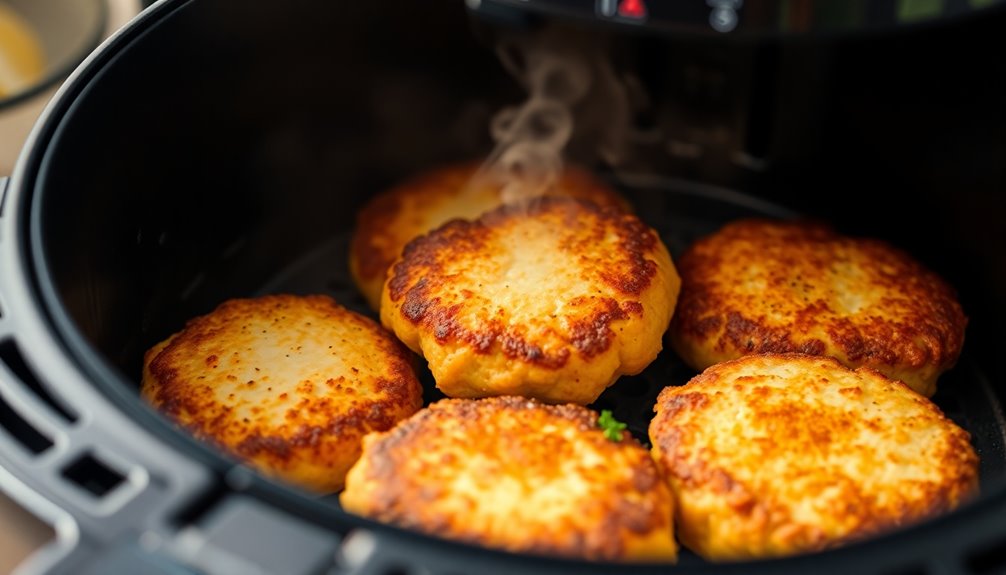
Cooking frozen fish cakes in an air fryer is quick and easy, giving you that crispy perfection you crave. Preheat your air fryer to 180°C (360°F). Place the fish cakes in a single layer, making sure not to overcrowd them. Cook for 8-10 minutes, flipping them halfway for even browning. You'll enjoy a delicious exterior while keeping the fat content low—up to 75% less than traditional frying! Plus, you'll retain more nutrients. Pair them with tartar sauce or a fresh salad for a satisfying meal. There's so much more to explore about flavors and tips that can elevate your dish even further!

Key Takeaways

  • Preheat the air fryer to 180°C/360°F for optimal cooking results and crispy texture.
  • Arrange frozen fish cakes in a single layer to ensure even cooking and browning.
  • Cook for 8-10 minutes, flipping halfway through for uniform crispiness and golden color.
  • Avoid overcrowding the basket to promote proper air circulation and prevent sogginess.
  • Serve with tartar sauce or fresh salad for a balanced and delicious meal experience.
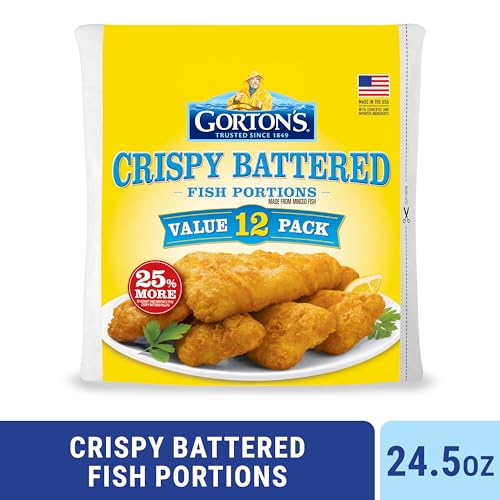
Benefits of Air Frying Fish Cakes

healthier cooking method

When you air fry fish cakes, you not only enjoy a delicious meal but also benefit from a healthier cooking method.

Air frying considerably cuts down the fat content by up to 75% compared to traditional deep frying, making it a fantastic choice for healthy cooking. You get that satisfying crispy texture without needing much oil, allowing you to indulge guilt-free.

Plus, cooking fish cakes in an air fryer typically takes only 8-10 minutes, which is faster than using a conventional oven and helps lock in moisture. The rapid air circulation guarantees even cooking and perfect browning, so you don't have to worry about sogginess.

Finally, air frying is energy-efficient, saving you money on electricity while enjoying your tasty fish cakes. Additionally, using energy-efficient systems like heat pumps can further enhance your overall energy savings in the kitchen and throughout your home.

Ingredients for Frozen Fish Cakes

fish cake recipe ingredients

When you're picking frozen fish cakes, you'll find key ingredients like fish, potatoes, and seasonings.

Some brands even offer fun variations with imitation crab or unique flavorings.

Don't forget to think about dipping sauces like tartar or aioli to enhance your meal!

Essential Ingredients Overview

Frozen fish cakes offer a delightful mix of flavors and textures, making them a popular choice for quick meals.

The essential ingredients for these treats include various fish types like imitation crab meat, salmon, or cod, ensuring you get a range of tastes.

Mashed potatoes provide a satisfying texture, while eggs bind everything together. To enhance the flavor, you'll often find seasonings like Dijon mustard mixed in.

For that irresistible crispy coating during air frying, panko breadcrumbs are a must. Some recipes might also feature herbs or spices, allowing you to customize the flavor to your liking.

Always check the packaging for nutritional information, as calorie counts and ingredients can vary by brand.

Additionally, using high-quality fish types can significantly elevate the flavor profile of your fish cakes.

Enjoy your culinary adventure!

Variations and Alternatives

If you're looking to mix things up, there are plenty of variations and alternatives for ingredients in frozen fish cakes. You can experiment with different seafood types, like imitation crab, salmon, cod, or haddock, which provide diverse flavor profiles.

For convenience, consider using canned fish such as tuna or salmon, perfect for quick meal prep. If you want a lighter option, skip the traditional potato base and try quinoa or cauliflower instead.

Variations like salmon patties or crab cakes can be enhanced with seasonings such as dill, lemon zest, or Dijon mustard to boost flavor.

Don't forget to coat your cakes with panko breadcrumbs for that irresistible crispy texture that sets them apart from regular frozen foods recipes. Additionally, incorporating chia seeds into your fish cakes can add health benefits such as increased fiber and omega-3 fatty acids.

Suggested Dipping Sauces

Dipping sauces can elevate your frozen fish cakes, adding layers of flavor that make each bite more enjoyable. Tartar sauce is a classic choice, providing a creamy, tangy contrast that complements the fish perfectly.

If you're in the mood for something bolder, try aioli or a spicy sriracha mayo for a kick. Sweet chili mayo also works wonderfully for those who enjoy a hint of sweetness.

For a healthier twist, consider yogurt-based sauces like tzatziki, which add creaminess without the calories. Fresh lemon wedges served alongside the fish cakes can brighten the dish, enhancing the overall experience.

Don't hesitate to experiment with homemade sauces, adding your favorite herbs or spices to create a personalized dipping experience! Additionally, remember that a balanced diet can contribute to good oral hygiene, ensuring your teeth stay healthy while you enjoy these delicious treats.

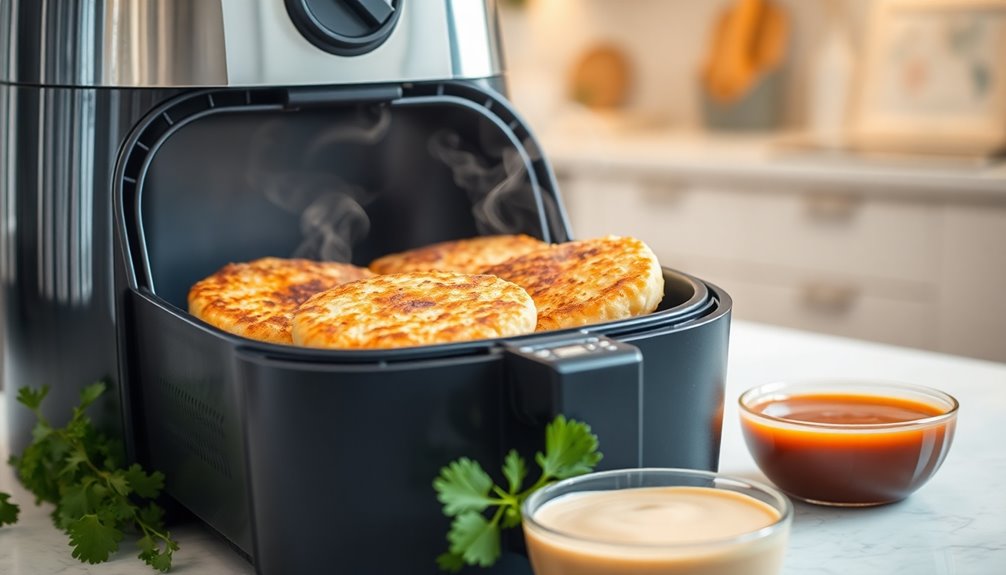
Cooking Process for Air Fryer

air frying cooking method

To achieve perfectly cooked fish cakes in your air fryer, start by preheating the appliance to 180°C/360°F.

Once it's ready, take your frozen fish cakes and arrange them in a single layer in the air fryer basket. Avoid stacking them to guarantee even cooking and that delicious crispiness.

You'll want to cook frozen fish cakes for about 8-10 minutes, flipping them halfway through at the 4-minute mark for consistent texture.

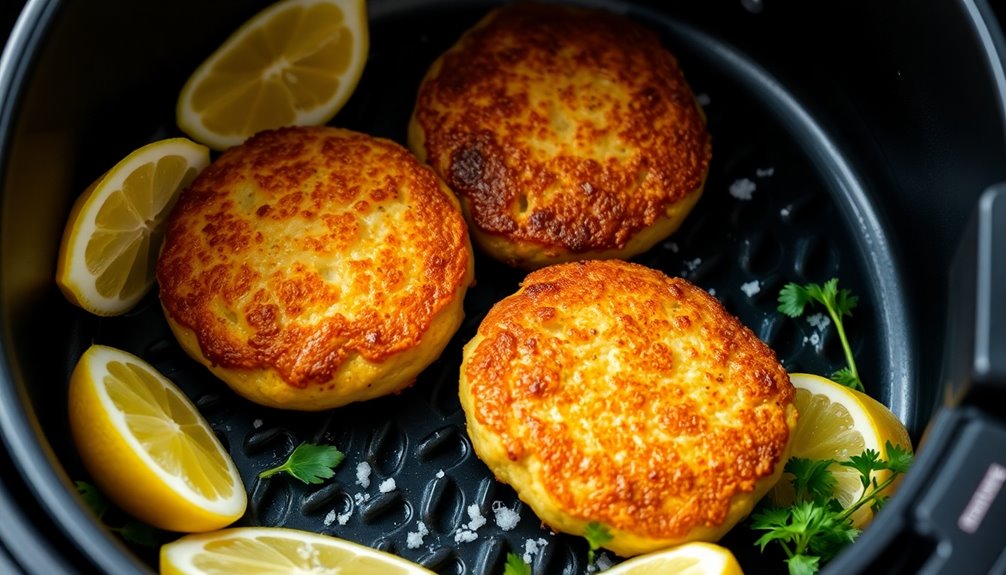
Keep an eye on them, checking for that golden brown and crispy exterior before removing them from the air fryer.

The circulating hot air gives you a healthier result without needing any oil, letting the natural flavors shine through.

Enjoy your perfectly cooked fish cakes!

Cooking Time and Temperature

cooking duration and heat

To get the best results with frozen fish cakes in your air fryer, aim for a cooking temperature of 180°C (360°F).

Generally, you'll want to cook them for about 8 to 10 minutes, flipping halfway for even crispiness.

Keep an eye on them to guarantee they turn a nice golden brown without overcooking.

Optimal Cooking Temperature

When cooking frozen fish cakes in an air fryer, achieving the right temperature is essential for that perfect crispy texture. The ideal cooking temperature for air fryer frozen fish is 180°C (360°F).

This temperature allows the fish cakes to cook evenly, creating a delightful golden-brown exterior without the need for excess oil. It's important to cook them directly from frozen, as this helps maintain their structural integrity and crispiness.

Preheating your air fryer for about 2 minutes can enhance efficiency and improve the final texture. Keep a close eye on the fish cakes to guarantee they reach that desired crispiness without overcooking.

Perfecting this temperature will elevate your cooking frozen fish cakes to a whole new level!

Cooking Time Guidelines

Cooking frozen fish cakes in an air fryer takes just 8 to 10 minutes, making it a quick and convenient option for a tasty meal.

For best results, set your air fryer to 180°C (360°F).

Here are some key cooking time guidelines to follow:

  • Flip the fish cakes halfway through, around the 4-minute mark, for an even, crispy texture.
  • Keep an eye on them, as cooking times may vary based on size and thickness.
  • Always check that the internal temperature reaches 145°F (63°C) to guarantee safe consumption.

Health Benefits of Air Frying

healthier cooking method alternative

Air frying offers a healthier cooking option that doesn't compromise on flavor. By using rapid air circulation, you can achieve that crispy texture you love while greatly reducing fat content—up to 75% compared to traditional deep frying.

This method allows you to indulge in your favorite fried foods without the guilt, promoting healthier eating habits. Plus, air frying typically requires less cooking time, enhancing energy efficiency and saving you valuable minutes in the kitchen.

Another great advantage is that air-fried foods retain more nutrients, minimizing the breakdown of vitamins and minerals during cooking. So, you get delicious, crispy meals that aren't only tasty but also better for your health! Additionally, opting for low carb options can further enhance the nutritional profile of your air-fried dishes.

Storage and Reheating Tips

food preservation techniques explained

Wondering how to keep your fish cakes fresh and tasty after cooking? Proper storage and reheating are key! Follow these tips for the best results:

  • Store leftover cooked fish cakes in an airtight container in the refrigerator for up to 3 days.
  • For longer shelf life, keep uncooked frozen fish cakes in airtight containers or Ziploc bags for up to 3 months.

When it's time to reheat, use an air fryer at 180°C/360°F for a few minutes until heated through. This method preserves their crispiness.

Avoid the microwave; it can make your fish cakes soggy.

Consume your reheated fish cakes promptly for the best taste and quality. Enjoy your crispy perfection!

Serving Suggestions and Variations

serving ideas and alternatives

After enjoying your perfectly reheated fish cakes, it's time to think about how to serve them for maximum flavor and enjoyment. Here are some tasty serving suggestions and variations for your fryer frozen fish cakes:

Serving Suggestions Variations
Pair with tartar sauce Use salmon or haddock
Serve with a fresh salad Try canned tuna for a twist
Accompany with spicy fries Add mango salsa for freshness

Enhance the dish with lemon wedges for a zesty kick, or balance your meal with sides like baked potatoes, quinoa, or zoodles. These ideas will elevate your fish cake experience and keep things exciting at the dinner table!

Frequently Asked Questions

How Long Do You Cook Frozen Fishcakes in an Air Fryer?

You'll want to cook frozen fish cakes in your air fryer for about 8-10 minutes.

Start by setting the temperature to 180°C (360°F). After the first 4-5 minutes, flip them over to guarantee they cook evenly.

Keep an eye on them as they finish up, aiming for a golden brown, crispy texture.

There's no need to defrost; just pop them straight into the air fryer basket and enjoy!

How Do You Cook Frozen Fish Patties in an Air Fryer?

You might think cooking frozen fish patties in an air fryer is complicated, but it's actually a breeze.

Just preheat your air fryer to 180°C (360°F) and arrange the patties in a single layer—no stacking!

Cook them for 8-10 minutes, flipping halfway through for even crispiness.

No oil necessary; the air fryer's magic does the work.

Just wait for that golden brown color, and you'll enjoy perfectly crispy fish patties in no time!

How Long to Cook Fishcakes From Frozen?

When you're cooking frozen fishcakes, aim for a cooking time of about 8 to 10 minutes.

It's important to flip them halfway through to guarantee they cook evenly and get that nice crispy texture.

Set your air fryer to 180°C (360°F) for the best results.

Always check for a golden brown exterior before serving, making sure they're thoroughly cooked and ready to enjoy.

Happy cooking!

Can You Cook Frozen Fish Cakes Without Defrosting?

Oh sure, defrosting those fish cakes is absolutely essential—said no one ever!

You can cook frozen fish cakes straight from the freezer without defrosting. Just pop them in your air fryer at 180°C (360°F) for about 8 to 10 minutes.

Don't forget to flip them halfway for that perfect golden brown crunch.

It's quick, easy, and way healthier than frying. So, why not enjoy a hassle-free meal tonight?

Conclusion

In just a few steps, you've transformed frozen fish cakes into golden, crispy delights—like treasures emerging from a hidden sea. The air fryer works its magic, giving you that satisfying crunch without the guilt. Whether you enjoy them with a zesty dip or toss them on a vibrant salad, every bite is a delicious wave of flavor. So plunge in and savor the taste of your culinary adventure, where convenience meets crispy perfection!

How-To Guides

How to Use an Air Fryer Like a Pro: Beginner’s Step-by-Step Guide

On your journey to mastering air frying, discover essential tips and tricks that will elevate your cooking game in ways you never imagined!

Published

on

air fryer usage guide

To use an air fryer like a pro, start by setting it up on a flat surface and familiarizing yourself with the controls. Prepare your ingredients by cutting them into uniform sizes for even cooking and marinating meats as needed. Preheat the air fryer to 350°F-400°F for about 3-5 minutes. When cooking, coat foods lightly with oil and avoid overcrowding the basket for optimal air circulation. Always monitor cooking times, as you'll need less time compared to traditional methods. Finally, remember to clean it after use for better performance. There's so much more to explore about perfecting your air frying skills!

Key Takeaways

  • Set up your air fryer on a stable surface, ensuring all parts are properly assembled according to the manual for optimal performance.
  • Prepare ingredients by cutting them into uniform sizes and marinating proteins to enhance flavor and ensure even cooking.
  • Preheat the air fryer to the recommended temperature for even cooking and improved texture, monitoring the digital display for completion.
  • Use proper cooking techniques, including shaking the basket, adjusting cooking times, and lightly coating fresh foods with oil for best results.
  • Maintain safety by keeping the air fryer away from children, using oven mitts, and regularly cleaning to prevent grease buildup and ensure longevity.

Setting Up the Air Fryer

air fryer setup instructions

Setting up your air fryer is a straightforward process that lays the foundation for delicious meals.

First, plug the cord into a wall outlet and ensure your air fryer sits on a flat, stable surface. Check for any accessories, like the frying basket and grate, and make sure they're properly assembled.

Next, read the instruction manual to get familiar with the specific features and controls of your model. Pay particular attention to the control panel, noting the temperature and timer dials. A good understanding of temperature guidelines will help you select the right settings for different foods.

This knowledge will make your cooking experience smoother and more enjoyable. Remember, a well-set air fryer leads to perfectly cooked food, so take a moment to get everything ready before you dive into your recipe!

Preparing Ingredients

gathering necessary cooking supplies

Now that your air fryer is set up and ready to go, it's time to prepare your ingredients for cooking.

Start by cutting your food into uniform sizes for even cooking; think fries or wedges for potatoes and bite-sized pieces for chicken. Remember to clean and prep shrimp, leaving them whole or cutting as per your recipe.

For seasoning, mix salt and spices with a bit of oil to keep them from blowing away. Marinate chicken in a buttermilk and hot sauce mix for at least 15 minutes. Cooking with an air fryer allows for a healthier cooking option as it requires minimal or no oil.

When coating, toss chicken in breadcrumbs or cornflakes, and don't forget to wrap jalapeño poppers with bacon.

Finally, arrange everything in an even layer in the air fryer basket, leaving space for hot air circulation.

Preheating and Settings

preheat and adjust settings

Preheating your air fryer is crucial for achieving perfectly cooked meals. Start by checking your manual for specific preheating instructions tailored to your model. If your air fryer has a preheat function, use it by selecting the appropriate setting or programming the cook time. Typically, you'll want to preheat between 350°F to 400°F for about 3-5 minutes. Keep an eye on the digital display—many models will beep when preheating is complete. Avoid overheating, as this can lead to burned food. Proper preheating ensures even cooking and enhances the overall texture and flavor of your air-fried dishes.

Cooking Techniques

various methods for cooking

To achieve deliciously crispy meals in your air fryer, it's essential to master various cooking techniques.

Start by cutting vegetables and potatoes into smaller pieces for even browning. Pat fresh foods dry and coat them lightly with oil—about one tablespoon per kilogram. For frozen foods, you can skip the oil.

When cooking meat, dry the skin and apply a thin layer of oil for crispiness. Use the perforated basket for airflow and shake it once or twice during cooking. This will help ensure that you achieve optimal cooking results by allowing the hot air to circulate effectively.

Adjust cooking times by reducing them by 20% compared to conventional recipes. Remember to check doneness and flip items midway for balanced crispness.

Lastly, lightly spritz oil for that extra-crispy exterior and ensure proper basket placement for airflow.

Safety Precautions

ensure safety at all times

Mastering cooking techniques in your air fryer is only one part of the process; keeping safety in mind is just as important.

Always place your air fryer on a heat-resistant surface and maintain at least 5 inches of space from walls or other objects. While it's cooking, avoid touching anything except the handle—you can use oven mitts if needed. Be aware that certain air fryer parts can reach temperatures that cause burns within seconds, so always handle with care.

Keep it out of reach of kids and pets until it's cool. Always plug it into a grounded outlet and unplug it after use to prevent accidental start-ups.

Remember to avoid overcrowding the basket and never use metal utensils. If you notice strange smells or sounds, unplug the fryer immediately to check for issues.

Stay safe and enjoy your cooking!

Post-Cooking Maintenance

cleaning and organizing kitchen

Once you've finished cooking with your air fryer, it's essential to prioritize maintenance to keep it in top shape.

First, unplug the air fryer and let it cool completely. Remove the basket, pan, or tray, and wash them with warm, soapy water. For tougher messes, soak them for 10-15 minutes.

Wipe the bottom chamber with a damp cloth and ensure all parts are dry before reassembling. For deep cleaning, fill the basket with a cup of water and run the fryer at a high setting for a few minutes. Regular cleaning is crucial to maintain appliance longevity and ensure optimal performance.

Don't forget to clean the heating element with a soft brush. Regularly clean the air fryer to prevent grease buildup and make your cooking experience smoother.

Frequently Asked Questions

Can I Use Aluminum Foil in the Air Fryer?

Yes, you can use aluminum foil in your air fryer, but with some precautions.

Make sure the foil doesn't cover all the holes in the basket to allow proper airflow. Weigh it down to prevent it from blowing around while cooking.

Avoid placing it at the bottom of the fryer, and be cautious with acidic foods, as they can react with the foil.

Using foil can help reduce sticking and make cleanup easier.

What Types of Food Are Best for Air Frying?

When you're air frying, focus on proteins like chicken, pork, and salmon for quick, flavorful meals.

Don't forget vegetables like potatoes, broccoli, and cauliflower; they turn out perfectly crispy.

Seafood like shrimp and crab works well too, as does tofu for a meat alternative.

You can even whip up omelets and muffins, maximizing versatility.

Experiment with different foods, and you'll discover just how delicious air frying can be!

How Do I Know When Food Is Done Cooking?

To know when your food's done cooking, rely on visual cues and cooking times. While a golden brown color might suggest doneness, it's not always reliable.

Use a food thermometer for accuracy, especially with meat; aim for 165°F for poultry and 145°F for fish.

Check halfway through cooking, and if it's not ready, continue in 5-minute increments.

Remember to shake or flip food as needed for even cooking!

Can I Cook Multiple Items at Once?

Yes, you can cook multiple items at once in your air fryer, but you'll need to choose foods with similar cooking times and temperatures.

Cut everything into uniform sizes and avoid overcrowding the basket to ensure even cooking.

You might need to adjust the cooking time and temperature slightly, so keep an eye on your food and shake the basket occasionally for even browning.

With practice, you'll master cooking a variety of dishes together!

Do I Need to Adjust Cooking Times for Different Air Fryer Models?

Yes, you absolutely need to adjust cooking times for different air fryer models.

Since wattage and size vary, higher wattage models will cook your food faster than lower wattage ones. Similarly, larger air fryers typically take longer than smaller, compact models.

Always check your specific model's guidelines, and feel free to reduce cooking time by 20-30% if adapting from traditional oven recipes.

Monitoring your food closely will help ensure it's cooked perfectly every time.

Conclusion

Now that you've mastered the basics of using an air fryer, you're ready to whip up delicious, healthier meals with confidence. Remember to set it up properly, prep your ingredients, and adjust the settings as needed. Experiment with different cooking techniques, and don't forget to follow safety precautions. With a little practice, you'll be air frying like a pro in no time. Enjoy the tasty results and the convenience that comes with this amazing kitchen gadget!

Continue Reading

How-To Guides

How to Reheat Wings in Air Fryer: Crisp Up Leftovers in Minutes!

Learn the secret to reviving leftover wings in an air fryer for that perfect crispy texture—your taste buds will thank you!

Published

on

reheat wings in air fryer

To reheat wings in an air fryer, preheat it to 375°F (190°C). Arrange your wings in a single layer in the basket to avoid overcrowding. Heat them for about 5-6 minutes, flipping halfway through to guarantee even crisping. Use a food thermometer to check that the internal temperature reaches at least 165°F (74°C). For extra moisture, consider brushing the wings with oil or melted butter before cooking. This method brings back the delicious crispy texture and juicy flavor of your leftovers in just minutes. Stick around for more tips to make the most of your air-fried delights!

Key Takeaways

  • Preheat the air fryer to 375°F (190°C) for optimal crispiness before adding wings.
  • Arrange wings in a single layer to avoid overcrowding and ensure even heating.
  • Heat wings for 5-6 minutes, flipping halfway to achieve a uniform crisp.
  • Check the internal temperature with a thermometer; it should reach at least 165°F (74°C).
  • Optionally, brush wings with oil or melted butter to enhance moisture and flavor.

Best Methods for Reheating Wings

optimal techniques for reheating

When you want to enjoy leftover wings, using an air fryer is the best method to bring them back to life. This cooking technique preserves the crispy texture while ensuring your sauced chicken wings remain juicy.

Start by preheating your air fryer to 375°F (190°C) for ideal results. Arrange the wings in a single layer to avoid overcrowding, which helps with even reheating. The cooking time is about 5-6 minutes, and don't forget to flip or shake them halfway through.

For sauced wings, consider using a small air fryer pan or lining the basket with tin foil to prevent sticking. Always check the internal temperature, making sure it reaches at least 165°F (74°C) for safe consumption.

Enjoy your revitalized wings!

Steps to Reheat in Air Fryer

reheat food in air fryer

To reheat your wings in an air fryer effectively, start by preheating the appliance to 375°F (190°C). Next, arrange the wings in a single layer in the air fryer basket for even cooking. Avoid overcrowding; you might need to reheat chicken wings in batches. Cook for 5-6 minutes, flipping or shaking them halfway to achieve that crispy texture.

Check the internal temperature at the 5-minute mark with a food thermometer, confirming it reaches 165°F (74°C) for safety. For added moisture, consider lightly brushing the wings with oil or melted butter before reheating.

Step Action
1. Preheat Set to 375°F (190°C)
2. Arrange Place wings in a single layer
3. Cook Heat for 5-6 minutes
4. Check temperature Confirm it reaches 165°F (74°C)

Tips for Moist and Crispy Wings

moist and crispy wings

For perfectly moist and crispy wings, it's essential to start with a well-preheated air fryer at 360°F (182°C) for 3-5 minutes; this helps lock in moisture right from the beginning.

Brush your wings lightly with cooking oil or melted butter before reheating leftover wings to enhance moisture retention.

When you're ready, arrange the wings in a single layer in the air fryer basket to guarantee even cooking and prevent drying out.

While reheating, monitor the wings closely, aiming for an internal temperature of 165°F (74°C) to maintain juiciness.

If you notice the wings browning too quickly, consider using aluminum foil to cover them, helping to retain moisture while achieving that desirable crispiness. Additionally, hula hooping can be a fun way to burn off some calories after enjoying those wings, as it burns approximately 200-400 calories per hour.

Storing Leftover Chicken Wings

store leftover chicken wings

Properly storing leftover chicken wings is essential if you want to enjoy them later without sacrificing their flavor and texture.

First, let the wings cool to room temperature to prevent moisture buildup inside the container. Use an airtight container or a zippered plastic bag for ideal freshness, ensuring you don't stack wings tightly to avoid sogginess.

Label the container with the date of storage to easily track freshness. If you plan to keep them longer, consider freezing wings. They can last up to 3 months in a regular freezer and up to a year in a deep freezer.

Following these steps will help you crisp up leftovers and enjoy your wings at their best later on!

Serving Suggestions for Reheated Wings

reheated wings serving ideas

While reheating wings is a great way to enjoy leftovers, pairing them with the right sides can elevate your meal even further.

Consider serving your reheated wings with classic celery and carrot sticks for a crisp crunch that complements their flavor. A variety of dipping sauces like ranch, blue cheese, or spicy buffalo will enhance your taste experience.

For something lighter, incorporate wings into salads or wraps, adding greens and fresh vegetables for a balanced meal. If you're in the mood for comfort food, mac and cheese or French fries make excellent accompaniments.

Don't forget to garnish your reheated wings with fresh herbs like parsley or cilantro for a pop of color and extra flavor!

Frequently Asked Questions

How Do I Make Leftover Wings Crispy in an Airfryer?

To make leftover wings crispy in an air fryer, start by preheating it to 360°F (182°C) for about 3-5 minutes.

Arrange the wings in a single layer, avoiding overcrowding. Lightly spray them with cooking oil to enhance crispiness.

Air fry at 375°F (190°C) for 5-6 minutes, flipping halfway through.

Check the internal temperature to guarantee they reach 165°F (74°C) for safe eating while keeping that delicious crunch.

Enjoy your wings!

How Do You Make Leftover Wings Crispy Again?

Did you know that air fryers can reduce fat content in food by up to 75%?

To make your leftover wings crispy again, start by preheating your air fryer to 375°F.

Arrange the wings in a single layer, lightly spray them with oil, and cook for 5-6 minutes, flipping halfway through.

This method not only revives their crunch but also guarantees they're heated evenly and safely to 165°F.

Enjoy your delicious wings!

How to Make Leftover Chicken Crispy in Air Fryer?

To make leftover chicken crispy in an air fryer, start by preheating it to 375°F (190°C).

Lightly spray the basket with cooking oil to prevent sticking and enhance crispiness.

Arrange your chicken in a single layer, ensuring not to overcrowd.

Cook for about 5-6 minutes, flipping halfway through for even crisping.

For extra flavor, you can brush the chicken with a little oil or melted butter before reheating.

Enjoy your deliciously crispy chicken!

How Long Should I Reheat Wings in the Air Fryer?

You've got those delicious wings, but they're not as crispy as you'd like.

To reheat them in the air fryer, set it to 375°F (190°C). Arrange your wings in a single layer, and cook for about 5-6 minutes.

Flip or shake them halfway through for even crispiness. Remember, if they're larger or smaller, you might need to adjust the time slightly.

Always check they reach 165°F (74°C) for safety!

Conclusion

To sum up, reheating wings in an air fryer is the ultimate game-changer for enjoying leftover chicken. You'll be amazed at how quickly you can transform soggy bites into crispy, mouthwatering delights. Just follow the steps, and don't forget those handy tips for keeping them moist. With your perfectly reheated wings, you'll feel like a culinary wizard, impressing everyone at the table. So go ahead, dig in, and relish every flavorful moment!

Continue Reading

How-To Guides

Can You Put Wax Paper in an Air Fryer? What You Must Know

Wondering if wax paper is safe for your air fryer? Discover the surprising truth that could change your cooking game forever!

Published

on

wax paper air fryer caution

You shouldn't put wax paper in an air fryer. It melts at temperatures above 200°F, which means it can ignite or contaminate your food. This not only leads to a mess but also poses a fire hazard. Instead, opt for parchment paper, which withstands higher temperatures and is safe to use. Silicone mats or aluminum foil are also good alternatives, but be cautious with airflow. Always consult your air fryer manual for the best practices. If you're curious about the safest ways to cook with these materials, there's plenty more helpful info to uncover.

Key Takeaways

  • Wax paper melts at temperatures above 200°F, posing a risk of food contamination and fire hazards in air fryers.
  • Manufacturers strongly advise against using wax paper due to safety concerns and potential messy cleanup.
  • Safe alternatives include parchment paper, aluminum foil, and silicone mats, designed to withstand high temperatures.
  • Parchment paper can handle temperatures up to 420-450°F, making it ideal for air frying without risks.
  • Always consult your air fryer manual for recommended materials and best practices to ensure safe cooking.

Risks of Using Wax Paper

wax paper safety concerns

When considering whether to use wax paper in an air fryer, you should be aware of the risks involved. Wax paper isn't suitable for high temperatures; it melts at temperatures above 200°F (94ºC).

This melting can lead to food contamination and create a fire hazard, as the wax coating can ignite when exposed to intense heat. Additionally, using wax paper may result in a messy cleanup, with melted wax potentially dripping onto the heating element.

Manufacturers strongly advise against its use due to these safety concerns. Ultimately, the degradation of wax paper can impart unwanted flavors to your food, making it an unsuitable option for air frying.

Avoiding these risks is essential for a safe cooking experience.

Safe Alternatives for Air Fryers

healthy cooking appliance options

If you're looking for safe alternatives to use in your air fryer, consider options that can withstand higher temperatures without compromising your cooking experience.

Parchment paper is a great choice, as it can handle temperatures up to 400°F (205°C) and helps prevent sticking.

Aluminum foil works too, but make sure it doesn't block air circulation and is weighed down to avoid floating.

For a reusable option, silicone mats are heat resistant and effective at keeping food from sticking.

Pre-fitted air fryer liners, especially perforated parchment paper, enhance airflow and simplify cleanup.

Just remember to steer clear of wax paper, as its low heat tolerance can lead to melting and potential fire hazards. Additionally, using high-quality air purifiers in your cooking space can help reduce odors and improve overall indoor air quality.

Understanding Material Properties

material properties comprehension essential

Understanding the properties of various cooking materials is essential for achieving the best results in your air fryer.

Wax paper isn't suitable for high heat, as it melts above 200°F, risking food contamination and fire hazards. In contrast, parchment paper boasts impressive heat resistance, handling temperatures up to 420-450°F, making it perfect for air frying.

Aluminum foil, while efficient at conducting heat and non-flammable, should be used cautiously to prevent airflow blockage.

Silicone mats provide a reusable, non-stick surface that withstands high temperatures, making them a safe alternative to wax paper.

User Experiences and Recommendations

user insights and suggestions

Why take unnecessary risks with your air fryer? Many users warn against using wax paper due to its low heat tolerance, which can lead to melting and even a fire hazard. Instead, you'll find a strong recommendation for parchment paper, designed for high-temperature cooking to effectively prevent sticking. Some air fryer enthusiasts also swear by silicone liners, which are heat-safe and serve as reusable alternatives. Here's a quick comparison:

Material Heat Tolerance Safety Level
Wax Paper Low Fire Hazard
Parchment Paper High Food Safety
Silicone Liner High Safe & Reusable

Adhering to safe cooking practices guarantees your meals are delicious and your appliance lasts longer!

Best Practices for Air Frying

air frying success tips

When it comes to air frying, following best practices can make a significant difference in your cooking results. Always consult your air fryer manual to verify you're using materials that are safe to use.

Opt for parchment paper instead of wax paper, as it withstands high temperatures and won't pose a fire hazard. To prevent food from sticking in the air fryer basket, weight down any liners with food, keeping them away from the heating element.

Avoid preheating with liners, as they can fly around and create a fire risk. Regularly monitor cooking times and temperatures for different foods, and steer clear of wet batters that obstruct air circulation. Additionally, be mindful of color accuracy as it can enhance your overall cooking experience by ensuring even browning and crispness.

These tips will make cleanup easier and enhance your air frying experience!

Frequently Asked Questions

Is Wax Paper Safe in an Air Fryer?

When you're wondering if wax paper is safe in an air fryer, it's important to know it isn't.

Wax paper can melt at high temperatures, potentially contaminating your food and damaging your appliance. The wax coating poses a fire hazard, and melted wax can create a mess on the heating element.

Instead, consider using parchment paper or silicone liners for safer and more effective cooking in your air fryer.

What Is the Best Thing to Put on the Bottom of an Air Fryer?

When you're looking for the best thing to put on the bottom of your air fryer, consider using parchment paper.

It's heat-resistant and prevents sticking, making cleanup a breeze. Aluminum foil works too, but make sure it doesn't block air circulation.

If you prefer a reusable option, silicone mats are perfect for non-stick surfaces.

You might also find pre-fitted liners convenient, as they simplify cleaning while allowing proper air flow.

What Can I Line My Air Fryer Basket With?

When it comes to lining your air fryer, the options are endless, like a culinary wonderland! You can use parchment paper, which withstands high temperatures and keeps your food from sticking.

Aluminum foil works too, but make sure it doesn't block air circulation. Silicone mats are reusable and perfect for easy cleanup.

Consider pre-fitted liners with perforations for ideal air flow. Just steer clear of wax paper; it's not safe for high heat!

What Kind of Paper Can I Put in the Air Fryer?

When you're looking for paper options for your air fryer, stick to parchment paper or aluminum foil.

Parchment paper can handle high temperatures without issues, while aluminum foil works as long as it doesn't block air circulation.

Silicone mats are also great, as they're heat-resistant and reusable.

Just remember to avoid wax paper; it's not safe due to its low heat tolerance and potential fire risks.

Always check your air fryer's manual for guidance.

Conclusion

In summary, while wax paper might seem like a simple solution, its risks outweigh the rewards in your air fryer. Instead, consider safe alternatives like parchment paper or silicone mats to guarantee a successful and safe cooking experience. By understanding material properties and following best practices, you'll whip up wonderful meals without worry. So, stay savvy, skip the wax paper, and savor the scrumptious sensations your air fryer can create!

Continue Reading

Affiliate disclaimer

As an affiliate, we may earn a commission from qualifying purchases. We get commissions for purchases made through links on this website from Amazon and other third parties.

Vetted

best student laptops 2025 best student laptops 2025
Vetted6 days ago

15 Best Laptops for Students in 2025 – Affordable, Powerful, and Perfect for Learning

I've compiled the top 15 laptops for students in 2025 that perfectly blend affordability and performance—discover which one will elevate...

top portable charging solutions top portable charging solutions
Vetted6 days ago

15 Best Power Banks of 2025 – Keep Your Devices Charged On the Go

In 2025, discover the 15 best power banks to keep your devices charged on the go, but which one will...

top travel backpacks 2025 top travel backpacks 2025
Vetted6 days ago

15 Best Travel Backpacks for Adventurers on the Go in 2025

I've curated the ultimate guide to the 15 best travel backpacks for adventurers in 2025, but you won't want to...

meal prep container recommendations meal prep container recommendations
Vetted6 days ago

15 Best Meal Prep Containers to Keep Your Food Fresh and Organized

Prepare to discover the 15 best meal prep containers that keep your food fresh and organized, ensuring you never waste...

top winter heated gloves top winter heated gloves
Vetted6 days ago

15 Best Heated Gloves to Keep Your Hands Warm All Winter Long

Unlock the secret to cozy hands this winter with the 15 best heated gloves—discover which pair will elevate your cold-weather...

top toasters for 2025 top toasters for 2025
Vetted6 days ago

15 Best Toasters of 2025: Crisp Perfection Every Morning

I've uncovered the top 15 toasters of 2025 that promise crisp perfection every morning, but which one will transform your...

air fryers with rotisserie functions air fryers with rotisserie functions
Vetted6 days ago

15 Best Air Fryers With Rotisserie Functions to Elevate Your Cooking Game

Find the perfect air fryer with rotisserie functions to transform your meals—discover the top 15 models that will elevate your...

top yoga mats reviewed top yoga mats reviewed
Vetted6 days ago

15 Best Yoga Mats for Comfort and Stability in Your Practice

Wondering which yoga mats provide the ultimate comfort and stability? Discover the top 15 options that could transform your practice...

energy efficient air fryer selection energy efficient air fryer selection
Vetted6 days ago

15 Best Energy-Efficient Air Fryers to Slash Your Energy Bills While Cooking Delicious Meals

One great way to save on energy bills is by choosing from the 15 best energy-efficient air fryers; discover which...

top car seats 2025 top car seats 2025
Vetted6 days ago

15 Best Car Seats of 2025 – Safety, Comfort, and Style Combined

Navigate the world of car seats with our top 15 picks for 2025, where unmatched safety, comfort, and style await...

silent cooking with air fryers silent cooking with air fryers
Vetted6 days ago

15 Best Quiet Air Fryers for a Peaceful Cooking Experience

Just imagine cooking your favorite meals in peace with our top 15 quiet air fryers; discover which models will transform...

top desk speakers 2025 top desk speakers 2025
Vetted6 days ago

15 Best Desk Speakers of 2025 – Elevate Your Audio Experience

Boost your audio experience with the 15 best desk speakers of 2025; discover which model will transform your sound setup...

Trending