How-To Guides
How Long to Cook Pork Tenderloin in Air Fryer: Expert Timing Tips
Discover the perfect timing for cooking pork tenderloin in your air fryer, ensuring juicy results and mouthwatering flavor—don’t miss these expert tips!
To cook pork tenderloin in your air fryer, set it to 400°F and plan for 18 to 22 minutes. If your tenderloin weighs between 1 and 1.5 pounds, 18 minutes should be enough, while larger pieces might take closer to 22 minutes. Flip it halfway through for even cooking. Always check that the internal temperature hits 145°F for safety. Let it rest for about 5-10 minutes after cooking to keep it juicy. Don't forget to enhance the flavor with delicious marinades and seasonings. There's plenty more to know to make your dish a success.
Key Takeaways
- Set the air fryer to 400°F and cook pork tenderloin for 18-22 minutes, depending on size.
- Flip the tenderloin halfway through cooking for even results and best texture.
- Ensure the internal temperature reaches 145°F for safe consumption using an instant-read thermometer.
- For juicier results, consider cooking at 380°F instead of 400°F.
- Let the pork rest for 5-10 minutes after cooking to retain juices and prevent dryness.
Cooking Time Overview
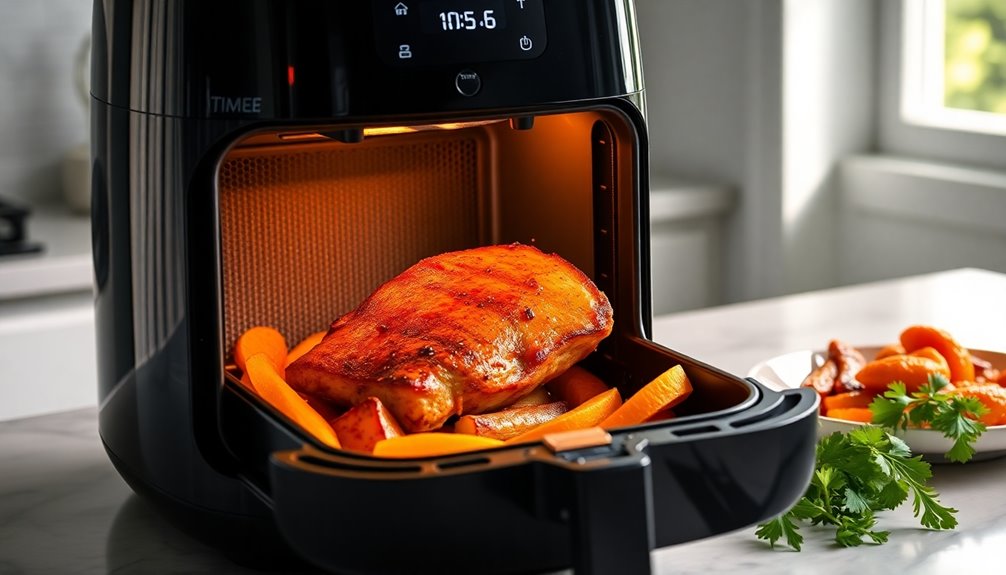
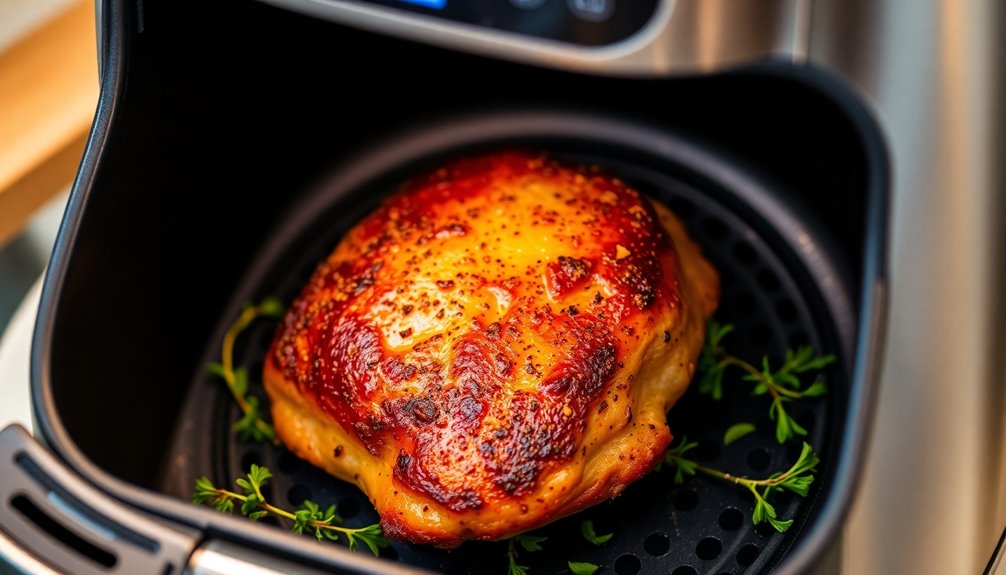
When you're ready to cook pork tenderloin in the air fryer, you'll find that timing is essential for achieving the perfect result.
Set your air fryer to 400°F and plan for a cooking time of 18-22 minutes. If you're working with smaller tenderloins, around 18 minutes will usually suffice, while larger ones may need up to 22 minutes.
To guarantee even cooking, flip the tenderloin halfway through the process. Always check the internal temperature using an instant-read thermometer; it should reach 145°F for safe consumption.
Once it's done, let the pork tenderloin rest for 5-10 minutes to help retain its juices before slicing. Following these steps will yield a perfectly cooked, juicy tenderloin.
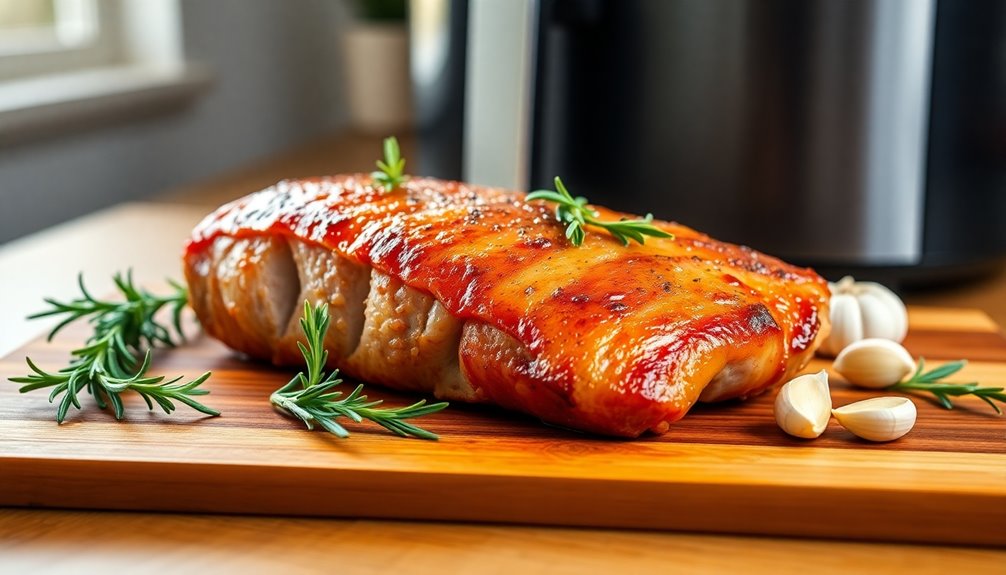
Essential Ingredients
To make a delicious air fryer pork tenderloin, you'll need the tenderloin itself, which usually weighs between 1-1.5 lbs.
You can enhance its flavor with a variety of seasonings and choose the right cooking oil to achieve that perfect crispy exterior.
Let's explore the key ingredients, seasoning options, and the best oils to use for your dish.
Key Ingredients Overview
Cooking pork tenderloin in an air fryer is a straightforward process, thanks to a short list of essential ingredients that pack a punch. The pork tenderloin, usually weighing between 1-1.5 pounds, is perfect for this method.
To enhance flavor, you'll need seasoning components like brown sugar, garlic powder, and smoked paprika. Olive oil or cooking spray is vital for helping the seasoning stick while guaranteeing a crispy exterior.
This recipe allows for customization, so feel free to add spices like onion powder or cayenne pepper for extra heat. The simplicity of these ingredients guarantees a quick prep, making it an ideal choice for busy weeknight dinners.
Enjoy the delicious results with minimal effort!
Seasoning Options Available
While you can stick to a classic seasoning blend, exploring various seasoning options for your pork tenderloin can elevate its flavor profile considerably.
Start by using olive oil to help your seasoning rub adhere well. A mix of brown sugar, smoked paprika, garlic powder, onion powder, and black pepper creates a delicious base.
Don't forget coarse sea salt to enhance the taste, and consider adding cayenne pepper for a spicy kick. After you trim the silver skin, apply your chosen blend evenly.
You can also create custom seasoning mixtures tailored to your preferences, like Italian seasoning or barbecue rubs.
Experimenting with flavors will make your pork tenderloin truly shine!
Recommended Cooking Oils
When it comes to air frying pork tenderloin, choosing the right cooking oil can make all the difference. Olive oil and avocado oil are excellent choices due to their high smoke points, helping achieve a crispy exterior while ensuring even cooking.
Using about ½ tablespoon of oil allows your seasoning to adhere to the meat, enhancing flavor and texture. If you prefer a lighter option, cooking spray is a great alternative—it coats the air fryer basket and the pork tenderloin without adding excess calories.
Just steer clear of oils with low smoke points, like flaxseed oil, as they can burn and ruin the taste. Experiment with different oils to find your favorite flavor profile for the dish!
Preparation Steps
To prepare your pork tenderloin for the air fryer, start by removing the silver skin and any excess fat to enhance both texture and flavor.
Allow the tenderloin to rest at room temperature for about 20 minutes to guarantee even cooking.
Next, coat the pork with olive oil, which helps the seasoning stick, then apply your chosen seasoning mix evenly on all sides.
It's essential to preheat the air fryer to 400°F for ideal cooking results and to achieve a crispy exterior.
Verify the pork fits properly in the air fryer basket; if it's too large, cut it in half to avoid overcrowding.
Following these steps will result in a tender and juicy pork tenderloin.
Air Fryer Settings
To achieve the best results with your pork tenderloin, it's essential to set your air fryer to the right temperature.
Preheating to 400°F guarantees even cooking and a crispy exterior.
Optimal Temperature Settings
Achieving the perfect pork tenderloin in an air fryer hinges on using the right temperature settings. Set your air fryer to 380°F, which helps you achieve a juicy interior without overcooking.
Preheat your air fryer for about 5 minutes at 400°F to guarantee even cooking and a crispy exterior. Cooking times typically range from 18 to 22 minutes, depending on the size of the tenderloin.
Always aim for an internal temperature of 145°F for safe consumption. Since some air fryer models may vary, it's essential to consult the manufacturer's guidelines for any adjustments in cooking time and temperature.
Use an instant-read thermometer to check the internal temperature accurately, ensuring your pork is perfectly cooked every time.
Preheating Importance
Preheating your air fryer is a key step that shouldn't be overlooked. By preheating it to 400°F for about 5 minutes, you'll achieve a crispy exterior on your pork tenderloin while ensuring even cooking throughout.
This step is vital because a properly preheated air fryer sears the meat, locking in juices and preventing dryness during the cooking process. If you skip preheating, you risk longer cooking times and unevenly cooked pork, leading to an undesirable texture and flavor.
Always check your specific air fryer model for preheat times, as they can vary. Consistent preheating contributes to reliable outcomes, helping you reach the perfect internal temperature of 145°F for delicious pork tenderloin every time.
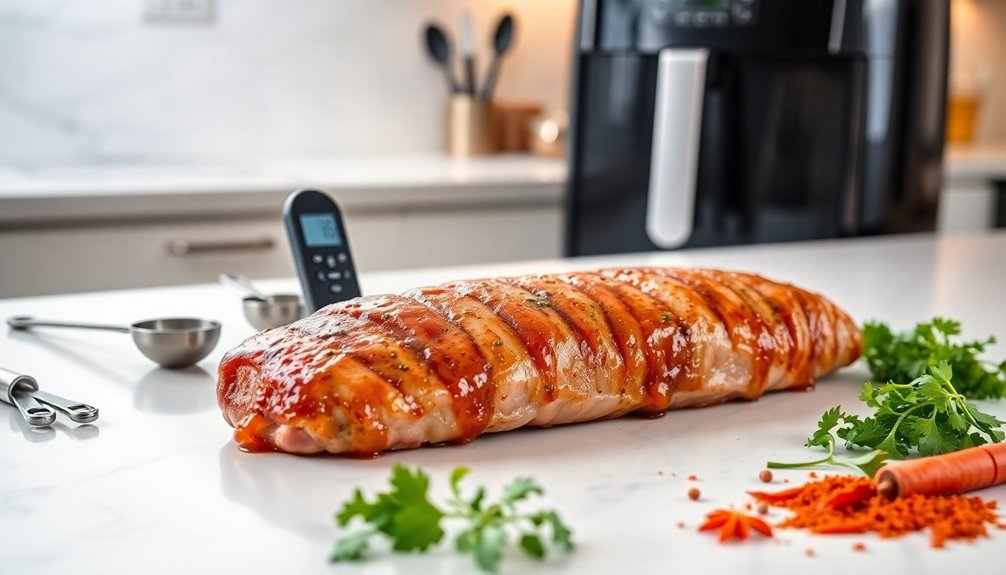
Checking Doneness
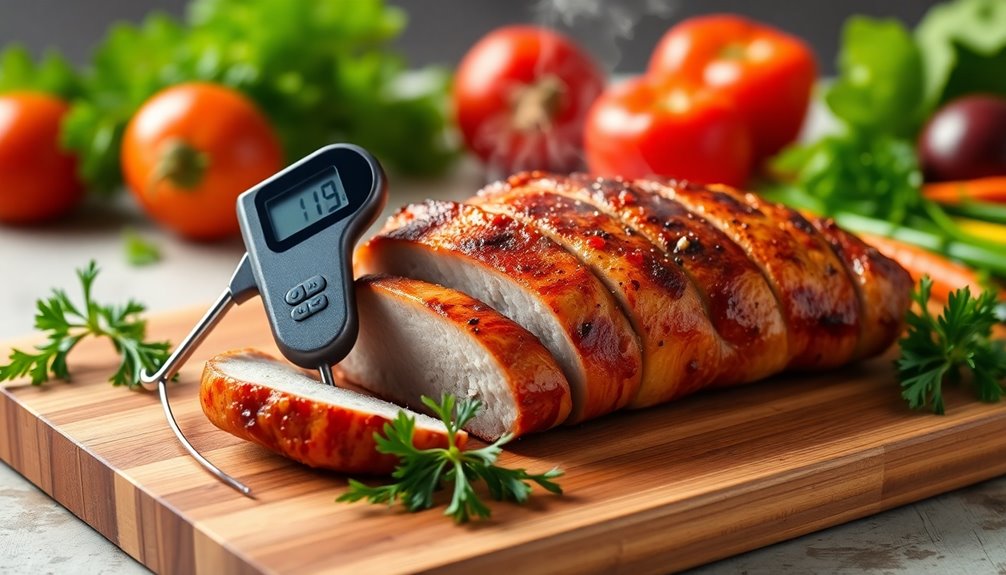
While cooking pork tenderloin, it's essential to check its doneness to guarantee safety and best flavor. The ideal internal temperature for pork tenderloin is between 145°F and 160°F, ensuring it's safe to eat while remaining juicy.
Use an instant-read thermometer to check the thickest part of the tenderloin, especially after the cooking time in your air fryer, which usually ranges from 18 to 25 minutes at 380°F.
Always monitor the temperature closely; overcooking can lead to dryness, while undercooked pork poses health risks.
Don't skip this important step—accurately checking doneness prevents you from serving an undercooked or overly dry meal.
Trust the thermometer, and you'll enjoy perfectly cooked pork tenderloin every time!
Resting the Meat
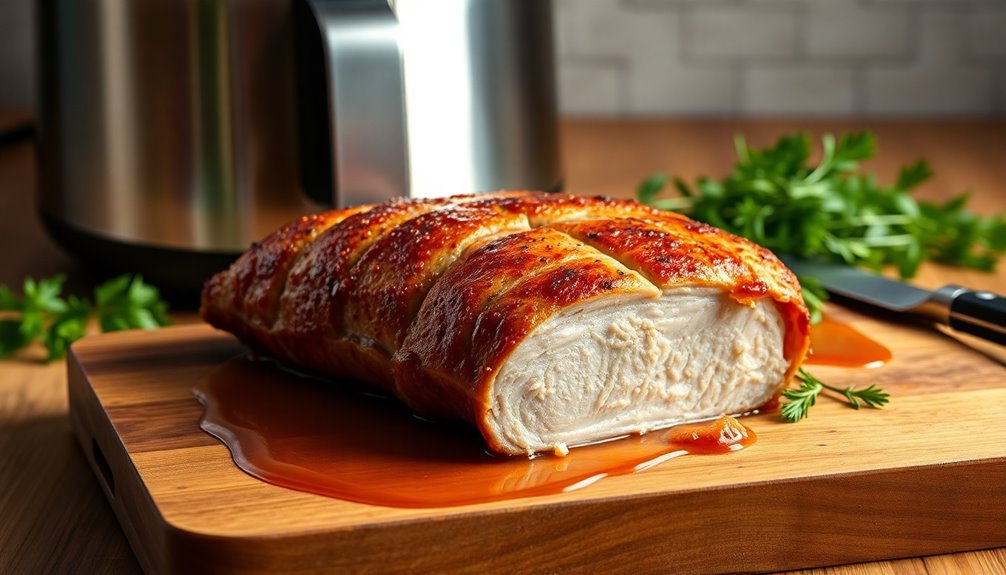
Resting the meat after cooking pork tenderloin is vital for achieving maximum flavor and tenderness. Allowing it to rest for 5-10 minutes lets the juices redistribute throughout the meat, enhancing moisture and tenderness.
Slicing too soon can lead to a drier texture, diminishing your eating experience. During this resting period, the internal temperature will continue to rise slightly, ensuring the pork reaches a safe consumption range of 145°F-150°F.
Cover the pork loosely with aluminum foil to retain heat without steaming the surface, preserving its crispness. This simple step greatly impacts the juiciness and overall enjoyment of the dish, making every bite more satisfying.
Don't skip this vital phase; your taste buds will thank you!
Flavor Enhancements
To elevate the flavor of pork tenderloin, consider marinating it with a Dijon mustard mixture that not only infuses bold taste but also tenderizes the meat as it cooks. Adding brown sugar promotes caramelization, giving you a crispy exterior. Experiment with spices like smoked paprika and garlic powder to create a unique flavor profile. A splash of apple cider vinegar adds a tangy contrast to balance the sweetness. For an extra kick, incorporate cayenne pepper or chili powder into your seasoning blend.
Ingredient | Purpose | Suggested Amount |
---|---|---|
Dijon mustard | Marinade base | 1/4 cup |
Brown sugar | Sweetness and caramelization | 2 tablespoons |
Smoked paprika | Adds depth | 1 teaspoon |
Garlic powder | Enhances flavor | 1 teaspoon |
Apple cider vinegar | Balances richness | 1 tablespoon |
Serving Ideas
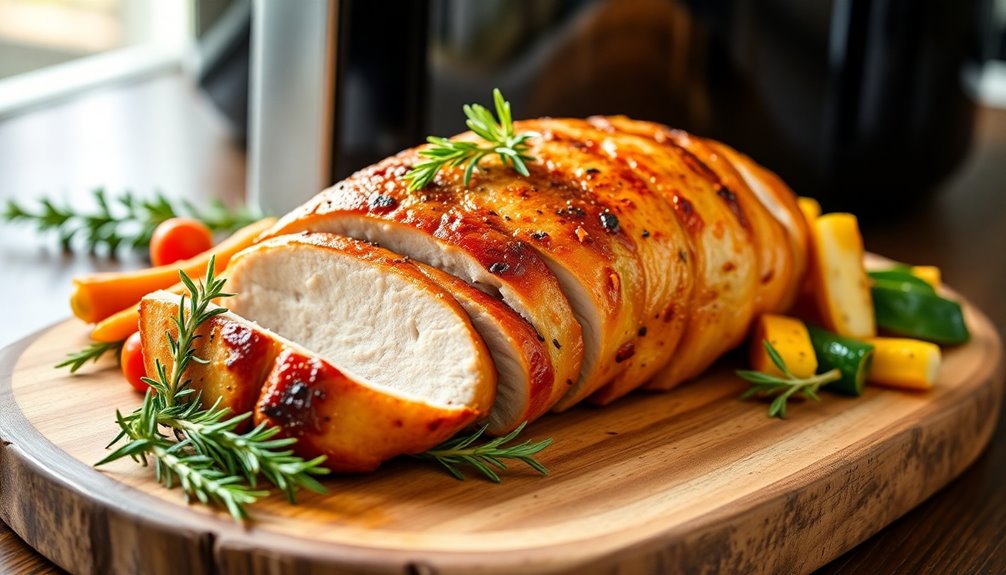
When planning your meal, consider how versatile pork tenderloin can be, as it pairs beautifully with a variety of side dishes and accompaniments.
Creamy mashed potatoes complement the tender, juicy pork, adding richness to your plate. For a fresh option, slice the pork and serve it over mixed greens with seasonal vegetables for a vibrant fall harvest salad.
You can also use sliced pork in sandwiches, especially with a creamy honey mustard sauce for a flavor boost. Don't forget crispy Brussels sprouts; they provide a delightful crunch alongside the tender meat.
If you have leftover pork, reheat it or serve it cold in wraps or salads for easy and versatile meal options.
Tips for Success
Achieving perfectly cooked pork tenderloin in your air fryer is easier when you follow a few essential tips.
First, preheat your Air Fryer to 400°F for ideal cooking conditions. Cook the pork tenderloin for 18-22 minutes, flipping it halfway through.
Use an instant-read thermometer to check that the internal temperature reaches 145°F for safe and delicious meat.
Don't forget to let it rest for 5-10 minutes after cooking; this step allows juices to redistribute, enhancing tenderness and flavor.
If you're working with larger tenderloins, consider cutting them in half to guarantee even cooking.
Finally, season your pork well to elevate its flavor, making every bite perfect!
Enjoy your perfectly cooked dish!
Frequently Asked Questions
How Long Do I Put a Pork Tenderloin in the Air Fryer?
You should cook a pork tenderloin in the air fryer for about 18-20 minutes at 380°F.
If your tenderloin is smaller, around 1.25 lbs, it might only need 15-18 minutes. For larger ones, up to 1.75 lbs, aim for about 22 minutes.
Don't forget to preheat your air fryer for five minutes, and flip the tenderloin halfway through cooking for even browning.
Let it rest for 5-10 minutes before slicing!
Is It Better to Cook a Pork Tenderloin at 350 or 400?
When deciding whether to cook pork tenderloin at 350°F or 400°F, consider your priorities.
Cooking at 400°F usually gives you a quicker time and a nice caramelized crust, while 350°F enhances tenderness but takes a bit longer.
If you want juicy meat with a great sear, go for 400°F.
However, if you prefer more tenderness and don't mind a slightly longer cooking time, 350°F might be your best bet.
How Do You Cook Pork Tenderloin in a Pampered Chef Air Fryer?
To cook pork tenderloin in a Pampered Chef air fryer, start by preheating it to 400°F for about 5 minutes.
While it heats, season the tenderloin with olive oil, salt, pepper, and your favorite herbs.
Place it in the air fryer and cook for 18-22 minutes, flipping halfway through.
Use a digital meat thermometer to verify it reaches 145°F.
Let it rest for 5-10 minutes before slicing to enhance tenderness and flavor.
What Temperature Should Pork Be Cooked in an Air Fryer?
When you're cooking pork in an air fryer, aim for a temperature of 380°F. This heat guarantees even cooking while keeping the meat juicy.
You'll want to check the internal temperature with an instant-read thermometer; 145°F gives you a slightly pink center, which is safe and delicious, while 160°F assures it's fully cooked.
Remember to let it rest for 5-10 minutes after cooking to let those juices redistribute for better flavor!
Conclusion
To sum up, cooking pork tenderloin in an air fryer is not only quick but also delivers juicy, flavorful results. Did you know that air fryers can reduce cooking time by up to 30% compared to traditional methods? By following these expert timing tips and techniques, you can enjoy perfectly cooked pork tenderloin in less time. So, fire up your air fryer, experiment with flavors, and impress your family and friends with a delicious meal!
How-To Guides
How to Use an Air Fryer Like a Pro: Beginner’s Step-by-Step Guide
On your journey to mastering air frying, discover essential tips and tricks that will elevate your cooking game in ways you never imagined!
To use an air fryer like a pro, start by setting it up on a flat surface and familiarizing yourself with the controls. Prepare your ingredients by cutting them into uniform sizes for even cooking and marinating meats as needed. Preheat the air fryer to 350°F-400°F for about 3-5 minutes. When cooking, coat foods lightly with oil and avoid overcrowding the basket for optimal air circulation. Always monitor cooking times, as you'll need less time compared to traditional methods. Finally, remember to clean it after use for better performance. There's so much more to explore about perfecting your air frying skills!
Key Takeaways
- Set up your air fryer on a stable surface, ensuring all parts are properly assembled according to the manual for optimal performance.
- Prepare ingredients by cutting them into uniform sizes and marinating proteins to enhance flavor and ensure even cooking.
- Preheat the air fryer to the recommended temperature for even cooking and improved texture, monitoring the digital display for completion.
- Use proper cooking techniques, including shaking the basket, adjusting cooking times, and lightly coating fresh foods with oil for best results.
- Maintain safety by keeping the air fryer away from children, using oven mitts, and regularly cleaning to prevent grease buildup and ensure longevity.
Setting Up the Air Fryer
Setting up your air fryer is a straightforward process that lays the foundation for delicious meals.
First, plug the cord into a wall outlet and ensure your air fryer sits on a flat, stable surface. Check for any accessories, like the frying basket and grate, and make sure they're properly assembled.
Next, read the instruction manual to get familiar with the specific features and controls of your model. Pay particular attention to the control panel, noting the temperature and timer dials. A good understanding of temperature guidelines will help you select the right settings for different foods.
This knowledge will make your cooking experience smoother and more enjoyable. Remember, a well-set air fryer leads to perfectly cooked food, so take a moment to get everything ready before you dive into your recipe!
Preparing Ingredients
Now that your air fryer is set up and ready to go, it's time to prepare your ingredients for cooking.
Start by cutting your food into uniform sizes for even cooking; think fries or wedges for potatoes and bite-sized pieces for chicken. Remember to clean and prep shrimp, leaving them whole or cutting as per your recipe.
For seasoning, mix salt and spices with a bit of oil to keep them from blowing away. Marinate chicken in a buttermilk and hot sauce mix for at least 15 minutes. Cooking with an air fryer allows for a healthier cooking option as it requires minimal or no oil.
When coating, toss chicken in breadcrumbs or cornflakes, and don't forget to wrap jalapeño poppers with bacon.
Finally, arrange everything in an even layer in the air fryer basket, leaving space for hot air circulation.
Preheating and Settings
Preheating your air fryer is crucial for achieving perfectly cooked meals. Start by checking your manual for specific preheating instructions tailored to your model. If your air fryer has a preheat function, use it by selecting the appropriate setting or programming the cook time. Typically, you'll want to preheat between 350°F to 400°F for about 3-5 minutes. Keep an eye on the digital display—many models will beep when preheating is complete. Avoid overheating, as this can lead to burned food. Proper preheating ensures even cooking and enhances the overall texture and flavor of your air-fried dishes.
Cooking Techniques
To achieve deliciously crispy meals in your air fryer, it's essential to master various cooking techniques.
Start by cutting vegetables and potatoes into smaller pieces for even browning. Pat fresh foods dry and coat them lightly with oil—about one tablespoon per kilogram. For frozen foods, you can skip the oil.
When cooking meat, dry the skin and apply a thin layer of oil for crispiness. Use the perforated basket for airflow and shake it once or twice during cooking. This will help ensure that you achieve optimal cooking results by allowing the hot air to circulate effectively.
Adjust cooking times by reducing them by 20% compared to conventional recipes. Remember to check doneness and flip items midway for balanced crispness.
Lastly, lightly spritz oil for that extra-crispy exterior and ensure proper basket placement for airflow.
Safety Precautions
Mastering cooking techniques in your air fryer is only one part of the process; keeping safety in mind is just as important.
Always place your air fryer on a heat-resistant surface and maintain at least 5 inches of space from walls or other objects. While it's cooking, avoid touching anything except the handle—you can use oven mitts if needed. Be aware that certain air fryer parts can reach temperatures that cause burns within seconds, so always handle with care.
Keep it out of reach of kids and pets until it's cool. Always plug it into a grounded outlet and unplug it after use to prevent accidental start-ups.
Remember to avoid overcrowding the basket and never use metal utensils. If you notice strange smells or sounds, unplug the fryer immediately to check for issues.
Stay safe and enjoy your cooking!
Post-Cooking Maintenance
Once you've finished cooking with your air fryer, it's essential to prioritize maintenance to keep it in top shape.
First, unplug the air fryer and let it cool completely. Remove the basket, pan, or tray, and wash them with warm, soapy water. For tougher messes, soak them for 10-15 minutes.
Wipe the bottom chamber with a damp cloth and ensure all parts are dry before reassembling. For deep cleaning, fill the basket with a cup of water and run the fryer at a high setting for a few minutes. Regular cleaning is crucial to maintain appliance longevity and ensure optimal performance.
Don't forget to clean the heating element with a soft brush. Regularly clean the air fryer to prevent grease buildup and make your cooking experience smoother.
Frequently Asked Questions
Can I Use Aluminum Foil in the Air Fryer?
Yes, you can use aluminum foil in your air fryer, but with some precautions.
Make sure the foil doesn't cover all the holes in the basket to allow proper airflow. Weigh it down to prevent it from blowing around while cooking.
Avoid placing it at the bottom of the fryer, and be cautious with acidic foods, as they can react with the foil.
Using foil can help reduce sticking and make cleanup easier.
What Types of Food Are Best for Air Frying?
When you're air frying, focus on proteins like chicken, pork, and salmon for quick, flavorful meals.
Don't forget vegetables like potatoes, broccoli, and cauliflower; they turn out perfectly crispy.
Seafood like shrimp and crab works well too, as does tofu for a meat alternative.
You can even whip up omelets and muffins, maximizing versatility.
Experiment with different foods, and you'll discover just how delicious air frying can be!
How Do I Know When Food Is Done Cooking?
To know when your food's done cooking, rely on visual cues and cooking times. While a golden brown color might suggest doneness, it's not always reliable.
Use a food thermometer for accuracy, especially with meat; aim for 165°F for poultry and 145°F for fish.
Check halfway through cooking, and if it's not ready, continue in 5-minute increments.
Remember to shake or flip food as needed for even cooking!
Can I Cook Multiple Items at Once?
Yes, you can cook multiple items at once in your air fryer, but you'll need to choose foods with similar cooking times and temperatures.
Cut everything into uniform sizes and avoid overcrowding the basket to ensure even cooking.
You might need to adjust the cooking time and temperature slightly, so keep an eye on your food and shake the basket occasionally for even browning.
With practice, you'll master cooking a variety of dishes together!
Do I Need to Adjust Cooking Times for Different Air Fryer Models?
Yes, you absolutely need to adjust cooking times for different air fryer models.
Since wattage and size vary, higher wattage models will cook your food faster than lower wattage ones. Similarly, larger air fryers typically take longer than smaller, compact models.
Always check your specific model's guidelines, and feel free to reduce cooking time by 20-30% if adapting from traditional oven recipes.
Monitoring your food closely will help ensure it's cooked perfectly every time.
Conclusion
Now that you've mastered the basics of using an air fryer, you're ready to whip up delicious, healthier meals with confidence. Remember to set it up properly, prep your ingredients, and adjust the settings as needed. Experiment with different cooking techniques, and don't forget to follow safety precautions. With a little practice, you'll be air frying like a pro in no time. Enjoy the tasty results and the convenience that comes with this amazing kitchen gadget!
How-To Guides
How to Reheat Wings in Air Fryer: Crisp Up Leftovers in Minutes!
Learn the secret to reviving leftover wings in an air fryer for that perfect crispy texture—your taste buds will thank you!
To reheat wings in an air fryer, preheat it to 375°F (190°C). Arrange your wings in a single layer in the basket to avoid overcrowding. Heat them for about 5-6 minutes, flipping halfway through to guarantee even crisping. Use a food thermometer to check that the internal temperature reaches at least 165°F (74°C). For extra moisture, consider brushing the wings with oil or melted butter before cooking. This method brings back the delicious crispy texture and juicy flavor of your leftovers in just minutes. Stick around for more tips to make the most of your air-fried delights!
Key Takeaways
- Preheat the air fryer to 375°F (190°C) for optimal crispiness before adding wings.
- Arrange wings in a single layer to avoid overcrowding and ensure even heating.
- Heat wings for 5-6 minutes, flipping halfway to achieve a uniform crisp.
- Check the internal temperature with a thermometer; it should reach at least 165°F (74°C).
- Optionally, brush wings with oil or melted butter to enhance moisture and flavor.
Best Methods for Reheating Wings
When you want to enjoy leftover wings, using an air fryer is the best method to bring them back to life. This cooking technique preserves the crispy texture while ensuring your sauced chicken wings remain juicy.
Start by preheating your air fryer to 375°F (190°C) for ideal results. Arrange the wings in a single layer to avoid overcrowding, which helps with even reheating. The cooking time is about 5-6 minutes, and don't forget to flip or shake them halfway through.
For sauced wings, consider using a small air fryer pan or lining the basket with tin foil to prevent sticking. Always check the internal temperature, making sure it reaches at least 165°F (74°C) for safe consumption.
Enjoy your revitalized wings!
Steps to Reheat in Air Fryer
To reheat your wings in an air fryer effectively, start by preheating the appliance to 375°F (190°C). Next, arrange the wings in a single layer in the air fryer basket for even cooking. Avoid overcrowding; you might need to reheat chicken wings in batches. Cook for 5-6 minutes, flipping or shaking them halfway to achieve that crispy texture.
Check the internal temperature at the 5-minute mark with a food thermometer, confirming it reaches 165°F (74°C) for safety. For added moisture, consider lightly brushing the wings with oil or melted butter before reheating.
Step | Action |
---|---|
1. Preheat | Set to 375°F (190°C) |
2. Arrange | Place wings in a single layer |
3. Cook | Heat for 5-6 minutes |
4. Check temperature | Confirm it reaches 165°F (74°C) |
Tips for Moist and Crispy Wings
For perfectly moist and crispy wings, it's essential to start with a well-preheated air fryer at 360°F (182°C) for 3-5 minutes; this helps lock in moisture right from the beginning.
Brush your wings lightly with cooking oil or melted butter before reheating leftover wings to enhance moisture retention.
When you're ready, arrange the wings in a single layer in the air fryer basket to guarantee even cooking and prevent drying out.
While reheating, monitor the wings closely, aiming for an internal temperature of 165°F (74°C) to maintain juiciness.
If you notice the wings browning too quickly, consider using aluminum foil to cover them, helping to retain moisture while achieving that desirable crispiness. Additionally, hula hooping can be a fun way to burn off some calories after enjoying those wings, as it burns approximately 200-400 calories per hour.
Storing Leftover Chicken Wings
Properly storing leftover chicken wings is essential if you want to enjoy them later without sacrificing their flavor and texture.
First, let the wings cool to room temperature to prevent moisture buildup inside the container. Use an airtight container or a zippered plastic bag for ideal freshness, ensuring you don't stack wings tightly to avoid sogginess.
Label the container with the date of storage to easily track freshness. If you plan to keep them longer, consider freezing wings. They can last up to 3 months in a regular freezer and up to a year in a deep freezer.
Following these steps will help you crisp up leftovers and enjoy your wings at their best later on!
Serving Suggestions for Reheated Wings
While reheating wings is a great way to enjoy leftovers, pairing them with the right sides can elevate your meal even further.
Consider serving your reheated wings with classic celery and carrot sticks for a crisp crunch that complements their flavor. A variety of dipping sauces like ranch, blue cheese, or spicy buffalo will enhance your taste experience.
For something lighter, incorporate wings into salads or wraps, adding greens and fresh vegetables for a balanced meal. If you're in the mood for comfort food, mac and cheese or French fries make excellent accompaniments.
Don't forget to garnish your reheated wings with fresh herbs like parsley or cilantro for a pop of color and extra flavor!
Frequently Asked Questions
How Do I Make Leftover Wings Crispy in an Airfryer?
To make leftover wings crispy in an air fryer, start by preheating it to 360°F (182°C) for about 3-5 minutes.
Arrange the wings in a single layer, avoiding overcrowding. Lightly spray them with cooking oil to enhance crispiness.
Air fry at 375°F (190°C) for 5-6 minutes, flipping halfway through.
Check the internal temperature to guarantee they reach 165°F (74°C) for safe eating while keeping that delicious crunch.
Enjoy your wings!
How Do You Make Leftover Wings Crispy Again?
Did you know that air fryers can reduce fat content in food by up to 75%?
To make your leftover wings crispy again, start by preheating your air fryer to 375°F.
Arrange the wings in a single layer, lightly spray them with oil, and cook for 5-6 minutes, flipping halfway through.
This method not only revives their crunch but also guarantees they're heated evenly and safely to 165°F.
Enjoy your delicious wings!
How to Make Leftover Chicken Crispy in Air Fryer?
To make leftover chicken crispy in an air fryer, start by preheating it to 375°F (190°C).
Lightly spray the basket with cooking oil to prevent sticking and enhance crispiness.
Arrange your chicken in a single layer, ensuring not to overcrowd.
Cook for about 5-6 minutes, flipping halfway through for even crisping.
For extra flavor, you can brush the chicken with a little oil or melted butter before reheating.
Enjoy your deliciously crispy chicken!
How Long Should I Reheat Wings in the Air Fryer?
You've got those delicious wings, but they're not as crispy as you'd like.
To reheat them in the air fryer, set it to 375°F (190°C). Arrange your wings in a single layer, and cook for about 5-6 minutes.
Flip or shake them halfway through for even crispiness. Remember, if they're larger or smaller, you might need to adjust the time slightly.
Always check they reach 165°F (74°C) for safety!
Conclusion
To sum up, reheating wings in an air fryer is the ultimate game-changer for enjoying leftover chicken. You'll be amazed at how quickly you can transform soggy bites into crispy, mouthwatering delights. Just follow the steps, and don't forget those handy tips for keeping them moist. With your perfectly reheated wings, you'll feel like a culinary wizard, impressing everyone at the table. So go ahead, dig in, and relish every flavorful moment!
How-To Guides
Can You Put Wax Paper in an Air Fryer? What You Must Know
Wondering if wax paper is safe for your air fryer? Discover the surprising truth that could change your cooking game forever!
You shouldn't put wax paper in an air fryer. It melts at temperatures above 200°F, which means it can ignite or contaminate your food. This not only leads to a mess but also poses a fire hazard. Instead, opt for parchment paper, which withstands higher temperatures and is safe to use. Silicone mats or aluminum foil are also good alternatives, but be cautious with airflow. Always consult your air fryer manual for the best practices. If you're curious about the safest ways to cook with these materials, there's plenty more helpful info to uncover.
Key Takeaways
- Wax paper melts at temperatures above 200°F, posing a risk of food contamination and fire hazards in air fryers.
- Manufacturers strongly advise against using wax paper due to safety concerns and potential messy cleanup.
- Safe alternatives include parchment paper, aluminum foil, and silicone mats, designed to withstand high temperatures.
- Parchment paper can handle temperatures up to 420-450°F, making it ideal for air frying without risks.
- Always consult your air fryer manual for recommended materials and best practices to ensure safe cooking.
Risks of Using Wax Paper
When considering whether to use wax paper in an air fryer, you should be aware of the risks involved. Wax paper isn't suitable for high temperatures; it melts at temperatures above 200°F (94ºC).
This melting can lead to food contamination and create a fire hazard, as the wax coating can ignite when exposed to intense heat. Additionally, using wax paper may result in a messy cleanup, with melted wax potentially dripping onto the heating element.
Manufacturers strongly advise against its use due to these safety concerns. Ultimately, the degradation of wax paper can impart unwanted flavors to your food, making it an unsuitable option for air frying.
Avoiding these risks is essential for a safe cooking experience.
Safe Alternatives for Air Fryers
If you're looking for safe alternatives to use in your air fryer, consider options that can withstand higher temperatures without compromising your cooking experience.
Parchment paper is a great choice, as it can handle temperatures up to 400°F (205°C) and helps prevent sticking.
Aluminum foil works too, but make sure it doesn't block air circulation and is weighed down to avoid floating.
For a reusable option, silicone mats are heat resistant and effective at keeping food from sticking.
Pre-fitted air fryer liners, especially perforated parchment paper, enhance airflow and simplify cleanup.
Just remember to steer clear of wax paper, as its low heat tolerance can lead to melting and potential fire hazards. Additionally, using high-quality air purifiers in your cooking space can help reduce odors and improve overall indoor air quality.
Understanding Material Properties
Understanding the properties of various cooking materials is essential for achieving the best results in your air fryer.
Wax paper isn't suitable for high heat, as it melts above 200°F, risking food contamination and fire hazards. In contrast, parchment paper boasts impressive heat resistance, handling temperatures up to 420-450°F, making it perfect for air frying.
Aluminum foil, while efficient at conducting heat and non-flammable, should be used cautiously to prevent airflow blockage.
Silicone mats provide a reusable, non-stick surface that withstands high temperatures, making them a safe alternative to wax paper.
User Experiences and Recommendations
Why take unnecessary risks with your air fryer? Many users warn against using wax paper due to its low heat tolerance, which can lead to melting and even a fire hazard. Instead, you'll find a strong recommendation for parchment paper, designed for high-temperature cooking to effectively prevent sticking. Some air fryer enthusiasts also swear by silicone liners, which are heat-safe and serve as reusable alternatives. Here's a quick comparison:
Material | Heat Tolerance | Safety Level |
---|---|---|
Wax Paper | Low | Fire Hazard |
Parchment Paper | High | Food Safety |
Silicone Liner | High | Safe & Reusable |
Adhering to safe cooking practices guarantees your meals are delicious and your appliance lasts longer!
Best Practices for Air Frying
When it comes to air frying, following best practices can make a significant difference in your cooking results. Always consult your air fryer manual to verify you're using materials that are safe to use.
Opt for parchment paper instead of wax paper, as it withstands high temperatures and won't pose a fire hazard. To prevent food from sticking in the air fryer basket, weight down any liners with food, keeping them away from the heating element.
Avoid preheating with liners, as they can fly around and create a fire risk. Regularly monitor cooking times and temperatures for different foods, and steer clear of wet batters that obstruct air circulation. Additionally, be mindful of color accuracy as it can enhance your overall cooking experience by ensuring even browning and crispness.
These tips will make cleanup easier and enhance your air frying experience!
Frequently Asked Questions
Is Wax Paper Safe in an Air Fryer?
When you're wondering if wax paper is safe in an air fryer, it's important to know it isn't.
Wax paper can melt at high temperatures, potentially contaminating your food and damaging your appliance. The wax coating poses a fire hazard, and melted wax can create a mess on the heating element.
Instead, consider using parchment paper or silicone liners for safer and more effective cooking in your air fryer.
What Is the Best Thing to Put on the Bottom of an Air Fryer?
When you're looking for the best thing to put on the bottom of your air fryer, consider using parchment paper.
It's heat-resistant and prevents sticking, making cleanup a breeze. Aluminum foil works too, but make sure it doesn't block air circulation.
If you prefer a reusable option, silicone mats are perfect for non-stick surfaces.
You might also find pre-fitted liners convenient, as they simplify cleaning while allowing proper air flow.
What Can I Line My Air Fryer Basket With?
When it comes to lining your air fryer, the options are endless, like a culinary wonderland! You can use parchment paper, which withstands high temperatures and keeps your food from sticking.
Aluminum foil works too, but make sure it doesn't block air circulation. Silicone mats are reusable and perfect for easy cleanup.
Consider pre-fitted liners with perforations for ideal air flow. Just steer clear of wax paper; it's not safe for high heat!
What Kind of Paper Can I Put in the Air Fryer?
When you're looking for paper options for your air fryer, stick to parchment paper or aluminum foil.
Parchment paper can handle high temperatures without issues, while aluminum foil works as long as it doesn't block air circulation.
Silicone mats are also great, as they're heat-resistant and reusable.
Just remember to avoid wax paper; it's not safe due to its low heat tolerance and potential fire risks.
Always check your air fryer's manual for guidance.
Conclusion
In summary, while wax paper might seem like a simple solution, its risks outweigh the rewards in your air fryer. Instead, consider safe alternatives like parchment paper or silicone mats to guarantee a successful and safe cooking experience. By understanding material properties and following best practices, you'll whip up wonderful meals without worry. So, stay savvy, skip the wax paper, and savor the scrumptious sensations your air fryer can create!
-
User Stories and Tips1 week ago
I Tried These 5 Air Fryer Hacks—You Won’t Believe the Results!
-
User Stories and Tips7 days ago
The Secret to Perfectly Crispy Fries: Real Users Share Their Air Fryer Tips
-
User Stories and Tips7 days ago
You’ll Never Cook the Same Again: How an Air Fryer Changed My Life!
-
Recipes6 days ago
How to Make Fries in Air Fryer: The Ultimate Crisp Guide
-
User Stories and Tips1 week ago
I Cooked Every Meal in an Air Fryer for a Week—Here’s What I Learned!
-
Vetted6 days ago
15 Best Smart Air Fryers With App Connectivity for Effortless Cooking in 2025
-
Vetted6 days ago
15 Best Desk Speakers of 2025 – Elevate Your Audio Experience
-
Recipes6 days ago
How to Cook Wings in Air Fryer: The Ultimate Crispy Recipe