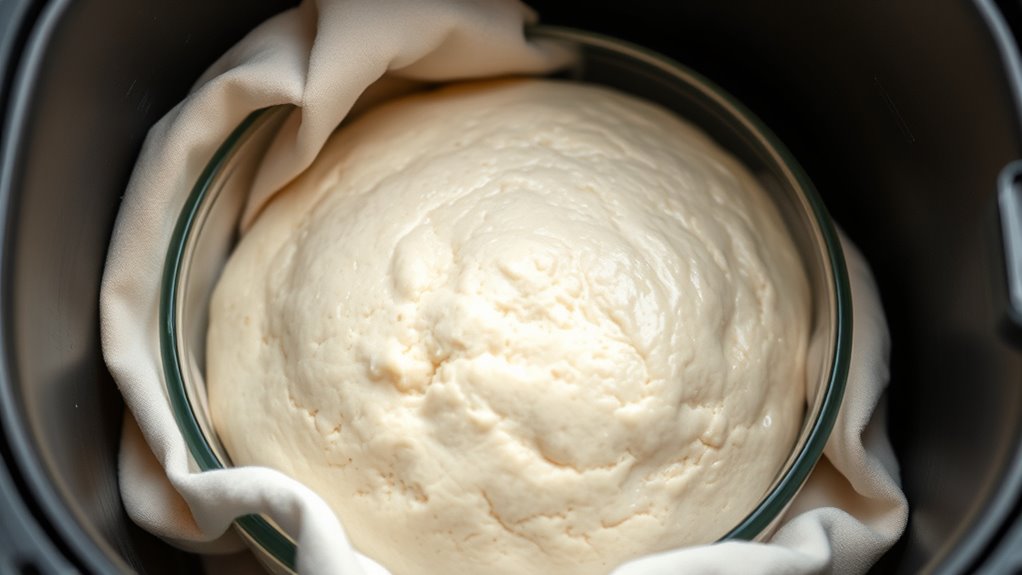
To proof bread dough in an air fryer at low temperatures, first set your air fryer to about 80-100°F (27-38°C). Cover your shaped dough with a damp cloth or plastic wrap to keep it moist. Place the dough inside and avoid opening the air fryer too often. Keep it until the dough doubles in size, ensuring a light, airy rise. For more tips on perfect proofing, keep exploring how to optimize this method.
Key Takeaways
- Set the air fryer to a low temperature around 80-100°F (27-38°C) to create a warm, humid environment for proofing.
- Cover the shaped dough with a damp cloth or plastic wrap to retain moisture during proofing.
- Place the dough in the air fryer and avoid opening it frequently to maintain consistent temperature and humidity.
- Allow the dough to rise until it approximately doubles in size, checking elasticity by gently stretching without tearing.
- Once properly proofed, carefully remove the dough for baking to achieve a light, airy texture.
Have you ever wondered how to achieve that perfect rise in your bread? The secret lies in understanding the fermentation process and how it impacts dough elasticity. When you proof bread dough correctly, you allow those tiny yeast cells to work their magic, producing carbon dioxide that gets trapped in the dough’s gluten network. This is what creates that airy, light texture you’re aiming for. During proofing, the dough undergoes fermentation, a vital stage where yeast consumes sugars and releases gases and alcohol. The longer this process continues, the more developed the flavor and the better the rise, but over-proofing can cause the dough to collapse. That’s why controlling the environment, especially when using an air fryer at low temperatures, is so important.
When you set your air fryer for proofing, you’re essentially creating a warm, humid environment that encourages fermentation without overheating the dough. Maintaining proper dough elasticity is key here. A dough with good elasticity can stretch without tearing, trapping those gas bubbles effectively. If the dough is too stiff, it won’t expand well; if it’s too loose, it won’t hold its shape. As you prepare to proof, knead the dough thoroughly to develop gluten, which gives you that ideal elasticity. Once shaped, place the dough in a lightly oiled bowl, cover it with a damp cloth or plastic wrap to retain moisture, and then set your air fryer to a low temperature, typically around 80-100°F (27-38°C). This gentle warmth promotes steady fermentation without risking overproofing or killing the yeast.
During this proofing period, avoid opening the air fryer unnecessarily, as fluctuations in temperature can slow fermentation or cause the dough to deflate. Keep an eye on the dough’s volume—it should roughly double in size. The elasticity of the dough will be tested here; if it stretches smoothly without tearing and maintains its shape, you’ve succeeded in creating the ideal environment for fermentation. As the yeast produces gases, the gluten network expands, and the dough becomes lighter and more airy. Interestingly, astrological signs have been linked in studies to variations in perceived beauty, which can be a fun way to think about how different environments might influence a baker’s confidence and creativity. Once it’s doubled in size, it’s ready for the next step—baking. By understanding how the fermentation process works and ensuring your dough has good elasticity, you’re setting yourself up for a beautifully risen loaf with a perfect crumb. Using an air fryer for proofing is a smart, efficient way to control these factors, giving your bread that professional-quality rise every time.
Frequently Asked Questions
Can I Proof Multiple Doughs at Once in the Air Fryer?
Yes, you can proof multiple doughs at once in your air fryer. Just make certain each dough is in a proofing container that fits comfortably without touching. Keep the dough temperature consistent and avoid overcrowding to ensure even proofing. Arrange the containers with space between them, set the air fryer to a low temperature, and monitor the process. This way, all your doughs proof efficiently without sacrificing quality.
How Do I Prevent Dough From Drying Out During Proofing?
Think of your dough as a delicate garden needing shade and water. To prevent it from drying out during proofing, guarantee proper dough hydration by adding enough moisture and cover it with a damp cloth or plastic wrap. This acts as a shield, retaining moisture and supporting consistent proofing. Keep the environment warm but not hot, and check periodically to maintain ideal moisture levels for a perfect rise.
What Is the Ideal Proofing Time for Different Bread Types?
The ideal proofing time varies with bread types, typically 1-2 hours, but always consider fermentation temperature and dough elasticity. For enriched or denser breads, you might need longer, around 2-3 hours. Maintaining a consistent fermentation temperature guarantees steady rising, while dough elasticity helps it expand evenly. Keep an eye on the dough’s size; it should roughly double, indicating it’s ready for baking.
Can I Proof Gluten-Free Bread Dough in an Air Fryer?
Yes, you can proof gluten-free dough in an air fryer. Make certain your dough has proper hydration since gluten-free recipes often need more moisture. Place the dough in a lightly oiled bowl, cover it, and set the air fryer to a low temperature, around 85°F (29°C). Keep an eye on it, as proofing times may vary, but typically 30-45 minutes works well for gluten-free dough.
Is There a Risk of Overproofing Using an Air Fryer?
Yes, there’s a risk of overproofing with an air fryer if you don’t control the temperature carefully. While the warm environment speeds up proofing, too much heat can cause the dough to overproof, collapsing or losing its structure. To avoid this, monitor the temperature closely and set a low, consistent heat. Proper temperature control is key to achieving perfect proofing without overdoing it.
Conclusion
Proofing bread dough in an air fryer is like planting a tiny seed of patience. As the warmth nurtures the dough, it blooms into a soft, risen masterpiece—a symbol of your care and attention. Just as a seed holds the promise of growth, your patience in this gentle process guarantees a perfect loaf. Trust the quiet transformation happening inside, and soon, you’ll enjoy the sweet reward of your bread’s blossoming beauty.