Connect with us

How-To Guides

How to Reheat Pizza in Air Fryer: Crisp, Delicious Results Every Time!

Just follow these simple steps to reheat your pizza in an air fryer for a crispy, delicious treat that will leave you wanting more!

Published

on

reheat pizza in air fryer

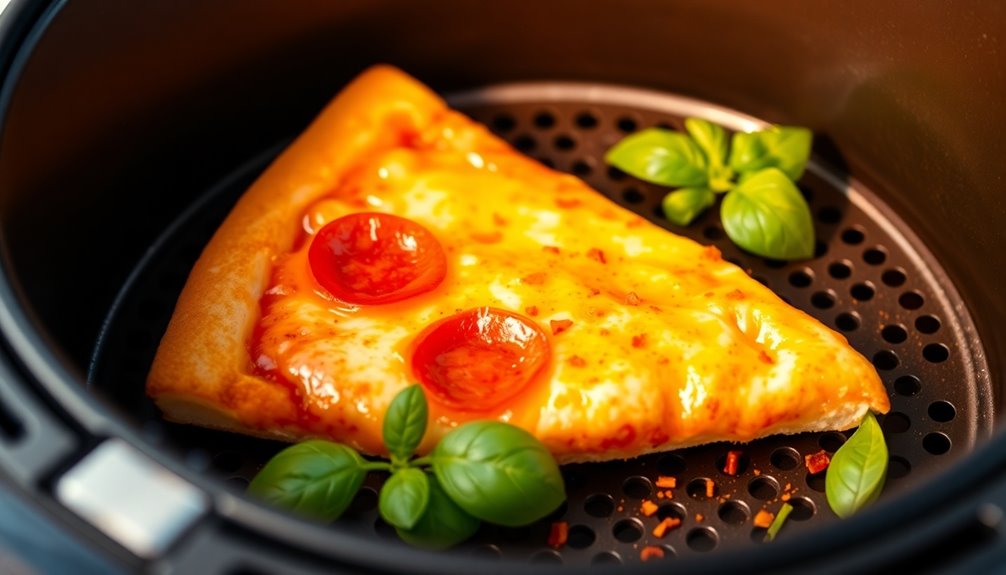
To reheat pizza in an air fryer, preheat it to 350°F (175°C). Arrange your slices in a single layer, making certain they don't overlap. If you want extra crispiness, lightly spray the pizza with cooking oil. Heat it for about 3-5 minutes, checking at the 5-minute mark for doneness. This method guarantees a deliciously crispy crust while keeping the cheese perfectly melted, avoiding that sogginess from microwaving. Monitor your pizza closely, and you'll achieve pizza perfection. Keep going to discover even more tips for ideal results!

Key Takeaways

  • Preheat the air fryer to 350°F (175°C) or 375°F for optimal crispiness and even cooking.
  • Arrange pizza slices in a single layer, avoiding overlap for proper air circulation.
  • Lightly spray the pizza with cooking oil for an extra crispy texture (optional).
  • Check for doneness at the 5-minute mark, adjusting time based on thickness.
  • Consider adding fresh toppings before reheating for enhanced flavor and enjoyment.

Benefits of Air Frying Pizza

healthier crispy pizza alternative

One of the standout benefits of air frying pizza is how it keeps the crust crispy and the cheese perfectly melted.

Using an air fryer guarantees even heat distribution, which is key for achieving delicious results. It's a faster alternative to traditional oven methods, taking only 3-5 minutes to reheat your pizza.

Plus, air frying prevents the sogginess and rubbery texture often found when microwaving leftovers.

Whether you've got thin crust, thick crust, deep dish, or stuffed varieties, this method works wonders for all types of pizza, helping to maintain the original flavor and texture.

Best of all, you won't need to add extra oil, making it a healthier option for satisfying your pizza cravings.

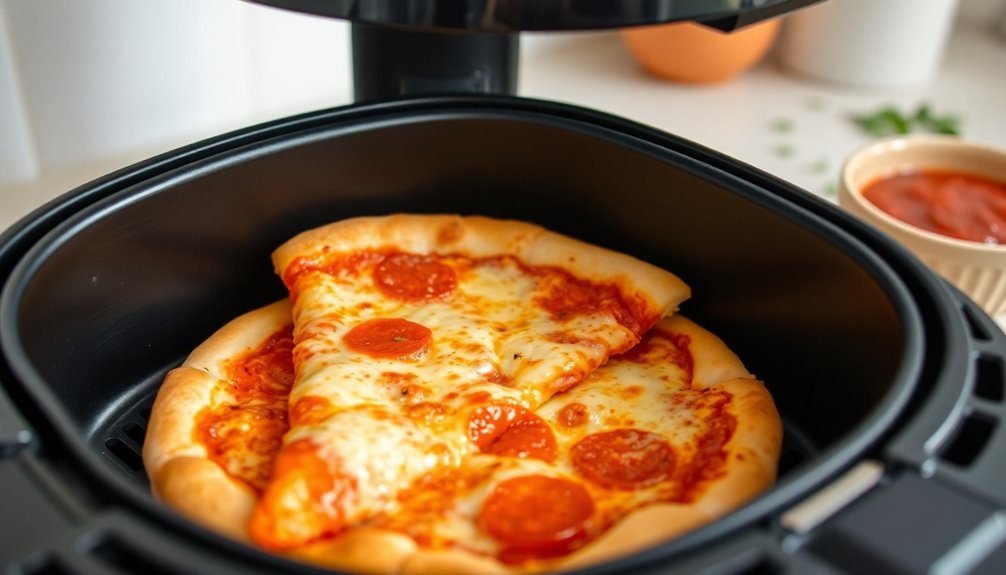
Step-by-Step Reheating Process

reheat food systematically and safely

To get started, preheat your air fryer to 375°F and set the timer for 2 minutes.

Once it's ready, arrange your pizza slices in a single layer in the basket, making sure they don't overlap.

This setup is key to achieving that perfect crispy finish you're after.

Preheating the Air Fryer

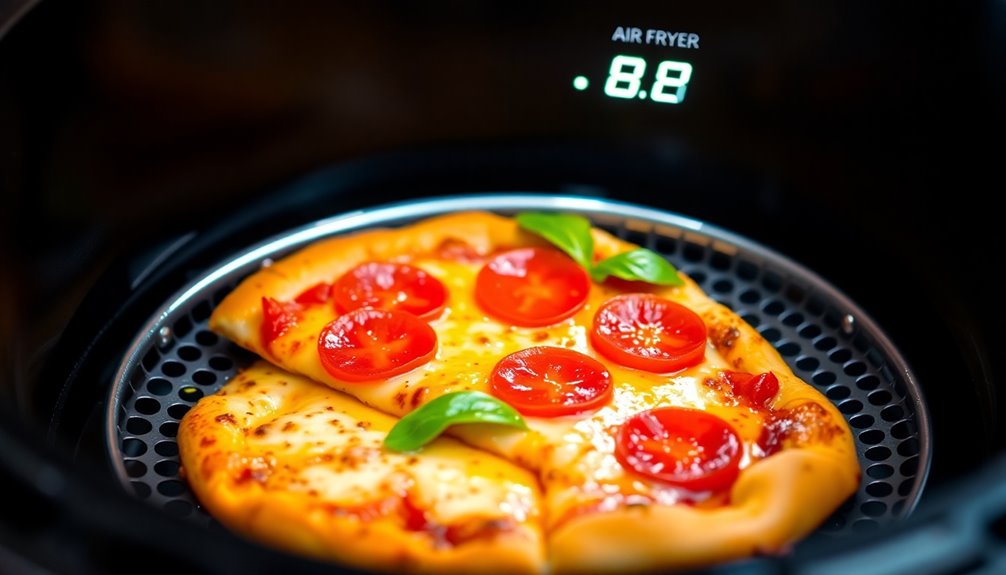
Preheating your air fryer is essential for achieving perfectly reheated pizza. To start, preheat your air fryer to 350°F (175°C) for ideal results.

This temperature guarantees even cooking and crispiness, enhancing your pizza's flavor and texture. Allow the air fryer to preheat for 2-3 minutes; this time lets the heating element reach the desired temperature efficiently.

Skipping this step can lead to uneven heating, leaving some parts overcooked while others stay cold. To avoid this, always check the air fryer's manual for specific preheating instructions, as different models may have varying recommendations. Additionally, using energy-efficient technology in your air fryer can contribute to faster preheating and better cooking results.

Arranging Pizza Slices

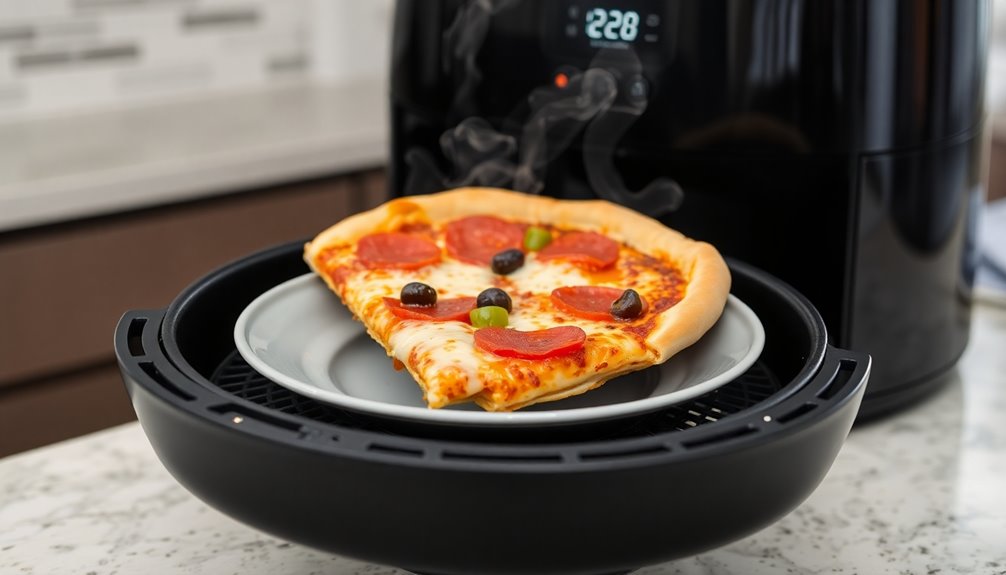
After your air fryer is preheated, it's time to arrange your pizza slices for reheating. Place the slices flat in the middle of the basket, guaranteeing they're in a single layer without overlapping. This promotes air circulation and helps achieve that crispy texture you love.

Pizza Type Cooking Time
Thin Crust Pizza 3-4 minutes
Thick Crust 5-7 minutes
Check Pizza After 2-3 mins
Avoid Overcrowding Yes
Enjoy Your Meal Absolutely!

Remember to check the pizza after a few minutes to adjust the cooking time as needed. Avoid overcrowding to guarantee even reheating, so you get delicious results every time!

Tips for Optimal Results

achieve best performance tips

To get the best results when reheating pizza in your air fryer, start by preheating it to 350°F for even cooking.

Make sure to arrange your pizza slices in a single layer without overlapping, so the hot air can circulate properly.

Keep an eye on the cooking time, checking for doneness to achieve your desired level of crispiness.

Preheat for Even Cooking

When you want your reheated pizza to taste just as good as it did fresh, taking the time to preheat your air fryer is essential. Preheating for 2-3 minutes at the recommended temperature guarantees even cooking and ideal texture, allowing the crust to crisp up immediately.

For thin crust pizza, set your air fryer to 350°F, while for thick crust, a lower temperature of 300°F works best. Skipping this step may lead to uneven heating, resulting in a less desirable texture.

By preheating, you'll avoid sogginess and achieve the perfect crisp you crave. Always check your air fryer model's manual for specific preheating recommendations, as performance can vary.

Enjoy delicious results every time!

Arrange Slices Properly

Arranging your pizza slices properly in the air fryer is essential for achieving that perfect reheated taste. Follow these tips for crispy, delicious results:

  • Always place pizza slices in a single layer for ideal air circulation.
  • Avoid overlapping to prevent soggy areas and guarantee even cooking.
  • Leave space between slices to promote heat distribution and avoid steaming.
  • Consider the thickness of slices; thicker ones need more space for effective reheating.

Using parchment paper or a silicone mat can help, but punch holes to maintain airflow. Additionally, using an air fryer can provide a smooth finish that enhances the overall texture of your reheated pizza.

Monitor Cooking Time

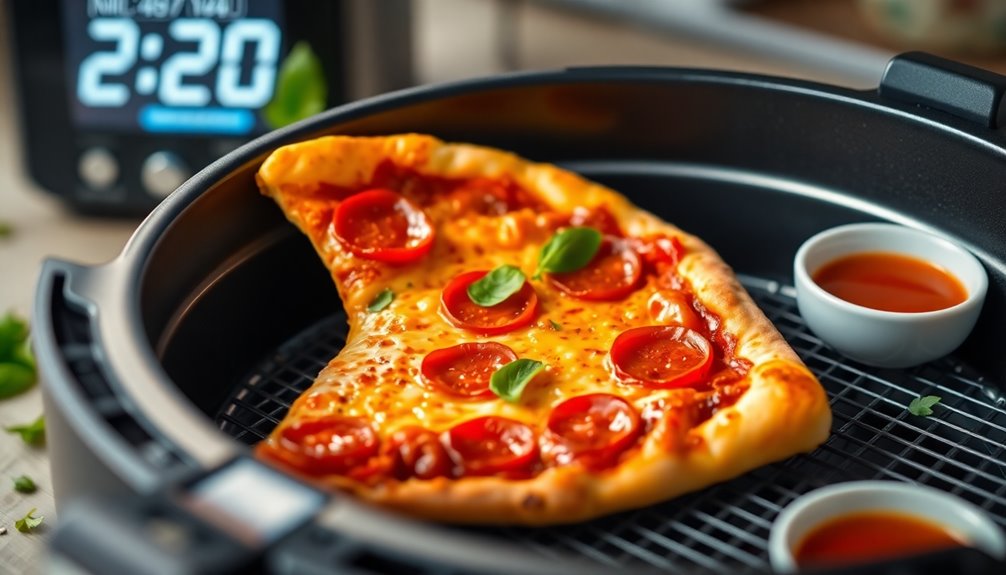
Once you've arranged your pizza slices properly, keeping an eye on the cooking time becomes essential for achieving that just-right reheating.

Start by monitoring cooking time closely, checking at the 1-minute mark. For thin crust pizza, aim for 3 minutes, while thick crust may need 5 to 7 minutes, depending on personal preference.

Regular checks allow you to assess the desired crispy perfection of the crust and the melting cheese, helping you achieve the perfect reheated slice.

If you're using a vortex air fryer, cooking times may shorten, so begin checking on the lower end. Adjust based on the thickness of the pizza and toppings, as thicker or heavily topped slices generally require more time.

Common Mistakes to Avoid

avoiding common mistakes

Although reheating pizza in an air fryer can yield delicious results, several common mistakes can ruin your efforts. To guarantee your pizza remains crispy and avoids sogginess, keep these tips in mind:

  • Always preheat your air fryer for 2-3 minutes.
  • Avoid overcrowding the basket with too many pizza slices.
  • Adjust cooking time based on the thickness of your pizza.
  • Monitor the temperature closely, aiming for around 350°F.

Skipping preheating can lead to uneven heating, while overcrowding restricts air circulation, resulting in soggy pizza.

Ignoring the thickness can leave you with either burnt edges or undercooked centers.

Don't forget to perform regular checks to achieve that perfect crispy texture you crave!

Types of Pizza Adjustments

pizza customization options available

When reheating pizza, it's important to take into account the type of crust you're working with, as each variety requires different adjustments.

For thin crust pizza, set your air fryer to 350°F and reheat for about 3-4 minutes for that perfect crispy edge and melted cheese.

Thick crust pizza needs a lower temperature of 300°F and a longer cooking time of 5-7 minutes to guarantee it heats thoroughly without burning.

Deep dish pizza also requires 5-7 minutes at 300°F, as its thicker base takes longer.

If you're reheating stuffed crust pizza, monitor closely and adjust the cooking duration based on thickness and toppings.

Always place your slices in a single layer in the air fryer basket for even cooking.

Nutritional Information

nutritional details and information

Reheating pizza not only brings back its delicious flavor but also retains its nutritional profile. Understanding the nutritional values of your leftover pizza can help you enjoy it guilt-free.

Here are some key points to take into account:

  • A typical slice contains about 151 calories.
  • Each slice has around 16g of carbohydrates and 6g of protein.
  • The fat content is approximately 7g per slice, with a sodium content of 253mg.
  • You can find about 2g of fiber, depending on the crust and toppings.

When you reheat pizza, the calorie count and nutrients remain largely unchanged.

Reader Engagement and Feedback

reader interaction and responses

How do you feel about sharing your pizza reheating experiences? Engaging with the recipe creator and fellow enthusiasts in the comments section can enhance your pizza night.

Your insights on the reheating method can inspire others, especially if you've discovered ways to improve texture and flavor. With a satisfaction rating of 4.67 from six votes, the positive feedback speaks volumes about this method's success.

By rating the recipe, you also contribute to valuable community recommendations, helping others make the best choice for their leftovers.

Frequently Asked Questions

How Do You Reheat Pizza in an Air Fryer for Crispy Crust?

To reheat pizza in an air fryer for a crispy crust, start by preheating the fryer to 350°F (175°C).

Place your pizza slices in a single layer, avoiding overcrowding.

Cook thin crust pizza for about 3 minutes and thick crust for 4-5 minutes.

Keep an eye on it to guarantee the cheese bubbles and the crust crisps without burning.

Using parchment paper can help with cleanup while maintaining that delicious texture.

Enjoy your pizza!

What Is the Best Way to Reheat Pizza for Good Results?

To reheat pizza for good results, you'll want to focus on temperature and timing.

Start by preheating your air fryer to 350°F. Place your pizza slices in a single layer for even heating.

For thin crust, aim for about 3 minutes, while thick crust may need closer to 5 minutes.

Keep an eye on it, checking after 3 minutes to guarantee it doesn't over-brown and the cheese melts perfectly.

Enjoy your delicious pizza!

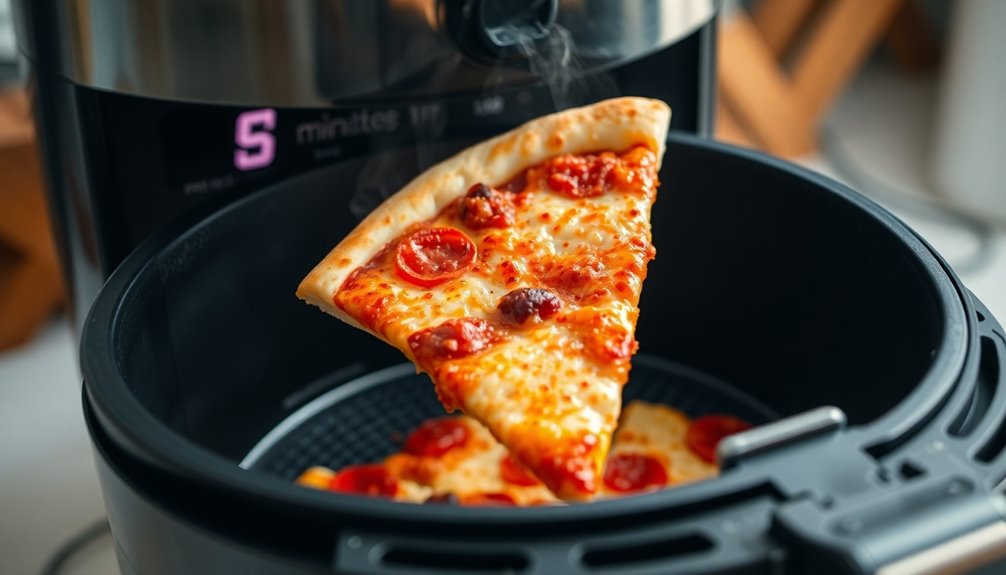
How Do You Keep Pizza Crispy When Reheating?

To keep your pizza crispy when reheating, preheat your air fryer to 375°F.

Place the slices in a single layer, avoiding overlap to guarantee proper air circulation.

For thin crust, reheat for about 3 minutes, and for thick crust, aim for 5-7 minutes.

Keep an eye on it to prevent burning, and skip the oil sprays—your pizza's cheese has enough fat to achieve that perfect crispy finish.

Enjoy your delicious slices!

How to Get Pizza Crispy in an Air Fryer?

To get pizza crispy in an air fryer, start by preheating it to 350°F for a few minutes.

Arrange your pizza slices in a single layer, ensuring they don't overlap.

For thin crust, cook for about 3 minutes; thick crust needs 5-7 minutes.

Check halfway for bubbling cheese and desired crispiness.

Spraying the base lightly with oil can enhance the texture.

Conclusion

Reheating pizza in your air fryer is a game changer, giving you that fresh-out-of-the-oven taste without the hassle. By following these steps and tips, you'll enjoy crisp, delicious slices every time—no more soggy leftovers! So, next time you've got a cold pie, don your favorite retro band tee, fire up the air fryer, and savor every cheesy bite. Your taste buds will thank you, and you'll feel like a rockstar in your own kitchen!

How-To Guides

How to Use an Air Fryer Like a Pro: Beginner’s Step-by-Step Guide

On your journey to mastering air frying, discover essential tips and tricks that will elevate your cooking game in ways you never imagined!

Published

on

air fryer usage guide

To use an air fryer like a pro, start by setting it up on a flat surface and familiarizing yourself with the controls. Prepare your ingredients by cutting them into uniform sizes for even cooking and marinating meats as needed. Preheat the air fryer to 350°F-400°F for about 3-5 minutes. When cooking, coat foods lightly with oil and avoid overcrowding the basket for optimal air circulation. Always monitor cooking times, as you'll need less time compared to traditional methods. Finally, remember to clean it after use for better performance. There's so much more to explore about perfecting your air frying skills!

Key Takeaways

  • Set up your air fryer on a stable surface, ensuring all parts are properly assembled according to the manual for optimal performance.
  • Prepare ingredients by cutting them into uniform sizes and marinating proteins to enhance flavor and ensure even cooking.
  • Preheat the air fryer to the recommended temperature for even cooking and improved texture, monitoring the digital display for completion.
  • Use proper cooking techniques, including shaking the basket, adjusting cooking times, and lightly coating fresh foods with oil for best results.
  • Maintain safety by keeping the air fryer away from children, using oven mitts, and regularly cleaning to prevent grease buildup and ensure longevity.

Setting Up the Air Fryer

air fryer setup instructions

Setting up your air fryer is a straightforward process that lays the foundation for delicious meals.

First, plug the cord into a wall outlet and ensure your air fryer sits on a flat, stable surface. Check for any accessories, like the frying basket and grate, and make sure they're properly assembled.

Next, read the instruction manual to get familiar with the specific features and controls of your model. Pay particular attention to the control panel, noting the temperature and timer dials. A good understanding of temperature guidelines will help you select the right settings for different foods.

This knowledge will make your cooking experience smoother and more enjoyable. Remember, a well-set air fryer leads to perfectly cooked food, so take a moment to get everything ready before you dive into your recipe!

Preparing Ingredients

gathering necessary cooking supplies

Now that your air fryer is set up and ready to go, it's time to prepare your ingredients for cooking.

Start by cutting your food into uniform sizes for even cooking; think fries or wedges for potatoes and bite-sized pieces for chicken. Remember to clean and prep shrimp, leaving them whole or cutting as per your recipe.

For seasoning, mix salt and spices with a bit of oil to keep them from blowing away. Marinate chicken in a buttermilk and hot sauce mix for at least 15 minutes. Cooking with an air fryer allows for a healthier cooking option as it requires minimal or no oil.

When coating, toss chicken in breadcrumbs or cornflakes, and don't forget to wrap jalapeño poppers with bacon.

Finally, arrange everything in an even layer in the air fryer basket, leaving space for hot air circulation.

Preheating and Settings

preheat and adjust settings

Preheating your air fryer is crucial for achieving perfectly cooked meals. Start by checking your manual for specific preheating instructions tailored to your model. If your air fryer has a preheat function, use it by selecting the appropriate setting or programming the cook time. Typically, you'll want to preheat between 350°F to 400°F for about 3-5 minutes. Keep an eye on the digital display—many models will beep when preheating is complete. Avoid overheating, as this can lead to burned food. Proper preheating ensures even cooking and enhances the overall texture and flavor of your air-fried dishes.

Cooking Techniques

various methods for cooking

To achieve deliciously crispy meals in your air fryer, it's essential to master various cooking techniques.

Start by cutting vegetables and potatoes into smaller pieces for even browning. Pat fresh foods dry and coat them lightly with oil—about one tablespoon per kilogram. For frozen foods, you can skip the oil.

When cooking meat, dry the skin and apply a thin layer of oil for crispiness. Use the perforated basket for airflow and shake it once or twice during cooking. This will help ensure that you achieve optimal cooking results by allowing the hot air to circulate effectively.

Adjust cooking times by reducing them by 20% compared to conventional recipes. Remember to check doneness and flip items midway for balanced crispness.

Lastly, lightly spritz oil for that extra-crispy exterior and ensure proper basket placement for airflow.

Safety Precautions

ensure safety at all times

Mastering cooking techniques in your air fryer is only one part of the process; keeping safety in mind is just as important.

Always place your air fryer on a heat-resistant surface and maintain at least 5 inches of space from walls or other objects. While it's cooking, avoid touching anything except the handle—you can use oven mitts if needed. Be aware that certain air fryer parts can reach temperatures that cause burns within seconds, so always handle with care.

Keep it out of reach of kids and pets until it's cool. Always plug it into a grounded outlet and unplug it after use to prevent accidental start-ups.

Remember to avoid overcrowding the basket and never use metal utensils. If you notice strange smells or sounds, unplug the fryer immediately to check for issues.

Stay safe and enjoy your cooking!

Post-Cooking Maintenance

cleaning and organizing kitchen

Once you've finished cooking with your air fryer, it's essential to prioritize maintenance to keep it in top shape.

First, unplug the air fryer and let it cool completely. Remove the basket, pan, or tray, and wash them with warm, soapy water. For tougher messes, soak them for 10-15 minutes.

Wipe the bottom chamber with a damp cloth and ensure all parts are dry before reassembling. For deep cleaning, fill the basket with a cup of water and run the fryer at a high setting for a few minutes. Regular cleaning is crucial to maintain appliance longevity and ensure optimal performance.

Don't forget to clean the heating element with a soft brush. Regularly clean the air fryer to prevent grease buildup and make your cooking experience smoother.

Frequently Asked Questions

Can I Use Aluminum Foil in the Air Fryer?

Yes, you can use aluminum foil in your air fryer, but with some precautions.

Make sure the foil doesn't cover all the holes in the basket to allow proper airflow. Weigh it down to prevent it from blowing around while cooking.

Avoid placing it at the bottom of the fryer, and be cautious with acidic foods, as they can react with the foil.

Using foil can help reduce sticking and make cleanup easier.

What Types of Food Are Best for Air Frying?

When you're air frying, focus on proteins like chicken, pork, and salmon for quick, flavorful meals.

Don't forget vegetables like potatoes, broccoli, and cauliflower; they turn out perfectly crispy.

Seafood like shrimp and crab works well too, as does tofu for a meat alternative.

You can even whip up omelets and muffins, maximizing versatility.

Experiment with different foods, and you'll discover just how delicious air frying can be!

How Do I Know When Food Is Done Cooking?

To know when your food's done cooking, rely on visual cues and cooking times. While a golden brown color might suggest doneness, it's not always reliable.

Use a food thermometer for accuracy, especially with meat; aim for 165°F for poultry and 145°F for fish.

Check halfway through cooking, and if it's not ready, continue in 5-minute increments.

Remember to shake or flip food as needed for even cooking!

Can I Cook Multiple Items at Once?

Yes, you can cook multiple items at once in your air fryer, but you'll need to choose foods with similar cooking times and temperatures.

Cut everything into uniform sizes and avoid overcrowding the basket to ensure even cooking.

You might need to adjust the cooking time and temperature slightly, so keep an eye on your food and shake the basket occasionally for even browning.

With practice, you'll master cooking a variety of dishes together!

Do I Need to Adjust Cooking Times for Different Air Fryer Models?

Yes, you absolutely need to adjust cooking times for different air fryer models.

Since wattage and size vary, higher wattage models will cook your food faster than lower wattage ones. Similarly, larger air fryers typically take longer than smaller, compact models.

Always check your specific model's guidelines, and feel free to reduce cooking time by 20-30% if adapting from traditional oven recipes.

Monitoring your food closely will help ensure it's cooked perfectly every time.

Conclusion

Now that you've mastered the basics of using an air fryer, you're ready to whip up delicious, healthier meals with confidence. Remember to set it up properly, prep your ingredients, and adjust the settings as needed. Experiment with different cooking techniques, and don't forget to follow safety precautions. With a little practice, you'll be air frying like a pro in no time. Enjoy the tasty results and the convenience that comes with this amazing kitchen gadget!

Continue Reading

How-To Guides

How to Reheat Wings in Air Fryer: Crisp Up Leftovers in Minutes!

Learn the secret to reviving leftover wings in an air fryer for that perfect crispy texture—your taste buds will thank you!

Published

on

reheat wings in air fryer

To reheat wings in an air fryer, preheat it to 375°F (190°C). Arrange your wings in a single layer in the basket to avoid overcrowding. Heat them for about 5-6 minutes, flipping halfway through to guarantee even crisping. Use a food thermometer to check that the internal temperature reaches at least 165°F (74°C). For extra moisture, consider brushing the wings with oil or melted butter before cooking. This method brings back the delicious crispy texture and juicy flavor of your leftovers in just minutes. Stick around for more tips to make the most of your air-fried delights!

Key Takeaways

  • Preheat the air fryer to 375°F (190°C) for optimal crispiness before adding wings.
  • Arrange wings in a single layer to avoid overcrowding and ensure even heating.
  • Heat wings for 5-6 minutes, flipping halfway to achieve a uniform crisp.
  • Check the internal temperature with a thermometer; it should reach at least 165°F (74°C).
  • Optionally, brush wings with oil or melted butter to enhance moisture and flavor.

Best Methods for Reheating Wings

optimal techniques for reheating

When you want to enjoy leftover wings, using an air fryer is the best method to bring them back to life. This cooking technique preserves the crispy texture while ensuring your sauced chicken wings remain juicy.

Start by preheating your air fryer to 375°F (190°C) for ideal results. Arrange the wings in a single layer to avoid overcrowding, which helps with even reheating. The cooking time is about 5-6 minutes, and don't forget to flip or shake them halfway through.

For sauced wings, consider using a small air fryer pan or lining the basket with tin foil to prevent sticking. Always check the internal temperature, making sure it reaches at least 165°F (74°C) for safe consumption.

Enjoy your revitalized wings!

Steps to Reheat in Air Fryer

reheat food in air fryer

To reheat your wings in an air fryer effectively, start by preheating the appliance to 375°F (190°C). Next, arrange the wings in a single layer in the air fryer basket for even cooking. Avoid overcrowding; you might need to reheat chicken wings in batches. Cook for 5-6 minutes, flipping or shaking them halfway to achieve that crispy texture.

Check the internal temperature at the 5-minute mark with a food thermometer, confirming it reaches 165°F (74°C) for safety. For added moisture, consider lightly brushing the wings with oil or melted butter before reheating.

Step Action
1. Preheat Set to 375°F (190°C)
2. Arrange Place wings in a single layer
3. Cook Heat for 5-6 minutes
4. Check temperature Confirm it reaches 165°F (74°C)

Tips for Moist and Crispy Wings

moist and crispy wings

For perfectly moist and crispy wings, it's essential to start with a well-preheated air fryer at 360°F (182°C) for 3-5 minutes; this helps lock in moisture right from the beginning.

Brush your wings lightly with cooking oil or melted butter before reheating leftover wings to enhance moisture retention.

When you're ready, arrange the wings in a single layer in the air fryer basket to guarantee even cooking and prevent drying out.

While reheating, monitor the wings closely, aiming for an internal temperature of 165°F (74°C) to maintain juiciness.

If you notice the wings browning too quickly, consider using aluminum foil to cover them, helping to retain moisture while achieving that desirable crispiness. Additionally, hula hooping can be a fun way to burn off some calories after enjoying those wings, as it burns approximately 200-400 calories per hour.

Storing Leftover Chicken Wings

store leftover chicken wings

Properly storing leftover chicken wings is essential if you want to enjoy them later without sacrificing their flavor and texture.

First, let the wings cool to room temperature to prevent moisture buildup inside the container. Use an airtight container or a zippered plastic bag for ideal freshness, ensuring you don't stack wings tightly to avoid sogginess.

Label the container with the date of storage to easily track freshness. If you plan to keep them longer, consider freezing wings. They can last up to 3 months in a regular freezer and up to a year in a deep freezer.

Following these steps will help you crisp up leftovers and enjoy your wings at their best later on!

Serving Suggestions for Reheated Wings

reheated wings serving ideas

While reheating wings is a great way to enjoy leftovers, pairing them with the right sides can elevate your meal even further.

Consider serving your reheated wings with classic celery and carrot sticks for a crisp crunch that complements their flavor. A variety of dipping sauces like ranch, blue cheese, or spicy buffalo will enhance your taste experience.

For something lighter, incorporate wings into salads or wraps, adding greens and fresh vegetables for a balanced meal. If you're in the mood for comfort food, mac and cheese or French fries make excellent accompaniments.

Don't forget to garnish your reheated wings with fresh herbs like parsley or cilantro for a pop of color and extra flavor!

Frequently Asked Questions

How Do I Make Leftover Wings Crispy in an Airfryer?

To make leftover wings crispy in an air fryer, start by preheating it to 360°F (182°C) for about 3-5 minutes.

Arrange the wings in a single layer, avoiding overcrowding. Lightly spray them with cooking oil to enhance crispiness.

Air fry at 375°F (190°C) for 5-6 minutes, flipping halfway through.

Check the internal temperature to guarantee they reach 165°F (74°C) for safe eating while keeping that delicious crunch.

Enjoy your wings!

How Do You Make Leftover Wings Crispy Again?

Did you know that air fryers can reduce fat content in food by up to 75%?

To make your leftover wings crispy again, start by preheating your air fryer to 375°F.

Arrange the wings in a single layer, lightly spray them with oil, and cook for 5-6 minutes, flipping halfway through.

This method not only revives their crunch but also guarantees they're heated evenly and safely to 165°F.

Enjoy your delicious wings!

How to Make Leftover Chicken Crispy in Air Fryer?

To make leftover chicken crispy in an air fryer, start by preheating it to 375°F (190°C).

Lightly spray the basket with cooking oil to prevent sticking and enhance crispiness.

Arrange your chicken in a single layer, ensuring not to overcrowd.

Cook for about 5-6 minutes, flipping halfway through for even crisping.

For extra flavor, you can brush the chicken with a little oil or melted butter before reheating.

Enjoy your deliciously crispy chicken!

How Long Should I Reheat Wings in the Air Fryer?

You've got those delicious wings, but they're not as crispy as you'd like.

To reheat them in the air fryer, set it to 375°F (190°C). Arrange your wings in a single layer, and cook for about 5-6 minutes.

Flip or shake them halfway through for even crispiness. Remember, if they're larger or smaller, you might need to adjust the time slightly.

Always check they reach 165°F (74°C) for safety!

Conclusion

To sum up, reheating wings in an air fryer is the ultimate game-changer for enjoying leftover chicken. You'll be amazed at how quickly you can transform soggy bites into crispy, mouthwatering delights. Just follow the steps, and don't forget those handy tips for keeping them moist. With your perfectly reheated wings, you'll feel like a culinary wizard, impressing everyone at the table. So go ahead, dig in, and relish every flavorful moment!

Continue Reading

How-To Guides

Can You Put Wax Paper in an Air Fryer? What You Must Know

Wondering if wax paper is safe for your air fryer? Discover the surprising truth that could change your cooking game forever!

Published

on

wax paper air fryer caution

You shouldn't put wax paper in an air fryer. It melts at temperatures above 200°F, which means it can ignite or contaminate your food. This not only leads to a mess but also poses a fire hazard. Instead, opt for parchment paper, which withstands higher temperatures and is safe to use. Silicone mats or aluminum foil are also good alternatives, but be cautious with airflow. Always consult your air fryer manual for the best practices. If you're curious about the safest ways to cook with these materials, there's plenty more helpful info to uncover.

Key Takeaways

  • Wax paper melts at temperatures above 200°F, posing a risk of food contamination and fire hazards in air fryers.
  • Manufacturers strongly advise against using wax paper due to safety concerns and potential messy cleanup.
  • Safe alternatives include parchment paper, aluminum foil, and silicone mats, designed to withstand high temperatures.
  • Parchment paper can handle temperatures up to 420-450°F, making it ideal for air frying without risks.
  • Always consult your air fryer manual for recommended materials and best practices to ensure safe cooking.

Risks of Using Wax Paper

wax paper safety concerns

When considering whether to use wax paper in an air fryer, you should be aware of the risks involved. Wax paper isn't suitable for high temperatures; it melts at temperatures above 200°F (94ºC).

This melting can lead to food contamination and create a fire hazard, as the wax coating can ignite when exposed to intense heat. Additionally, using wax paper may result in a messy cleanup, with melted wax potentially dripping onto the heating element.

Manufacturers strongly advise against its use due to these safety concerns. Ultimately, the degradation of wax paper can impart unwanted flavors to your food, making it an unsuitable option for air frying.

Avoiding these risks is essential for a safe cooking experience.

Safe Alternatives for Air Fryers

healthy cooking appliance options

If you're looking for safe alternatives to use in your air fryer, consider options that can withstand higher temperatures without compromising your cooking experience.

Parchment paper is a great choice, as it can handle temperatures up to 400°F (205°C) and helps prevent sticking.

Aluminum foil works too, but make sure it doesn't block air circulation and is weighed down to avoid floating.

For a reusable option, silicone mats are heat resistant and effective at keeping food from sticking.

Pre-fitted air fryer liners, especially perforated parchment paper, enhance airflow and simplify cleanup.

Just remember to steer clear of wax paper, as its low heat tolerance can lead to melting and potential fire hazards. Additionally, using high-quality air purifiers in your cooking space can help reduce odors and improve overall indoor air quality.

Understanding Material Properties

material properties comprehension essential

Understanding the properties of various cooking materials is essential for achieving the best results in your air fryer.

Wax paper isn't suitable for high heat, as it melts above 200°F, risking food contamination and fire hazards. In contrast, parchment paper boasts impressive heat resistance, handling temperatures up to 420-450°F, making it perfect for air frying.

Aluminum foil, while efficient at conducting heat and non-flammable, should be used cautiously to prevent airflow blockage.

Silicone mats provide a reusable, non-stick surface that withstands high temperatures, making them a safe alternative to wax paper.

User Experiences and Recommendations

user insights and suggestions

Why take unnecessary risks with your air fryer? Many users warn against using wax paper due to its low heat tolerance, which can lead to melting and even a fire hazard. Instead, you'll find a strong recommendation for parchment paper, designed for high-temperature cooking to effectively prevent sticking. Some air fryer enthusiasts also swear by silicone liners, which are heat-safe and serve as reusable alternatives. Here's a quick comparison:

Material Heat Tolerance Safety Level
Wax Paper Low Fire Hazard
Parchment Paper High Food Safety
Silicone Liner High Safe & Reusable

Adhering to safe cooking practices guarantees your meals are delicious and your appliance lasts longer!

Best Practices for Air Frying

air frying success tips

When it comes to air frying, following best practices can make a significant difference in your cooking results. Always consult your air fryer manual to verify you're using materials that are safe to use.

Opt for parchment paper instead of wax paper, as it withstands high temperatures and won't pose a fire hazard. To prevent food from sticking in the air fryer basket, weight down any liners with food, keeping them away from the heating element.

Avoid preheating with liners, as they can fly around and create a fire risk. Regularly monitor cooking times and temperatures for different foods, and steer clear of wet batters that obstruct air circulation. Additionally, be mindful of color accuracy as it can enhance your overall cooking experience by ensuring even browning and crispness.

These tips will make cleanup easier and enhance your air frying experience!

Frequently Asked Questions

Is Wax Paper Safe in an Air Fryer?

When you're wondering if wax paper is safe in an air fryer, it's important to know it isn't.

Wax paper can melt at high temperatures, potentially contaminating your food and damaging your appliance. The wax coating poses a fire hazard, and melted wax can create a mess on the heating element.

Instead, consider using parchment paper or silicone liners for safer and more effective cooking in your air fryer.

What Is the Best Thing to Put on the Bottom of an Air Fryer?

When you're looking for the best thing to put on the bottom of your air fryer, consider using parchment paper.

It's heat-resistant and prevents sticking, making cleanup a breeze. Aluminum foil works too, but make sure it doesn't block air circulation.

If you prefer a reusable option, silicone mats are perfect for non-stick surfaces.

You might also find pre-fitted liners convenient, as they simplify cleaning while allowing proper air flow.

What Can I Line My Air Fryer Basket With?

When it comes to lining your air fryer, the options are endless, like a culinary wonderland! You can use parchment paper, which withstands high temperatures and keeps your food from sticking.

Aluminum foil works too, but make sure it doesn't block air circulation. Silicone mats are reusable and perfect for easy cleanup.

Consider pre-fitted liners with perforations for ideal air flow. Just steer clear of wax paper; it's not safe for high heat!

What Kind of Paper Can I Put in the Air Fryer?

When you're looking for paper options for your air fryer, stick to parchment paper or aluminum foil.

Parchment paper can handle high temperatures without issues, while aluminum foil works as long as it doesn't block air circulation.

Silicone mats are also great, as they're heat-resistant and reusable.

Just remember to avoid wax paper; it's not safe due to its low heat tolerance and potential fire risks.

Always check your air fryer's manual for guidance.

Conclusion

In summary, while wax paper might seem like a simple solution, its risks outweigh the rewards in your air fryer. Instead, consider safe alternatives like parchment paper or silicone mats to guarantee a successful and safe cooking experience. By understanding material properties and following best practices, you'll whip up wonderful meals without worry. So, stay savvy, skip the wax paper, and savor the scrumptious sensations your air fryer can create!

Continue Reading

Affiliate disclaimer

As an affiliate, we may earn a commission from qualifying purchases. We get commissions for purchases made through links on this website from Amazon and other third parties.

Vetted

best student laptops 2025 best student laptops 2025
Vetted6 days ago

15 Best Laptops for Students in 2025 – Affordable, Powerful, and Perfect for Learning

I've compiled the top 15 laptops for students in 2025 that perfectly blend affordability and performance—discover which one will elevate...

top portable charging solutions top portable charging solutions
Vetted6 days ago

15 Best Power Banks of 2025 – Keep Your Devices Charged On the Go

In 2025, discover the 15 best power banks to keep your devices charged on the go, but which one will...

top travel backpacks 2025 top travel backpacks 2025
Vetted6 days ago

15 Best Travel Backpacks for Adventurers on the Go in 2025

I've curated the ultimate guide to the 15 best travel backpacks for adventurers in 2025, but you won't want to...

meal prep container recommendations meal prep container recommendations
Vetted6 days ago

15 Best Meal Prep Containers to Keep Your Food Fresh and Organized

Prepare to discover the 15 best meal prep containers that keep your food fresh and organized, ensuring you never waste...

top winter heated gloves top winter heated gloves
Vetted6 days ago

15 Best Heated Gloves to Keep Your Hands Warm All Winter Long

Unlock the secret to cozy hands this winter with the 15 best heated gloves—discover which pair will elevate your cold-weather...

top toasters for 2025 top toasters for 2025
Vetted6 days ago

15 Best Toasters of 2025: Crisp Perfection Every Morning

I've uncovered the top 15 toasters of 2025 that promise crisp perfection every morning, but which one will transform your...

air fryers with rotisserie functions air fryers with rotisserie functions
Vetted6 days ago

15 Best Air Fryers With Rotisserie Functions to Elevate Your Cooking Game

Find the perfect air fryer with rotisserie functions to transform your meals—discover the top 15 models that will elevate your...

top yoga mats reviewed top yoga mats reviewed
Vetted6 days ago

15 Best Yoga Mats for Comfort and Stability in Your Practice

Wondering which yoga mats provide the ultimate comfort and stability? Discover the top 15 options that could transform your practice...

energy efficient air fryer selection energy efficient air fryer selection
Vetted6 days ago

15 Best Energy-Efficient Air Fryers to Slash Your Energy Bills While Cooking Delicious Meals

One great way to save on energy bills is by choosing from the 15 best energy-efficient air fryers; discover which...

top car seats 2025 top car seats 2025
Vetted6 days ago

15 Best Car Seats of 2025 – Safety, Comfort, and Style Combined

Navigate the world of car seats with our top 15 picks for 2025, where unmatched safety, comfort, and style await...

silent cooking with air fryers silent cooking with air fryers
Vetted6 days ago

15 Best Quiet Air Fryers for a Peaceful Cooking Experience

Just imagine cooking your favorite meals in peace with our top 15 quiet air fryers; discover which models will transform...

top desk speakers 2025 top desk speakers 2025
Vetted6 days ago

15 Best Desk Speakers of 2025 – Elevate Your Audio Experience

Boost your audio experience with the 15 best desk speakers of 2025; discover which model will transform your sound setup...

Trending