How-To Guides
How to Toast Bread in an Air Fryer: Quick and Crunchy Results!
Keen to achieve perfectly toasted bread in your air fryer? Discover essential tips and delicious topping ideas that will elevate your breakfast game!
To toast bread in your air fryer, start by preheating it to 400°F (200°C). Arrange your slices in a single layer for even toasting. Depending on the thickness of the bread, toast for about 3-5 minutes, flipping thicker slices halfway through for best results. Keep an eye on it during the last minute to avoid burning. You can use any type of bread, so feel free to experiment. For added flavor, consider spreading butter or toppings like avocado or nut butter. There's plenty more to explore, including tips for perfecting your toast and delicious topping ideas.
Key Takeaways
- Preheat your air fryer to 400°F (200°C) for optimal toasting results.
- Arrange sliced bread in a single layer to ensure even cooking.
- Cook for 3-5 minutes, flipping thicker slices halfway through for uniform crispiness.
- Monitor closely during the last minute to achieve your desired golden-brown finish.
- Enhance flavor with toppings like avocado, nut butter, or jams after toasting.
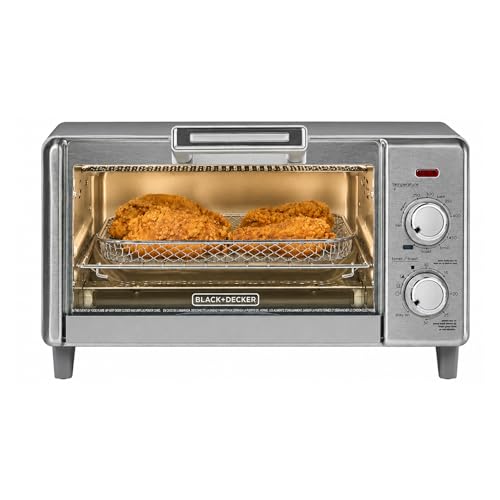
Benefits of Air Fryer Toast
When you want a quick and delicious snack, toasting bread in an air fryer offers several advantages.
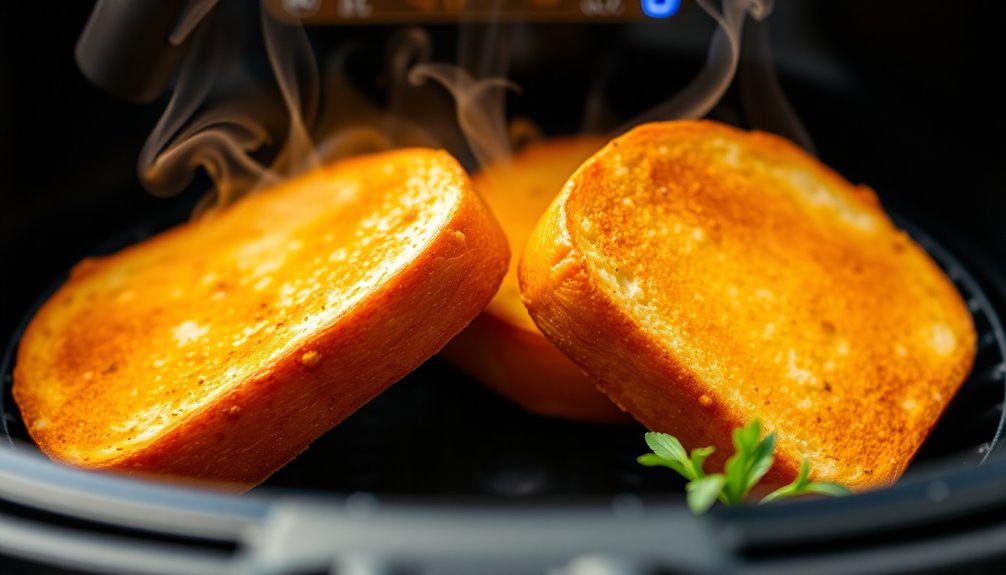
First, air fryer toast cooks faster than traditional methods, usually taking just 3-5 minutes. You'll enjoy even toasting results, which eliminates burnt bread and unevenly cooked slices.
The air fryer's versatility lets you experiment with various bread types, from gluten-free to thicker slices, all while using adjustable cooking times to suit your taste.
Plus, it's a healthier option, reducing oil usage by up to 75%. Its compact design makes it perfect for small kitchens, and its energy efficiency guarantees you'll whip up quick meals without wasting power. Additionally, opting for air-fried toast can be a better choice for those looking to manage cholesterol levels while still enjoying tasty snacks.
With an air fryer, you can savor perfectly toasted bread every time!
Ingredients for Perfect Toast
To achieve perfect toast in your air fryer, you'll want to start with the right ingredients. Any type of sliced bread works, whether it's sourdough, whole wheat, white, or gluten-free. Fresh bread yields the best texture and flavor, so try to use it whenever possible.
The thickness of your bread affects cooking time; thicker slices will need a bit longer to reach that golden toast perfection. It's best to arrange your slices of bread in a single layer in the air fryer basket to guarantee even cooking and crispiness.
For added flavor, consider spreading optional ingredients like butter or oil on your bread before air frying, which also helps achieve that delightful golden-brown color.
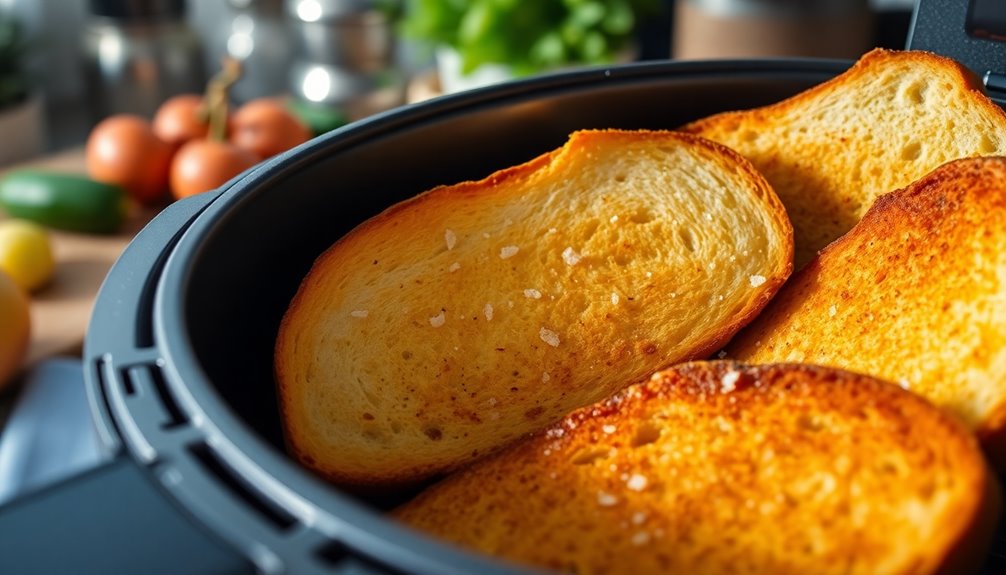
Step-by-Step Toasting Instructions
To get the best toast from your air fryer, you need to start by preheating it to 400°F (200°C).
Once it's ready, arrange your bread in a single layer to guarantee even cooking.
Keep an eye on the time to achieve that perfect golden brown finish without burning.
Preheat Air Fryer Properly
Before you start toasting your bread, it's essential to preheat your air fryer properly for the best results.
Begin by setting your air fryer to 400°F (200°C), which is the ideal cooking temperature for even toasting. Let it preheat for about 3-5 minutes; this duration helps achieve that desired crispy exterior.
Confirm your air fryer basket is clean before you start to avoid any unwanted flavors affecting your toast bread.
Once preheated, make sure the bread is arranged in a single layer, allowing for proper air circulation. This guarantees that each slice gets the same attention and toasts evenly.
Now you're ready to enjoy perfectly toasted bread!
Arrange Bread Evenly
With your air fryer preheated and ready, it's time to arrange your bread for ideal toasting.
Start by slicing your bread to a uniform thickness, ideally between ½ inch to 1 inch, for consistent results.
Place the slices in a single layer in the air fryer basket, ensuring there's space between them to promote air circulation. This will help achieve that perfect crispy texture.
If you're using thicker bread or toasting a larger batch, remember to flip the slices halfway through the cooking time, which usually ranges from 3-5 minutes.
Keep an eye on the toast during the last minute to monitor its crispiness and prevent burning.
Enjoy your perfectly toasted bread!
Monitor Cooking Time
While you're toasting your bread in the air fryer, it's crucial to keep an eye on the cooking time to achieve that perfect golden-brown finish.
Start by preheating the air fryer to 400°F (200°C). Place your bread slices in a single layer, avoiding overlap for even cooking.
Set the cooking time for 3-5 minutes, flipping the slices halfway through if you're not using butter. Monitor the toast closely during the last minute to reach your desired level of crispiness without burning.
Topping Ideas for Toast
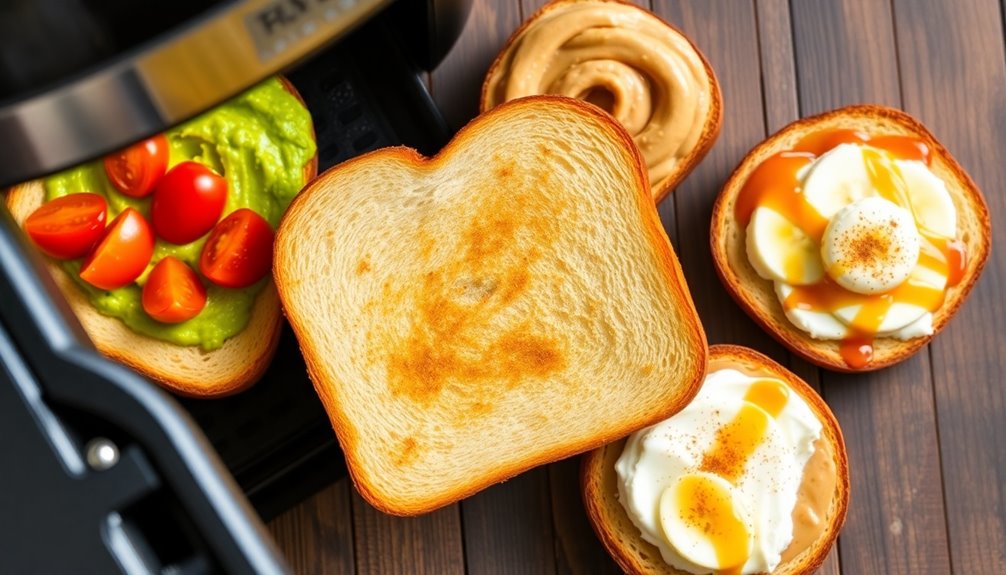
What toppings will you choose to elevate your air fryer toast?
For a nutritious option, spread creamy avocado on your toast, seasoned with salt and pepper.
If you're in the mood for something sweet, nut butters like peanut butter paired with banana slices or honey can satisfy your cravings.
For those who love savory flavors, try a layer of cream cheese with chives or a garlic spread for a delicious twist.
Don't forget to explore jams like orange marmalade or homemade fruit preserves for a burst of flavor.
Want to make it a meal? Top your toast with scrambled eggs, crispy bacon, or even feta cheese for breakfast or brunch perfection! Engaging with food preparation can enhance fine motor skills as you spread and layer toppings.
Serving Suggestions
Choosing the right toppings can truly enhance your air fryer toast experience, but how you serve it matters too.
For a hearty breakfast, pile your air fryer toast high with scrambled eggs, bacon, or sausage for a satisfying start to your day.
If you're in the mood for something lighter, try avocado toast topped with arugula for a nutritious twist.
Don't forget about sweet options! Spread homemade Nutella or nut butters for a delightful treat.
For a savory delight, slather garlic spreads or cream cheese on your toast, or experiment with pickled onions.
You can even create a quick cheesy bread by adding marinara sauce and cheese on top, achieving those crunchy results you crave.
Enjoy!
Tips for Best Results
To achieve the best results when toasting bread in an air fryer, preheating the appliance to 400°F (200°C) is essential.
Arrange your bread slices in a single layer in the air fryer basket to prevent overcrowding, ensuring perfect, crispy toast.
Flip the bread halfway through the cooking time, typically between 3-5 minutes, to toast both sides evenly.
Keep a close eye on the toast during the last minute; this helps you reach your desired level of crispiness without burning.
Don't hesitate to experiment with different types of bread and thickness. Thicker slices may need additional cooking time, so adjust accordingly for the best results.
Enjoy your perfectly toasted bread!
Frequently Asked Questions
How Do You Make Bread Crispy Again in an Air Fryer?
To make bread crispy again in an air fryer, start by preheating it to 400°F (200°C).
Place your stale or soft bread slices in a single layer in the basket, avoiding overcrowding.
Air fry the bread for about 3-5 minutes, flipping halfway through and checking often to prevent burning.
For extra flavor, brush the bread lightly with olive oil or melted butter before cooking.
Keep an eye on it, as cooking times may vary.
Can I Use an Air Fryer to Toast Bread?
Yes, you can use an air fryer to toast bread! Imagine crisping your bread to perfection, enjoying a warm, golden slice, and savoring that satisfying crunch.
Set your air fryer to 375°F or 400°F, place the bread in a single layer, and let it cook for 3 to 5 minutes. Flip it halfway for even browning.
If you want, add butter or oil for extra flavor. It's a quick and easy way to enjoy toast!
How Do You Toast Bread Without Making It Crispy?
To toast bread without making it crispy, lower the temperature to between 375°F and 390°F.
Opt for thicker slices, as they'll hold moisture better. Limit your cooking time to about 2-3 minutes, keeping a close eye to avoid over-toasting.
You can also spread a thin layer of butter or oil on one side to help retain moisture. Flipping the bread halfway through guarantees even heating while keeping that soft texture you want.
Why Is My Air Fryer Toast so Dry?
Imagine a desert where moisture's a rare treasure; that's what your toast might be like if it's dry.
If your air fryer toast turns out parched, it could be due to stale bread, high cooking temperatures, or neglecting fats like butter.
Overcrowding the basket can also lead to uneven results.
To rescue your toast, lower the heat, shorten the cooking time, or add a flavorful spread to restore that much-needed moisture.
Conclusion
Toasting bread in an air fryer is a game-changer that'll help you achieve crunchy perfection in no time. With minimal effort and a few simple steps, you can elevate your breakfast or snack. So, don't hesitate to experiment with toppings and serve it up however you like. Remember, the sky's the limit when it comes to creativity in the kitchen! Enjoy your perfectly toasted bread and savor every bite. Happy toasting!
How-To Guides
How to Use an Air Fryer Like a Pro: Beginner’s Step-by-Step Guide
On your journey to mastering air frying, discover essential tips and tricks that will elevate your cooking game in ways you never imagined!
To use an air fryer like a pro, start by setting it up on a flat surface and familiarizing yourself with the controls. Prepare your ingredients by cutting them into uniform sizes for even cooking and marinating meats as needed. Preheat the air fryer to 350°F-400°F for about 3-5 minutes. When cooking, coat foods lightly with oil and avoid overcrowding the basket for optimal air circulation. Always monitor cooking times, as you'll need less time compared to traditional methods. Finally, remember to clean it after use for better performance. There's so much more to explore about perfecting your air frying skills!
Key Takeaways
- Set up your air fryer on a stable surface, ensuring all parts are properly assembled according to the manual for optimal performance.
- Prepare ingredients by cutting them into uniform sizes and marinating proteins to enhance flavor and ensure even cooking.
- Preheat the air fryer to the recommended temperature for even cooking and improved texture, monitoring the digital display for completion.
- Use proper cooking techniques, including shaking the basket, adjusting cooking times, and lightly coating fresh foods with oil for best results.
- Maintain safety by keeping the air fryer away from children, using oven mitts, and regularly cleaning to prevent grease buildup and ensure longevity.
Setting Up the Air Fryer
Setting up your air fryer is a straightforward process that lays the foundation for delicious meals.
First, plug the cord into a wall outlet and ensure your air fryer sits on a flat, stable surface. Check for any accessories, like the frying basket and grate, and make sure they're properly assembled.
Next, read the instruction manual to get familiar with the specific features and controls of your model. Pay particular attention to the control panel, noting the temperature and timer dials. A good understanding of temperature guidelines will help you select the right settings for different foods.
This knowledge will make your cooking experience smoother and more enjoyable. Remember, a well-set air fryer leads to perfectly cooked food, so take a moment to get everything ready before you dive into your recipe!
Preparing Ingredients
Now that your air fryer is set up and ready to go, it's time to prepare your ingredients for cooking.
Start by cutting your food into uniform sizes for even cooking; think fries or wedges for potatoes and bite-sized pieces for chicken. Remember to clean and prep shrimp, leaving them whole or cutting as per your recipe.
For seasoning, mix salt and spices with a bit of oil to keep them from blowing away. Marinate chicken in a buttermilk and hot sauce mix for at least 15 minutes. Cooking with an air fryer allows for a healthier cooking option as it requires minimal or no oil.
When coating, toss chicken in breadcrumbs or cornflakes, and don't forget to wrap jalapeño poppers with bacon.
Finally, arrange everything in an even layer in the air fryer basket, leaving space for hot air circulation.
Preheating and Settings
Preheating your air fryer is crucial for achieving perfectly cooked meals. Start by checking your manual for specific preheating instructions tailored to your model. If your air fryer has a preheat function, use it by selecting the appropriate setting or programming the cook time. Typically, you'll want to preheat between 350°F to 400°F for about 3-5 minutes. Keep an eye on the digital display—many models will beep when preheating is complete. Avoid overheating, as this can lead to burned food. Proper preheating ensures even cooking and enhances the overall texture and flavor of your air-fried dishes.
Cooking Techniques
To achieve deliciously crispy meals in your air fryer, it's essential to master various cooking techniques.
Start by cutting vegetables and potatoes into smaller pieces for even browning. Pat fresh foods dry and coat them lightly with oil—about one tablespoon per kilogram. For frozen foods, you can skip the oil.
When cooking meat, dry the skin and apply a thin layer of oil for crispiness. Use the perforated basket for airflow and shake it once or twice during cooking. This will help ensure that you achieve optimal cooking results by allowing the hot air to circulate effectively.
Adjust cooking times by reducing them by 20% compared to conventional recipes. Remember to check doneness and flip items midway for balanced crispness.
Lastly, lightly spritz oil for that extra-crispy exterior and ensure proper basket placement for airflow.
Safety Precautions
Mastering cooking techniques in your air fryer is only one part of the process; keeping safety in mind is just as important.
Always place your air fryer on a heat-resistant surface and maintain at least 5 inches of space from walls or other objects. While it's cooking, avoid touching anything except the handle—you can use oven mitts if needed. Be aware that certain air fryer parts can reach temperatures that cause burns within seconds, so always handle with care.
Keep it out of reach of kids and pets until it's cool. Always plug it into a grounded outlet and unplug it after use to prevent accidental start-ups.
Remember to avoid overcrowding the basket and never use metal utensils. If you notice strange smells or sounds, unplug the fryer immediately to check for issues.
Stay safe and enjoy your cooking!
Post-Cooking Maintenance
Once you've finished cooking with your air fryer, it's essential to prioritize maintenance to keep it in top shape.
First, unplug the air fryer and let it cool completely. Remove the basket, pan, or tray, and wash them with warm, soapy water. For tougher messes, soak them for 10-15 minutes.
Wipe the bottom chamber with a damp cloth and ensure all parts are dry before reassembling. For deep cleaning, fill the basket with a cup of water and run the fryer at a high setting for a few minutes. Regular cleaning is crucial to maintain appliance longevity and ensure optimal performance.
Don't forget to clean the heating element with a soft brush. Regularly clean the air fryer to prevent grease buildup and make your cooking experience smoother.
Frequently Asked Questions
Can I Use Aluminum Foil in the Air Fryer?
Yes, you can use aluminum foil in your air fryer, but with some precautions.
Make sure the foil doesn't cover all the holes in the basket to allow proper airflow. Weigh it down to prevent it from blowing around while cooking.
Avoid placing it at the bottom of the fryer, and be cautious with acidic foods, as they can react with the foil.
Using foil can help reduce sticking and make cleanup easier.
What Types of Food Are Best for Air Frying?
When you're air frying, focus on proteins like chicken, pork, and salmon for quick, flavorful meals.
Don't forget vegetables like potatoes, broccoli, and cauliflower; they turn out perfectly crispy.
Seafood like shrimp and crab works well too, as does tofu for a meat alternative.
You can even whip up omelets and muffins, maximizing versatility.
Experiment with different foods, and you'll discover just how delicious air frying can be!
How Do I Know When Food Is Done Cooking?
To know when your food's done cooking, rely on visual cues and cooking times. While a golden brown color might suggest doneness, it's not always reliable.
Use a food thermometer for accuracy, especially with meat; aim for 165°F for poultry and 145°F for fish.
Check halfway through cooking, and if it's not ready, continue in 5-minute increments.
Remember to shake or flip food as needed for even cooking!
Can I Cook Multiple Items at Once?
Yes, you can cook multiple items at once in your air fryer, but you'll need to choose foods with similar cooking times and temperatures.
Cut everything into uniform sizes and avoid overcrowding the basket to ensure even cooking.
You might need to adjust the cooking time and temperature slightly, so keep an eye on your food and shake the basket occasionally for even browning.
With practice, you'll master cooking a variety of dishes together!
Do I Need to Adjust Cooking Times for Different Air Fryer Models?
Yes, you absolutely need to adjust cooking times for different air fryer models.
Since wattage and size vary, higher wattage models will cook your food faster than lower wattage ones. Similarly, larger air fryers typically take longer than smaller, compact models.
Always check your specific model's guidelines, and feel free to reduce cooking time by 20-30% if adapting from traditional oven recipes.
Monitoring your food closely will help ensure it's cooked perfectly every time.
Conclusion
Now that you've mastered the basics of using an air fryer, you're ready to whip up delicious, healthier meals with confidence. Remember to set it up properly, prep your ingredients, and adjust the settings as needed. Experiment with different cooking techniques, and don't forget to follow safety precautions. With a little practice, you'll be air frying like a pro in no time. Enjoy the tasty results and the convenience that comes with this amazing kitchen gadget!
How-To Guides
How to Reheat Wings in Air Fryer: Crisp Up Leftovers in Minutes!
Learn the secret to reviving leftover wings in an air fryer for that perfect crispy texture—your taste buds will thank you!
To reheat wings in an air fryer, preheat it to 375°F (190°C). Arrange your wings in a single layer in the basket to avoid overcrowding. Heat them for about 5-6 minutes, flipping halfway through to guarantee even crisping. Use a food thermometer to check that the internal temperature reaches at least 165°F (74°C). For extra moisture, consider brushing the wings with oil or melted butter before cooking. This method brings back the delicious crispy texture and juicy flavor of your leftovers in just minutes. Stick around for more tips to make the most of your air-fried delights!
Key Takeaways
- Preheat the air fryer to 375°F (190°C) for optimal crispiness before adding wings.
- Arrange wings in a single layer to avoid overcrowding and ensure even heating.
- Heat wings for 5-6 minutes, flipping halfway to achieve a uniform crisp.
- Check the internal temperature with a thermometer; it should reach at least 165°F (74°C).
- Optionally, brush wings with oil or melted butter to enhance moisture and flavor.
Best Methods for Reheating Wings
When you want to enjoy leftover wings, using an air fryer is the best method to bring them back to life. This cooking technique preserves the crispy texture while ensuring your sauced chicken wings remain juicy.
Start by preheating your air fryer to 375°F (190°C) for ideal results. Arrange the wings in a single layer to avoid overcrowding, which helps with even reheating. The cooking time is about 5-6 minutes, and don't forget to flip or shake them halfway through.
For sauced wings, consider using a small air fryer pan or lining the basket with tin foil to prevent sticking. Always check the internal temperature, making sure it reaches at least 165°F (74°C) for safe consumption.
Enjoy your revitalized wings!
Steps to Reheat in Air Fryer
To reheat your wings in an air fryer effectively, start by preheating the appliance to 375°F (190°C). Next, arrange the wings in a single layer in the air fryer basket for even cooking. Avoid overcrowding; you might need to reheat chicken wings in batches. Cook for 5-6 minutes, flipping or shaking them halfway to achieve that crispy texture.
Check the internal temperature at the 5-minute mark with a food thermometer, confirming it reaches 165°F (74°C) for safety. For added moisture, consider lightly brushing the wings with oil or melted butter before reheating.
Step | Action |
---|---|
1. Preheat | Set to 375°F (190°C) |
2. Arrange | Place wings in a single layer |
3. Cook | Heat for 5-6 minutes |
4. Check temperature | Confirm it reaches 165°F (74°C) |
Tips for Moist and Crispy Wings
For perfectly moist and crispy wings, it's essential to start with a well-preheated air fryer at 360°F (182°C) for 3-5 minutes; this helps lock in moisture right from the beginning.
Brush your wings lightly with cooking oil or melted butter before reheating leftover wings to enhance moisture retention.
When you're ready, arrange the wings in a single layer in the air fryer basket to guarantee even cooking and prevent drying out.
While reheating, monitor the wings closely, aiming for an internal temperature of 165°F (74°C) to maintain juiciness.
If you notice the wings browning too quickly, consider using aluminum foil to cover them, helping to retain moisture while achieving that desirable crispiness. Additionally, hula hooping can be a fun way to burn off some calories after enjoying those wings, as it burns approximately 200-400 calories per hour.
Storing Leftover Chicken Wings
Properly storing leftover chicken wings is essential if you want to enjoy them later without sacrificing their flavor and texture.
First, let the wings cool to room temperature to prevent moisture buildup inside the container. Use an airtight container or a zippered plastic bag for ideal freshness, ensuring you don't stack wings tightly to avoid sogginess.
Label the container with the date of storage to easily track freshness. If you plan to keep them longer, consider freezing wings. They can last up to 3 months in a regular freezer and up to a year in a deep freezer.
Following these steps will help you crisp up leftovers and enjoy your wings at their best later on!
Serving Suggestions for Reheated Wings
While reheating wings is a great way to enjoy leftovers, pairing them with the right sides can elevate your meal even further.
Consider serving your reheated wings with classic celery and carrot sticks for a crisp crunch that complements their flavor. A variety of dipping sauces like ranch, blue cheese, or spicy buffalo will enhance your taste experience.
For something lighter, incorporate wings into salads or wraps, adding greens and fresh vegetables for a balanced meal. If you're in the mood for comfort food, mac and cheese or French fries make excellent accompaniments.
Don't forget to garnish your reheated wings with fresh herbs like parsley or cilantro for a pop of color and extra flavor!
Frequently Asked Questions
How Do I Make Leftover Wings Crispy in an Airfryer?
To make leftover wings crispy in an air fryer, start by preheating it to 360°F (182°C) for about 3-5 minutes.
Arrange the wings in a single layer, avoiding overcrowding. Lightly spray them with cooking oil to enhance crispiness.
Air fry at 375°F (190°C) for 5-6 minutes, flipping halfway through.
Check the internal temperature to guarantee they reach 165°F (74°C) for safe eating while keeping that delicious crunch.
Enjoy your wings!
How Do You Make Leftover Wings Crispy Again?
Did you know that air fryers can reduce fat content in food by up to 75%?
To make your leftover wings crispy again, start by preheating your air fryer to 375°F.
Arrange the wings in a single layer, lightly spray them with oil, and cook for 5-6 minutes, flipping halfway through.
This method not only revives their crunch but also guarantees they're heated evenly and safely to 165°F.
Enjoy your delicious wings!
How to Make Leftover Chicken Crispy in Air Fryer?
To make leftover chicken crispy in an air fryer, start by preheating it to 375°F (190°C).
Lightly spray the basket with cooking oil to prevent sticking and enhance crispiness.
Arrange your chicken in a single layer, ensuring not to overcrowd.
Cook for about 5-6 minutes, flipping halfway through for even crisping.
For extra flavor, you can brush the chicken with a little oil or melted butter before reheating.
Enjoy your deliciously crispy chicken!
How Long Should I Reheat Wings in the Air Fryer?
You've got those delicious wings, but they're not as crispy as you'd like.
To reheat them in the air fryer, set it to 375°F (190°C). Arrange your wings in a single layer, and cook for about 5-6 minutes.
Flip or shake them halfway through for even crispiness. Remember, if they're larger or smaller, you might need to adjust the time slightly.
Always check they reach 165°F (74°C) for safety!
Conclusion
To sum up, reheating wings in an air fryer is the ultimate game-changer for enjoying leftover chicken. You'll be amazed at how quickly you can transform soggy bites into crispy, mouthwatering delights. Just follow the steps, and don't forget those handy tips for keeping them moist. With your perfectly reheated wings, you'll feel like a culinary wizard, impressing everyone at the table. So go ahead, dig in, and relish every flavorful moment!
How-To Guides
Can You Put Wax Paper in an Air Fryer? What You Must Know
Wondering if wax paper is safe for your air fryer? Discover the surprising truth that could change your cooking game forever!
You shouldn't put wax paper in an air fryer. It melts at temperatures above 200°F, which means it can ignite or contaminate your food. This not only leads to a mess but also poses a fire hazard. Instead, opt for parchment paper, which withstands higher temperatures and is safe to use. Silicone mats or aluminum foil are also good alternatives, but be cautious with airflow. Always consult your air fryer manual for the best practices. If you're curious about the safest ways to cook with these materials, there's plenty more helpful info to uncover.
Key Takeaways
- Wax paper melts at temperatures above 200°F, posing a risk of food contamination and fire hazards in air fryers.
- Manufacturers strongly advise against using wax paper due to safety concerns and potential messy cleanup.
- Safe alternatives include parchment paper, aluminum foil, and silicone mats, designed to withstand high temperatures.
- Parchment paper can handle temperatures up to 420-450°F, making it ideal for air frying without risks.
- Always consult your air fryer manual for recommended materials and best practices to ensure safe cooking.
Risks of Using Wax Paper
When considering whether to use wax paper in an air fryer, you should be aware of the risks involved. Wax paper isn't suitable for high temperatures; it melts at temperatures above 200°F (94ºC).
This melting can lead to food contamination and create a fire hazard, as the wax coating can ignite when exposed to intense heat. Additionally, using wax paper may result in a messy cleanup, with melted wax potentially dripping onto the heating element.
Manufacturers strongly advise against its use due to these safety concerns. Ultimately, the degradation of wax paper can impart unwanted flavors to your food, making it an unsuitable option for air frying.
Avoiding these risks is essential for a safe cooking experience.
Safe Alternatives for Air Fryers
If you're looking for safe alternatives to use in your air fryer, consider options that can withstand higher temperatures without compromising your cooking experience.
Parchment paper is a great choice, as it can handle temperatures up to 400°F (205°C) and helps prevent sticking.
Aluminum foil works too, but make sure it doesn't block air circulation and is weighed down to avoid floating.
For a reusable option, silicone mats are heat resistant and effective at keeping food from sticking.
Pre-fitted air fryer liners, especially perforated parchment paper, enhance airflow and simplify cleanup.
Just remember to steer clear of wax paper, as its low heat tolerance can lead to melting and potential fire hazards. Additionally, using high-quality air purifiers in your cooking space can help reduce odors and improve overall indoor air quality.
Understanding Material Properties
Understanding the properties of various cooking materials is essential for achieving the best results in your air fryer.
Wax paper isn't suitable for high heat, as it melts above 200°F, risking food contamination and fire hazards. In contrast, parchment paper boasts impressive heat resistance, handling temperatures up to 420-450°F, making it perfect for air frying.
Aluminum foil, while efficient at conducting heat and non-flammable, should be used cautiously to prevent airflow blockage.
Silicone mats provide a reusable, non-stick surface that withstands high temperatures, making them a safe alternative to wax paper.
User Experiences and Recommendations
Why take unnecessary risks with your air fryer? Many users warn against using wax paper due to its low heat tolerance, which can lead to melting and even a fire hazard. Instead, you'll find a strong recommendation for parchment paper, designed for high-temperature cooking to effectively prevent sticking. Some air fryer enthusiasts also swear by silicone liners, which are heat-safe and serve as reusable alternatives. Here's a quick comparison:
Material | Heat Tolerance | Safety Level |
---|---|---|
Wax Paper | Low | Fire Hazard |
Parchment Paper | High | Food Safety |
Silicone Liner | High | Safe & Reusable |
Adhering to safe cooking practices guarantees your meals are delicious and your appliance lasts longer!
Best Practices for Air Frying
When it comes to air frying, following best practices can make a significant difference in your cooking results. Always consult your air fryer manual to verify you're using materials that are safe to use.
Opt for parchment paper instead of wax paper, as it withstands high temperatures and won't pose a fire hazard. To prevent food from sticking in the air fryer basket, weight down any liners with food, keeping them away from the heating element.
Avoid preheating with liners, as they can fly around and create a fire risk. Regularly monitor cooking times and temperatures for different foods, and steer clear of wet batters that obstruct air circulation. Additionally, be mindful of color accuracy as it can enhance your overall cooking experience by ensuring even browning and crispness.
These tips will make cleanup easier and enhance your air frying experience!
Frequently Asked Questions
Is Wax Paper Safe in an Air Fryer?
When you're wondering if wax paper is safe in an air fryer, it's important to know it isn't.
Wax paper can melt at high temperatures, potentially contaminating your food and damaging your appliance. The wax coating poses a fire hazard, and melted wax can create a mess on the heating element.
Instead, consider using parchment paper or silicone liners for safer and more effective cooking in your air fryer.
What Is the Best Thing to Put on the Bottom of an Air Fryer?
When you're looking for the best thing to put on the bottom of your air fryer, consider using parchment paper.
It's heat-resistant and prevents sticking, making cleanup a breeze. Aluminum foil works too, but make sure it doesn't block air circulation.
If you prefer a reusable option, silicone mats are perfect for non-stick surfaces.
You might also find pre-fitted liners convenient, as they simplify cleaning while allowing proper air flow.
What Can I Line My Air Fryer Basket With?
When it comes to lining your air fryer, the options are endless, like a culinary wonderland! You can use parchment paper, which withstands high temperatures and keeps your food from sticking.
Aluminum foil works too, but make sure it doesn't block air circulation. Silicone mats are reusable and perfect for easy cleanup.
Consider pre-fitted liners with perforations for ideal air flow. Just steer clear of wax paper; it's not safe for high heat!
What Kind of Paper Can I Put in the Air Fryer?
When you're looking for paper options for your air fryer, stick to parchment paper or aluminum foil.
Parchment paper can handle high temperatures without issues, while aluminum foil works as long as it doesn't block air circulation.
Silicone mats are also great, as they're heat-resistant and reusable.
Just remember to avoid wax paper; it's not safe due to its low heat tolerance and potential fire risks.
Always check your air fryer's manual for guidance.
Conclusion
In summary, while wax paper might seem like a simple solution, its risks outweigh the rewards in your air fryer. Instead, consider safe alternatives like parchment paper or silicone mats to guarantee a successful and safe cooking experience. By understanding material properties and following best practices, you'll whip up wonderful meals without worry. So, stay savvy, skip the wax paper, and savor the scrumptious sensations your air fryer can create!
-
User Stories and Tips1 week ago
I Tried These 5 Air Fryer Hacks—You Won’t Believe the Results!
-
User Stories and Tips7 days ago
The Secret to Perfectly Crispy Fries: Real Users Share Their Air Fryer Tips
-
User Stories and Tips7 days ago
You’ll Never Cook the Same Again: How an Air Fryer Changed My Life!
-
Recipes6 days ago
How to Make Fries in Air Fryer: The Ultimate Crisp Guide
-
User Stories and Tips1 week ago
I Cooked Every Meal in an Air Fryer for a Week—Here’s What I Learned!
-
Vetted6 days ago
15 Best Smart Air Fryers With App Connectivity for Effortless Cooking in 2025
-
Vetted6 days ago
15 Best Desk Speakers of 2025 – Elevate Your Audio Experience
-
Recipes6 days ago
How to Cook Wings in Air Fryer: The Ultimate Crispy Recipe