
Using compact baskets for baking sourdough boules helps shape your loaf uniformly and adds attractive patterns for presentation. Before use, dust the basket lightly with rice or wheat flour to prevent sticking, and support your dough during proofing. Make certain your environment is warm and humid for proper fermentation. When ready, transfer the dough carefully onto a hot baking surface for a crusty finish. For tips on perfect results, keep exploring how to best prepare and bake with your basket.
Key Takeaways
- Properly prepare and flour the basket to prevent sticking and ensure easy dough release during shaping and proofing.
- Match basket size and material to your dough, supporting proper fermentation and shaping for consistent boule formation.
- Use a bench scraper and gentle tension techniques to shape the dough tautly before placing it in the basket.
- Maintain optimal proofing conditions—around 75°F with humidity—to ensure proper fermentation and oven spring.
- Transfer the dough carefully onto parchment, score, and bake with steam for a crusty, bakery-quality sourdough boule.
Why Use Compact Baskets for Sourdough Baking

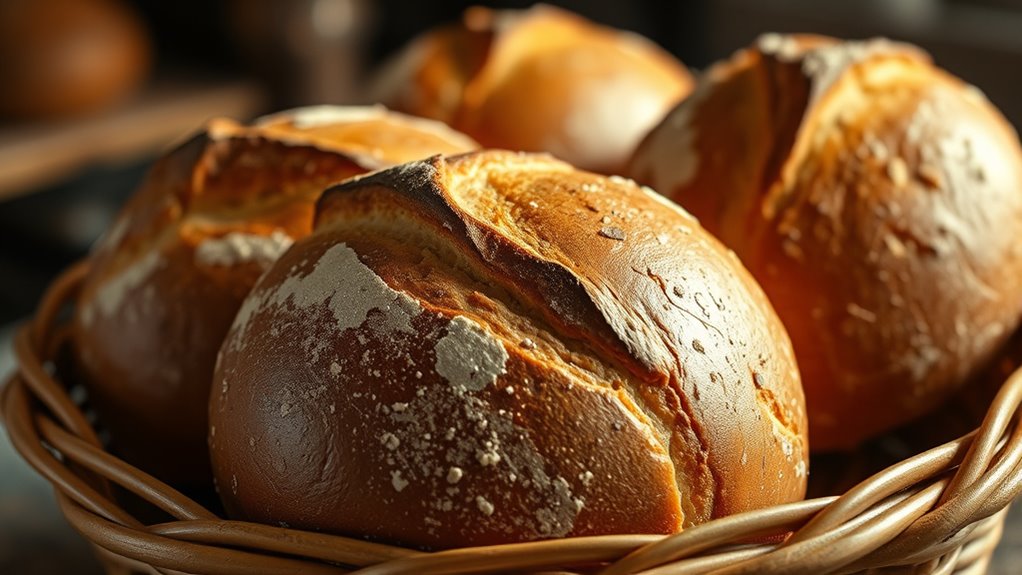
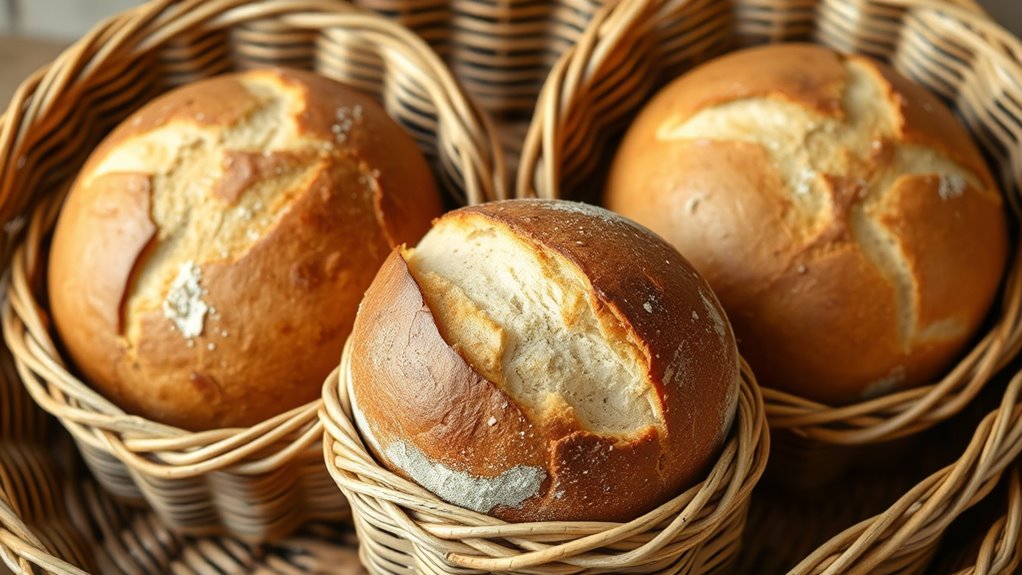
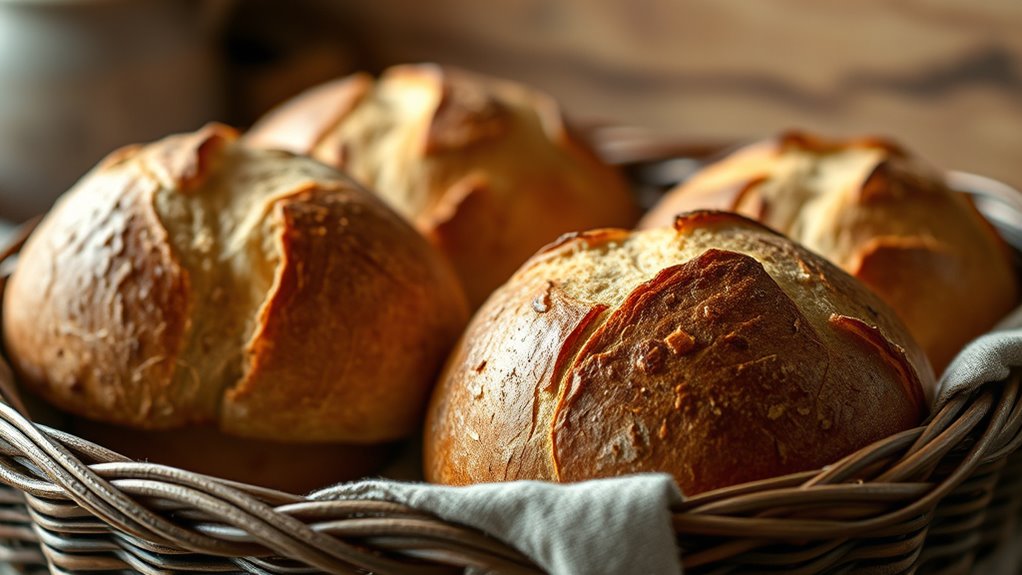
Using compact baskets for sourdough baking offers several practical benefits. They help shape your dough into a perfect boule, ensuring consistent results every time. The baskets also add an appealing touch to your bread’s presentation through their basket aesthetics, giving each loaf a professional look. Many compact baskets feature decorative patterns that transfer onto the dough’s surface, creating beautiful designs without extra effort. These patterns enhance your bread’s visual appeal, making it stand out on the table. Additionally, the snug fit of a compact basket supports the dough during proofing, encouraging even fermentation. Incorporating natural materials such as wicker or rattan can further improve the baking process and final appearance. Overall, these baskets combine functionality with visual charm, helping you produce bakery-quality sourdough with attractive, decorative crusts that impress friends and family alike.
Selecting the Right Size and Material for Your Basket
Choosing the right size and material for your basket is essential to achieve the best results in sourdough baking. Your basket materials, such as cane, wood, or silicone, influence airflow and crust development, so pick one that suits your baking style. Basket sizes should match your dough portion; a smaller basket creates a taller boule, while a larger one yields a wider loaf. Guarantee the basket is spacious enough for the dough to expand without sticking. For consistency, select materials that provide proper support and moisture regulation. Avoid overly large or small baskets that might hinder proper proofing. Additionally, proper basket preparation is crucial for achieving a well-shaped, beautifully crusted sourdough boule with ease.
Preparing Your Basket for the First Use

Before using your basket for the first time, make certain it’s clean and completely dry. Lightly dust the surface with flour to prevent your dough from sticking. Taking these simple steps helps guarantee your sourdough boules come out perfectly shaped. Additionally, understanding the importance of proper preparation in baking can improve your results and ensure consistent quality.
Clean and Dry
To make certain your basket doesn’t stick to your dough and stays in good condition, start by cleaning it thoroughly. A clean basket prevents residue buildup that can affect dough hydration and fermentation timing. After cleaning, ensure it’s completely dry before use to avoid mold or sticking issues. Using proper maintenance techniques can extend the lifespan of your basket and ensure optimal baking results.
Here are three tips:
- Use a soft brush or damp cloth to remove any dust or debris.
- Let the basket air dry completely, avoiding direct sunlight.
- Lightly dust with rice flour or fine whole wheat flour before your first use to create a non-stick surface.
Proper cleaning and drying help maintain the basket’s structure and ensure your sourdough develops a beautiful crust without sticking. This simple step supports consistent fermentation timing and dough hydration.
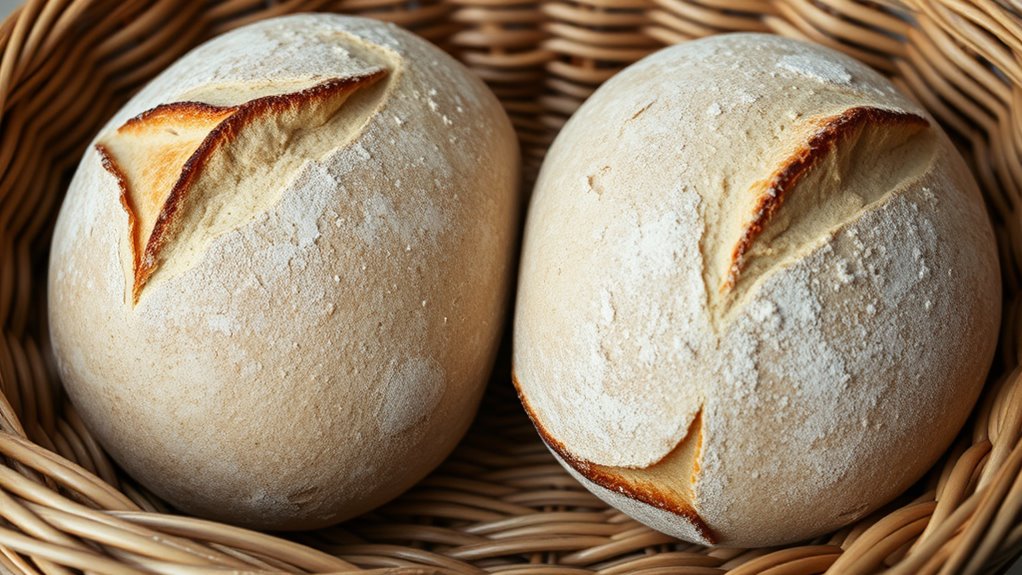
Lightly Flour Surface
Have you prepared your basket for its first use? Lightly applying flour is essential to prevent sticking and guarantee easy release of your dough. Use a fine sieve or your hands to dust the surface evenly, focusing on creating a thin, uniform layer. Proper flour application helps develop a smooth surface texture, making it easier to handle the dough without tearing. Be careful not to overdo it; too much flour can alter the crust’s appearance and texture. Aim for a light coating that covers all areas where the dough will contact the basket. This simple step sets the foundation for a beautifully shaped boule and ensures your bread comes out effortlessly once baked. Remember, a well-floured surface is key to a successful bake and aligns with the Law of Attraction by creating positive expectations for your baking process.
Prevent Sticking
When preparing your basket for its first use, applying a proper coating of flour helps prevent sticking during the shaping and baking process. To guarantee your dough releases easily, consider these steps:
- Use rice flour or a mix of rice and wheat flour, as they’re less likely to stick to high-hydration dough.
- Lightly dust the basket, focusing on areas where dough might cling, especially if your dough has high hydration levels.
- Preheat your oven to the recommended temperature, as hotter oven temperatures help set the crust faster and reduce sticking issues.
- Incorporate proper flour types, such as rice flour, which are especially effective for high-hydration doughs.
Shaping Your Boule for Optimal Results

To shape your boule for the best results, focus on creating proper dough tension to hold its shape during baking. Use a seamless flouring technique to prevent sticking and guarantee a smooth surface. Mastering these skills will give your bread an attractive crust and even crumb. Additionally, understanding the significance of dough elasticity helps in achieving a well-formed boule that maintains its shape through the baking process.
Proper Dough Tension
Achieving proper dough tension is essential for shaping your boule so it holds its structure during baking. To do this effectively, focus on managing dough elasticity and fermentation timing. Well-developed dough elasticity allows you to shape with control, preventing it from tearing or losing shape. Proper fermentation timing ensures the dough is at its peak stretchiness, not over- or under-proofed. Additionally, understanding the importance of color accuracy can help you assess the dough’s readiness by its appearance, ensuring optimal results. Here are key tips: 1. Gently tighten the surface by pulling the dough taut during shaping, creating surface tension. 2. Use a bench scraper to assist in tightening the dough without overworking it. 3. Allow enough fermentation time for the dough to develop elasticity before shaping, ensuring it’s neither too slack nor too tight. Mastering tension results in a beautifully shaped boule that maintains its form during baking.
Seamless Flouring Technique
A seamless flour coating during shaping helps create a smooth, taut surface on your boule, which promotes even oven spring and a beautiful crust. To achieve this, apply a light, even layer of flour to your work surface and your hands before shaping. When transferring the dough into your basket, guarantee you don’t over-flour it, as excess can hinder proper expansion. Proper flour application prevents sticking and helps maintain the dough’s tension, resulting in a cleaner, more professional-looking boule. Remember to regularly maintain your basket by removing residual flour after each use and occasionally re-season it if needed. This upkeep keeps the basket in top condition, ensuring consistent results and easy release every time. A seamless flour technique makes shaping more efficient and your final loaf more polished. Supporting proper fermentation is also vital to achieving the best oven spring and crust quality.
Achieving the Perfect Proofing Environment
Creating the ideal proofing environment is essential for developing the perfect sourdough boule. A proper environment promotes optimal dough fermentation, ensuring your bread develops flavor and structure. To enhance this, focus on these key factors:
- Maintain consistent temperature—around 75°F (24°C)—to encourage steady fermentation and maximize oven spring.
- Use humidity to prevent drying out, either by covering your dough with a damp cloth or proofing in a humid container.
- Allow enough time for proofing; under-proofed dough won’t rise well, while over-proofed dough can collapse, affecting oven spring.
- Understanding the ancient cultivation of sourdough ingredients can help in selecting traditional starters that enhance fermentation quality.
Transferring Dough From Banneton to Oven
Before transferring your dough from the banneton to the oven, gently prepare a piece of parchment paper or a baker’s peel. This step helps prevent sticking and guarantees a smooth transfer. Check your dough’s hydration level—well-hydrated dough is more delicate but yields a better crust. Carefully invert the banneton onto the parchment or peel, supporting the sides to keep its shape. Make sure your oven is fully preheated to the right temperature before moving the dough inside; this guarantees ideal oven spring and crust development. Handle the dough gently to maintain its structure, especially if it’s highly hydrated. Once transferred, score the surface if desired, then slide it into the preheated oven to begin baking.
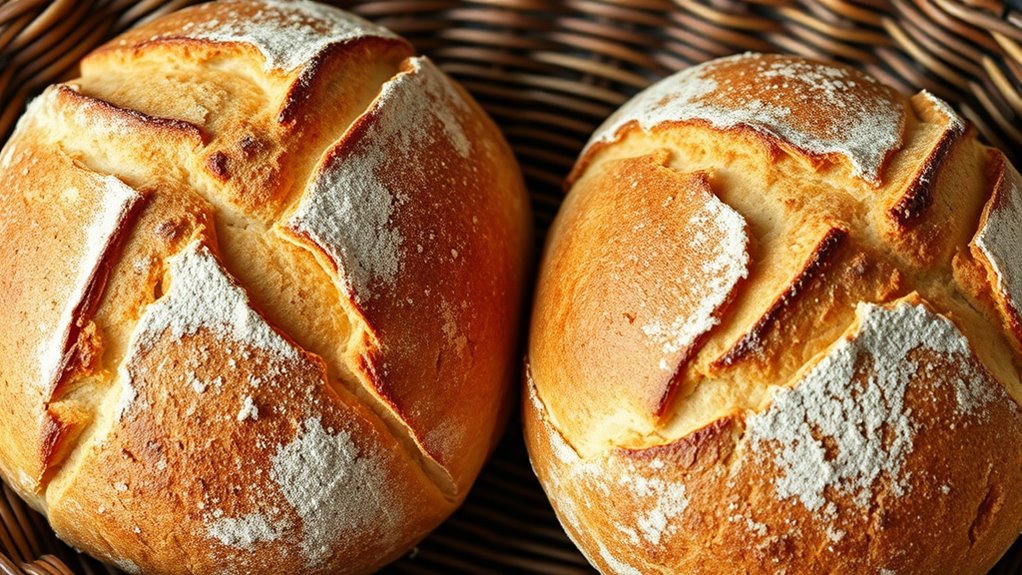
Baking Techniques for a Beautiful Crust

To achieve a stunning, crusty exterior on your sourdough boule, focus on controlling steam during baking. Steam keeps the crust moist initially, allowing it to expand fully before setting. Here are key techniques:
- Use oven steaming: Place a tray with water at the bottom of your oven to generate steam during the first 15–20 minutes. This creates the ideal environment for a crispy crust.
- Proper bread scoring: Make clean, confident cuts with a sharp blade to guide the dough’s expansion and develop an attractive pattern. Proper scoring prevents uneven tearing.
- Maintain high heat: Bake at a temperature of around 450°F (230°C) to promote caramelization and a deep, golden crust. Adjust oven settings to optimize steam retention.
Mastering these techniques results in a beautiful, bakery-quality crust.
Cooling and Storing Your Baked Boule

Once you’ve taken your sourdough boule out of the oven, proper cooling is essential to preserve its crust and crumb. Let it cool on a wire rack, avoiding the temptation to cut into it immediately, which can collapse the structure. Proper cooling allows the dough’s hydration to settle evenly, ensuring the crumb remains airy and moist. Be mindful of fermentation timing during baking; over-proofed dough may become dense if cooled too quickly. For storage, wrap the cooled boule loosely in a cloth or paper bag to maintain its crust while preventing excess moisture buildup. If you plan to keep it longer, store it in a paper bag at room temperature for up to two days or freeze slices for later use. Proper cooling and storage keep your sourdough fresh and delicious.
Troubleshooting Common Issues With Compact Basket Baking
Using a compact basket can sometimes lead to issues like uneven shaping or a dense crumb, but most problems stem from small adjustments in technique. Overproofing issues and uneven fermentation are common culprits. To troubleshoot:
- Ensure proper fermentation timing—don’t let the dough overproof, which causes collapse and dense texture.
- Adjust proofing environment—warm spots accelerate fermentation unevenly, so find a consistent, moderate temperature.
- Improve shaping technique—firmly shape your boule to maintain even expansion and prevent uneven fermentation during proofing.
Frequently Asked Questions
Can I Use a Compact Basket for Gluten-Free Sourdough?
You can use a compact basket for gluten-free sourdough, but check basket compatibility first. Gluten-free alternatives often have different textures and stickiness, so verify the basket’s material and size suit your dough. Non-stick or linen-lined baskets work well to prevent sticking. Be prepared to adjust your technique slightly, but with the right basket, you’ll get a beautiful crust and a perfect rise, even with gluten-free sourdough.
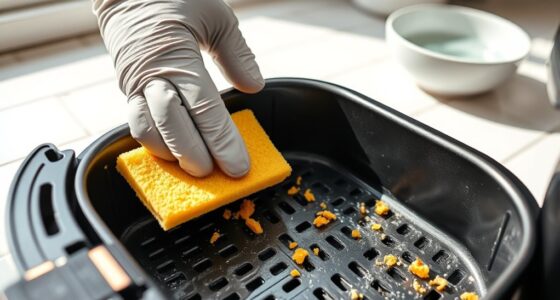
How Do I Clean and Maintain My Compact Bread Basket?
Imagine your basket’s secrets are hiding in plain sight—are you aware of the best cleaning techniques? To keep your basket in top shape, you should regularly brush out flour and debris, then wash with warm water and mild soap. Avoid soaking, and let it air dry completely. Proper basket maintenance isn’t just routine; it’s your key to perfect baking results, preserving your basket’s longevity and flavor.
What Are Common Mistakes When Using Compact Baskets?
When using compact baskets, you often make mistakes like overproofing dough, which can cause it to stick or lose shape, or improper basket preparation, such as not flouring it enough. You might also rush the process or forget to handle the dough gently. To avoid these, guarantee proper flouring, watch proofing times, and handle the dough carefully. These steps help you achieve better, more professional-looking baked bread.
Are There Alternative Materials for Compact Sourdough Baskets?
Did you know that around 60% of bakers experiment with different basket options? When exploring alternative materials, you can consider silicone, linen, or silicone-lined proofing bowls. These options offer unique benefits like easy cleanup or better airflow. So, if you’re looking for alternative materials for your sourdough baskets, these choices can enhance your baking experience and help you achieve perfect crusts and shapes every time.
How Does Basket Size Affect Bread Rise and Texture?
You’ll notice that basket size directly impacts dough expansion and crust development. A larger basket gives your dough more room to rise, resulting in a more open crumb, while a smaller basket restricts expansion, leading to a denser texture. Smaller baskets also promote a thicker crust due to tighter dough contact, whereas larger ones encourage a thinner, crisper crust. Choose the basket size based on your desired bread texture and appearance.
Conclusion
Using a compact basket can improve your sourdough’s shape and crust, making every bake more satisfying. Did you know that properly proofed dough in a basket results in 30% better oven spring? With the right preparation and techniques, you’ll consistently achieve bakery-quality boules at home. So, embrace your compact basket and enjoy the art of perfect sourdough baking—your crusty, beautifully shaped loaves are just a few steps away.