Connect with us

Recipes

Air Fry Frozen Fish Cakes: Simple Steps for Crispy Goodness

You won’t believe how easy it is to achieve crispy, golden fish cakes in your air fryer—discover the simple steps and tips inside!

Published

on

crispy air fried fish cakes

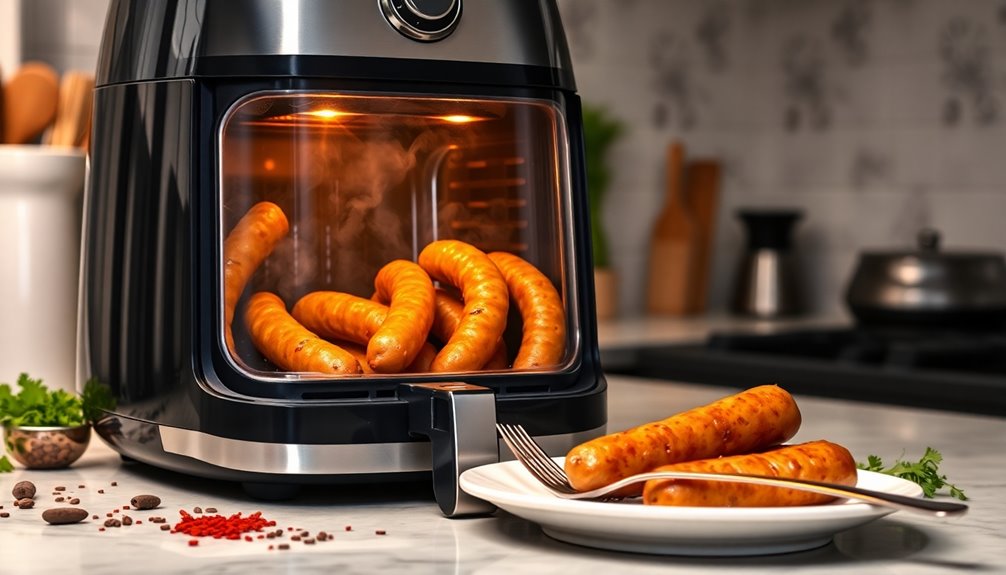
Air frying frozen fish cakes is an easy way to get crispy, golden goodness. Start by preheating your air fryer to 180°C (360°F). Place the frozen fish cakes in a single layer, ensuring they're not overcrowded. Cook for 8-10 minutes, flipping them halfway to achieve even crispiness. Make sure they reach an internal temperature of at least 63°C (145°F) for safety. Serve them up with tartar sauce or a zesty salad for a delicious meal. You'll find helpful tips on variations and storage techniques as you explore more about perfecting your air-fried fish cakes!

Key Takeaways

  • Preheat your air fryer to 180°C (360°F) for optimal cooking results.
  • Arrange frozen fish cakes in a single layer for even cooking.
  • Cook for 8-10 minutes, flipping halfway for a golden brown exterior.
  • Ensure the internal temperature reaches at least 63°C (145°F) for safety.
  • Serve with tartar sauce, lemon wedges, or a fresh salad for added flavor.

Overview of Air Fryer Fish Cakes

crispy flavorful fish cakes

When you're looking for a quick and healthier way to enjoy fish cakes, air frying is the perfect solution. Using an air fryer allows you to achieve a crispy texture without the excess oil found in traditional frying methods.

Plus, cooking frozen fish cakes requires no defrosting and takes just 8-10 minutes at 180°C/360°F. For ideal results, place the fish cakes in a single layer in the air fryer basket, ensuring even cooking and preventing sogginess.

Don't forget to flip them halfway through for that uniform crispiness, aiming for a golden brown exterior.

These air fryer fish cakes make a fantastic appetizer or snack and pair beautifully with various dipping sauces like tartar sauce or sweet chili mayo, making them a health alternative you'll love.

Essential Ingredients

key components for success

When air frying frozen fish cakes, the key ingredients typically include the cakes themselves, which are made of fish, breadcrumbs, and seasonings.

You can also explore variations by trying different brands or adding your favorite dipping sauces for extra flavor.

Key Ingredients Overview

To create delicious frozen fish cakes, you'll need a few essential ingredients that come together to deliver great flavor and texture.

Start with quality fish fillets, such as cod or salmon, as your primary protein source. For that irresistible crunch, use panko breadcrumbs, and don't forget eggs to bind everything together. Fresh herbs like parsley or cilantro add not only taste but also nutritional benefits.

If you're feeling adventurous, incorporate crab meat or even canned fish for variety. Sweet potatoes can enhance the moisture and sweetness of your cakes.

Finally, a light spritz of cooking spray before air frying guarantees a crispy finish. Additionally, consider adding anti-inflammatory ingredients to your fish cakes, as they can provide health benefits alongside flavor. This recipe makes a satisfying and nutritious meal that your whole family will enjoy!

Variations and Substitutions

If you're looking to switch things up with your frozen fish cakes, there are plenty of variations and substitutions you can try. Different types of fish, like salmon or tuna, can make a great addition to your air fryer recipes, offering unique flavor profiles.

For a healthier option, substitute traditional breadcrumbs with almond flour or crushed cornflakes, maintaining the right thickness and size. To enhance flavor, mix in fresh herbs or chopped jalapeños for a kick.

If you're seeking a vegetarian alternative, use shredded vegetables and chickpeas for a satisfying plant-based fish cake. You can also incorporate ingredients like Dijon mustard or lemon zest for a tangy twist, making your fish cakes a delicious main course.

Cooking Instructions

cooking step by step guide

To get the best results with your frozen fish cakes, start by preheating your air fryer to 180°C/360°F.

Cook them for 8-10 minutes, flipping them halfway to guarantee they crisp up nicely.

Remember to keep an eye on them, as cooking times can vary by air fryer model.

Optimal Cooking Temperature

Achieving the perfect crispy texture for frozen fish cakes requires an ideal cooking temperature of 180°C (360°F).

To start, preheat your air fryer for about 2 minutes. This guarantees your Air Fryer Fish Cakes cook evenly.

Cook them for 8-10 minutes, flipping halfway through to promote even cooking. Keep an eye on them towards the end to prevent overcooking and maintain that golden brown color.

Remember, the internal temperature should reach at least 63°C (145°F) for safe consumption.

Monitoring the cooking process is essential to achieving the desired crispy texture while making sure your meal is both delicious and safe to eat.

Enjoy your perfectly cooked fish cakes!

Cooking Time Guidelines

After preheating your air fryer to 180°C (360°F), it's time to focus on the cooking time for your frozen fish cakes. Cook them directly from the freezer without defrosting for about 8-10 minutes. Start by cooking for 4 minutes, then flip the fish cakes using a spoon and continue for another 4 minutes. Monitor them closely to achieve that perfect crispy, golden brown texture. Guarantee they're not stacked in the basket to maximize crispiness.

Cooking Time Action Notes
0-4 minutes Initial cook Start with the frozen cakes
4 minutes Flip Use a spoon to turn them
4-8 minutes Continue cooking Check for crispiness
8-10 minutes Serve Enjoy your crispy fish cakes!

Preparation Steps

preparation steps outlined clearly

Once you've cooked your fish until it's flaky, let it cool before you start preparing the cakes.

Flake the cooled fish and combine it in a mixing bowl with breadcrumbs, fresh herbs, eggs, and seasonings to create your fish mixture. This easy recipe allows you to customize flavors to your liking.

Form the mixture into evenly shaped cakes, ensuring they're consistent for even cook time. To help them hold their shape during air frying, refrigerate the formed fish cakes for at least 15 minutes.

When you're ready to cook, preheat your air fryer to 180°C/360°F. Place the chilled cakes in the basket without stacking them, allowing for proper air circulation—perfect for a great appetizer!

Serving Suggestions

delicious meal presentation ideas

To elevate your air-fried fish cakes, serve them with a side of tartar sauce or spicy mayo for a creamy, flavorful contrast.

You can also pair the cakes with a light salad dressed in vinaigrette, which complements their richness and adds freshness to your meal.

Don't forget to include lemon wedges on the side; a squeeze of fresh lemon juice brightens up the fish cakes beautifully.

For a heartier option, consider mashed potatoes, roasted vegetables, or sweet potato fries, providing a satisfying side dish.

Finally, garnish your fish cakes with freshly chopped herbs like parsley or dill to enhance their flavor profile and add a lovely touch to your plate.

Enjoy your crispy creation!

Recipe Variations

recipe modification ideas suggested

Elevating your air-fried fish cakes doesn't stop at serving suggestions; there are plenty of recipe variations to explore. You can easily switch up your fishcake recipe by using different types of fish like tuna, salmon, or crab to keep fish exciting.

For a super easy twist, combine the fish with shredded zucchini or mashed potatoes, which enhances texture and adds veggies. If you're avoiding gluten, swap in gluten-free breadcrumbs or almond flour for a crispy coating.

Don't forget to add spices like cayenne pepper or fresh herbs such as dill and parsley to elevate the flavor. Experimenting with canned fish options is another convenient way to make delicious fish cakes using frozen foods you already have!

Storage and Reheating Tips

food preservation and warming

Storing and reheating your air-fried fish cakes properly can make a big difference in taste and texture.

To maintain freshness, keep leftover fish cakes in an airtight container in the refrigerator for up to 3-5 days. For longer storage, freeze uncooked fish cakes in airtight containers or Ziploc bags for up to 3 months, laying them flat to prevent sticking.

When you're ready to enjoy them, reheat refrigerated fish cakes in the air fryer at 375°F (190°C) for about 5 minutes for ideal texture.

If reheating frozen fish cakes, cook them directly from frozen at 360°F (180°C) for an additional 2-3 minutes, ensuring they reach a safe internal temperature to avoid spoilage.

Enjoy your delicious fish cakes!

Frequently Asked Questions

How to Cook Fish Cakes From Frozen in Air Fryer?

To cook fish cakes from frozen in an air fryer, first preheat your air fryer to 180°C (360°F).

Place the frozen fish cakes in the basket without stacking them, ensuring they've space for air circulation.

Cook them for 8-10 minutes, flipping halfway through to achieve an even crispiness.

Keep an eye on them, as cooking times can vary.

Once they're golden brown, serve immediately for the best taste and texture!

How Do You Cook Frozen Fish Patties in an Air Fryer?

Cooking frozen fish patties in an air fryer is as easy as pie!

First, preheat your air fryer to 180°C/360°F.

Then, toss the frozen patties into the basket.

Cook them for 8-10 minutes, flipping halfway through for that golden, crispy finish.

No need to defrost or add oil—just let the circulating air work its magic.

Keep an eye on them to prevent overcooking, and enjoy them hot with your favorite dipping sauce!

How to Cook Fishcakes From Frozen?

To cook fishcakes from frozen, start by preheating your air fryer to 180°C (360°F).

Place the frozen fishcakes in the basket without stacking them for even cooking.

Set the timer for 4 minutes, then flip them using a spoon.

Cook for another 4 minutes until they're golden brown and crispy.

Keep an eye on them to avoid overcooking, as times can vary based on thickness and brand.

Enjoy your delicious fishcakes!

How to Air Fry Frozen Fish Balls?

To air fry frozen fish balls, start by preheating your air fryer to 180°C (360°F).

Place the fish balls in the basket in a single layer, ensuring they're not stacked for even cooking.

Cook them for 8-10 minutes, flipping halfway through at the 4-minute mark.

Keep an eye on them to achieve that golden brown, crispy texture.

No oil's needed, as the hot air circulation will give you a healthier finish.

Enjoy!

Conclusion

Air frying frozen fish cakes is a game-changer for busy weeknights! You might think they won't turn out crispy, but with the right temperature and timing, you'll get golden, crunchy bites every time. Plus, it's a healthier option than deep frying, so you can indulge without the guilt. So why wait? Grab your air fryer, follow these simple steps, and enjoy delicious fish cakes that'll impress your family and friends in no time!

Recipes

How to Cook Asparagus in Air Fryer: Perfectly Roasted Every Time

Discover the secrets to perfectly roasted asparagus in your air fryer that will leave you craving more—your taste buds will thank you!

Published

on

air fryer asparagus recipe

To cook asparagus in your air fryer perfectly, start by trimming the tough ends and rinsing the spears. Pat them dry, then toss with olive oil, garlic powder, salt, and pepper. Preheat your air fryer to 380°F to 400°F, then arrange the asparagus in a single layer. Cook thin spears for 5-6 minutes and thicker ones for 7-8 minutes, flipping them halfway through for even roasting. Aim for that vibrant green color and crisp-tender texture. Keep an eye on them to adjust cooking time as needed. There's more to master for your air frying adventures!

Key Takeaways

  • Trim tough ends of asparagus and rinse under cool water before cooking for better texture and cleanliness.
  • Preheat the air fryer to 380°F to 400°F for optimal cooking results.
  • Season asparagus with olive oil, garlic powder, sea salt, and black pepper for enhanced flavor.
  • Cook medium-thick spears for 5-7 minutes, tossing halfway for even roasting.
  • Monitor cooking closely, adjusting time every 2 minutes for desired tenderness and crispness.

Preparing the Asparagus

prepare fresh asparagus carefully

Preparing asparagus starts with trimming the spears to remove tough ends. You'll want to cut off the bottom 1/2 to 1 inch of each spear, snapping or using a knife to eliminate any hard, woody parts. This ensures only the tender sections are cooked, giving you the best texture and flavor.

Next, rinse the asparagus under cool water to remove any dirt or debris, then pat them dry with a clean towel. This step is crucial, as clean asparagus cooks more evenly and prevents sogginess. Additionally, remember that cooking times vary by thickness, so selecting medium-thick spears can help prevent overcooking.

Finally, when selecting fresh asparagus, choose firm, bright green stalks without any signs of wilting or damage. Aim for spears of similar size for even cooking, ensuring a delightful dish every time.

Seasoning the Asparagus

seasoned asparagus preparation steps

After you've trimmed and rinsed the asparagus, it's time to enhance its flavor with seasoning. Start by patting the asparagus dry, then drizzle it with olive oil. For a basic seasoning, mix garlic powder, sea salt, and black pepper. If you prefer a simpler option, garlic salt works well too. Toss the asparagus until it's well-coated, and consider adding lemon juice or zest for a fresh twist. Parmesan cheese can also elevate the flavor.

Remember, you can experiment with different oils like avocado or vegetable oil. If you're prepping ahead, seasonings can be applied in advance. Additionally, make sure to trim the woody ends of the asparagus, as this helps improve texture. Lastly, ensure even seasoning by tossing halfway through cooking and keeping the asparagus in a single layer. Enjoy your perfectly seasoned asparagus!

Setting Up the Air Fryer

air fryer preparation guide

To set up your air fryer effectively, start by removing all packaging and washing the cooking basket and tray in warm, soapy water.

Once they're clean and dry, reassemble them and insert them back into the air fryer. If you're working with asparagus, trim any excess ends before you proceed.

Next, read the user manual to familiarize yourself with the controls; understanding the temperature and time settings is crucial. Warranty obligations assigned to Grip Group of Companies, Inc. will ensure that consumers continue to receive support for their purchased products.

Ensure the basket is securely attached—this may vary by model.

Finally, plug in the air fryer and preheat it for a few minutes, allowing it to reach the desired temperature, typically around 400°F for asparagus, before you begin cooking.

Cooking the Asparagus

cooking fresh asparagus tips

Now that you've got your air fryer set up and the asparagus prepped, it's time to cook.

Preheat your air fryer to 380°F to 400°F. Place the asparagus spears in the basket, ensuring they're in an even layer with some space between them for optimal cooking.

If your asparagus is thin, cook for 5 to 6 minutes. For thicker spears, aim for 7 to 8 minutes. Remember to toss the asparagus halfway through to ensure even roasting. Cooking in an air fryer allows for a crispy texture without the sogginess that can occur with traditional methods.

Keep an eye on them; you're looking for a crisp-tender texture and a vibrant green color.

Once they're done, carefully remove them from the basket, and get ready to enjoy your perfectly roasted asparagus!

Monitoring and Adjusting

tracking and modifying performance

While cooking asparagus in the air fryer, it's crucial to monitor the spears closely to achieve the perfect texture.

For thin asparagus, cook for 3-4 minutes at 390°F, and check at 5-6 minutes at 400°F, as they can overcook quickly. Medium-thick asparagus typically takes 5-7 minutes at 390°F, while thicker spears may need 7-8 minutes at 400°F. Additionally, the standard bunch of asparagus typically weighs about 1 pound, so adjust the quantity and cooking time accordingly. Always check for doneness halfway through, and adjust the time every 2 minutes until you reach your desired tenderness.

Remember to arrange the asparagus in a single layer and use tongs to turn them halfway through to ensure even cooking. If you're unsure, it's better to undercook, as asparagus continues to soften after being removed from the fryer.

Serving the Asparagus

cooking and presenting asparagus

Serving asparagus right after it's cooked keeps its delicious crisp-tender texture intact. It's best to cook only what you need, as reheated asparagus tends to lose its appeal. If you have leftovers, chop them into 1/2″ pieces for fried rice, egg scrambles, or salads. This versatile veggie can complement any meal, whether it's dinner, lunch, or breakfast. Pair it with proteins and starches to create a balanced plate. Incorporating vegetables like asparagus into meals can also support healthy eating practices.

Enhance the flavor with salt, pepper, or garlic salt. A drizzle of balsamic glaze or a sprinkle of Parmesan cheese adds a tasty twist. Don't forget a squeeze of lemon juice for brightness. Additionally, air fried asparagus is a healthy option that pairs well with grilled meats.

Enjoy your asparagus fresh for the best experience!

Frequently Asked Questions

Can I Use Frozen Asparagus in the Air Fryer?

Yes, you can use frozen asparagus in the air fryer! Just place the frozen spears directly in the basket without thawing them.

Preheat your air fryer to 400°F (204°C) for optimal results. Cook for about 10-13 minutes, depending on the thickness, and shake the basket halfway through to ensure even cooking.

Toss them with olive oil, salt, and your favorite seasonings for added flavor. Enjoy your deliciously roasted asparagus!

What Are Some Alternative Cooking Methods for Asparagus?

If you're looking for alternative cooking methods for asparagus, you've got plenty of options.

You can boil or blanch it for a quick softening, steam it to retain nutrients, or bake it for a more hands-off approach.

Grilling and sautéing add delicious flavors but require more attention.

Each method has its benefits, so experiment to find the perfect technique that suits your taste and cooking style!

How Can I Store Leftover Cooked Asparagus?

To store leftover cooked asparagus, let it cool to room temperature before placing it in an airtight container.

You can keep it in the refrigerator for up to three days. If you don't have an airtight container, wrap it in aluminum foil or a plastic bag.

If you want to store it longer, freeze the asparagus in a freezer bag, pushing out air to prevent freezer burn.

Always check for spoilage before eating.

Can I Cook Other Vegetables Alongside Asparagus in the Air Fryer?

Yes, you can cook other vegetables alongside asparagus in the air fryer, but be mindful of their cooking times and sizes.

Thin vegetables like zucchini and bell peppers can cook well with asparagus, while thicker ones will need more time.

To ensure even cooking, cut everything to similar sizes and avoid overcrowding.

Consider air frying in batches for the best results, and use compatible seasonings to enhance their flavors together.

What Are the Nutritional Benefits of Eating Asparagus?

Asparagus offers numerous nutritional benefits that you shouldn't overlook.

It's packed with antioxidants like vitamins A and E, which help protect your cells from damage. The high fiber content promotes digestive health, making it easier for you to maintain regularity.

Plus, its potassium helps lower blood pressure and supports heart health. Eating asparagus can enhance your overall well-being, making it a smart addition to your diet.

Enjoy its delicious taste and health benefits!

Conclusion

With your perfectly roasted asparagus ready, it's time to dig in! Remember, the key to success is in the prep and seasoning—don't skip those steps. Feel free to experiment with different spices or add a squeeze of lemon for extra zing. Whether you're serving it as a side dish or tossing it into a salad, you'll love how easy and delicious air-fried asparagus can be. Enjoy your tasty creation and impress your guests!

Continue Reading

Recipes

How to Cook Pork Chops in Air Fryer: Tender and Flavorful Guide

Flavorful pork chops await in your air fryer—discover the secrets to achieving perfect tenderness and taste every time. Don’t miss these essential tips!

Published

on

air fryer pork chop recipe

To cook tender and flavorful pork chops in an air fryer, start by preheating your fryer to 380°F. Choose high-quality, 1½ to 2-inch thick chops and pat them dry. Coat both sides with olive oil and season them with salt, pepper, and any spices you fancy. Arrange the chops in a single layer and cook for 10-14 minutes, flipping halfway through. Check the internal temperature to ensure it reaches 145°F. Let the chops rest for 5 minutes before serving. If you want to explore more tips and tasty variations for your pork chops, stay tuned for what's next!

Key Takeaways

  • Preheat the air fryer to 360°F to 400°F, depending on desired crispiness and chop thickness, for about 5 minutes.
  • Use fresh, high-quality pork chops, ideally 1 ½ to 2 inches thick, and coat them with oil for even cooking.
  • Season generously with a mix of salt, pepper, garlic powder, and paprika, or experiment with other flavor profiles.
  • Cook boneless chops at 400°F for 11-13 minutes, flipping halfway and checking for an internal temperature of 145°F.
  • Let the pork chops rest for 5 minutes after cooking, then serve with sides like mashed potatoes or sautéed vegetables.

Preheating the Air Fryer

preheat air fryer properly

Preheating your air fryer is a crucial step for perfectly cooked pork chops. Set your air fryer to 360°F (182°C) for thinner cuts, 380°F (194°C) for a crispy exterior, or 400°F (204°C) for both boneless and bone-in chops. Preheat for about 5 minutes, but if you're cooking thicker chops, consider extending that time. Make sure you place the pork chops in a single layer in the basket to allow for optimal air circulation. Flipping them halfway through cooking promotes even browning, which is essential for achieving desired texture and flavor. Always check the internal temperature with an instant-read thermometer; it should reach 145°F (63°C). Avoid overcrowding to ensure each chop cooks evenly and thoroughly.

Preparing the Pork Chops

cooking tender pork chops

After getting your air fryer ready, it's time to focus on preparing the pork chops. Start by selecting fresh, high-quality pork chops, ideally 1 ½ to 2 inches thick, either boneless or bone-in.

Remove them from the packaging and rinse with cool water if needed. Next, pat the pork chops dry with paper towels to remove excess moisture, which helps ensure even browning and a crispy texture. Thicker cuts are recommended for juiciness and tenderness, making them less likely to dry out during cooking.

Once dry, coat both sides with olive oil or grape seed oil using a basting brush or your hands for even coverage. Finally, arrange the pork chops in a single layer in the air fryer basket, leaving space around each chop for proper air circulation.

Cook in batches if necessary.

Seasoning Options

various seasoning choices available

Seasoning pork chops is key to enhancing their natural flavors and achieving a delicious meal. Start with a basic mix of salt, pepper, garlic powder, onion powder, and paprika. For a touch of sweetness, add brown sugar; it caramelizes beautifully during cooking. If you're feeling adventurous, try flavor variations like Cajun seasoning for a zesty kick or Mexican seasoning with chili powder and cumin for a delightful twist. You can also brush the chops with melted butter or olive oil to help the seasonings stick and keep the meat moist. For extra depth, consider combining smoked paprika with garlic powder or dried thyme with onion powder. Additionally, using bone-in pork chops promises to enhance flavor and moisture, elevating your pork chops to a new level of flavor.

Air Fryer Settings

air fryer cooking instructions

To achieve perfectly cooked pork chops in the air fryer, it's crucial to set the right temperature and follow a few key steps.

Start by preheating your air fryer to 400°F for most boneless and bone-in chops. If you're cooking thinner chops or using different seasonings, set it to 360°F. For thicker bone-in chops or defrosting, consider 380°F. Always arrange the pork chops in a single layer to avoid overcrowding and ensure even cooking. Lightly spray the basket or chops with cooking spray for better results. Additionally, remember to check the internal temperature with a probe thermometer, aiming for 145°F, but you can safely remove them at 140°F to rest under foil for juiciness.

Happy cooking!

Cooking Time Guidelines

cooking time recommendations provided

Now that you've set your air fryer, it's time to focus on the cooking time guidelines for pork chops.

For boneless chops, thickness matters: cook 1/2-inch thick chops for about 7-9 minutes and 1-inch thick for 11-13 minutes. You'll want to flip them halfway through for even cooking. Many users reported that cooking at the optimal temperature yields moist and flavorful results.

At 400°F (204°C), expect 11-13 minutes for 1-inch thick chops, while 380°F (194°C) takes 10-14 minutes. If you're using 375°F (190°C), aim for 9-12 minutes.

To ensure perfect results, preheat your air fryer and avoid overcrowding the basket. For the best flavor and texture, let your pork sit at room temperature for 30 minutes before cooking, and don't marinate for more than 12 hours. Enjoy!

Checking Internal Temperature

verify food temperature accuracy

Checking the internal temperature of your pork chops is crucial for ensuring they're safe and delicious. To prevent undercooked or overcooked meat, use a meat thermometer to get an accurate reading. Aim for an internal temperature of at least 140°F; it'll rise to 145°F after you remove the chops from the air fryer. Always check the thickest part of the chop, avoiding any bone or fat for the most precise measurement.

Additionally, using an air fryer can result in juicy and flavorful pork chops, enhancing the overall dining experience. Allow the chops to rest for about 5 minutes, covering them with foil to retain heat. This resting period helps distribute heat and juices evenly, ensuring your pork is tender and flavorful by the time you're ready to serve it.

Serving Suggestions

serving food ideas creatively

After ensuring your pork chops are perfectly cooked and resting, it's time to think about how to serve them for a delightful meal.

Pair your chops with classic starchy sides like creamy mashed potatoes or fluffy white rice for comfort. If you're feeling adventurous, creamy Parmesan polenta or sweet potato casserole can add a unique twist. Additionally, serving pork chops with a cooking thermometer ensures they are cooked to the ideal temperature. Remember that butter's creamy texture can enhance the richness of your mashed potatoes or polenta.

For vibrant vegetable options, consider roasted asparagus or sweet, crunchy roasted carrots. If it's summer, grilled corn on the cob brings a smoky flavor. You could also try sautéed vegetables for a nutritious touch.

Finally, don't forget a simple side like butter-steamed cabbage or Southern-style green beans to round out your meal. Enjoy the delicious combination!

Additional Cooking Tips

enhance your culinary skills

To achieve perfectly cooked pork chops in your air fryer, it's crucial to focus on preparation and cooking techniques.

Start by preheating your air fryer to 400°F for five minutes. Pat the pork chops dry, coat them with olive oil, and apply your favorite seasoning mix generously. For the best results, choose thick, center-cut chops to enhance the char and flavor.

For a crispy texture, consider dipping them in eggs followed by breadcrumbs. Cook them for 12-14 minutes, flipping halfway through. Use an instant-read thermometer to ensure the internal temperature reaches 140-145°F.

After cooking, let the pork chops rest for 3-5 minutes to lock in the juices. If cooking in batches, keep the first batch warm while finishing the rest.

Serve immediately for the best flavor and tenderness!

Frequently Asked Questions

Can I Cook Frozen Pork Chops in the Air Fryer?

Yes, you can cook frozen pork chops in the air fryer!

Just place them in a single layer in the basket and preheat the fryer to 350°F to 380°F.

Start by cooking them for about 5 to 10 minutes to defrost, then season as desired.

Continue cooking for an additional 10 to 15 minutes, flipping halfway.

Ensure they reach an internal temperature of 145°F for safe eating.

Enjoy your delicious, tender pork chops!

What Side Dishes Pair Well With Air-Fried Pork Chops?

When you're enjoying air-fried pork chops, you'll want side dishes that complement their flavor.

Try air fryer green beans for a quick, crunchy option, or roasted carrots for a touch of sweetness.

Creamy mashed potatoes soak up the juices beautifully.

If you prefer something lighter, a refreshing cucumber salad can balance the meal nicely.

Don't forget some fluffy dinner rolls to complete your plate and add to the comfort of your feast!

How Do I Prevent Pork Chops From Drying Out?

To prevent your pork chops from drying out, start by brining or salting them ahead of time to enhance moisture retention.

Make sure to bring them to room temperature before cooking for even results.

Pat them dry to help marinate or season effectively.

During cooking, avoid overcooking by using a meat thermometer to reach a safe internal temperature of 145°F.

Finally, let them rest for a few minutes before slicing to keep juices intact.

Can I Use Different Oils for Cooking?

Absolutely, you can use different oils for cooking!

Olive oil is a popular choice, but avocado oil works well too, especially for high-heat methods. Canola and vegetable oils are also great alternatives if you prefer a neutral flavor.

Just remember to brush or spray the oil on your meat to help seasonings stick and keep everything moist.

Using the right oil not only enhances flavor but also prevents sticking during the cooking process.

What Is the Best Way to Store Leftover Pork Chops?

To store leftover pork chops, place them in airtight containers to keep out air and odors.

Store them in the coldest part of your refrigerator, ideally at 40°F (4°C) or below.

Consume the chops within 3-4 days for the best quality.

If you need to keep them longer, wrap them tightly in heavy-duty freezer bags and freeze at 0°F (-18°C) or below, labeling each package with the date for easy tracking.

Conclusion

Now that you know how to cook pork chops in an air fryer, you're all set to impress at your next meal. With tender, flavorful results and endless seasoning options, it's a quick and easy way to enjoy this delicious cut of meat. Don't forget to check the internal temperature to ensure they're perfectly cooked. So go ahead, fire up that air fryer, and savor the juicy goodness of your homemade pork chops! Enjoy!

Continue Reading

Recipes

How Long to Cook Chicken Wings in Air Fryer: Ultimate Crispy Guide!

Get ready to master air fryer chicken wings with our ultimate guide—discover the secret to achieving unbeatable crispiness and mouthwatering flavor!

Published

on

crispy air fryer wings

To cook chicken wings in an air fryer, preheat it to 360°F. Arrange your wings in a single layer, then cook them for about 23-25 minutes. For best results, flip the wings every five minutes and shake the basket every six minutes to ensure even cooking. If you're using frozen wings, increase the temperature to 400°F and cook for around 25 minutes. Pat the wings dry before seasoning, and consider using aluminum-free baking powder to boost crispiness. Want to explore more tips and tricks for perfect wings? There's plenty more to discover!

Key Takeaways

  • Preheat the air fryer to 360°F for about 4-5 minutes for optimal crispiness before cooking wings.
  • Cook 2 lbs of chicken wings for 23-24 minutes, flipping and shaking the basket every 5-6 minutes.
  • For frozen wings, increase the temperature to 400°F and cook for approximately 25 minutes.
  • Ensure wings are patted dry and arranged in a single layer for maximum crispiness.
  • Always check that the internal temperature of the wings reaches at least 165°F for safe consumption.

Preheating the Air Fryer

preheat your air fryer

Before you dive into cooking those delicious chicken wings, it's essential to preheat your air fryer. Preheating helps achieve that signature crispiness you crave by circulating super-hot air around the fryer, which is vital for thick cuts like chicken wings. Smaller air fryers usually need just 2-3 minutes, while larger models may take 4-5 minutes. For optimal results, set the temperature before turning it on, and let it run empty for the recommended time. Always consult your operating manual for specific instructions, especially if your model lacks a preheat button. This step is crucial because most recipes yield improved outcomes with preheating, so don't overlook this crucial part of the process!

Preparing Chicken Wings

cooking flavorful chicken wings

To prepare your chicken wings for air frying, start by cutting and separating them into drums and flats if you prefer. Aim for uniform pieces to ensure even cooking, and remove any excess cartilage or tips.

Next, pat them dry with paper towels to eliminate excess moisture; this step is crucial for achieving crispy skin. If you're using frozen wings, make sure to remove any visible ice.

For seasoning, combine spices like garlic powder, onion powder, paprika, oregano, salt, and black pepper in a bowl. Add baking powder to help crisp the skin, then drizzle with olive or avocado oil. Incorporating baking powder into your seasoning mix is essential for that perfect crunch.

Finally, massage the seasonings into the wings, ensuring they're evenly coated before air frying.

Cooking Time and Temperature

cooking duration and heat

Cooking chicken wings in an air fryer requires careful attention to cooking time and temperature for the best results.

Start by preheating your air fryer to 360°F for about 18 minutes. For 2 lbs of wings, aim for a total cooking time of 23-24 minutes. Air fryer wings achieve crispiness without deep frying, making them a healthier option.

Some recipes might suggest starting at 380°F for the first 20 minutes. After the initial phase, increase the temperature to 390°F for the next few minutes, and finish with a final boost to 400°F for the last 2 minutes.

Remember to shake the basket every 6 minutes and flip the wings every 5 minutes to ensure even cooking. This method helps achieve that perfect golden, crispy skin while ensuring the internal temperature reaches at least 165°F.

Achieving Maximum Crispiness

perfectly crispy preparation method

Achieving maximum crispiness for your air-fried chicken wings is all about preparation and technique. Start by patting the wings dry with paper towels to remove moisture, which is key for crispy skin.

Separate the wings into drums and flats for even cooking, and make sure they're fully defrosted. Arrange them in a single layer in the air fryer basket to prevent overlapping.

For an extra crispy finish, add aluminum-free baking powder to your seasoning mix; this raises the pH level and enhances the crust. Cooking your wings in an air fryer offers a healthier alternative to traditional frying, resulting in crispy and juicy wings with less effort. Cook initially at medium heat to render fat, then increase the temperature for that perfect crunch.

Remember to shake the basket every few minutes for even cooking and serve immediately for the best results!

Flavorful Seasoning Options

tasty seasoning choices available

Once you've perfected the crispiness of your chicken wings, it's time to elevate their flavor with a variety of seasoning options. For a classic taste, stick with simple salt and pepper or try lemon pepper for a citrusy kick.

If you want a savory boost, sprinkle on garlic powder or a mix of kosher salt and white pepper. For a spicy twist, cayenne pepper or smoked paprika can add some heat and depth. Additionally, ensure your wings are well-cooked by checking the internal temperature to guarantee they reach at least 165°F for safety.

Consider herb-based options like Italian seasoning or a garlic and herb blend for an aromatic touch.

If you're feeling adventurous, explore global flavors—mix cumin and chili powder for a Mexican flair or use garam masala for an Indian-inspired taste. Your wings will never be boring again!

Delicious Sauce Suggestions

tasty sauce recipe ideas

To truly take your air-fried chicken wings to the next level, consider adding a variety of delicious sauces that can enhance their flavor profile.

For a spicy kick, whip up a homemade hot sauce by mixing your favorite hot sauce with butter, cayenne, garlic, and onion powder. This flavor enhancement is particularly effective when using fresh chicken wings, as it allows the sauce to cling perfectly to the crispy skin.

If you're craving something sweet and smoky, try a BBQ sauce mixed with honey or brown sugar.

For an Asian twist, combine soy sauce with honey, ginger, and sesame oil.

Lastly, don't forget about creamy options; ranch dressing mixed with hot sauce or a tangy blue cheese dressing pairs beautifully.

These sauces can transform your wings into a flavorful feast that everyone will love!

Handling Frozen Chicken Wings

thaw and cook properly

When you're ready to cook frozen chicken wings, knowing how to handle them properly can make all the difference in achieving that perfect texture and flavor.

The safest way to thaw wings is in the refrigerator overnight, but if you're short on time, you can use a cold water bath—just remember to change the water every 30 minutes. You can also thaw in the microwave, but it's less recommended.

Pat the wings dry after thawing to remove excess moisture for that crispy finish. If you choose to cook from frozen, preheat your air fryer to 400°F (200°C) and cook for about 25-30 minutes. Don't forget to flip them halfway through for even crispiness! Additionally, cooking from frozen allows you to skip the thawing process entirely, making it a convenient option for a quick meal while still achieving a crispy exterior.

General Cooking Tips

essential kitchen advice shared

While cooking chicken wings in an air fryer may seem straightforward, a few key tips can elevate your results.

Preheat your air fryer to 360-380°F (182-193°C) for the first half, then crank it up to 390-430°F (199-221°C) to crisp the skin. Low carb diets can be complemented with delicious chicken wings when prepared this way.

Don't forget to pat the wings dry and season them with salt, garlic powder, and olive oil before cooking. Air frying reduces calories compared to traditional frying methods, so it's a healthier choice.

To ensure even cooking, arrange the wings in a single layer and leave space between them. Flip or shake them every 5-6 minutes.

For extra crispiness, add baking powder to your seasoning mix and use a digital meat thermometer to make sure the internal temperature hits 165°F (74°C).

Happy cooking!

Variations and Experimentation

creative exploration and innovation

Exploring variations and experimentation can turn your air-fried chicken wings into a culinary adventure.

You can start by adjusting cooking temperatures and times to achieve the perfect crispiness. Try cooking at 380°F for 20 minutes, flipping every five minutes, then increase to 400°F for a final crisp. Additionally, consider the whole chicken wings that include different parts, which can offer a variety of textures and flavors.

Don't forget to play with seasonings—mix salt, white pepper, and baking powder for classic crispy wings, or go bold with buffalo sauce for a spicy kick.

For added crunch, pat your wings dry and consider a dusting of baking powder.

If you're using frozen wings, cook them at 400°F for about 25 minutes.

With these tweaks, your chicken wings will be a hit every time!

Serving Suggestions

delicious meal presentation ideas

To elevate your air-fried chicken wings, consider pairing them with complementary sides that enhance their flavor and texture. Traditional options like celery and carrot sticks with blue cheese or ranch dressing are always a hit.

If you're serving spicy wings, coleslaw balances the heat perfectly. For something heartier, try loaded potato skins or creamy mac and cheese. Classic pairings like wings and fries are also easy to recreate at home for added satisfaction. Incorporating aesthetic serveware can enhance the presentation of your meal, making it more enjoyable for your guests.

Fresh options like a Mediterranean salad or guacamole add a light touch. Craving indulgence? Mozzarella sticks or jalapeño poppers can take your meal up a notch.

Don't forget seasoned fries for a savory crunch or garlic bread for a lighter choice. These pairings will surely make your chicken wings the star of the meal!

Frequently Asked Questions

Can I Use Other Types of Poultry Instead of Chicken Wings?

Absolutely, you can use other types of poultry instead of chicken wings!

Boneless skinless breasts, thighs, and drumsticks are great alternatives. Just remember to adjust the cooking temperature and time accordingly.

For instance, boneless breasts cook faster than thighs. Always check that the internal temperature reaches at least 165°F to ensure they're safe to eat.

Don't overcrowd your air fryer basket, and flip the poultry halfway through for even cooking.

Enjoy!

How Do I Store Leftover Cooked Chicken Wings?

To store leftover cooked chicken wings, you'll want to use airtight, refrigerator-safe containers.

Make sure to transfer the wings promptly and keep them sealed to prevent drying out and bacterial growth.

Store them in the fridge at a temperature below 40°F (4°C) and consume within three to four days.

For longer storage, freeze them in airtight containers or bags.

Thaw frozen wings in the fridge before reheating to enjoy them safely.

Can I Reheat Chicken Wings in the Air Fryer?

Yes, you can definitely reheat chicken wings in the air fryer!

Start by preheating it to around 360°F (182°C). Arrange your wings in a single layer to ensure even cooking, and spray the basket to prevent sticking.

Heat them for about 5 minutes, flipping halfway through. For extra crispiness, shake the basket.

Just make sure the internal temperature reaches 165°F (74°C) before enjoying those delicious wings again!

What Is the Best Way to Defrost Frozen Chicken Wings?

The best way to defrost frozen chicken wings is in cold water.

Place the wings in a leak-proof bag, then submerge them in a non-reactive bowl filled with cold water. Change the water every 30 minutes to keep it cold. This method typically takes about 20-30 minutes for smaller batches.

Alternatively, you can thaw them in the refrigerator overnight, but that'll take longer.

Just avoid microwaving; it can unevenly defrost and affect texture.

Are Air Fryer Chicken Wings Healthier Than Deep-Fried Wings?

Yes, air fryer chicken wings are healthier than deep-fried wings.

You'll enjoy significantly lower fat content—up to 75% less! Plus, they retain essential nutrients like protein and vitamins while minimizing harmful compounds.

Air frying requires just a tablespoon of oil compared to three cups for deep frying, reducing calorie intake by 70-80%.

Conclusion

Now you're ready to whip up some delicious, crispy chicken wings in your air fryer! By following these tips on preheating, cooking time, and seasoning, you'll impress everyone with your culinary skills. Don't hesitate to experiment with flavors and variations to find your perfect wing recipe. Remember, the key to that mouthwatering crunch is in the technique. So gather your ingredients, fire up the air fryer, and enjoy your tasty creations! Happy cooking!

Continue Reading

Affiliate disclaimer

As an affiliate, we may earn a commission from qualifying purchases. We get commissions for purchases made through links on this website from Amazon and other third parties.

Vetted

best student laptops 2025 best student laptops 2025
Vetted6 days ago

15 Best Laptops for Students in 2025 – Affordable, Powerful, and Perfect for Learning

I've compiled the top 15 laptops for students in 2025 that perfectly blend affordability and performance—discover which one will elevate...

top portable charging solutions top portable charging solutions
Vetted6 days ago

15 Best Power Banks of 2025 – Keep Your Devices Charged On the Go

In 2025, discover the 15 best power banks to keep your devices charged on the go, but which one will...

top travel backpacks 2025 top travel backpacks 2025
Vetted6 days ago

15 Best Travel Backpacks for Adventurers on the Go in 2025

I've curated the ultimate guide to the 15 best travel backpacks for adventurers in 2025, but you won't want to...

meal prep container recommendations meal prep container recommendations
Vetted6 days ago

15 Best Meal Prep Containers to Keep Your Food Fresh and Organized

Prepare to discover the 15 best meal prep containers that keep your food fresh and organized, ensuring you never waste...

top winter heated gloves top winter heated gloves
Vetted6 days ago

15 Best Heated Gloves to Keep Your Hands Warm All Winter Long

Unlock the secret to cozy hands this winter with the 15 best heated gloves—discover which pair will elevate your cold-weather...

top toasters for 2025 top toasters for 2025
Vetted6 days ago

15 Best Toasters of 2025: Crisp Perfection Every Morning

I've uncovered the top 15 toasters of 2025 that promise crisp perfection every morning, but which one will transform your...

air fryers with rotisserie functions air fryers with rotisserie functions
Vetted6 days ago

15 Best Air Fryers With Rotisserie Functions to Elevate Your Cooking Game

Find the perfect air fryer with rotisserie functions to transform your meals—discover the top 15 models that will elevate your...

top yoga mats reviewed top yoga mats reviewed
Vetted6 days ago

15 Best Yoga Mats for Comfort and Stability in Your Practice

Wondering which yoga mats provide the ultimate comfort and stability? Discover the top 15 options that could transform your practice...

energy efficient air fryer selection energy efficient air fryer selection
Vetted6 days ago

15 Best Energy-Efficient Air Fryers to Slash Your Energy Bills While Cooking Delicious Meals

One great way to save on energy bills is by choosing from the 15 best energy-efficient air fryers; discover which...

top car seats 2025 top car seats 2025
Vetted6 days ago

15 Best Car Seats of 2025 – Safety, Comfort, and Style Combined

Navigate the world of car seats with our top 15 picks for 2025, where unmatched safety, comfort, and style await...

silent cooking with air fryers silent cooking with air fryers
Vetted6 days ago

15 Best Quiet Air Fryers for a Peaceful Cooking Experience

Just imagine cooking your favorite meals in peace with our top 15 quiet air fryers; discover which models will transform...

top desk speakers 2025 top desk speakers 2025
Vetted6 days ago

15 Best Desk Speakers of 2025 – Elevate Your Audio Experience

Boost your audio experience with the 15 best desk speakers of 2025; discover which model will transform your sound setup...

Trending