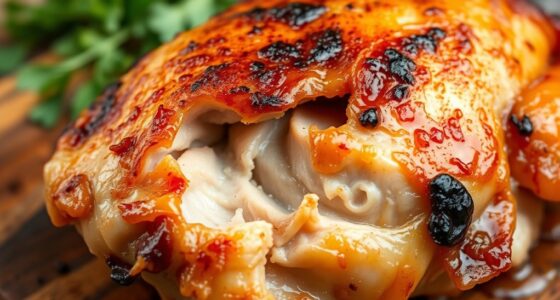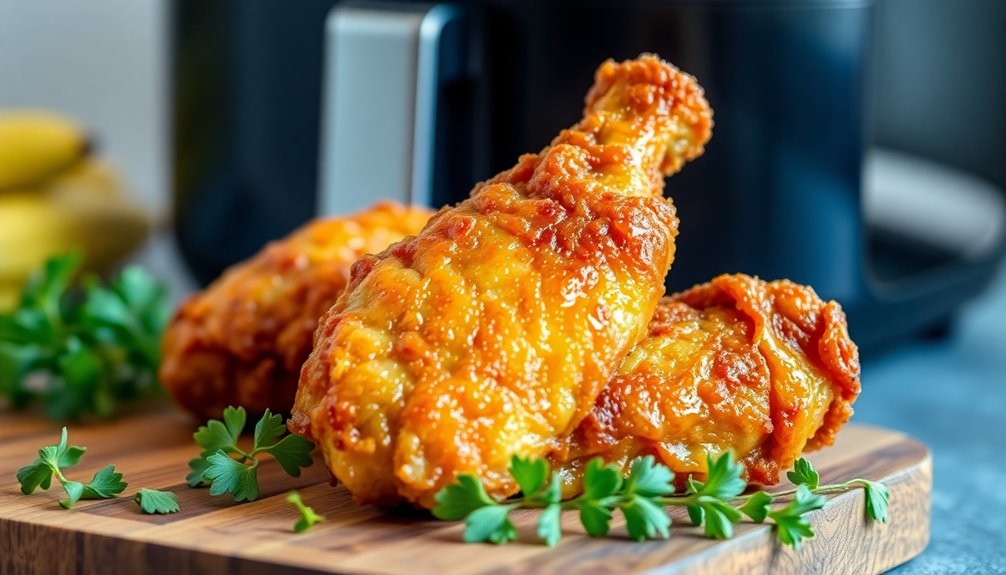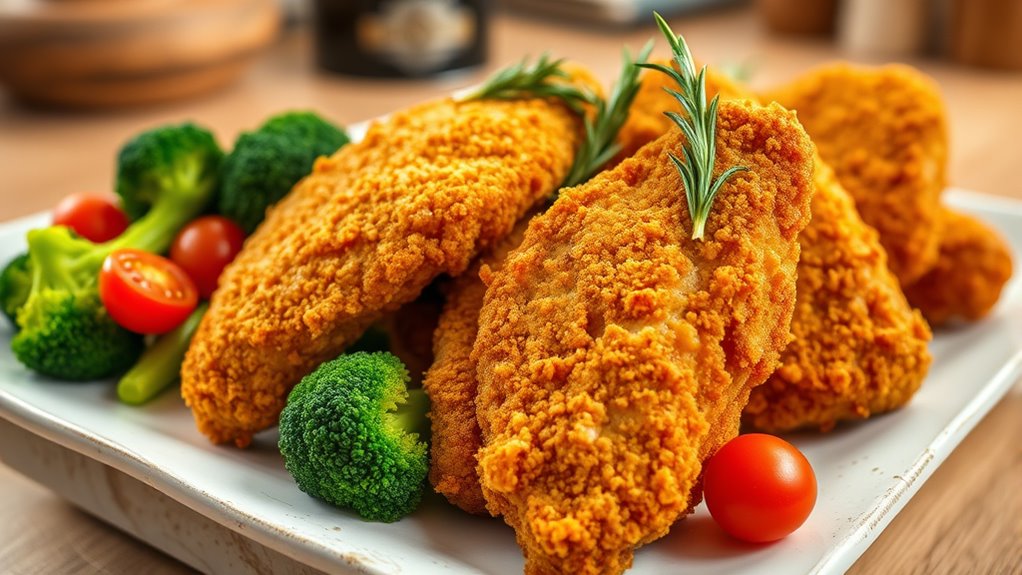

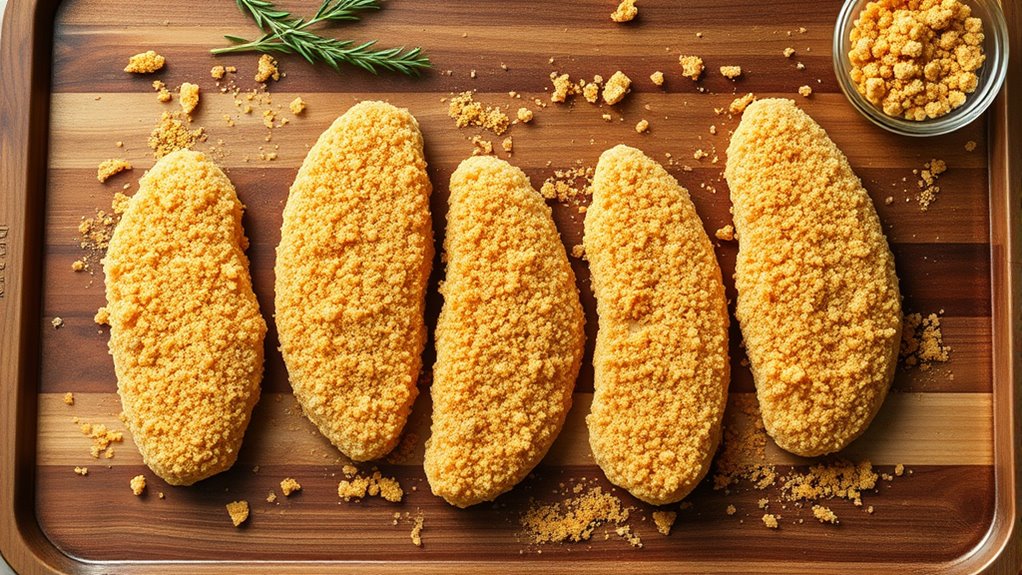
To make crispy, juicy chicken tenders in just 10 minutes with an air fryer, start by seasoning and coating boneless chicken strips with spices, egg wash, and breadcrumbs. Preheat the fryer to 400°F, then place the tenders in a single layer and cook for about 8-10 minutes, flipping halfway. The result is golden, crispy outside and tender inside. Want to know the step-by-step process and tips for perfect tenders? Keep exploring!
Key Takeaways
- Preheat the air fryer to 400°F for 3-5 minutes for quick, even cooking.
- Season and coat chicken tenders thoroughly with spices, egg wash, and breadcrumbs for crispy results.
- Place tenders in a single layer without overlapping to ensure even crispiness.
- Cook for 8-10 minutes, flipping halfway, until internal temperature reaches 165°F.
- Rest for 1 minute before serving to set the coating and maintain tenderness.
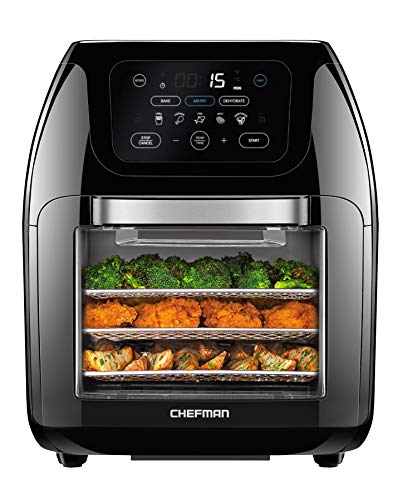
CHEFMAN Multifunctional Digital Air Fryer+ Rotisserie, Dehydrator, Convection Oven, 17 Touch Screen Presets Fry, Roast, Dehydrate, Bake, XL 10L Family Size, Auto Shutoff, Large Easy-View Window, Black
Versatile countertop cooking: Air fry, bake, dehydrate, rotisserie, or roast to crispy perfection in one convenient appliance
As an affiliate, we earn on qualifying purchases.
Recipe
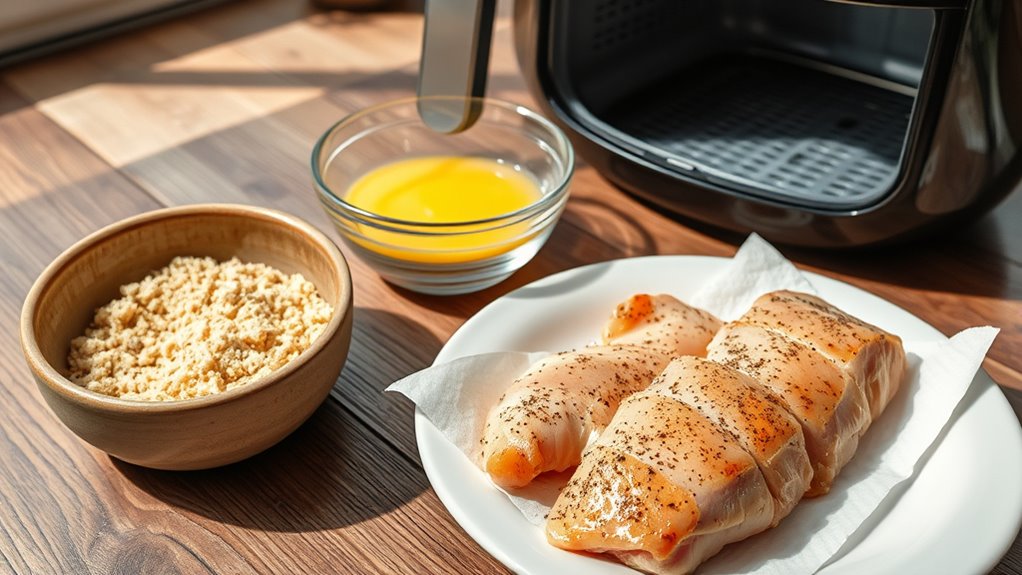
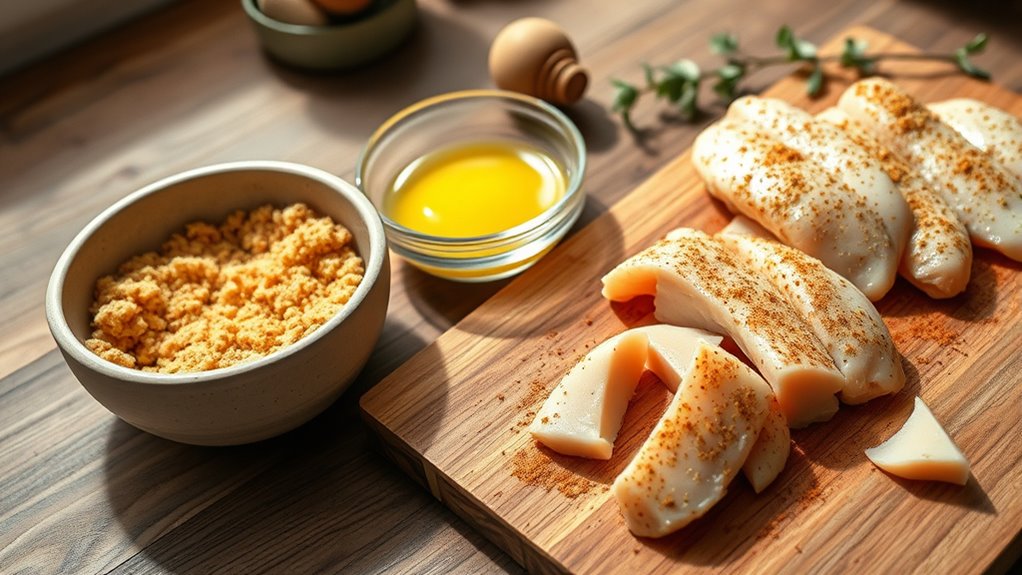
To make these quick and crispy 10-Minute Air Fryer Chicken Tenders, start by preparing your chicken. Slice boneless, skinless chicken breasts into even strips, about 1-inch wide. Pat them dry with paper towels to remove excess moisture, which helps achieve a crispy exterior. In a shallow bowl, mix your preferred seasonings—such as salt, pepper, garlic powder, and paprika—along with a light coating of flour or cornstarch if desired. Dipping the chicken tenders in egg wash before coating them with seasoned breadcrumbs or panko will guarantee they stick well and develop a crunchy crust.
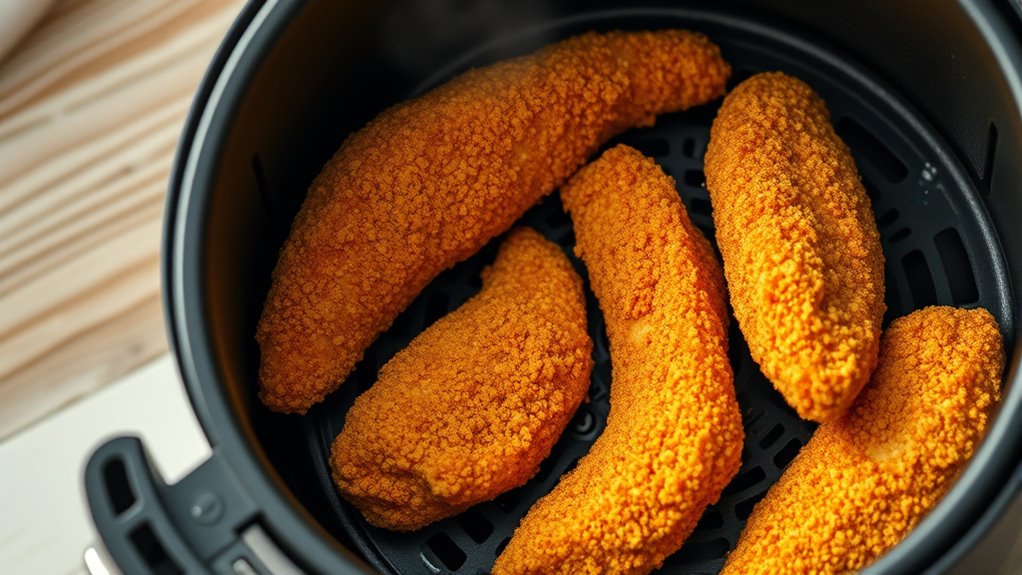
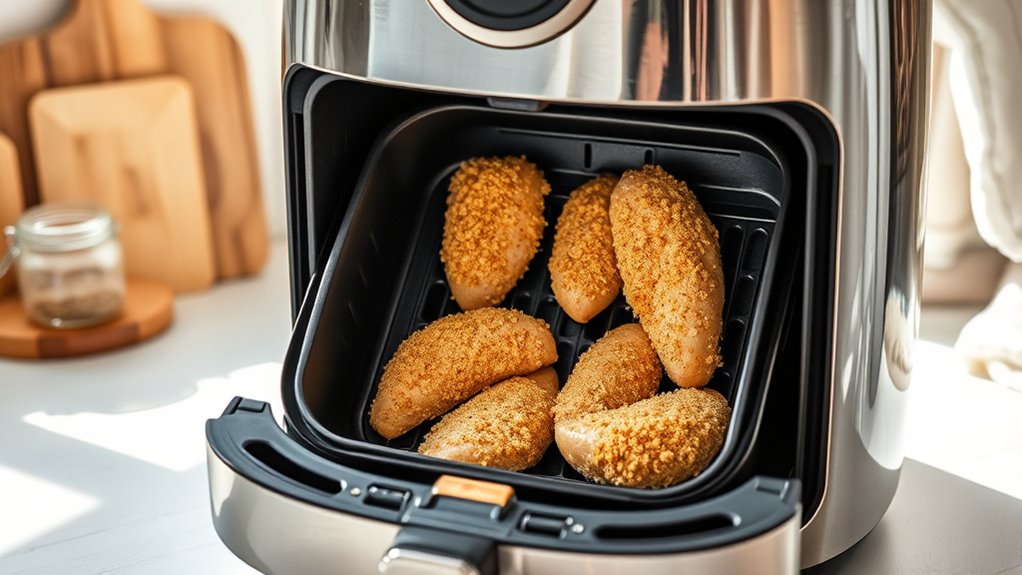
Preheat your air fryer to 400°F (200°C) for a few minutes. While it heats, prepare your breading station with the seasoned breadcrumbs. Dip each chicken tender into the egg wash, then roll or coat it thoroughly with the breadcrumb mixture. Place the coated tenders in a single layer in the air fryer basket, making sure they do not overlap. Cooking at the right temperature ensures optimal crispiness, which is essential for a satisfying texture. Cooking at the correct temperature also helps in creating a digital-friendly environment at home, fostering more innovative cooking practices. Cook for about 8-10 minutes, flipping halfway through, until they are golden brown and cooked through (internal temperature should reach 165°F). Once done, remove from the air fryer and let rest for a minute before serving.
Preheat to 400°F, coat tenders, cook 8-10 minutes until golden and internal temp reaches 165°F.
Ingredients:
- 2 boneless, skinless chicken breasts
- 1 cup all-purpose flour or cornstarch (optional)
- 2 large eggs
- 1 cup breadcrumbs or panko
- 1 teaspoon salt
- ½ teaspoon black pepper
- ½ teaspoon garlic powder
- ½ teaspoon paprika
- Cooking spray or a little oil for spraying
Cooking Instructions:
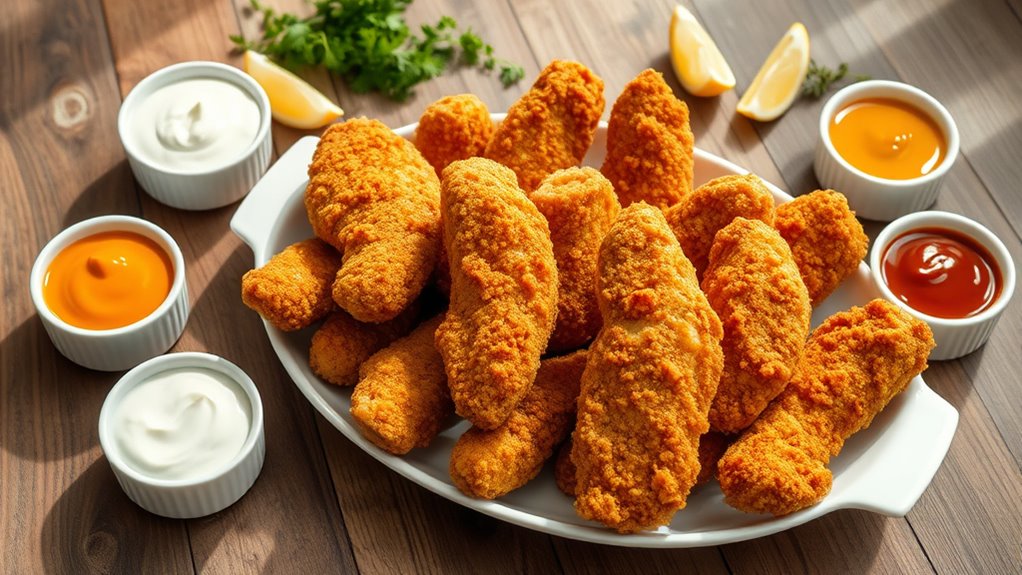
Start by slicing the chicken into tenders and patting them dry. Prepare a breading station with seasoned breadcrumbs, and set up bowls for the egg wash and flour if using. Dip each chicken strip into the egg, then coat thoroughly with the breadcrumb mixture. Preheat the air fryer to 400°F. Arrange the tenders in a single layer in the air fryer basket, lightly spray with cooking spray, and cook for 8-10 minutes, flipping halfway through, until crispy and cooked through. Serve hot with your favorite dipping sauces.
Extra Tips:
For extra crispiness, lightly spray the chicken tenders with cooking spray before air frying. If your tenders are thicker, you may need to add an extra minute or two to the cooking time. To keep them warm while cooking batches, place cooked tenders on a paper towel-lined plate and keep warm in a low oven. For added flavor, consider mixing Parmesan cheese or your favorite herbs into the breadcrumb mixture. Always use a meat thermometer to make sure the chicken reaches a safe internal temperature of 165°F. Additionally, incorporating proper food safety practices helps ensure your chicken is cooked to perfection and safe to eat. Incorporating rustic decor elements or natural textures can inspire ideas for creating a farmhouse-inspired environment in your kitchen or dining area.

Emeril Lagasse Extra Large French Door Air Fryer Toaster Oven Combo, 24 Cooking Functions and Digital Controls, 7 Accessories Included, Stainless Steel Finish, 26QT Capacity
A VERSATILE AIR FRYER AND MULTI-COOKER COMBO: Elevates practically any meal, from air frying quick after-school snacks to...
As an affiliate, we earn on qualifying purchases.
Cooking Steps
To get started, you’ll want to preheat your air fryer for even cooking. Then, season your chicken with your favorite spices and prepare the coating by dredging it in an egg wash before applying the crispy mixture. Finally, you’ll bake the tenders for just a few minutes until they’re perfectly crispy.
Step 1. Preheat Air Fryer
Preheating your air fryer guarantees it’s at the right temperature for perfectly crispy chicken tenders. To do this, set your air fryer to 400°F (200°C) and let it run for about 3-5 minutes. This step ensures the cooking chamber reaches the ideal heat, which helps achieve a crispy exterior without overcooking the inside. Preheating also reduces cooking time, allowing your tenders to cook evenly and quickly. Once preheated, carefully add your chicken tenders to the basket, making sure they aren’t overcrowded. This allows hot air to circulate freely, resulting in crispy, golden-brown chicken. Skipping this step might lead to uneven cooking or soggy tenders, so always take a few minutes to preheat your air fryer for the best results. Additionally, air purifier maintenance can enhance your experience by ensuring your environment remains clean and free of airborne pollutants during your cooking process. Proper air quality can also help prevent lingering food odors and improve overall kitchen comfort. Maintaining your air fryer regularly ensures optimal performance and consistent results.
Step 2. Season Chicken With Spices
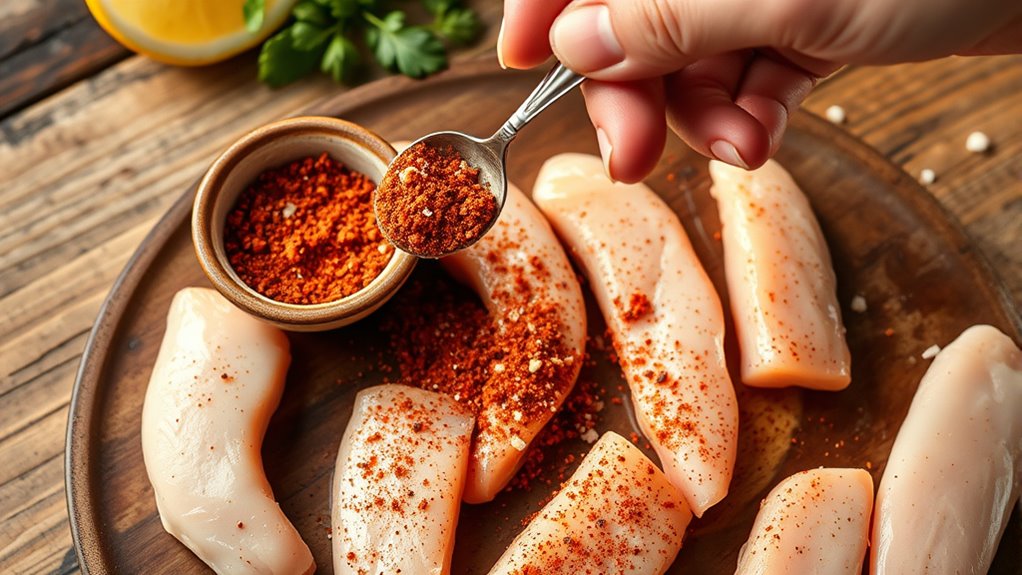
Once your air fryer is preheated, it’s time to season the chicken tenders with a flavorful blend of spices. In a small bowl, combine salt, black pepper, paprika, garlic powder, and onion powder. Pat the chicken tenders dry with paper towels to make certain the spices stick well. Sprinkle the spice mixture evenly over all sides of the chicken, pressing gently to help the seasoning adhere. Toss or rub the tenders to coat them thoroughly with the spices. This step guarantees each bite is full of flavor. Be sure not to skip this part, as it sets the foundation for delicious, well-seasoned chicken tenders. Proper investment diversification can help secure your financial future, much like seasoning enhances the flavor of your dish. Once seasoned, you’re ready to move on to the next step in cooking.
Step 3. Dredge in Egg Wash
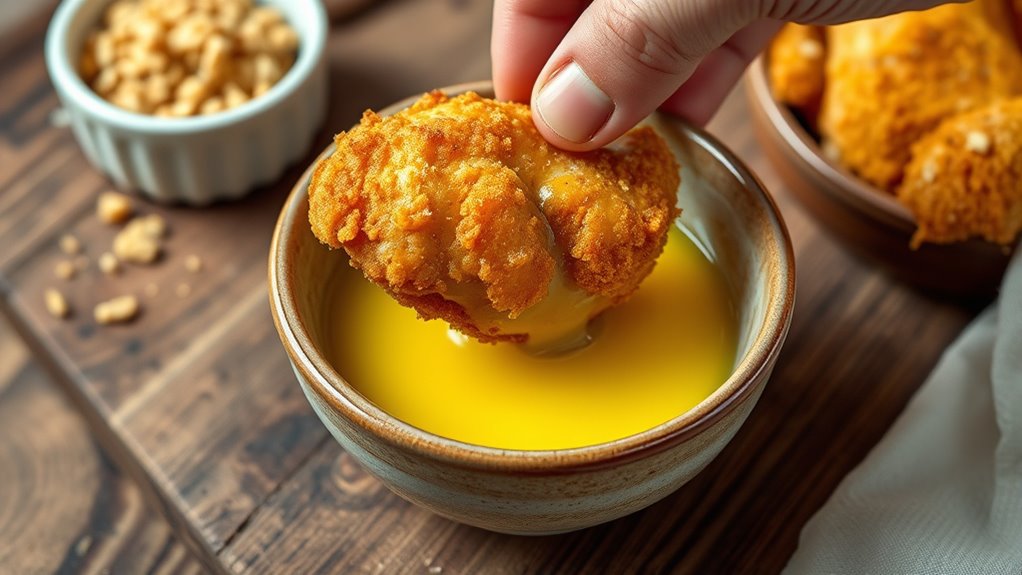
After seasoning the chicken tenders, dip each piece into a bowl of beaten egg wash. Make certain the entire surface is coated evenly, allowing the egg to adhere well. This step helps the crispy coating stick better later on. Hold the tender over the bowl to let excess egg drip off briefly, preventing pooling and uneven coating. If you prefer, you can use a fork or tongs to handle the chicken, keeping your hands clean. Confirm each piece is fully submerged and coated before moving on to the next step. The egg wash acts as a binding agent, preparing the chicken for the crispy coating that’s coming up. Once all tenders are coated, they’re ready for the next step in your air fryer process.
Step 4. Crispy Coating Application
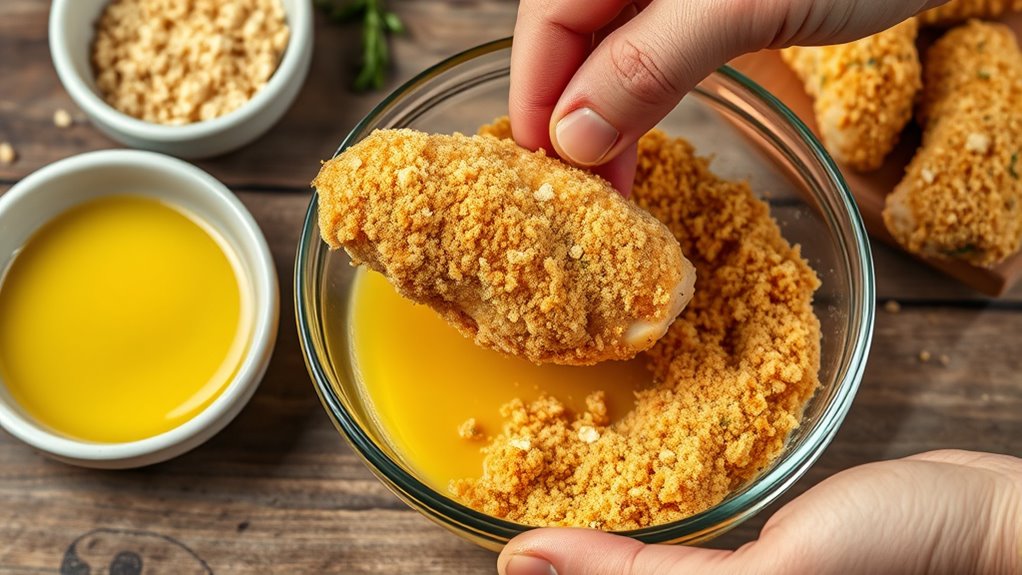
With the chicken tenders coated in egg wash, it’s time to apply the crispy coating. Place the tenders in a shallow dish filled with your chosen coating mixture—panko breadcrumbs, seasoned flour, or a blend. Gently press each tender into the coating, guaranteeing it’s evenly covered on all sides. Use your fingers to pat the coating onto the chicken, pressing firmly so it sticks well. Turn the tender over and repeat, coating both sides thoroughly. Shake off any excess crumbs before placing the tender on a tray or plate. This step assures a uniform, crispy exterior. Make sure each tender is well-coated for maximum crunch and flavor once air fried. Proper coating is key to achieving that perfect crispy texture.
Step 5. Crispy Coating Baking Time
To achieve a perfectly crispy coating, bake the chicken tenders at 400°F (200°C) for about 10 minutes. Before baking, ensure your tenders are evenly coated and placed in a single layer on your air fryer basket or tray. This allows hot air to circulate and crisp each piece evenly. Check the tenders around the 8-minute mark to prevent overcooking, as oven and air fryer models vary. If needed, add an extra minute or two for extra crispness, but avoid overbaking to keep the chicken tender. Once baked, the coating should be golden brown and crunchy. Rest the tenders for a minute before serving to help the coating set. This timing guarantees a crispy exterior without sacrificing juicy, tender chicken inside.
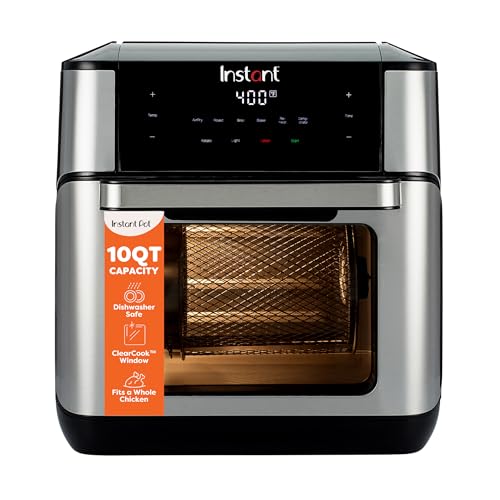
Instant Pot 10QT Air Fryer, 7-in-1 Functions with EvenCrisp Technology that Crisps, Broils, Bakes, Roasts, Dehydrates, Reheats & Rotisseries, Includes over 100 In-App Recipes, Stainless Steel
7 Cooking Functions: Air fry, roast, broil, bake, reheat, dehydrate, and rotisserie all in one easy appliance with...
As an affiliate, we earn on qualifying purchases.
History
The history of chicken tenders dates back to the mid-20th century when they first appeared as a convenient and kid-friendly menu item in American restaurants. Originally, chefs used tenderloin cuts from chickens, breaded and fried to appeal to young diners. Their popularity grew quickly because they were easy to eat and customizable with various sauces. Over time, the dish evolved beyond traditional deep-frying, with restaurants experimenting with different cooking methods to make them healthier. Today, chicken tenders are a staple in many households and fast-food chains, appreciated for their versatility and quick preparation. The advent of modern appliances like air fryers has further transformed how you prepare these tender, crispy bites, making them accessible and convenient for everyday cooking.

Ninja Air Fryer with Air Crisp | 5 QT Capacity fits up to 4lbs of Fries | 4-in-1 Pro Air Fry, Roast, Reheat, Dehydrate | 400°F Max Temp | 1750 Watts | W/Nonstick Basket & Crisper Plate | Grey | AF141
AIR CRISP TECHNOLOGY: 400℉ superheated air surrounds food for hot, crispy results with little to no oil.
As an affiliate, we earn on qualifying purchases.
Final Thoughts
Air fryer chicken tenders have become a game-changer for busy households and anyone seeking a healthier way to enjoy this classic comfort food. With just a few ingredients and about 10 minutes, you can whip up crispy, juicy tenders without the mess of traditional frying. The air fryer’s quick cooking time makes it perfect for busy weeknights or last-minute cravings. Plus, you get a satisfying meal with less oil, reducing calories and fat. Whether you’re cooking for kids or yourself, these tenders deliver on flavor and convenience. Once you try this method, you’ll likely keep it as a go-to recipe. It’s simple, fast, and always delicious—making it an essential addition to your cooking routine.
Frequently Asked Questions
Can I Substitute Chicken Breasts With Thighs?
You can definitely substitute chicken breasts with thighs in recipes. Thighs are more forgiving, tend to stay juicy, and cook faster in an air fryer. Just keep in mind that thighs are darker meat and may have a richer flavor. Cut the thighs into similar-sized strips or pieces for even cooking. Adjust the cooking time slightly if needed, but overall, thighs work well as a delicious alternative.
What Dipping Sauces Go Best With These Tenders?
Oh, the eternal dilemma: which dipping sauce will elevate your chicken tenders to divine status? Honestly, you can’t go wrong with classic options like honey mustard, ranch, or buffalo sauce. If you crave a touch of sweetness, try honey or a sweet chili. For a bold punch, go for blue cheese or spicy sriracha. Remember, the right sauce makes even the simplest tenders feel like gourmet indulgence.
How Long Can Leftovers Be Stored Safely?
When storing leftovers, you should refrigerate them within two hours of cooking to guarantee safety. Keep your leftovers in airtight containers or wrap them tightly to prevent bacteria growth. Typically, cooked chicken leftovers last 3 to 4 days in the refrigerator. If you want to keep them longer, freeze them for up to 3 months. Always reheat leftovers thoroughly before eating to prevent foodborne illnesses.
Is It Suitable for Meal Prep and Freezing?
Did you know that many quick-cooked foods are perfect for meal prep and freezing? You can prepare your chicken tenders in the air fryer, then store them in airtight containers or freezer bags. When you’re ready to eat, just reheat them in the air fryer for that fresh-crispy taste. This way, you save time and enjoy a delicious, reheated meal anytime without sacrificing flavor or texture.
Can I Use Gluten-Free Breadcrumbs?
Using gluten-free breadcrumbs is a great idea if you’re avoiding gluten or want a different flavor and texture. You can easily substitute them in your favorite recipes, including air fryer chicken tenders. Just make sure to choose a high-quality gluten-free breadcrumb brand for the best crunch and taste. You might need to adjust the cooking time slightly, but overall, it’s a simple swap that works wonderfully.