Recipes
How to Make Baked Potatoes in Air Fryer: Step-by-Step for Best Results
Create perfectly baked potatoes in your air fryer with these simple steps—discover tips that will elevate your potato game!
![air fryer baked potatoes](https://airfryerhub.com/wp-content/uploads/2025/01/air_fryer_baked_potatoes-1.jpg)
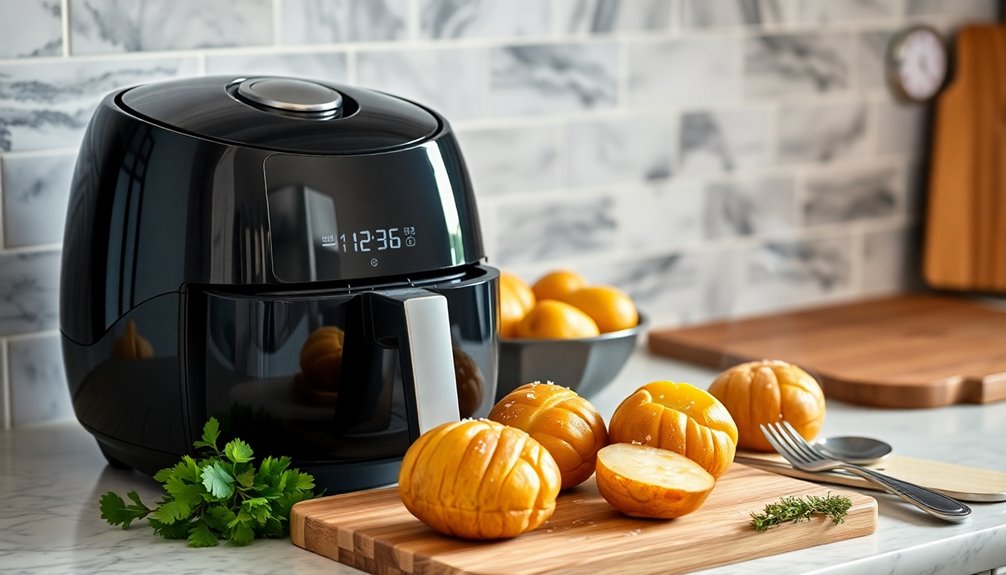
To make baked potatoes in your air fryer, start by scrubbing russet potatoes. Preheat your air fryer to 400°F (200°C) for about 5-8 minutes. Pierce each potato with a fork, drizzle with olive oil, and season with salt and pepper. Place them in the air fryer and cook for 40-50 minutes, turning halfway through. Check for doneness by piercing with a fork; they should be tender. Avoid overcrowding the basket for best results. Once done, load them with your favorite toppings like cheese or sour cream for an extra treat. Discover more tips for perfect potatoes!
Key Takeaways
- Scrub russet potatoes clean, then pierce them with a fork to allow steam to escape during cooking.
- Preheat the air fryer to 400°F (200°C) for 5-8 minutes to ensure crispy skin and even cooking.
- Drizzle olive oil and season the potatoes with salt, pepper, garlic powder, and parsley for added flavor.
- Cook the potatoes in the air fryer for 40-50 minutes, flipping halfway through for uniform browning.
- Serve baked potatoes with your favorite toppings, such as butter, cheese, bacon, and chives for a delicious meal.
Benefits of Air Fryer Baked Potatoes
![healthy quick crispy potatoes](https://airfryerhub.com/wp-content/uploads/2025/01/healthy_quick_crispy_potatoes.jpg)
When you choose to make baked potatoes in an air fryer, you'll quickly discover several benefits that elevate your cooking experience.
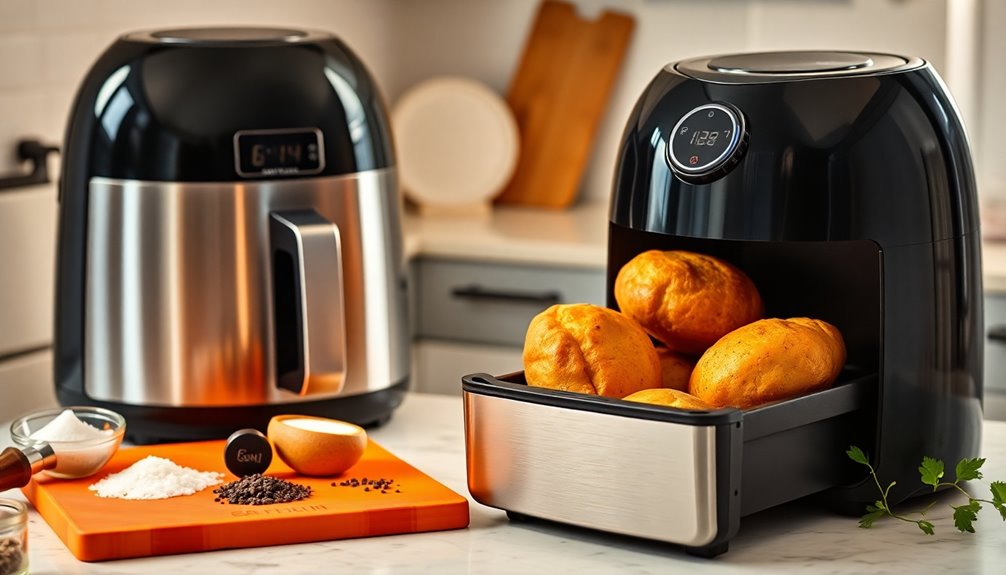
Air fryer baked potatoes cook faster, typically taking only 40-50 minutes at 400°F (200°C), while traditional methods can exceed an hour. The air fryer delivers a delicious crispy skin and fluffy insides, thanks to its rapid air circulation technology.
This method is also energy-efficient, using less electricity and keeping your kitchen cool. Plus, you'll enjoy minimal dish usage, making cleanup a breeze.
Air fryer baked potatoes are incredibly versatile, serving as a blank canvas for a variety of toppings, allowing you to customize flavors to your liking. For instance, you could enjoy them with a flavorful dumpling sauce for an exciting twist.
You'll love how easy and satisfying this cooking method is!
Essential Ingredients for Success
![keys to achieving success](https://airfryerhub.com/wp-content/uploads/2025/01/keys_to_achieving_success.jpg)
To achieve perfectly baked potatoes in your air fryer, it's vital to focus on the right ingredients. Start with russet potatoes, as their high starch content guarantees a fluffy interior and crispy skin.
You'll want to rub about 1 tablespoon of olive oil on each medium potato; this not only enhances flavor but also helps attain that coveted crispiness.
Don't forget to season your potatoes generously with salt, pepper, garlic powder, and parsley for added taste.
Finally, consider your toppings; butter, cheese, bacon, and chives can elevate your dish and let you customize based on your cravings. Incorporating healthy fats into your diet, like olive oil, can support metabolic changes leading to fat burning.
With these essential ingredients, you're on your way to an air fryer success!
Preparation Steps for Perfect Potatoes
![perfectly prepared potato steps](https://airfryerhub.com/wp-content/uploads/2025/01/perfectly_prepared_potato_steps.jpg)
Before you plunge into cooking, make certain your russet potatoes are clean and scrubbed thoroughly. Their high starch content is key for creating that fluffy interior and crispy skin you're after.
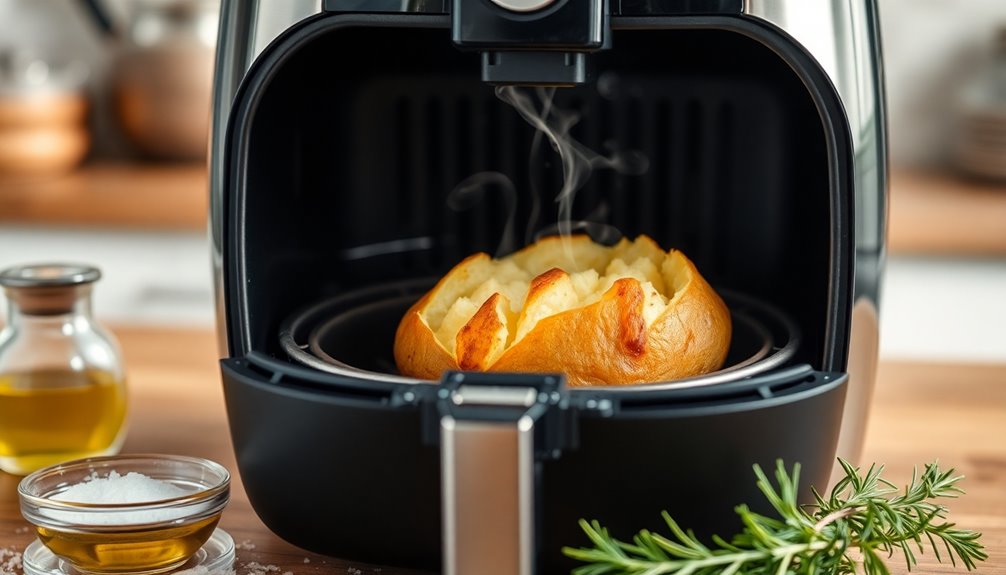
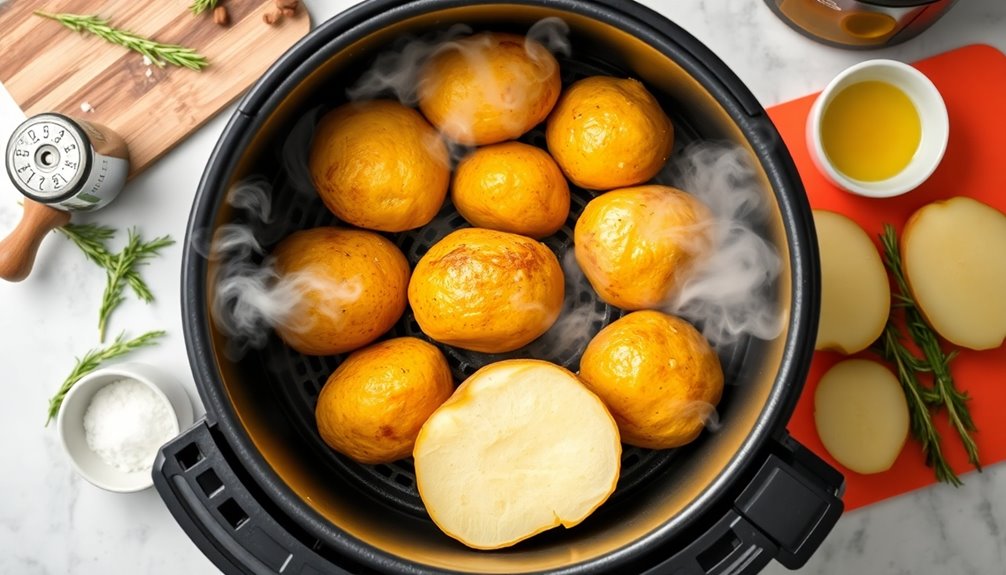
Next, preheat your air fryer to 400°F (200°C) for 5-8 minutes to guarantee even cooking. While it heats up, pierce the potatoes all over with a fork to let steam escape and prevent bursting.
Drizzle olive oil over the potatoes, rubbing it into the skin, and season generously with sea salt for added flavor.
Once preheated, place the seasoned potatoes in the air fryer basket. Cook for 40 to 50 minutes, turning halfway through for even browning, and check for doneness by inserting a fork.
Enjoy your air fryer baked potato!
Cooking Techniques and Tips
![culinary skills and methods](https://airfryerhub.com/wp-content/uploads/2025/01/culinary_skills_and_methods.jpg)
Choosing the right potatoes is key to getting that perfect baked texture.
You'll also want to adjust cooking times based on the size of your potatoes and consider some handy air fryer techniques to enhance the results.
Let's explore how these factors can elevate your air-fried potatoes to the next level.
Optimal Potato Selection
When it comes to making the perfect baked potato in an air fryer, selecting the right type of potato is essential. For ideal potato selection, choose russet potatoes due to their high starch content, which gives you that fluffy interior and crispy skin you crave.
Aim for medium-sized potatoes, around 7 oz each, to guarantee even cooking and the best texture. Before cooking, scrub the potatoes thoroughly to remove dirt, then dry them well to promote crispiness.
Don't forget to pierce each potato with a fork to allow steam to escape, preventing bursts during air frying. Most importantly, avoid wrapping them in foil, as this traps moisture and leads to soggy skin instead of the delightful crispiness you want. Additionally, understanding the importance of fine motor skills can enhance your cooking experience by improving your ability to handle kitchen tools effectively.
Cooking Time Adjustments
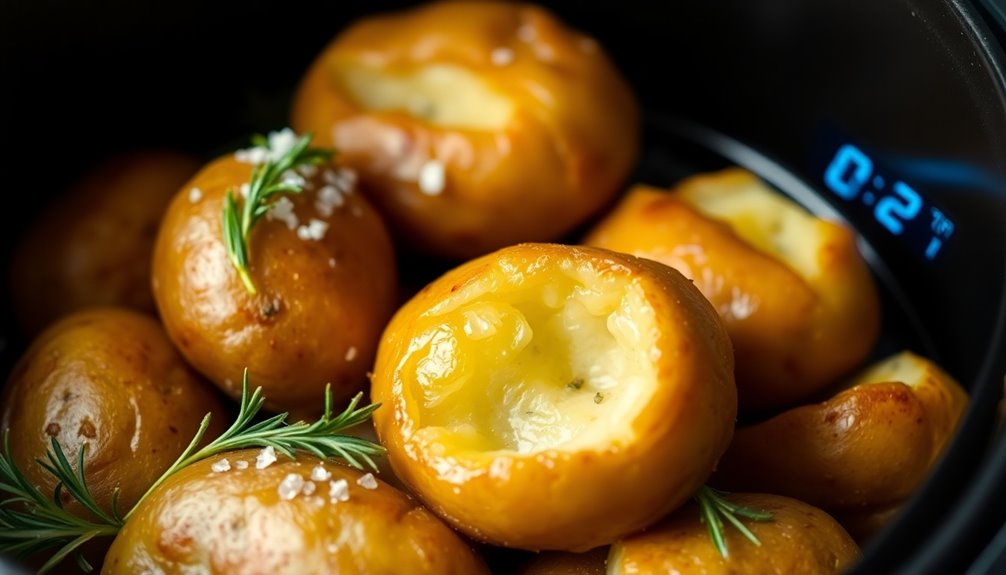
Cooking baked potatoes in an air fryer usually takes between 40 to 50 minutes at 400°F, but you might need to adjust that based on your potato size.
Larger potatoes require extra cooking time, while smaller ones may need less. To achieve that perfect crispy texture, remember to flip the potatoes halfway through.
If you're in a hurry, consider microwaving them for 6-8 minutes before air frying, which can cut down the overall cooking time. Always check for doneness by poking them with a fork; this guarantees they're soft enough inside.
If your potatoes aren't crispy enough, you can make adjustments by increasing the cooking time or slightly raising the temperature for better results.
Air Fryer Techniques
To achieve the best results when making baked potatoes in an air fryer, incorporate a few essential techniques.
First, preheat your air fryer to 400°F (200°C) for 5-8 minutes to guarantee even cooking and get that crispy skin.
Before cooking, pierce the potatoes with a fork to allow steam to escape, preventing any potential bursting. Lightly coat them with olive oil and season generously with salt and garlic powder for extra flavor.
Cook the potatoes for 40-50 minutes, flipping them halfway through to promote even browning.
Make sure not to overcrowd the air fryer basket, as proper air circulation is vital for achieving that perfectly crispy exterior. Additionally, the proper temperature control can significantly enhance the cooking process, ensuring uniform results throughout.
Enjoy your deliciously baked potatoes!
Understanding Cooking Times
![cooking time essentials explained](https://airfryerhub.com/wp-content/uploads/2025/01/cooking_time_essentials_explained.jpg)
Understanding the cooking times for baked potatoes in an air fryer can make a significant difference in achieving that perfect texture.
For medium-sized russet potatoes, about 7 oz, you should aim for a cooking time of 35-40 minutes at 400°F (200°C). If you're using larger potatoes, be prepared for cooking times that may extend up to 60 minutes to reach proper doneness.
To guarantee even cooking and a crispy skin, flip the potatoes halfway through the cooking process.
To check for doneness, simply insert a fork or knife into the potato; it should slide in easily when fully cooked.
Master these cooking times, and you'll enjoy deliciously baked potatoes every time!
Popular Baked Potato Toppings
![tasty toppings for potatoes](https://airfryerhub.com/wp-content/uploads/2025/01/tasty_toppings_for_potatoes.jpg)
Baked potatoes are incredibly versatile, especially when it comes to toppings that can elevate their flavor and texture.
For a classic choice, you can't go wrong with sour cream and shredded cheddar cheese. If you want a loaded baked potato, add crispy bacon and chives for a hearty treat.
Vegetarian options, like roasted broccoli and melted cheese or Greek yogurt with fresh herbs, offer delicious alternatives. For those who crave heat, consider spicy toppings like chipotle sauce or jalapeños.
You can also get creative with unique toppings like BBQ pulled pork or turkey chili, giving your baked potatoes a savory twist that will impress your family and friends. The possibilities are endless!
Nutritional Information Overview
![nutritional information summary provided](https://airfryerhub.com/wp-content/uploads/2025/01/nutritional_information_summary_provided.jpg)
When you enjoy a baked potato, you're not just indulging in a tasty treat; you're also choosing a nutritious option. A medium baked potato contains about 157 calories, making it a low-calorie base for various toppings.
With approximately 36 grams of carbohydrates, it provides the energy you need, while 4 grams of protein help support your muscle health. Plus, baked potatoes are a great source of dietary fiber, offering around 2.52 grams per serving, which aids in digestion.
The fat content is minimal, typically around 0.5 grams, positioning it as a heart-healthy choice when prepared wisely. Remember, the nutritional values can change based on toppings and preparation methods, so keep that in mind for a balanced diet.
Common Mistakes to Avoid
![avoid common pitfalls effectively](https://airfryerhub.com/wp-content/uploads/2025/01/avoid_common_pitfalls_effectively-2.jpg)
When making baked potatoes in your air fryer, there are a few common mistakes you should steer clear of.
Avoid wrapping your potatoes in foil, as this can lead to soggy skin, and don't overcrowd the basket to guarantee even cooking.
Finally, keep an eye on the cooking time; adjusting it as needed can make all the difference in achieving that perfect crispy texture.
Overcrowding the Air Fryer
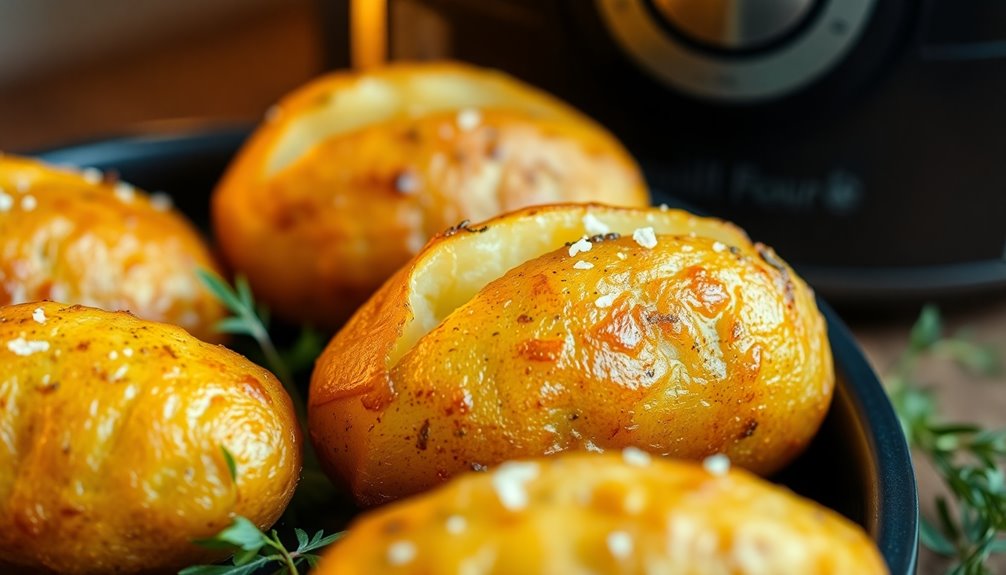
Overcrowding the air fryer basket can lead to frustrating results, so it's crucial to avoid this common mistake. Stacking or cramming too many medium-sized potatoes together can impede heat circulation, preventing them from achieving that perfect crispy skin.
To guarantee even cooking, follow these tips:
- Limit yourself to 4 medium-sized potatoes at a time.
- Flip them halfway through cooking to promote even browning.
- Space larger potatoes apart as they may require additional cooking time.
Wrapping Potatoes in Foil
Although it might seem convenient to wrap your potatoes in foil while cooking them in an air fryer, this common mistake can lead to disappointing results. Wrapping potatoes in foil traps moisture, resulting in soggy skin instead of the crispy skin you desire. For ideal crispiness, place your potatoes directly in the air fryer basket. This allows for even air circulation, ensuring a fluffy interior and a satisfying texture.
Mistake | Result |
---|---|
Wrapping in foil | Soggy skin |
Cooking unwrapped | Crispy skin |
Trapping steam | Compromised fluffy interior |
Overcrowding | Uneven cooking |
Ignoring air circulation | Diminished quality |
Skip the foil for the best baked potatoes!
Ignoring Cooking Time Adjustments
Ignoring cooking time adjustments can lead to undercooked or overcooked baked potatoes in your air fryer. Each air fryer model varies, so don't rely solely on the recommended time.
Typically, you'll need 40 to 50 minutes, depending on potato size. Remember to pierce potatoes and check for doneness; they should be tender when done. Flipping the potatoes halfway through guarantees even browning.
If they're still hard after the initial time, consider microwaving them briefly before air frying to speed things up.
- You could end up with a hard, unappetizing potato.
- Overcooked potatoes can turn into a mushy disaster.
- Missing that perfect crispy skin can be disappointing.
Adjust as necessary for the best results! Regularly monitoring cooking times can enhance your cooking experience and lead to healthier lifestyle choices.
Serving and Presentation Ideas
![creative food serving techniques](https://airfryerhub.com/wp-content/uploads/2025/01/creative_food_serving_techniques.jpg)
Baked potatoes are a delightful canvas for creativity when it comes to serving and presentation. After cooking, slice the baked potato lengthwise and pinch the sides to open it up, revealing a fluffy interior.
Start by adding a tablespoon of butter inside to enhance the flavor. Next, choose your favorite toppings—shredded cheese, crispy bacon bits, fresh chives, or steamed broccoli work beautifully.
For an inviting presentation, serve your baked potatoes on warm plates to keep them hot. Drizzle sour cream or chipotle sauce on top, and don't forget to garnish with freshly chopped herbs.
This colorful display not only looks great but also entices your guests to dig in and enjoy!
Additional Potato Recipes to Try
![potato recipe ideas collection](https://airfryerhub.com/wp-content/uploads/2025/01/potato_recipe_ideas_collection-1.jpg)
If you're looking to expand your potato repertoire beyond baked varieties, there are plenty of delicious options to explore.
Try these mouthwatering potato recipes that will elevate your meals:
- Crispy Smashed Potatoes: Boil, smash, and season with olive oil and herbs before air frying until golden.
- Oven Roasted Potatoes: Cut into wedges, toss with olive oil and your favorite seasonings, then bake for that perfect crunch.
- Air Fryer French Fries: Slice potatoes into fries, coat with oil and seasonings, and air fry for a quick, crispy snack.
These alternatives will keep your potato dishes exciting and flavorful, showcasing the versatility of this beloved ingredient! Additionally, incorporating mindful consumption practices can help you appreciate the quality of your ingredients and reduce waste in your cooking.
Frequently Asked Questions
How Long Does It Take to Air Fry a Baked Potato?
It typically takes about 40 to 50 minutes to air fry a baked potato at 400°F (200°C).
If you're using medium-sized russet potatoes, you'll find they're usually done around the 40-minute mark. Larger potatoes might need up to 60 minutes.
Don't forget to flip them halfway through for even cooking!
To speed things up, try microwaving them for 6-8 minutes before air frying, cutting the time down considerably.
Why Soak Potatoes in Water Before Air Frying?
Soaking potatoes before air frying is like giving them a revitalizing drink before a workout. It helps remove excess starch, making the interior fluffier and the skin crispier.
By hydrating the potatoes, you're ensuring they retain moisture during cooking, which enhances texture. This technique also speeds up cooking time slightly and promotes even cooking, particularly beneficial for high-starch russets.
How Long Does It Take for Potatoes to Cook in an Air Fryer?
When you cook potatoes in an air fryer, the time varies based on their size. For medium-sized russet or Idaho potatoes, you'll typically need about 35 to 40 minutes at 400°F (200°C).
Larger potatoes might take around 60 to 90 minutes. Don't forget to flip them halfway through to guarantee even cooking.
To check if they're done, just insert a fork or knife; it should slide in easily if they're cooked through.
Do You Wrap Potatoes in Foil When Using an Air Fryer?
Imagine biting into a perfectly crispy baked potato, the skin crackling beneath your fork. You might wonder if wrapping your potatoes in foil achieves that dream, but it doesn't.
Foil traps steam, leaving you with soggy skin instead of the desired crunch. Instead, cook them unwrapped, rub some oil on the skin for that golden finish, and don't forget to prick them to release steam.
You'll savor every delicious bite!
Conclusion
In just a short time, you can transform simple potatoes into crispy, fluffy delights that rival any restaurant dish. It's like turning a plain canvas into a masterpiece—once you've mastered this technique, you'll find countless ways to elevate your meals. So, grab your air fryer and get cooking! With practice, you'll create perfectly baked potatoes every time, impressing family and friends alike. Enjoy the journey, and don't forget to get creative with your toppings!
Recipes
How to Cook Asparagus in Air Fryer: Perfectly Roasted Every Time
Discover the secrets to perfectly roasted asparagus in your air fryer that will leave you craving more—your taste buds will thank you!
![air fryer asparagus recipe](https://airfryerhub.com/wp-content/uploads/2025/01/air_fryer_asparagus_recipe.jpg)
To cook asparagus in your air fryer perfectly, start by trimming the tough ends and rinsing the spears. Pat them dry, then toss with olive oil, garlic powder, salt, and pepper. Preheat your air fryer to 380°F to 400°F, then arrange the asparagus in a single layer. Cook thin spears for 5-6 minutes and thicker ones for 7-8 minutes, flipping them halfway through for even roasting. Aim for that vibrant green color and crisp-tender texture. Keep an eye on them to adjust cooking time as needed. There's more to master for your air frying adventures!
Key Takeaways
- Trim tough ends of asparagus and rinse under cool water before cooking for better texture and cleanliness.
- Preheat the air fryer to 380°F to 400°F for optimal cooking results.
- Season asparagus with olive oil, garlic powder, sea salt, and black pepper for enhanced flavor.
- Cook medium-thick spears for 5-7 minutes, tossing halfway for even roasting.
- Monitor cooking closely, adjusting time every 2 minutes for desired tenderness and crispness.
Preparing the Asparagus
![prepare fresh asparagus carefully](https://airfryerhub.com/wp-content/uploads/2025/01/prepare_fresh_asparagus_carefully.jpg)
Preparing asparagus starts with trimming the spears to remove tough ends. You'll want to cut off the bottom 1/2 to 1 inch of each spear, snapping or using a knife to eliminate any hard, woody parts. This ensures only the tender sections are cooked, giving you the best texture and flavor.
Next, rinse the asparagus under cool water to remove any dirt or debris, then pat them dry with a clean towel. This step is crucial, as clean asparagus cooks more evenly and prevents sogginess. Additionally, remember that cooking times vary by thickness, so selecting medium-thick spears can help prevent overcooking.
Finally, when selecting fresh asparagus, choose firm, bright green stalks without any signs of wilting or damage. Aim for spears of similar size for even cooking, ensuring a delightful dish every time.
Seasoning the Asparagus
![seasoned asparagus preparation steps](https://airfryerhub.com/wp-content/uploads/2025/01/seasoned_asparagus_preparation_steps.jpg)
After you've trimmed and rinsed the asparagus, it's time to enhance its flavor with seasoning. Start by patting the asparagus dry, then drizzle it with olive oil. For a basic seasoning, mix garlic powder, sea salt, and black pepper. If you prefer a simpler option, garlic salt works well too. Toss the asparagus until it's well-coated, and consider adding lemon juice or zest for a fresh twist. Parmesan cheese can also elevate the flavor.
Remember, you can experiment with different oils like avocado or vegetable oil. If you're prepping ahead, seasonings can be applied in advance. Additionally, make sure to trim the woody ends of the asparagus, as this helps improve texture. Lastly, ensure even seasoning by tossing halfway through cooking and keeping the asparagus in a single layer. Enjoy your perfectly seasoned asparagus!
Setting Up the Air Fryer
![air fryer preparation guide](https://airfryerhub.com/wp-content/uploads/2025/01/air_fryer_preparation_guide.jpg)
To set up your air fryer effectively, start by removing all packaging and washing the cooking basket and tray in warm, soapy water.
Once they're clean and dry, reassemble them and insert them back into the air fryer. If you're working with asparagus, trim any excess ends before you proceed.
Next, read the user manual to familiarize yourself with the controls; understanding the temperature and time settings is crucial. Warranty obligations assigned to Grip Group of Companies, Inc. will ensure that consumers continue to receive support for their purchased products.
Ensure the basket is securely attached—this may vary by model.
Finally, plug in the air fryer and preheat it for a few minutes, allowing it to reach the desired temperature, typically around 400°F for asparagus, before you begin cooking.
Cooking the Asparagus
![cooking fresh asparagus tips](https://airfryerhub.com/wp-content/uploads/2025/01/cooking_fresh_asparagus_tips.jpg)
Now that you've got your air fryer set up and the asparagus prepped, it's time to cook.
Preheat your air fryer to 380°F to 400°F. Place the asparagus spears in the basket, ensuring they're in an even layer with some space between them for optimal cooking.
If your asparagus is thin, cook for 5 to 6 minutes. For thicker spears, aim for 7 to 8 minutes. Remember to toss the asparagus halfway through to ensure even roasting. Cooking in an air fryer allows for a crispy texture without the sogginess that can occur with traditional methods.
Keep an eye on them; you're looking for a crisp-tender texture and a vibrant green color.
Once they're done, carefully remove them from the basket, and get ready to enjoy your perfectly roasted asparagus!
Monitoring and Adjusting
![tracking and modifying performance](https://airfryerhub.com/wp-content/uploads/2025/01/tracking_and_modifying_performance.jpg)
While cooking asparagus in the air fryer, it's crucial to monitor the spears closely to achieve the perfect texture.
For thin asparagus, cook for 3-4 minutes at 390°F, and check at 5-6 minutes at 400°F, as they can overcook quickly. Medium-thick asparagus typically takes 5-7 minutes at 390°F, while thicker spears may need 7-8 minutes at 400°F. Additionally, the standard bunch of asparagus typically weighs about 1 pound, so adjust the quantity and cooking time accordingly. Always check for doneness halfway through, and adjust the time every 2 minutes until you reach your desired tenderness.
Remember to arrange the asparagus in a single layer and use tongs to turn them halfway through to ensure even cooking. If you're unsure, it's better to undercook, as asparagus continues to soften after being removed from the fryer.
Serving the Asparagus
![cooking and presenting asparagus](https://airfryerhub.com/wp-content/uploads/2025/01/cooking_and_presenting_asparagus.jpg)
Serving asparagus right after it's cooked keeps its delicious crisp-tender texture intact. It's best to cook only what you need, as reheated asparagus tends to lose its appeal. If you have leftovers, chop them into 1/2″ pieces for fried rice, egg scrambles, or salads. This versatile veggie can complement any meal, whether it's dinner, lunch, or breakfast. Pair it with proteins and starches to create a balanced plate. Incorporating vegetables like asparagus into meals can also support healthy eating practices.
Enhance the flavor with salt, pepper, or garlic salt. A drizzle of balsamic glaze or a sprinkle of Parmesan cheese adds a tasty twist. Don't forget a squeeze of lemon juice for brightness. Additionally, air fried asparagus is a healthy option that pairs well with grilled meats.
Enjoy your asparagus fresh for the best experience!
Frequently Asked Questions
Can I Use Frozen Asparagus in the Air Fryer?
Yes, you can use frozen asparagus in the air fryer! Just place the frozen spears directly in the basket without thawing them.
Preheat your air fryer to 400°F (204°C) for optimal results. Cook for about 10-13 minutes, depending on the thickness, and shake the basket halfway through to ensure even cooking.
Toss them with olive oil, salt, and your favorite seasonings for added flavor. Enjoy your deliciously roasted asparagus!
What Are Some Alternative Cooking Methods for Asparagus?
If you're looking for alternative cooking methods for asparagus, you've got plenty of options.
You can boil or blanch it for a quick softening, steam it to retain nutrients, or bake it for a more hands-off approach.
Grilling and sautéing add delicious flavors but require more attention.
Each method has its benefits, so experiment to find the perfect technique that suits your taste and cooking style!
How Can I Store Leftover Cooked Asparagus?
To store leftover cooked asparagus, let it cool to room temperature before placing it in an airtight container.
You can keep it in the refrigerator for up to three days. If you don't have an airtight container, wrap it in aluminum foil or a plastic bag.
If you want to store it longer, freeze the asparagus in a freezer bag, pushing out air to prevent freezer burn.
Always check for spoilage before eating.
Can I Cook Other Vegetables Alongside Asparagus in the Air Fryer?
Yes, you can cook other vegetables alongside asparagus in the air fryer, but be mindful of their cooking times and sizes.
Thin vegetables like zucchini and bell peppers can cook well with asparagus, while thicker ones will need more time.
To ensure even cooking, cut everything to similar sizes and avoid overcrowding.
Consider air frying in batches for the best results, and use compatible seasonings to enhance their flavors together.
What Are the Nutritional Benefits of Eating Asparagus?
Asparagus offers numerous nutritional benefits that you shouldn't overlook.
It's packed with antioxidants like vitamins A and E, which help protect your cells from damage. The high fiber content promotes digestive health, making it easier for you to maintain regularity.
Plus, its potassium helps lower blood pressure and supports heart health. Eating asparagus can enhance your overall well-being, making it a smart addition to your diet.
Enjoy its delicious taste and health benefits!
Conclusion
With your perfectly roasted asparagus ready, it's time to dig in! Remember, the key to success is in the prep and seasoning—don't skip those steps. Feel free to experiment with different spices or add a squeeze of lemon for extra zing. Whether you're serving it as a side dish or tossing it into a salad, you'll love how easy and delicious air-fried asparagus can be. Enjoy your tasty creation and impress your guests!
Recipes
How to Cook Pork Chops in Air Fryer: Tender and Flavorful Guide
Flavorful pork chops await in your air fryer—discover the secrets to achieving perfect tenderness and taste every time. Don’t miss these essential tips!
![air fryer pork chop recipe](https://airfryerhub.com/wp-content/uploads/2025/01/air_fryer_pork_chop_recipe.jpg)
To cook tender and flavorful pork chops in an air fryer, start by preheating your fryer to 380°F. Choose high-quality, 1½ to 2-inch thick chops and pat them dry. Coat both sides with olive oil and season them with salt, pepper, and any spices you fancy. Arrange the chops in a single layer and cook for 10-14 minutes, flipping halfway through. Check the internal temperature to ensure it reaches 145°F. Let the chops rest for 5 minutes before serving. If you want to explore more tips and tasty variations for your pork chops, stay tuned for what's next!
Key Takeaways
- Preheat the air fryer to 360°F to 400°F, depending on desired crispiness and chop thickness, for about 5 minutes.
- Use fresh, high-quality pork chops, ideally 1 ½ to 2 inches thick, and coat them with oil for even cooking.
- Season generously with a mix of salt, pepper, garlic powder, and paprika, or experiment with other flavor profiles.
- Cook boneless chops at 400°F for 11-13 minutes, flipping halfway and checking for an internal temperature of 145°F.
- Let the pork chops rest for 5 minutes after cooking, then serve with sides like mashed potatoes or sautéed vegetables.
Preheating the Air Fryer
![preheat air fryer properly](https://airfryerhub.com/wp-content/uploads/2025/01/preheat_air_fryer_properly.jpg)
Preheating your air fryer is a crucial step for perfectly cooked pork chops. Set your air fryer to 360°F (182°C) for thinner cuts, 380°F (194°C) for a crispy exterior, or 400°F (204°C) for both boneless and bone-in chops. Preheat for about 5 minutes, but if you're cooking thicker chops, consider extending that time. Make sure you place the pork chops in a single layer in the basket to allow for optimal air circulation. Flipping them halfway through cooking promotes even browning, which is essential for achieving desired texture and flavor. Always check the internal temperature with an instant-read thermometer; it should reach 145°F (63°C). Avoid overcrowding to ensure each chop cooks evenly and thoroughly.
Preparing the Pork Chops
![cooking tender pork chops](https://airfryerhub.com/wp-content/uploads/2025/01/cooking_tender_pork_chops.jpg)
After getting your air fryer ready, it's time to focus on preparing the pork chops. Start by selecting fresh, high-quality pork chops, ideally 1 ½ to 2 inches thick, either boneless or bone-in.
Remove them from the packaging and rinse with cool water if needed. Next, pat the pork chops dry with paper towels to remove excess moisture, which helps ensure even browning and a crispy texture. Thicker cuts are recommended for juiciness and tenderness, making them less likely to dry out during cooking.
Once dry, coat both sides with olive oil or grape seed oil using a basting brush or your hands for even coverage. Finally, arrange the pork chops in a single layer in the air fryer basket, leaving space around each chop for proper air circulation.
Cook in batches if necessary.
Seasoning Options
![various seasoning choices available](https://airfryerhub.com/wp-content/uploads/2025/01/various_seasoning_choices_available.jpg)
Seasoning pork chops is key to enhancing their natural flavors and achieving a delicious meal. Start with a basic mix of salt, pepper, garlic powder, onion powder, and paprika. For a touch of sweetness, add brown sugar; it caramelizes beautifully during cooking. If you're feeling adventurous, try flavor variations like Cajun seasoning for a zesty kick or Mexican seasoning with chili powder and cumin for a delightful twist. You can also brush the chops with melted butter or olive oil to help the seasonings stick and keep the meat moist. For extra depth, consider combining smoked paprika with garlic powder or dried thyme with onion powder. Additionally, using bone-in pork chops promises to enhance flavor and moisture, elevating your pork chops to a new level of flavor.
Air Fryer Settings
![air fryer cooking instructions](https://airfryerhub.com/wp-content/uploads/2025/01/air_fryer_cooking_instructions-2.jpg)
To achieve perfectly cooked pork chops in the air fryer, it's crucial to set the right temperature and follow a few key steps.
Start by preheating your air fryer to 400°F for most boneless and bone-in chops. If you're cooking thinner chops or using different seasonings, set it to 360°F. For thicker bone-in chops or defrosting, consider 380°F. Always arrange the pork chops in a single layer to avoid overcrowding and ensure even cooking. Lightly spray the basket or chops with cooking spray for better results. Additionally, remember to check the internal temperature with a probe thermometer, aiming for 145°F, but you can safely remove them at 140°F to rest under foil for juiciness.
Happy cooking!
Cooking Time Guidelines
![cooking time recommendations provided](https://airfryerhub.com/wp-content/uploads/2025/01/cooking_time_recommendations_provided-1.jpg)
Now that you've set your air fryer, it's time to focus on the cooking time guidelines for pork chops.
For boneless chops, thickness matters: cook 1/2-inch thick chops for about 7-9 minutes and 1-inch thick for 11-13 minutes. You'll want to flip them halfway through for even cooking. Many users reported that cooking at the optimal temperature yields moist and flavorful results.
At 400°F (204°C), expect 11-13 minutes for 1-inch thick chops, while 380°F (194°C) takes 10-14 minutes. If you're using 375°F (190°C), aim for 9-12 minutes.
To ensure perfect results, preheat your air fryer and avoid overcrowding the basket. For the best flavor and texture, let your pork sit at room temperature for 30 minutes before cooking, and don't marinate for more than 12 hours. Enjoy!
Checking Internal Temperature
![verify food temperature accuracy](https://airfryerhub.com/wp-content/uploads/2025/01/verify_food_temperature_accuracy.jpg)
Checking the internal temperature of your pork chops is crucial for ensuring they're safe and delicious. To prevent undercooked or overcooked meat, use a meat thermometer to get an accurate reading. Aim for an internal temperature of at least 140°F; it'll rise to 145°F after you remove the chops from the air fryer. Always check the thickest part of the chop, avoiding any bone or fat for the most precise measurement.
Additionally, using an air fryer can result in juicy and flavorful pork chops, enhancing the overall dining experience. Allow the chops to rest for about 5 minutes, covering them with foil to retain heat. This resting period helps distribute heat and juices evenly, ensuring your pork is tender and flavorful by the time you're ready to serve it.
Serving Suggestions
![serving food ideas creatively](https://airfryerhub.com/wp-content/uploads/2025/01/serving_food_ideas_creatively.jpg)
After ensuring your pork chops are perfectly cooked and resting, it's time to think about how to serve them for a delightful meal.
Pair your chops with classic starchy sides like creamy mashed potatoes or fluffy white rice for comfort. If you're feeling adventurous, creamy Parmesan polenta or sweet potato casserole can add a unique twist. Additionally, serving pork chops with a cooking thermometer ensures they are cooked to the ideal temperature. Remember that butter's creamy texture can enhance the richness of your mashed potatoes or polenta.
For vibrant vegetable options, consider roasted asparagus or sweet, crunchy roasted carrots. If it's summer, grilled corn on the cob brings a smoky flavor. You could also try sautéed vegetables for a nutritious touch.
Finally, don't forget a simple side like butter-steamed cabbage or Southern-style green beans to round out your meal. Enjoy the delicious combination!
Additional Cooking Tips
![enhance your culinary skills](https://airfryerhub.com/wp-content/uploads/2025/01/enhance_your_culinary_skills.jpg)
To achieve perfectly cooked pork chops in your air fryer, it's crucial to focus on preparation and cooking techniques.
Start by preheating your air fryer to 400°F for five minutes. Pat the pork chops dry, coat them with olive oil, and apply your favorite seasoning mix generously. For the best results, choose thick, center-cut chops to enhance the char and flavor.
For a crispy texture, consider dipping them in eggs followed by breadcrumbs. Cook them for 12-14 minutes, flipping halfway through. Use an instant-read thermometer to ensure the internal temperature reaches 140-145°F.
After cooking, let the pork chops rest for 3-5 minutes to lock in the juices. If cooking in batches, keep the first batch warm while finishing the rest.
Serve immediately for the best flavor and tenderness!
Frequently Asked Questions
Can I Cook Frozen Pork Chops in the Air Fryer?
Yes, you can cook frozen pork chops in the air fryer!
Just place them in a single layer in the basket and preheat the fryer to 350°F to 380°F.
Start by cooking them for about 5 to 10 minutes to defrost, then season as desired.
Continue cooking for an additional 10 to 15 minutes, flipping halfway.
Ensure they reach an internal temperature of 145°F for safe eating.
Enjoy your delicious, tender pork chops!
What Side Dishes Pair Well With Air-Fried Pork Chops?
When you're enjoying air-fried pork chops, you'll want side dishes that complement their flavor.
Try air fryer green beans for a quick, crunchy option, or roasted carrots for a touch of sweetness.
Creamy mashed potatoes soak up the juices beautifully.
If you prefer something lighter, a refreshing cucumber salad can balance the meal nicely.
Don't forget some fluffy dinner rolls to complete your plate and add to the comfort of your feast!
How Do I Prevent Pork Chops From Drying Out?
To prevent your pork chops from drying out, start by brining or salting them ahead of time to enhance moisture retention.
Make sure to bring them to room temperature before cooking for even results.
Pat them dry to help marinate or season effectively.
During cooking, avoid overcooking by using a meat thermometer to reach a safe internal temperature of 145°F.
Finally, let them rest for a few minutes before slicing to keep juices intact.
Can I Use Different Oils for Cooking?
Absolutely, you can use different oils for cooking!
Olive oil is a popular choice, but avocado oil works well too, especially for high-heat methods. Canola and vegetable oils are also great alternatives if you prefer a neutral flavor.
Just remember to brush or spray the oil on your meat to help seasonings stick and keep everything moist.
Using the right oil not only enhances flavor but also prevents sticking during the cooking process.
What Is the Best Way to Store Leftover Pork Chops?
To store leftover pork chops, place them in airtight containers to keep out air and odors.
Store them in the coldest part of your refrigerator, ideally at 40°F (4°C) or below.
Consume the chops within 3-4 days for the best quality.
If you need to keep them longer, wrap them tightly in heavy-duty freezer bags and freeze at 0°F (-18°C) or below, labeling each package with the date for easy tracking.
Conclusion
Now that you know how to cook pork chops in an air fryer, you're all set to impress at your next meal. With tender, flavorful results and endless seasoning options, it's a quick and easy way to enjoy this delicious cut of meat. Don't forget to check the internal temperature to ensure they're perfectly cooked. So go ahead, fire up that air fryer, and savor the juicy goodness of your homemade pork chops! Enjoy!
Recipes
How Long to Cook Chicken Wings in Air Fryer: Ultimate Crispy Guide!
Get ready to master air fryer chicken wings with our ultimate guide—discover the secret to achieving unbeatable crispiness and mouthwatering flavor!
![crispy air fryer wings](https://airfryerhub.com/wp-content/uploads/2025/01/crispy_air_fryer_wings-3.jpg)
To cook chicken wings in an air fryer, preheat it to 360°F. Arrange your wings in a single layer, then cook them for about 23-25 minutes. For best results, flip the wings every five minutes and shake the basket every six minutes to ensure even cooking. If you're using frozen wings, increase the temperature to 400°F and cook for around 25 minutes. Pat the wings dry before seasoning, and consider using aluminum-free baking powder to boost crispiness. Want to explore more tips and tricks for perfect wings? There's plenty more to discover!
Key Takeaways
- Preheat the air fryer to 360°F for about 4-5 minutes for optimal crispiness before cooking wings.
- Cook 2 lbs of chicken wings for 23-24 minutes, flipping and shaking the basket every 5-6 minutes.
- For frozen wings, increase the temperature to 400°F and cook for approximately 25 minutes.
- Ensure wings are patted dry and arranged in a single layer for maximum crispiness.
- Always check that the internal temperature of the wings reaches at least 165°F for safe consumption.
Preheating the Air Fryer
![preheat your air fryer](https://airfryerhub.com/wp-content/uploads/2025/01/preheat_your_air_fryer.jpg)
Before you dive into cooking those delicious chicken wings, it's essential to preheat your air fryer. Preheating helps achieve that signature crispiness you crave by circulating super-hot air around the fryer, which is vital for thick cuts like chicken wings. Smaller air fryers usually need just 2-3 minutes, while larger models may take 4-5 minutes. For optimal results, set the temperature before turning it on, and let it run empty for the recommended time. Always consult your operating manual for specific instructions, especially if your model lacks a preheat button. This step is crucial because most recipes yield improved outcomes with preheating, so don't overlook this crucial part of the process!
Preparing Chicken Wings
![cooking flavorful chicken wings](https://airfryerhub.com/wp-content/uploads/2025/01/cooking_flavorful_chicken_wings.jpg)
To prepare your chicken wings for air frying, start by cutting and separating them into drums and flats if you prefer. Aim for uniform pieces to ensure even cooking, and remove any excess cartilage or tips.
Next, pat them dry with paper towels to eliminate excess moisture; this step is crucial for achieving crispy skin. If you're using frozen wings, make sure to remove any visible ice.
For seasoning, combine spices like garlic powder, onion powder, paprika, oregano, salt, and black pepper in a bowl. Add baking powder to help crisp the skin, then drizzle with olive or avocado oil. Incorporating baking powder into your seasoning mix is essential for that perfect crunch.
Finally, massage the seasonings into the wings, ensuring they're evenly coated before air frying.
Cooking Time and Temperature
![cooking duration and heat](https://airfryerhub.com/wp-content/uploads/2025/01/cooking_duration_and_heat-3.jpg)
Cooking chicken wings in an air fryer requires careful attention to cooking time and temperature for the best results.
Start by preheating your air fryer to 360°F for about 18 minutes. For 2 lbs of wings, aim for a total cooking time of 23-24 minutes. Air fryer wings achieve crispiness without deep frying, making them a healthier option.
Some recipes might suggest starting at 380°F for the first 20 minutes. After the initial phase, increase the temperature to 390°F for the next few minutes, and finish with a final boost to 400°F for the last 2 minutes.
Remember to shake the basket every 6 minutes and flip the wings every 5 minutes to ensure even cooking. This method helps achieve that perfect golden, crispy skin while ensuring the internal temperature reaches at least 165°F.
Achieving Maximum Crispiness
![perfectly crispy preparation method](https://airfryerhub.com/wp-content/uploads/2025/01/perfectly_crispy_preparation_method.jpg)
Achieving maximum crispiness for your air-fried chicken wings is all about preparation and technique. Start by patting the wings dry with paper towels to remove moisture, which is key for crispy skin.
Separate the wings into drums and flats for even cooking, and make sure they're fully defrosted. Arrange them in a single layer in the air fryer basket to prevent overlapping.
For an extra crispy finish, add aluminum-free baking powder to your seasoning mix; this raises the pH level and enhances the crust. Cooking your wings in an air fryer offers a healthier alternative to traditional frying, resulting in crispy and juicy wings with less effort. Cook initially at medium heat to render fat, then increase the temperature for that perfect crunch.
Remember to shake the basket every few minutes for even cooking and serve immediately for the best results!
Flavorful Seasoning Options
![tasty seasoning choices available](https://airfryerhub.com/wp-content/uploads/2025/01/tasty_seasoning_choices_available-1.jpg)
Once you've perfected the crispiness of your chicken wings, it's time to elevate their flavor with a variety of seasoning options. For a classic taste, stick with simple salt and pepper or try lemon pepper for a citrusy kick.
If you want a savory boost, sprinkle on garlic powder or a mix of kosher salt and white pepper. For a spicy twist, cayenne pepper or smoked paprika can add some heat and depth. Additionally, ensure your wings are well-cooked by checking the internal temperature to guarantee they reach at least 165°F for safety.
Consider herb-based options like Italian seasoning or a garlic and herb blend for an aromatic touch.
If you're feeling adventurous, explore global flavors—mix cumin and chili powder for a Mexican flair or use garam masala for an Indian-inspired taste. Your wings will never be boring again!
Delicious Sauce Suggestions
![tasty sauce recipe ideas](https://airfryerhub.com/wp-content/uploads/2025/01/tasty_sauce_recipe_ideas.jpg)
To truly take your air-fried chicken wings to the next level, consider adding a variety of delicious sauces that can enhance their flavor profile.
For a spicy kick, whip up a homemade hot sauce by mixing your favorite hot sauce with butter, cayenne, garlic, and onion powder. This flavor enhancement is particularly effective when using fresh chicken wings, as it allows the sauce to cling perfectly to the crispy skin.
If you're craving something sweet and smoky, try a BBQ sauce mixed with honey or brown sugar.
For an Asian twist, combine soy sauce with honey, ginger, and sesame oil.
Lastly, don't forget about creamy options; ranch dressing mixed with hot sauce or a tangy blue cheese dressing pairs beautifully.
These sauces can transform your wings into a flavorful feast that everyone will love!
Handling Frozen Chicken Wings
![thaw and cook properly](https://airfryerhub.com/wp-content/uploads/2025/01/thaw_and_cook_properly.jpg)
When you're ready to cook frozen chicken wings, knowing how to handle them properly can make all the difference in achieving that perfect texture and flavor.
The safest way to thaw wings is in the refrigerator overnight, but if you're short on time, you can use a cold water bath—just remember to change the water every 30 minutes. You can also thaw in the microwave, but it's less recommended.
Pat the wings dry after thawing to remove excess moisture for that crispy finish. If you choose to cook from frozen, preheat your air fryer to 400°F (200°C) and cook for about 25-30 minutes. Don't forget to flip them halfway through for even crispiness! Additionally, cooking from frozen allows you to skip the thawing process entirely, making it a convenient option for a quick meal while still achieving a crispy exterior.
General Cooking Tips
![essential kitchen advice shared](https://airfryerhub.com/wp-content/uploads/2025/01/essential_kitchen_advice_shared.jpg)
While cooking chicken wings in an air fryer may seem straightforward, a few key tips can elevate your results.
Preheat your air fryer to 360-380°F (182-193°C) for the first half, then crank it up to 390-430°F (199-221°C) to crisp the skin. Low carb diets can be complemented with delicious chicken wings when prepared this way.
Don't forget to pat the wings dry and season them with salt, garlic powder, and olive oil before cooking. Air frying reduces calories compared to traditional frying methods, so it's a healthier choice.
To ensure even cooking, arrange the wings in a single layer and leave space between them. Flip or shake them every 5-6 minutes.
For extra crispiness, add baking powder to your seasoning mix and use a digital meat thermometer to make sure the internal temperature hits 165°F (74°C).
Happy cooking!
Variations and Experimentation
![creative exploration and innovation](https://airfryerhub.com/wp-content/uploads/2025/01/creative_exploration_and_innovation.jpg)
Exploring variations and experimentation can turn your air-fried chicken wings into a culinary adventure.
You can start by adjusting cooking temperatures and times to achieve the perfect crispiness. Try cooking at 380°F for 20 minutes, flipping every five minutes, then increase to 400°F for a final crisp. Additionally, consider the whole chicken wings that include different parts, which can offer a variety of textures and flavors.
Don't forget to play with seasonings—mix salt, white pepper, and baking powder for classic crispy wings, or go bold with buffalo sauce for a spicy kick.
For added crunch, pat your wings dry and consider a dusting of baking powder.
If you're using frozen wings, cook them at 400°F for about 25 minutes.
With these tweaks, your chicken wings will be a hit every time!
Serving Suggestions
![delicious meal presentation ideas](https://airfryerhub.com/wp-content/uploads/2025/01/delicious_meal_presentation_ideas-4.jpg)
To elevate your air-fried chicken wings, consider pairing them with complementary sides that enhance their flavor and texture. Traditional options like celery and carrot sticks with blue cheese or ranch dressing are always a hit.
If you're serving spicy wings, coleslaw balances the heat perfectly. For something heartier, try loaded potato skins or creamy mac and cheese. Classic pairings like wings and fries are also easy to recreate at home for added satisfaction. Incorporating aesthetic serveware can enhance the presentation of your meal, making it more enjoyable for your guests.
Fresh options like a Mediterranean salad or guacamole add a light touch. Craving indulgence? Mozzarella sticks or jalapeño poppers can take your meal up a notch.
Don't forget seasoned fries for a savory crunch or garlic bread for a lighter choice. These pairings will surely make your chicken wings the star of the meal!
Frequently Asked Questions
Can I Use Other Types of Poultry Instead of Chicken Wings?
Absolutely, you can use other types of poultry instead of chicken wings!
Boneless skinless breasts, thighs, and drumsticks are great alternatives. Just remember to adjust the cooking temperature and time accordingly.
For instance, boneless breasts cook faster than thighs. Always check that the internal temperature reaches at least 165°F to ensure they're safe to eat.
Don't overcrowd your air fryer basket, and flip the poultry halfway through for even cooking.
Enjoy!
How Do I Store Leftover Cooked Chicken Wings?
To store leftover cooked chicken wings, you'll want to use airtight, refrigerator-safe containers.
Make sure to transfer the wings promptly and keep them sealed to prevent drying out and bacterial growth.
Store them in the fridge at a temperature below 40°F (4°C) and consume within three to four days.
For longer storage, freeze them in airtight containers or bags.
Thaw frozen wings in the fridge before reheating to enjoy them safely.
Can I Reheat Chicken Wings in the Air Fryer?
Yes, you can definitely reheat chicken wings in the air fryer!
Start by preheating it to around 360°F (182°C). Arrange your wings in a single layer to ensure even cooking, and spray the basket to prevent sticking.
Heat them for about 5 minutes, flipping halfway through. For extra crispiness, shake the basket.
Just make sure the internal temperature reaches 165°F (74°C) before enjoying those delicious wings again!
What Is the Best Way to Defrost Frozen Chicken Wings?
The best way to defrost frozen chicken wings is in cold water.
Place the wings in a leak-proof bag, then submerge them in a non-reactive bowl filled with cold water. Change the water every 30 minutes to keep it cold. This method typically takes about 20-30 minutes for smaller batches.
Alternatively, you can thaw them in the refrigerator overnight, but that'll take longer.
Just avoid microwaving; it can unevenly defrost and affect texture.
Are Air Fryer Chicken Wings Healthier Than Deep-Fried Wings?
Yes, air fryer chicken wings are healthier than deep-fried wings.
You'll enjoy significantly lower fat content—up to 75% less! Plus, they retain essential nutrients like protein and vitamins while minimizing harmful compounds.
Air frying requires just a tablespoon of oil compared to three cups for deep frying, reducing calorie intake by 70-80%.
Conclusion
Now you're ready to whip up some delicious, crispy chicken wings in your air fryer! By following these tips on preheating, cooking time, and seasoning, you'll impress everyone with your culinary skills. Don't hesitate to experiment with flavors and variations to find your perfect wing recipe. Remember, the key to that mouthwatering crunch is in the technique. So gather your ingredients, fire up the air fryer, and enjoy your tasty creations! Happy cooking!
-
User Stories and Tips1 week ago
I Tried These 5 Air Fryer Hacks—You Won’t Believe the Results!
-
User Stories and Tips7 days ago
The Secret to Perfectly Crispy Fries: Real Users Share Their Air Fryer Tips
-
User Stories and Tips7 days ago
You’ll Never Cook the Same Again: How an Air Fryer Changed My Life!
-
Recipes6 days ago
How to Make Fries in Air Fryer: The Ultimate Crisp Guide
-
User Stories and Tips1 week ago
I Cooked Every Meal in an Air Fryer for a Week—Here’s What I Learned!
-
Vetted6 days ago
15 Best Smart Air Fryers With App Connectivity for Effortless Cooking in 2025
-
Vetted6 days ago
15 Best Desk Speakers of 2025 – Elevate Your Audio Experience
-
Recipes6 days ago
How to Cook Wings in Air Fryer: The Ultimate Crispy Recipe