Recipes
How to Make Tortilla Chips in Air Fryer: Easy Snack Hacks
Delight in creating crispy, homemade tortilla chips in your air fryer, but discover the secret seasoning that will elevate your snack to the next level!
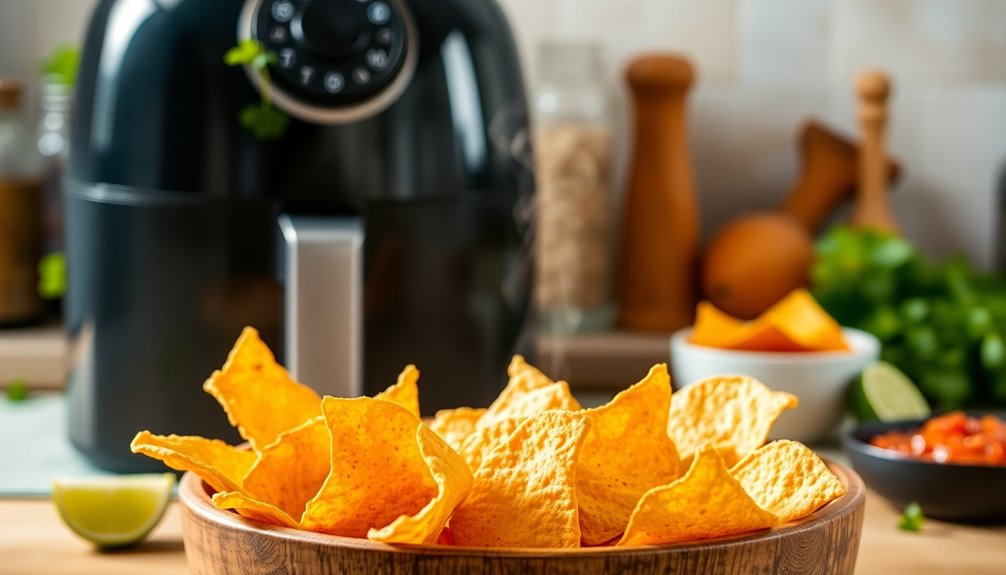
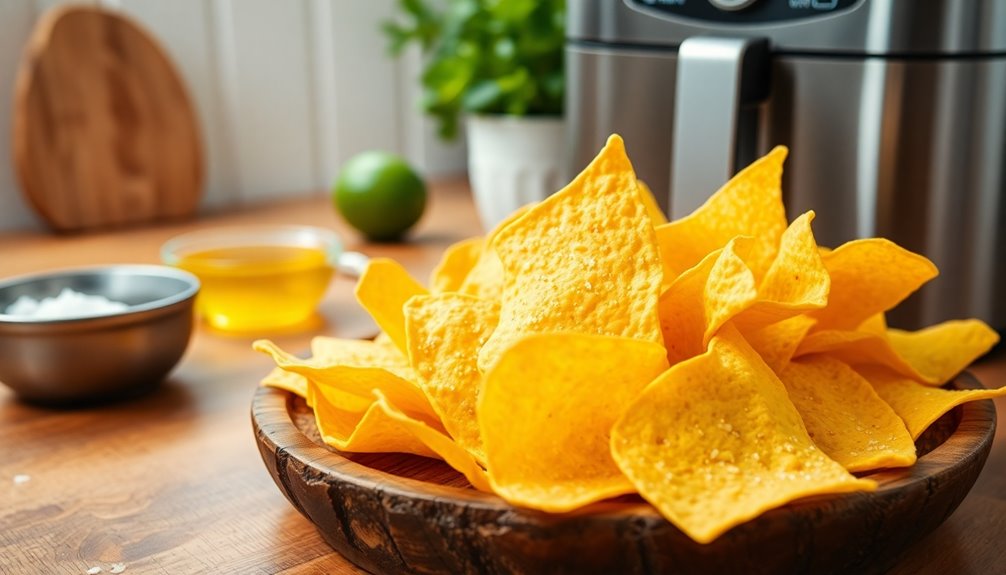
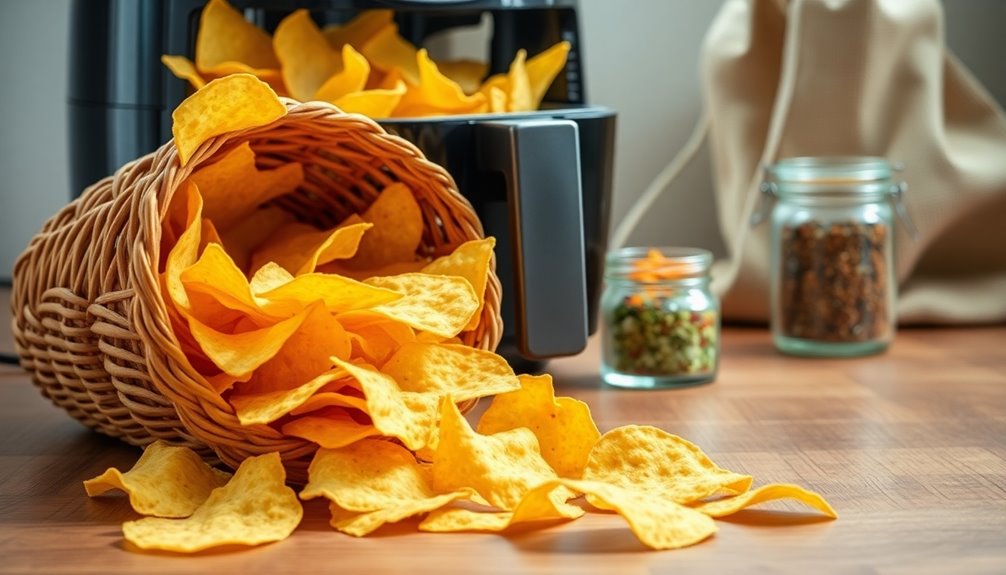
Making tortilla chips in an air fryer is simple and rewarding. Start by preheating your air fryer to 350°F (175°C). Use whole wheat or corn tortillas, brushing them lightly with oil and seasoning both sides. Cut the tortillas into uniform triangles and arrange them in a single layer in the basket. Cook for about 8-10 minutes, shaking the basket halfway for even browning. Feel free to experiment with different seasonings or drizzle lime juice post-frying for a zestier flavor. To keep your chips fresh, store them in an airtight container and treat yourself to a tasty snack hack! There's more to explore.
Key Takeaways
- Preheat your air fryer to 350°F (175°C) for optimal crispiness in your tortilla chips.
- Lightly brush whole wheat or corn tortillas with oil and season both sides for added flavor.
- Cut tortillas into uniform triangles to ensure even cooking and browning.
- Arrange chips in a single layer in the air fryer basket, shaking halfway through cooking.
- Store cooled chips in an airtight container to maintain freshness and crunch.
Why This Recipe Is Dietitian Approved
When you whip up air fryer tortilla chips, you're not just indulging in a tasty snack; you're also making a dietitian-approved choice. This air fryer recipe utilizes whole wheat tortillas, boosting the fiber content and making it a healthier snack option.
You'll appreciate how easy it is, needing only oil and tortillas for preparation, which keeps things budget-friendly. By using an air fryer, you're considerably cutting down on oil, leading to lower fat content compared to traditional frying methods.
Plus, the customizable seasoning allows you to add your favorite flavors without piling on calories or sodium. The result? A crispy texture that satisfies your snack cravings while keeping your health in check. Additionally, opting for healthier oils, such as essential oils for toothache relief, can enhance your culinary experience and promote overall wellness.
Essential Ingredients
To make delicious tortilla chips in your air fryer, start with the right tortillas—whole wheat or corn are great choices.
You'll also need a touch of oil for crispiness and your favorite seasonings to boost flavor.
With these essential ingredients, you can easily customize your chips to match your taste.
Tortilla Types Overview
Tortilla chips can be made from a variety of tortillas, each offering unique flavors and textures. You can choose corn tortillas for that classic crunch or opt for whole wheat tortillas for a healthier, fiber-rich option.
If you're looking for gluten-free tortillas, there are plenty available to guarantee everyone can enjoy homemade tortilla chips.
When preparing your chips, remember to cut the tortillas into uniform shapes, usually triangles, to promote even cooking while air frying.
Using neutral oils like olive or avocado oil is best, as they help seasoning adhere and enhance the flavor.
With these choices, you'll have delicious, crispy tortilla chips in no time!
Oil and Seasoning Options
Choosing the right oil and seasoning can make all the difference in your homemade tortilla chips. For that perfect crispy tortilla, use olive oil or neutral oils like avocado or canola. A light coating of about 1-2 tablespoons per 6 tortillas not only enhances texture but also keeps your chips healthier.
When it comes to seasoning blends, you've got endless options! Popular choices like sea salt, paprika, garlic powder, or taco seasoning can elevate your chips without piling on calories.
Feeling adventurous? Try brushing your tortillas with oil and maple syrup, then sprinkle with cinnamon for a sweet twist. Don't forget to explore unique mixes from stores like Trader Joe's to truly customize your flavor profile!
Step-by-Step Instructions
Now that you have your essential ingredients ready, it's time to get cooking.
You'll start by preheating your air fryer and preparing the tortillas for the perfect crunch.
Follow these simple steps for a delicious batch of homemade tortilla chips.
Essential Ingredients Needed
To make delicious tortilla chips in your air fryer, you'll need just a few essential ingredients. Start with your choice of tortillas; corn tortillas are great for that authentic flavor, but you can use flour or whole wheat for added fiber.
Next, grab some olive oil to lightly brush or spritz on both sides of the tortillas, ensuring they turn crispy without excess fat. Don't forget salt—sea salt or Kosher salt works best. You can also add your favorite seasoning, like paprika or chili powder, for extra flavor.
Once you've prepared your tortillas, you're all set for the cooking time ahead. With these ingredients, you'll create tasty, homemade corn tortilla chips in no time!
Cooking Process Overview
With your tortillas and seasonings ready, it's time to get cooking. Preheat your air fryer to 350°F (175°C) for best results.
Lightly brush your corn tortillas with avocado oil and season both sides with salt and any optional spices. Cut them into uniform triangles, aiming for about 12 chips per tortilla.
Arrange the triangles in a single layer in the air fryer basket—this step is essential for achieving that desired crispy texture. Cook the chips for 5-7 minutes, but make sure to monitor closely.
Shake the basket halfway through the cook time to guarantee they turn golden brown and cook evenly. Enjoy your delicious Air Fryer Tortilla Chips!
Variations and Substitutions
If you're looking to put a twist on your tortilla chips, there are plenty of variations and substitutions to explore.
Start by using gluten-free tortillas made from corn or rice if you need a gluten-free option. For flavor, try different seasoning blends like taco or ranch seasoning, or even cinnamon sugar for a sweet treat.
Switch up your oils, opting for avocado or canola oil instead of olive oil to still achieve crispy air fried tortilla chips. For a revitalizing flavor boost, squeeze lime juice over your chips after frying and sprinkle with sea salt.
You can also experiment with unique spice blends from Trader Joe's to create your signature lime tortilla chips that cater to your taste preferences.
Storage Tips
Proper storage is essential for keeping your homemade tortilla chips crispy and fresh. To achieve that, follow these storage tips:
Action | Container Type | Duration |
---|---|---|
Allow chips to cool | Airtight container | Up to 5 days |
Store in a cool, dry place | Airtight container | Prevent moisture absorption |
Reheat if stale | Air fryer | Restore crunch |
Top Success Tips
To achieve the perfect batch of tortilla chips in your air fryer, it's crucial to follow a few key success tips.
First, preheat your air fryer to 350°F to guarantee even cooking.
Next, cut your tortillas into uniform triangles—aim for about 8 chips per tortilla—for consistent cook time.
Lightly coat both sides with a little bit of oil, such as olive oil or cooking spray, to get that perfect crunch without excess grease.
Remember to avoid overcrowding the basket, as this can lead to soggy chips; cook in batches if needed.
Finally, let your chips cool for a few minutes after air frying to enhance their crisp texture before serving.
Enjoy your delicious, homemade tortilla chips!
Additional Snack Ideas
Looking for tasty ways to enjoy your air fryer tortilla chips? You've got plenty of options to elevate your snack game! Here are some delicious ideas:
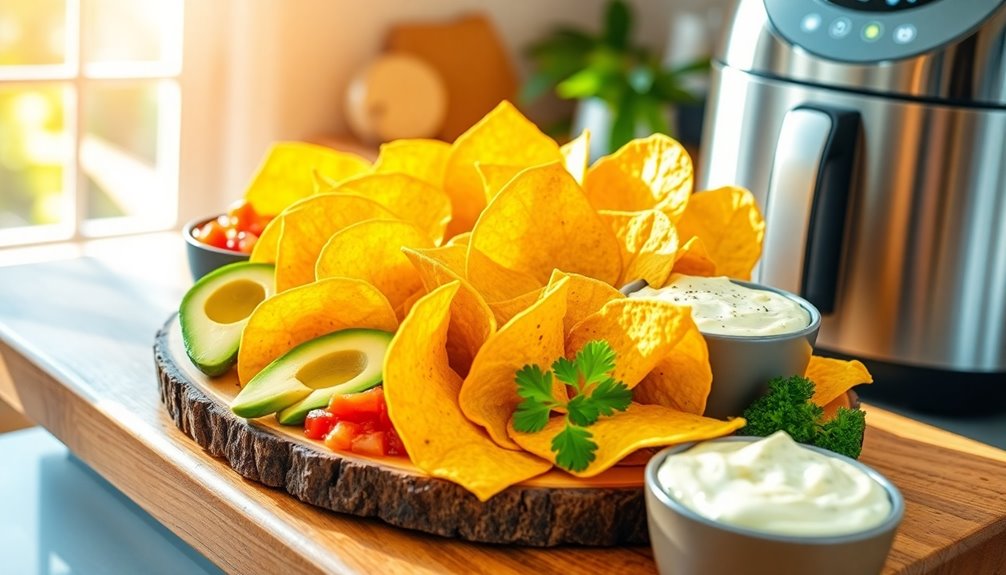
- Pair with Dips: Serve your chips with salsa, guacamole, or queso for a classic combination.
- Veggie Platter: Create a healthier snack by pairing your tortilla chips with fresh veggies like carrots, cucumbers, and bell peppers.
- Seasoned Chips: Experiment with different seasonings like taco seasoning, ranch powder, or even cinnamon sugar for a unique twist.
- Crunchy Topping: Use your air-fried tortilla chips as a crunchy topping for salads or soups to add texture and flavor.
Additionally, consider incorporating investment strategies for a budget-friendly approach to snack preparation. Don't forget to store any leftovers in an airtight container for up to 3 days to keep them crispy!
Frequently Asked Questions
How to Crisp up Tortilla Chips in an Air Fryer?
To crisp up tortilla chips in an air fryer, start by preheating it to 350°F.
Lightly brush your tortilla pieces with olive oil and sprinkle them with salt or your favorite spices.
Cut the tortillas into even triangles for uniform cooking.
Arrange them in a single layer in the basket, avoiding overcrowding.
Cook for 5-7 minutes, keeping an eye on them to prevent burning, and let them cool slightly to enhance their crunchiness.
Why Are My Air Fryer Tortilla Chips Not Crispy?
Imagine pulling out a batch of golden tortilla chips, only to find them limp and sad.
Your air fryer chips mightn't be crispy due to insufficient oil, overcrowded baskets, or cooking at a low temperature. You need to coat them lightly, cook in smaller batches, and aim for 350°F to 400°F.
Letting them cool for a few minutes can also help achieve that perfect crunch you're craving.
Can You Air Fry Store-Bought Tortilla Chips?
Yes, you can air fry store-bought tortilla chips!
It's a great way to enhance their crispiness, especially if they're a bit stale.
Just preheat your air fryer to 350°F (175°C) and arrange the chips in a single layer.
Air fry them for about 3-5 minutes, shaking the basket halfway through to guarantee even cooking.
Let them cool for a few minutes afterward to achieve the perfect crunch.
Enjoy your crispy snack!
What Is the Best Way to Do Chips in an Air Fryer?
Imagine you're hosting a game night and want something quick and tasty.
The best way to make chips in an air fryer is to preheat it, then lightly brush your tortillas with olive oil and season them.
Cut them into triangles and arrange them in a single layer.
Cook for 5-7 minutes, shaking halfway through for even cooking.
You'll end up with perfectly crispy chips that everyone will love!
Conclusion
In the culinary garden of snacks, your air fryer stands as a wise gardener, transforming simple tortillas into crispy treasures. With each batch you create, you cultivate not just flavor but also joy and satisfaction. As you enjoy your homemade tortilla chips, remember that even the simplest ingredients can flourish into delightful treats. So, embrace your role as the chef in this vibrant garden, and let your creativity bloom with every crunchy bite. Happy snacking!
Recipes
How to Cook Asparagus in Air Fryer: Perfectly Roasted Every Time
Discover the secrets to perfectly roasted asparagus in your air fryer that will leave you craving more—your taste buds will thank you!
To cook asparagus in your air fryer perfectly, start by trimming the tough ends and rinsing the spears. Pat them dry, then toss with olive oil, garlic powder, salt, and pepper. Preheat your air fryer to 380°F to 400°F, then arrange the asparagus in a single layer. Cook thin spears for 5-6 minutes and thicker ones for 7-8 minutes, flipping them halfway through for even roasting. Aim for that vibrant green color and crisp-tender texture. Keep an eye on them to adjust cooking time as needed. There's more to master for your air frying adventures!
Key Takeaways
- Trim tough ends of asparagus and rinse under cool water before cooking for better texture and cleanliness.
- Preheat the air fryer to 380°F to 400°F for optimal cooking results.
- Season asparagus with olive oil, garlic powder, sea salt, and black pepper for enhanced flavor.
- Cook medium-thick spears for 5-7 minutes, tossing halfway for even roasting.
- Monitor cooking closely, adjusting time every 2 minutes for desired tenderness and crispness.
Preparing the Asparagus
Preparing asparagus starts with trimming the spears to remove tough ends. You'll want to cut off the bottom 1/2 to 1 inch of each spear, snapping or using a knife to eliminate any hard, woody parts. This ensures only the tender sections are cooked, giving you the best texture and flavor.
Next, rinse the asparagus under cool water to remove any dirt or debris, then pat them dry with a clean towel. This step is crucial, as clean asparagus cooks more evenly and prevents sogginess. Additionally, remember that cooking times vary by thickness, so selecting medium-thick spears can help prevent overcooking.
Finally, when selecting fresh asparagus, choose firm, bright green stalks without any signs of wilting or damage. Aim for spears of similar size for even cooking, ensuring a delightful dish every time.
Seasoning the Asparagus
After you've trimmed and rinsed the asparagus, it's time to enhance its flavor with seasoning. Start by patting the asparagus dry, then drizzle it with olive oil. For a basic seasoning, mix garlic powder, sea salt, and black pepper. If you prefer a simpler option, garlic salt works well too. Toss the asparagus until it's well-coated, and consider adding lemon juice or zest for a fresh twist. Parmesan cheese can also elevate the flavor.
Remember, you can experiment with different oils like avocado or vegetable oil. If you're prepping ahead, seasonings can be applied in advance. Additionally, make sure to trim the woody ends of the asparagus, as this helps improve texture. Lastly, ensure even seasoning by tossing halfway through cooking and keeping the asparagus in a single layer. Enjoy your perfectly seasoned asparagus!
Setting Up the Air Fryer
To set up your air fryer effectively, start by removing all packaging and washing the cooking basket and tray in warm, soapy water.
Once they're clean and dry, reassemble them and insert them back into the air fryer. If you're working with asparagus, trim any excess ends before you proceed.
Next, read the user manual to familiarize yourself with the controls; understanding the temperature and time settings is crucial. Warranty obligations assigned to Grip Group of Companies, Inc. will ensure that consumers continue to receive support for their purchased products.
Ensure the basket is securely attached—this may vary by model.
Finally, plug in the air fryer and preheat it for a few minutes, allowing it to reach the desired temperature, typically around 400°F for asparagus, before you begin cooking.
Cooking the Asparagus
Now that you've got your air fryer set up and the asparagus prepped, it's time to cook.
Preheat your air fryer to 380°F to 400°F. Place the asparagus spears in the basket, ensuring they're in an even layer with some space between them for optimal cooking.
If your asparagus is thin, cook for 5 to 6 minutes. For thicker spears, aim for 7 to 8 minutes. Remember to toss the asparagus halfway through to ensure even roasting. Cooking in an air fryer allows for a crispy texture without the sogginess that can occur with traditional methods.
Keep an eye on them; you're looking for a crisp-tender texture and a vibrant green color.
Once they're done, carefully remove them from the basket, and get ready to enjoy your perfectly roasted asparagus!
Monitoring and Adjusting
While cooking asparagus in the air fryer, it's crucial to monitor the spears closely to achieve the perfect texture.
For thin asparagus, cook for 3-4 minutes at 390°F, and check at 5-6 minutes at 400°F, as they can overcook quickly. Medium-thick asparagus typically takes 5-7 minutes at 390°F, while thicker spears may need 7-8 minutes at 400°F. Additionally, the standard bunch of asparagus typically weighs about 1 pound, so adjust the quantity and cooking time accordingly. Always check for doneness halfway through, and adjust the time every 2 minutes until you reach your desired tenderness.
Remember to arrange the asparagus in a single layer and use tongs to turn them halfway through to ensure even cooking. If you're unsure, it's better to undercook, as asparagus continues to soften after being removed from the fryer.
Serving the Asparagus
Serving asparagus right after it's cooked keeps its delicious crisp-tender texture intact. It's best to cook only what you need, as reheated asparagus tends to lose its appeal. If you have leftovers, chop them into 1/2″ pieces for fried rice, egg scrambles, or salads. This versatile veggie can complement any meal, whether it's dinner, lunch, or breakfast. Pair it with proteins and starches to create a balanced plate. Incorporating vegetables like asparagus into meals can also support healthy eating practices.
Enhance the flavor with salt, pepper, or garlic salt. A drizzle of balsamic glaze or a sprinkle of Parmesan cheese adds a tasty twist. Don't forget a squeeze of lemon juice for brightness. Additionally, air fried asparagus is a healthy option that pairs well with grilled meats.
Enjoy your asparagus fresh for the best experience!
Frequently Asked Questions
Can I Use Frozen Asparagus in the Air Fryer?
Yes, you can use frozen asparagus in the air fryer! Just place the frozen spears directly in the basket without thawing them.
Preheat your air fryer to 400°F (204°C) for optimal results. Cook for about 10-13 minutes, depending on the thickness, and shake the basket halfway through to ensure even cooking.
Toss them with olive oil, salt, and your favorite seasonings for added flavor. Enjoy your deliciously roasted asparagus!
What Are Some Alternative Cooking Methods for Asparagus?
If you're looking for alternative cooking methods for asparagus, you've got plenty of options.
You can boil or blanch it for a quick softening, steam it to retain nutrients, or bake it for a more hands-off approach.
Grilling and sautéing add delicious flavors but require more attention.
Each method has its benefits, so experiment to find the perfect technique that suits your taste and cooking style!
How Can I Store Leftover Cooked Asparagus?
To store leftover cooked asparagus, let it cool to room temperature before placing it in an airtight container.
You can keep it in the refrigerator for up to three days. If you don't have an airtight container, wrap it in aluminum foil or a plastic bag.
If you want to store it longer, freeze the asparagus in a freezer bag, pushing out air to prevent freezer burn.
Always check for spoilage before eating.
Can I Cook Other Vegetables Alongside Asparagus in the Air Fryer?
Yes, you can cook other vegetables alongside asparagus in the air fryer, but be mindful of their cooking times and sizes.
Thin vegetables like zucchini and bell peppers can cook well with asparagus, while thicker ones will need more time.
To ensure even cooking, cut everything to similar sizes and avoid overcrowding.
Consider air frying in batches for the best results, and use compatible seasonings to enhance their flavors together.
What Are the Nutritional Benefits of Eating Asparagus?
Asparagus offers numerous nutritional benefits that you shouldn't overlook.
It's packed with antioxidants like vitamins A and E, which help protect your cells from damage. The high fiber content promotes digestive health, making it easier for you to maintain regularity.
Plus, its potassium helps lower blood pressure and supports heart health. Eating asparagus can enhance your overall well-being, making it a smart addition to your diet.
Enjoy its delicious taste and health benefits!
Conclusion
With your perfectly roasted asparagus ready, it's time to dig in! Remember, the key to success is in the prep and seasoning—don't skip those steps. Feel free to experiment with different spices or add a squeeze of lemon for extra zing. Whether you're serving it as a side dish or tossing it into a salad, you'll love how easy and delicious air-fried asparagus can be. Enjoy your tasty creation and impress your guests!
Recipes
How to Cook Pork Chops in Air Fryer: Tender and Flavorful Guide
Flavorful pork chops await in your air fryer—discover the secrets to achieving perfect tenderness and taste every time. Don’t miss these essential tips!
To cook tender and flavorful pork chops in an air fryer, start by preheating your fryer to 380°F. Choose high-quality, 1½ to 2-inch thick chops and pat them dry. Coat both sides with olive oil and season them with salt, pepper, and any spices you fancy. Arrange the chops in a single layer and cook for 10-14 minutes, flipping halfway through. Check the internal temperature to ensure it reaches 145°F. Let the chops rest for 5 minutes before serving. If you want to explore more tips and tasty variations for your pork chops, stay tuned for what's next!
Key Takeaways
- Preheat the air fryer to 360°F to 400°F, depending on desired crispiness and chop thickness, for about 5 minutes.
- Use fresh, high-quality pork chops, ideally 1 ½ to 2 inches thick, and coat them with oil for even cooking.
- Season generously with a mix of salt, pepper, garlic powder, and paprika, or experiment with other flavor profiles.
- Cook boneless chops at 400°F for 11-13 minutes, flipping halfway and checking for an internal temperature of 145°F.
- Let the pork chops rest for 5 minutes after cooking, then serve with sides like mashed potatoes or sautéed vegetables.
Preheating the Air Fryer
Preheating your air fryer is a crucial step for perfectly cooked pork chops. Set your air fryer to 360°F (182°C) for thinner cuts, 380°F (194°C) for a crispy exterior, or 400°F (204°C) for both boneless and bone-in chops. Preheat for about 5 minutes, but if you're cooking thicker chops, consider extending that time. Make sure you place the pork chops in a single layer in the basket to allow for optimal air circulation. Flipping them halfway through cooking promotes even browning, which is essential for achieving desired texture and flavor. Always check the internal temperature with an instant-read thermometer; it should reach 145°F (63°C). Avoid overcrowding to ensure each chop cooks evenly and thoroughly.
Preparing the Pork Chops
After getting your air fryer ready, it's time to focus on preparing the pork chops. Start by selecting fresh, high-quality pork chops, ideally 1 ½ to 2 inches thick, either boneless or bone-in.
Remove them from the packaging and rinse with cool water if needed. Next, pat the pork chops dry with paper towels to remove excess moisture, which helps ensure even browning and a crispy texture. Thicker cuts are recommended for juiciness and tenderness, making them less likely to dry out during cooking.
Once dry, coat both sides with olive oil or grape seed oil using a basting brush or your hands for even coverage. Finally, arrange the pork chops in a single layer in the air fryer basket, leaving space around each chop for proper air circulation.
Cook in batches if necessary.
Seasoning Options
Seasoning pork chops is key to enhancing their natural flavors and achieving a delicious meal. Start with a basic mix of salt, pepper, garlic powder, onion powder, and paprika. For a touch of sweetness, add brown sugar; it caramelizes beautifully during cooking. If you're feeling adventurous, try flavor variations like Cajun seasoning for a zesty kick or Mexican seasoning with chili powder and cumin for a delightful twist. You can also brush the chops with melted butter or olive oil to help the seasonings stick and keep the meat moist. For extra depth, consider combining smoked paprika with garlic powder or dried thyme with onion powder. Additionally, using bone-in pork chops promises to enhance flavor and moisture, elevating your pork chops to a new level of flavor.
Air Fryer Settings
To achieve perfectly cooked pork chops in the air fryer, it's crucial to set the right temperature and follow a few key steps.
Start by preheating your air fryer to 400°F for most boneless and bone-in chops. If you're cooking thinner chops or using different seasonings, set it to 360°F. For thicker bone-in chops or defrosting, consider 380°F. Always arrange the pork chops in a single layer to avoid overcrowding and ensure even cooking. Lightly spray the basket or chops with cooking spray for better results. Additionally, remember to check the internal temperature with a probe thermometer, aiming for 145°F, but you can safely remove them at 140°F to rest under foil for juiciness.
Happy cooking!
Cooking Time Guidelines
Now that you've set your air fryer, it's time to focus on the cooking time guidelines for pork chops.
For boneless chops, thickness matters: cook 1/2-inch thick chops for about 7-9 minutes and 1-inch thick for 11-13 minutes. You'll want to flip them halfway through for even cooking. Many users reported that cooking at the optimal temperature yields moist and flavorful results.
At 400°F (204°C), expect 11-13 minutes for 1-inch thick chops, while 380°F (194°C) takes 10-14 minutes. If you're using 375°F (190°C), aim for 9-12 minutes.
To ensure perfect results, preheat your air fryer and avoid overcrowding the basket. For the best flavor and texture, let your pork sit at room temperature for 30 minutes before cooking, and don't marinate for more than 12 hours. Enjoy!
Checking Internal Temperature
Checking the internal temperature of your pork chops is crucial for ensuring they're safe and delicious. To prevent undercooked or overcooked meat, use a meat thermometer to get an accurate reading. Aim for an internal temperature of at least 140°F; it'll rise to 145°F after you remove the chops from the air fryer. Always check the thickest part of the chop, avoiding any bone or fat for the most precise measurement.
Additionally, using an air fryer can result in juicy and flavorful pork chops, enhancing the overall dining experience. Allow the chops to rest for about 5 minutes, covering them with foil to retain heat. This resting period helps distribute heat and juices evenly, ensuring your pork is tender and flavorful by the time you're ready to serve it.
Serving Suggestions
After ensuring your pork chops are perfectly cooked and resting, it's time to think about how to serve them for a delightful meal.
Pair your chops with classic starchy sides like creamy mashed potatoes or fluffy white rice for comfort. If you're feeling adventurous, creamy Parmesan polenta or sweet potato casserole can add a unique twist. Additionally, serving pork chops with a cooking thermometer ensures they are cooked to the ideal temperature. Remember that butter's creamy texture can enhance the richness of your mashed potatoes or polenta.
For vibrant vegetable options, consider roasted asparagus or sweet, crunchy roasted carrots. If it's summer, grilled corn on the cob brings a smoky flavor. You could also try sautéed vegetables for a nutritious touch.
Finally, don't forget a simple side like butter-steamed cabbage or Southern-style green beans to round out your meal. Enjoy the delicious combination!
Additional Cooking Tips
To achieve perfectly cooked pork chops in your air fryer, it's crucial to focus on preparation and cooking techniques.
Start by preheating your air fryer to 400°F for five minutes. Pat the pork chops dry, coat them with olive oil, and apply your favorite seasoning mix generously. For the best results, choose thick, center-cut chops to enhance the char and flavor.
For a crispy texture, consider dipping them in eggs followed by breadcrumbs. Cook them for 12-14 minutes, flipping halfway through. Use an instant-read thermometer to ensure the internal temperature reaches 140-145°F.
After cooking, let the pork chops rest for 3-5 minutes to lock in the juices. If cooking in batches, keep the first batch warm while finishing the rest.
Serve immediately for the best flavor and tenderness!
Frequently Asked Questions
Can I Cook Frozen Pork Chops in the Air Fryer?
Yes, you can cook frozen pork chops in the air fryer!
Just place them in a single layer in the basket and preheat the fryer to 350°F to 380°F.
Start by cooking them for about 5 to 10 minutes to defrost, then season as desired.
Continue cooking for an additional 10 to 15 minutes, flipping halfway.
Ensure they reach an internal temperature of 145°F for safe eating.
Enjoy your delicious, tender pork chops!
What Side Dishes Pair Well With Air-Fried Pork Chops?
When you're enjoying air-fried pork chops, you'll want side dishes that complement their flavor.
Try air fryer green beans for a quick, crunchy option, or roasted carrots for a touch of sweetness.
Creamy mashed potatoes soak up the juices beautifully.
If you prefer something lighter, a refreshing cucumber salad can balance the meal nicely.
Don't forget some fluffy dinner rolls to complete your plate and add to the comfort of your feast!
How Do I Prevent Pork Chops From Drying Out?
To prevent your pork chops from drying out, start by brining or salting them ahead of time to enhance moisture retention.
Make sure to bring them to room temperature before cooking for even results.
Pat them dry to help marinate or season effectively.
During cooking, avoid overcooking by using a meat thermometer to reach a safe internal temperature of 145°F.
Finally, let them rest for a few minutes before slicing to keep juices intact.
Can I Use Different Oils for Cooking?
Absolutely, you can use different oils for cooking!
Olive oil is a popular choice, but avocado oil works well too, especially for high-heat methods. Canola and vegetable oils are also great alternatives if you prefer a neutral flavor.
Just remember to brush or spray the oil on your meat to help seasonings stick and keep everything moist.
Using the right oil not only enhances flavor but also prevents sticking during the cooking process.
What Is the Best Way to Store Leftover Pork Chops?
To store leftover pork chops, place them in airtight containers to keep out air and odors.
Store them in the coldest part of your refrigerator, ideally at 40°F (4°C) or below.
Consume the chops within 3-4 days for the best quality.
If you need to keep them longer, wrap them tightly in heavy-duty freezer bags and freeze at 0°F (-18°C) or below, labeling each package with the date for easy tracking.
Conclusion
Now that you know how to cook pork chops in an air fryer, you're all set to impress at your next meal. With tender, flavorful results and endless seasoning options, it's a quick and easy way to enjoy this delicious cut of meat. Don't forget to check the internal temperature to ensure they're perfectly cooked. So go ahead, fire up that air fryer, and savor the juicy goodness of your homemade pork chops! Enjoy!
Recipes
How Long to Cook Chicken Wings in Air Fryer: Ultimate Crispy Guide!
Get ready to master air fryer chicken wings with our ultimate guide—discover the secret to achieving unbeatable crispiness and mouthwatering flavor!
To cook chicken wings in an air fryer, preheat it to 360°F. Arrange your wings in a single layer, then cook them for about 23-25 minutes. For best results, flip the wings every five minutes and shake the basket every six minutes to ensure even cooking. If you're using frozen wings, increase the temperature to 400°F and cook for around 25 minutes. Pat the wings dry before seasoning, and consider using aluminum-free baking powder to boost crispiness. Want to explore more tips and tricks for perfect wings? There's plenty more to discover!
Key Takeaways
- Preheat the air fryer to 360°F for about 4-5 minutes for optimal crispiness before cooking wings.
- Cook 2 lbs of chicken wings for 23-24 minutes, flipping and shaking the basket every 5-6 minutes.
- For frozen wings, increase the temperature to 400°F and cook for approximately 25 minutes.
- Ensure wings are patted dry and arranged in a single layer for maximum crispiness.
- Always check that the internal temperature of the wings reaches at least 165°F for safe consumption.
Preheating the Air Fryer
Before you dive into cooking those delicious chicken wings, it's essential to preheat your air fryer. Preheating helps achieve that signature crispiness you crave by circulating super-hot air around the fryer, which is vital for thick cuts like chicken wings. Smaller air fryers usually need just 2-3 minutes, while larger models may take 4-5 minutes. For optimal results, set the temperature before turning it on, and let it run empty for the recommended time. Always consult your operating manual for specific instructions, especially if your model lacks a preheat button. This step is crucial because most recipes yield improved outcomes with preheating, so don't overlook this crucial part of the process!
Preparing Chicken Wings
To prepare your chicken wings for air frying, start by cutting and separating them into drums and flats if you prefer. Aim for uniform pieces to ensure even cooking, and remove any excess cartilage or tips.
Next, pat them dry with paper towels to eliminate excess moisture; this step is crucial for achieving crispy skin. If you're using frozen wings, make sure to remove any visible ice.
For seasoning, combine spices like garlic powder, onion powder, paprika, oregano, salt, and black pepper in a bowl. Add baking powder to help crisp the skin, then drizzle with olive or avocado oil. Incorporating baking powder into your seasoning mix is essential for that perfect crunch.
Finally, massage the seasonings into the wings, ensuring they're evenly coated before air frying.
Cooking Time and Temperature
Cooking chicken wings in an air fryer requires careful attention to cooking time and temperature for the best results.
Start by preheating your air fryer to 360°F for about 18 minutes. For 2 lbs of wings, aim for a total cooking time of 23-24 minutes. Air fryer wings achieve crispiness without deep frying, making them a healthier option.
Some recipes might suggest starting at 380°F for the first 20 minutes. After the initial phase, increase the temperature to 390°F for the next few minutes, and finish with a final boost to 400°F for the last 2 minutes.
Remember to shake the basket every 6 minutes and flip the wings every 5 minutes to ensure even cooking. This method helps achieve that perfect golden, crispy skin while ensuring the internal temperature reaches at least 165°F.
Achieving Maximum Crispiness
Achieving maximum crispiness for your air-fried chicken wings is all about preparation and technique. Start by patting the wings dry with paper towels to remove moisture, which is key for crispy skin.
Separate the wings into drums and flats for even cooking, and make sure they're fully defrosted. Arrange them in a single layer in the air fryer basket to prevent overlapping.
For an extra crispy finish, add aluminum-free baking powder to your seasoning mix; this raises the pH level and enhances the crust. Cooking your wings in an air fryer offers a healthier alternative to traditional frying, resulting in crispy and juicy wings with less effort. Cook initially at medium heat to render fat, then increase the temperature for that perfect crunch.
Remember to shake the basket every few minutes for even cooking and serve immediately for the best results!
Flavorful Seasoning Options
Once you've perfected the crispiness of your chicken wings, it's time to elevate their flavor with a variety of seasoning options. For a classic taste, stick with simple salt and pepper or try lemon pepper for a citrusy kick.
If you want a savory boost, sprinkle on garlic powder or a mix of kosher salt and white pepper. For a spicy twist, cayenne pepper or smoked paprika can add some heat and depth. Additionally, ensure your wings are well-cooked by checking the internal temperature to guarantee they reach at least 165°F for safety.
Consider herb-based options like Italian seasoning or a garlic and herb blend for an aromatic touch.
If you're feeling adventurous, explore global flavors—mix cumin and chili powder for a Mexican flair or use garam masala for an Indian-inspired taste. Your wings will never be boring again!
Delicious Sauce Suggestions
To truly take your air-fried chicken wings to the next level, consider adding a variety of delicious sauces that can enhance their flavor profile.
For a spicy kick, whip up a homemade hot sauce by mixing your favorite hot sauce with butter, cayenne, garlic, and onion powder. This flavor enhancement is particularly effective when using fresh chicken wings, as it allows the sauce to cling perfectly to the crispy skin.
If you're craving something sweet and smoky, try a BBQ sauce mixed with honey or brown sugar.
For an Asian twist, combine soy sauce with honey, ginger, and sesame oil.
Lastly, don't forget about creamy options; ranch dressing mixed with hot sauce or a tangy blue cheese dressing pairs beautifully.
These sauces can transform your wings into a flavorful feast that everyone will love!
Handling Frozen Chicken Wings
When you're ready to cook frozen chicken wings, knowing how to handle them properly can make all the difference in achieving that perfect texture and flavor.
The safest way to thaw wings is in the refrigerator overnight, but if you're short on time, you can use a cold water bath—just remember to change the water every 30 minutes. You can also thaw in the microwave, but it's less recommended.
Pat the wings dry after thawing to remove excess moisture for that crispy finish. If you choose to cook from frozen, preheat your air fryer to 400°F (200°C) and cook for about 25-30 minutes. Don't forget to flip them halfway through for even crispiness! Additionally, cooking from frozen allows you to skip the thawing process entirely, making it a convenient option for a quick meal while still achieving a crispy exterior.
General Cooking Tips
While cooking chicken wings in an air fryer may seem straightforward, a few key tips can elevate your results.
Preheat your air fryer to 360-380°F (182-193°C) for the first half, then crank it up to 390-430°F (199-221°C) to crisp the skin. Low carb diets can be complemented with delicious chicken wings when prepared this way.
Don't forget to pat the wings dry and season them with salt, garlic powder, and olive oil before cooking. Air frying reduces calories compared to traditional frying methods, so it's a healthier choice.
To ensure even cooking, arrange the wings in a single layer and leave space between them. Flip or shake them every 5-6 minutes.
For extra crispiness, add baking powder to your seasoning mix and use a digital meat thermometer to make sure the internal temperature hits 165°F (74°C).
Happy cooking!
Variations and Experimentation
Exploring variations and experimentation can turn your air-fried chicken wings into a culinary adventure.
You can start by adjusting cooking temperatures and times to achieve the perfect crispiness. Try cooking at 380°F for 20 minutes, flipping every five minutes, then increase to 400°F for a final crisp. Additionally, consider the whole chicken wings that include different parts, which can offer a variety of textures and flavors.
Don't forget to play with seasonings—mix salt, white pepper, and baking powder for classic crispy wings, or go bold with buffalo sauce for a spicy kick.
For added crunch, pat your wings dry and consider a dusting of baking powder.
If you're using frozen wings, cook them at 400°F for about 25 minutes.
With these tweaks, your chicken wings will be a hit every time!
Serving Suggestions
To elevate your air-fried chicken wings, consider pairing them with complementary sides that enhance their flavor and texture. Traditional options like celery and carrot sticks with blue cheese or ranch dressing are always a hit.
If you're serving spicy wings, coleslaw balances the heat perfectly. For something heartier, try loaded potato skins or creamy mac and cheese. Classic pairings like wings and fries are also easy to recreate at home for added satisfaction. Incorporating aesthetic serveware can enhance the presentation of your meal, making it more enjoyable for your guests.
Fresh options like a Mediterranean salad or guacamole add a light touch. Craving indulgence? Mozzarella sticks or jalapeño poppers can take your meal up a notch.
Don't forget seasoned fries for a savory crunch or garlic bread for a lighter choice. These pairings will surely make your chicken wings the star of the meal!
Frequently Asked Questions
Can I Use Other Types of Poultry Instead of Chicken Wings?
Absolutely, you can use other types of poultry instead of chicken wings!
Boneless skinless breasts, thighs, and drumsticks are great alternatives. Just remember to adjust the cooking temperature and time accordingly.
For instance, boneless breasts cook faster than thighs. Always check that the internal temperature reaches at least 165°F to ensure they're safe to eat.
Don't overcrowd your air fryer basket, and flip the poultry halfway through for even cooking.
Enjoy!
How Do I Store Leftover Cooked Chicken Wings?
To store leftover cooked chicken wings, you'll want to use airtight, refrigerator-safe containers.
Make sure to transfer the wings promptly and keep them sealed to prevent drying out and bacterial growth.
Store them in the fridge at a temperature below 40°F (4°C) and consume within three to four days.
For longer storage, freeze them in airtight containers or bags.
Thaw frozen wings in the fridge before reheating to enjoy them safely.
Can I Reheat Chicken Wings in the Air Fryer?
Yes, you can definitely reheat chicken wings in the air fryer!
Start by preheating it to around 360°F (182°C). Arrange your wings in a single layer to ensure even cooking, and spray the basket to prevent sticking.
Heat them for about 5 minutes, flipping halfway through. For extra crispiness, shake the basket.
Just make sure the internal temperature reaches 165°F (74°C) before enjoying those delicious wings again!
What Is the Best Way to Defrost Frozen Chicken Wings?
The best way to defrost frozen chicken wings is in cold water.
Place the wings in a leak-proof bag, then submerge them in a non-reactive bowl filled with cold water. Change the water every 30 minutes to keep it cold. This method typically takes about 20-30 minutes for smaller batches.
Alternatively, you can thaw them in the refrigerator overnight, but that'll take longer.
Just avoid microwaving; it can unevenly defrost and affect texture.
Are Air Fryer Chicken Wings Healthier Than Deep-Fried Wings?
Yes, air fryer chicken wings are healthier than deep-fried wings.
You'll enjoy significantly lower fat content—up to 75% less! Plus, they retain essential nutrients like protein and vitamins while minimizing harmful compounds.
Air frying requires just a tablespoon of oil compared to three cups for deep frying, reducing calorie intake by 70-80%.
Conclusion
Now you're ready to whip up some delicious, crispy chicken wings in your air fryer! By following these tips on preheating, cooking time, and seasoning, you'll impress everyone with your culinary skills. Don't hesitate to experiment with flavors and variations to find your perfect wing recipe. Remember, the key to that mouthwatering crunch is in the technique. So gather your ingredients, fire up the air fryer, and enjoy your tasty creations! Happy cooking!
-
User Stories and Tips1 week ago
I Tried These 5 Air Fryer Hacks—You Won’t Believe the Results!
-
User Stories and Tips7 days ago
The Secret to Perfectly Crispy Fries: Real Users Share Their Air Fryer Tips
-
User Stories and Tips7 days ago
You’ll Never Cook the Same Again: How an Air Fryer Changed My Life!
-
Recipes6 days ago
How to Make Fries in Air Fryer: The Ultimate Crisp Guide
-
User Stories and Tips1 week ago
I Cooked Every Meal in an Air Fryer for a Week—Here’s What I Learned!
-
Vetted6 days ago
15 Best Smart Air Fryers With App Connectivity for Effortless Cooking in 2025
-
Vetted6 days ago
15 Best Desk Speakers of 2025 – Elevate Your Audio Experience
-
Recipes6 days ago
How to Cook Wings in Air Fryer: The Ultimate Crispy Recipe