
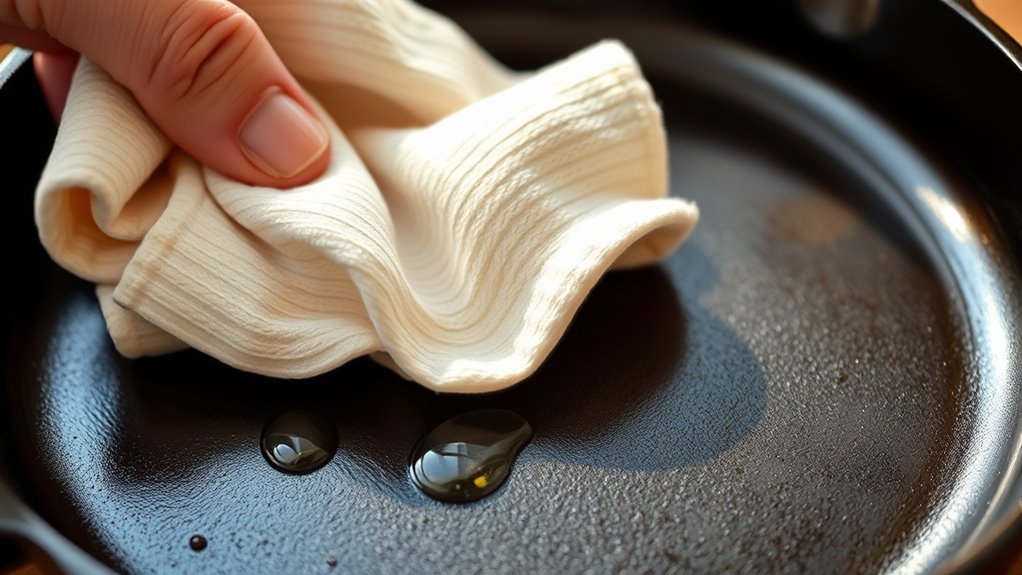
To safeguard your non-stick coating during your first cleanup, gather soft sponges, microfiber cloths, and gentle dish soap. Rinse the pan with warm water to loosen residues, then soak it briefly if needed. Use non-abrasive tools and mild detergent to gently clean in circular motions. Dry thoroughly and inspect for damage. Applying a light coating of oil can help maintain the surface. If you keep these steps in mind, you’ll ensure your cookware stays in top condition long-term.
Key Takeaways
- Use soft sponges and microfiber cloths with mild, non-abrasive detergents to gently clean the non-stick surface.
- Rinse and soak pans in warm water to loosen baked-on residue without damaging the coating.
- Dry thoroughly and inspect for cracks, chips, or flaking to early detect potential damage.
- Avoid abrasive tools like steel wool and harsh scrubbers that can scratch or remove the coating.
- Apply a light coating of oil or follow manufacturer instructions to maintain and protect the non-stick surface.
Gather Your Supplies and Prepare the Pan

Before you start cleaning, gather all the supplies you’ll need and prepare your pan. Proper pan prep guarantees you won’t waste time searching for tools mid-cleaning. Choose gentle utensils that won’t scratch the non-stick coating; soft sponges, microfiber cloths, or silicone scrapers work best. Keep your cleaning solution ready—mild dish soap is usually enough. If you plan to soak the pan later, set aside a basin or sink with warm water. Having everything within reach makes the process smoother and helps protect the coating from damage. Remember, selecting the right utensil choice is key to maintaining your pan’s non-stick surface. Preparing your supplies beforehand allows you to focus on cleaning effectively without risking scratches or residue buildup from the wrong tools. Additionally, understanding the importance of proper cleaning techniques can help preserve the non-stick coating for longer periods.
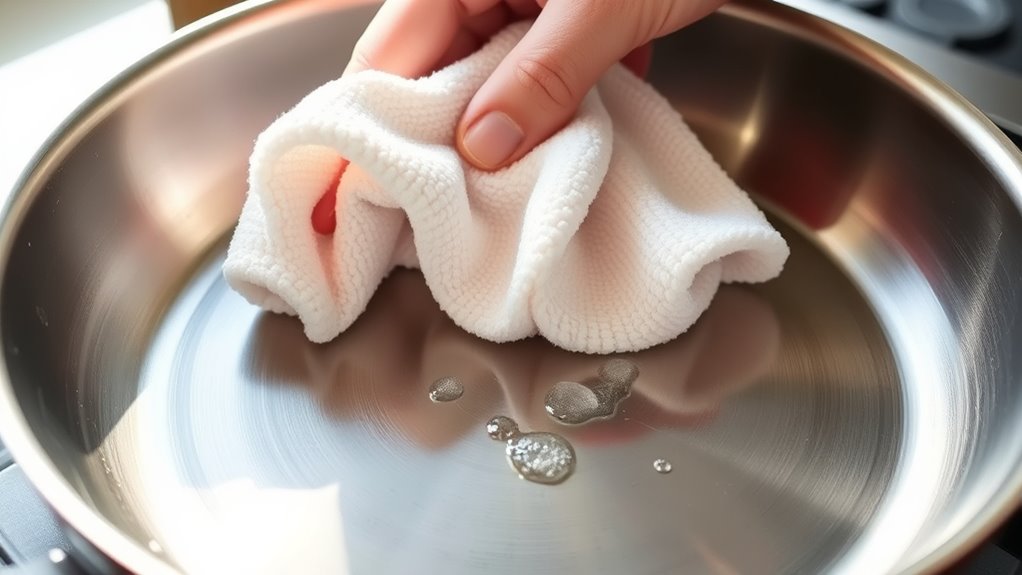
Rinse and Soak to Loosen Residue
Start by rinsing your pan with warm water to remove loose food particles and surface grime. This initial step helps loosen stuck-on residue and prepares the surface for more effective cleaning. Use gentle swirling motions to enhance residue removal without damaging the non-stick coating. Once rinsed, fill the pan with warm water, enough to cover the remaining stubborn food bits. Let it soak using simple soaking techniques for 10 to 15 minutes. This soaking process softens baked-on residue, making it easier to clean later without harsh scrubbing. Avoid using cold water or overly hot water, which can stress the coating. Proper rinsing and soaking ensure that residue loosens naturally, setting the stage for a gentle, thorough cleaning that preserves your pan’s non-stick surface. Incorporating soaking techniques can also support emotional regulation and reduce the need for aggressive scrubbing.
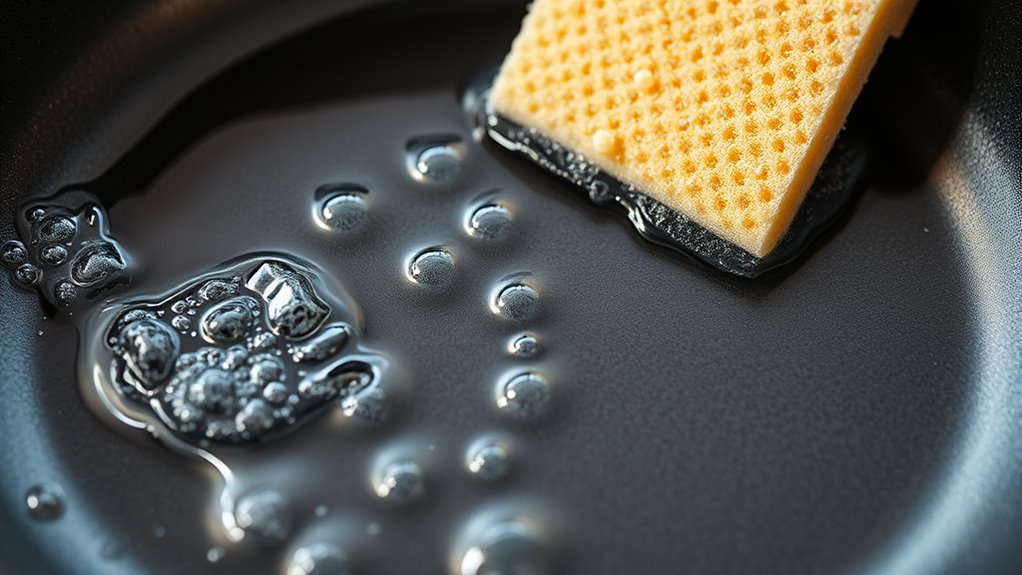
Use Gentle Cleaning Tools and Mild Detergent

To guarantee your non-stick pan stays in top condition, opt for gentle cleaning tools and mild detergents. Use non-abrasive tools like soft sponges or microfiber cloths to avoid scratching the coating. Harsh scrub brushes or steel wool can damage the surface, so steer clear. When washing, choose mild detergents that won’t strip away the non-stick layer. Avoid abrasive cleaners containing harsh chemicals or strong acids. Gently scrub the surface in a circular motion to lift residue without harming the coating. After cleaning, rinse thoroughly with warm water to remove any soap residue. By sticking to gentle tools and mild detergents, you’ll extend your pan’s lifespan and keep its non-stick properties intact for many uses to come.
Focus on Avoiding Abrasive Materials
To protect your surfaces, choose soft sponges instead of abrasive ones. Steer clear of steel wool and harsh scrubbers that can scratch or damage. Stick to gentle cleaning tools to keep everything looking its best. Incorporating appropriate automation technologies into cleaning routines can further enhance surface preservation by reducing human error.
Use Soft Sponges
Using soft sponges is essential for preventing scratches and damage during your cleaning routine. They help maintain the non-stick coating, making sure long-lasting performance. Avoid abrasive materials like steel wool or scouring pads, which can ruin the surface. Instead, choose gentle sponges designed for non-stick cookware. Ensuring the integrity of your cookware’s surface is crucial for safety and effectiveness, especially as research highlights the importance of AI safety measures in the development of durable kitchen tools.
Steer Clear of Steel Wool
Ever wonder why steel wool is off-limits for your non-stick cookware? Metal scrubbing with steel wool can easily scratch and damage the delicate non-stick coating. These abrasive materials remove the protective layer, making your cookware more prone to sticking and deterioration. Steel wool is too harsh and can leave behind tiny scratches that you might not see immediately but will affect performance over time. Instead, stick to softer cleaning tools like sponges or brushes designed for non-stick surfaces. By avoiding metal scrubbing, you preserve the coating’s integrity and extend the lifespan of your cookware. Proper tuning practices and gentle cleaning methods are essential for maintaining a non-stick surface that works like new for longer. Keep steel wool and other abrasive materials far away from your non-stick pots and pans.
Avoid Harsh Abrasives
Avoiding harsh abrasives is essential for keeping your cookware in top condition. Metal scrubbing tools, like steel wool or abrasive pads, can scratch or damage the non-stick coating, reducing its effectiveness. Instead, opt for gentle cleaning tools such as soft sponges or cloths. Chemical cleaners containing harsh abrasives can also harm the surface, so choose mild, non-abrasive options. Always avoid scrubbing vigorously or using rough materials that might strip away the coating. If stubborn residue remains, soak the pan first to loosen debris, then gently clean. Properly avoiding abrasive materials helps extend the life of your cookware and keeps your non-stick surface smooth and effective. Incorporating innovative materials can further enhance the durability of your non-stick coating. Remember, gentle cleaning preserves your cookware’s quality and performance long-term.
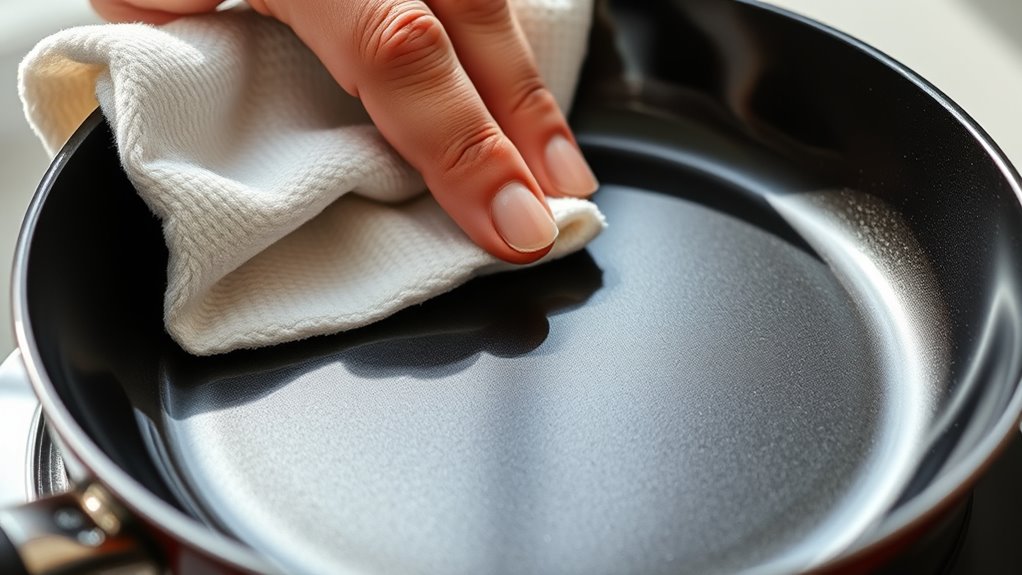
Dry and Inspect the Surface for Damage

Before you start cleaning, dry the surface thoroughly and inspect it carefully. Look closely for any cracks, chips, or signs of damage that might affect the cleaning process. Check for flaking coating to guarantee the surface is intact and ready for the next steps. Incorporating proper workspace setup can further ensure you maintain the non-stick coating’s longevity during cleaning.
Examine Surface Carefully
To effectively clean a surface for the first time, you need to carefully examine it both when dry and after a brief inspection for damage. This surface analysis helps identify any issues that could affect the coating’s longevity. Focus on coating inspection to catch potential problems early. Here are key steps:
- Check for discoloration or stains that might indicate underlying damage.
- Look for uneven spots or residue that could interfere with cleaning.
- Feel the surface for rough patches or inconsistencies.
- Observe for signs of corrosion, rust, or peeling paint.
- Consider the material of the surface, such as self watering plant pots, which may require specific cleaning methods to prevent damage.
Look for Cracks or Chips
Inspect the surface carefully for cracks or chips, both when dry and after a brief visual check. Crack detection is key to preventing further damage, so look closely for any signs of fractures or breaks. Chip inspection involves checking for small, broken pieces that may compromise the non-stick coating. Use good lighting and a steady hand to catch even minor issues. To help visualize, consider this:
| Damage Type | Visual Clues |
|---|---|
| Cracks | Fine lines or fractures on surface |
| Chips | Small missing pieces or dents |
| Surface Fractures | Slight splits or fissures |
| Breaks | Larger missing sections |
Addressing these early helps maintain the coating’s integrity and prolongs your cookware’s lifespan. Regular inspection and prompt repairs can prevent minor issues from becoming major problems.
Check for Flaking Coating
After checking for cracks and chips, it’s important to look for signs of flaking on the surface. Flaking indicates coating deterioration, which can compromise your non-stick coating’s effectiveness. To prevent further damage, carefully inspect the surface for any loose or peeling areas. Here are key points to contemplate:
- Look for small flakes or chips along the edges or surface.
- Check for areas where the coating appears lifted or bubbled.
- Tap gently to listen for hollow or loose spots.
- Examine for any rough patches that could indicate deterioration.
- Regular inspections can help identify early signs of coating deterioration and extend your cookware’s lifespan.
Addressing flaking early helps prevent more extensive coating damage, ensuring your non-stick surface remains effective and durable. Regular inspections like this are essential for flaking prevention and maintaining your cookware’s lifespan.
Apply a Protective Coating or Seasoning (If Recommended)
Applying a protective coating or seasoning after cleaning helps safeguard your cookware and enhances its performance. If your cookware recommends it, seasoning tips can help build a durable non-stick surface. Use a light layer of oil or apply protective sprays designed for your cookware type. This creates a barrier that prevents future damage and improves cooking results. Consider the following options:
| Method | Best For |
|---|---|
| Manual seasoning | Regular maintenance, seasoning tips |
| Protective sprays | Quick touch-ups, convenience |
Choose the method that fits your routine. Proper seasoning or protective sprays help prolong your cookware’s lifespan and keep the non-stick coating in top shape. Always follow manufacturer recommendations for best results.
Frequently Asked Questions
How Often Should I Repeat the Cleaning Routine for Best Results?
You should repeat the cleaning routine based on your cooking frequency and the cookware’s condition. For best non-stick coating protection, aim for a gentle clean after every few uses, adjusting as needed. Establish a consistent cleaning schedule, such as after each use or every few days, and pay attention to any buildup or residue. Regular maintenance helps preserve the non-stick surface and guarantees your cookware performs well over time.
Can I Use Dishwasher Cleaning Cycles on Non-Stick Cookware?
Think of your cookware as a treasure chest—valuable and delicate. While dishwasher safety might tempt you, using dishwasher cycles on non-stick cookware isn’t advisable, as harsh water and detergents can damage the coating. Instead, focus on gentle cleaning and regular maintenance. Keep cleaning frequency consistent, and hand wash with mild soap to preserve your treasure’s non-stick surface. Protect your investment by avoiding dishwasher use and maintaining a mindful routine.
Is It Safe to Use Baking Soda on Non-Stick Surfaces?
You might wonder about baking soda safety on non-stick surfaces. Generally, baking soda is safe for cleaning non-stick cookware if used gently. It helps remove stains without damaging the non-stick durability. Just avoid harsh scrubbing or abrasive tools, and don’t leave it on too long. When used properly, baking soda preserves your cookware’s coating and keeps it looking new, ensuring your non-stick pans stay durable and effective over time.
What Are Signs That My Non-Stick Coating Is Deteriorating?
You might notice your non-stick coating is deteriorating if you see scratched surfaces or discoloration marks, which often happen over time. When you cook, if food starts sticking more or cleaning becomes tougher, it’s a sign the coating’s losing its effectiveness. Keep an eye out for these signs, and if you spot them, it’s time to think about replacing your pan or treating it gently to prolong its life.
How Do I Store Non-Stick Pans to Prevent Damage During Long-Term Storage?
To prevent damage during long-term storage, you should follow pan storage tips that promote non-stick preservation. First, make certain the pan is thoroughly cleaned and completely dry. Then, store it in a cool, dry place, avoiding stacking heavy items directly on the surface. Use padding like paper towels or cloth between pans to prevent scratches. Proper storage helps maintain your non-stick coating and extends the life of your cookware.
Conclusion
Now that you’ve mastered your first-time cleaning routine, your non-stick pan is practically invincible—ready to fry, sauté, and scramble like it’s brand new every time! With gentle care, you’ve shielded that coating from the forces of evil (and stubborn residue), making it more durable than a superhero’s shield. Keep up this routine, and your pan will last longer than your favorite pair of jeans—forever ready for culinary adventures that are nothing short of legendary!