To get juicy pork chops every time, start with quality cuts and bring them to room temperature before cooking. Brine them with salt, sugar, and herbs to lock in moisture, and season well or marinate for added flavor. Use a hot pan or oven, and avoid overcooking by monitoring internal temperature with a reliable thermometer—145°F is ideal. Rest the chops briefly to keep juices sealed. Follow these tips closely, and you’ll guarantee perfect, juicy results every time. Keep going to learn more.
Key Takeaways
- Properly select fresh, well-marbled pork chops and bring them to room temperature before cooking.
- Brine or marinate with herbs, citrus, or fruit glazes to enhance moisture and flavor.
- Use a hot, preheated pan for searing to develop a crust while locking in juices.
- Cook to an internal temperature of 145°F and allow a brief rest before serving.
- Avoid overcooking by relying on a meat thermometer and adjusting timing for thickness.
Selecting the Perfect Pork Chops

To select the perfect pork chops, you should start by paying attention to their cut and quality. Understanding pork chop types helps you choose the right option; rib chops, loin chops, and shoulder chops each have distinct textures and flavors. For tender, juicy results, leaner cuts like loin chops are popular, but they can dry out if overcooked. Sourcing tips are vital—look for pork that’s labeled fresh, with a pink hue and firm texture. Check for marbling, as a bit of fat enhances flavor and moisture. Always buy from reputable sources or local butchers who guarantee quality and proper handling. Proper selection sets the foundation for juicy, flavorful pork chops every time. Additionally, selecting pork that meets energy efficiency standards can ensure better freshness and quality during storage and transportation.
Brining for Moisture and Flavor
Brining is a simple yet effective technique to guarantee your pork chops stay juicy and flavorful during cooking. The key is adjusting the brine based on pork chop thickness, ensuring even absorption. A basic brine solution includes water, salt, and sugar, but you can customize with herbs and spices. The salt helps the meat retain moisture, while sugar enhances flavor and browning. For thicker chops, extend the brining time; thinner ones need less. Use this guide to choose your ingredients:
| Pork Chop Thickness | Brine Solution Ingredients |
|---|---|
| Thin (½ inch) | 1 cup water, ¼ cup salt, 2 tbsp sugar |
| Medium (1 inch) | 2 cups water, ½ cup salt, 3 tbsp sugar |
| Thick (1½+ inches) | 3 cups water, ¾ cup salt, 4 tbsp sugar |
Proper brining results in moist, flavorful pork every time.
Seasoning and Marinades
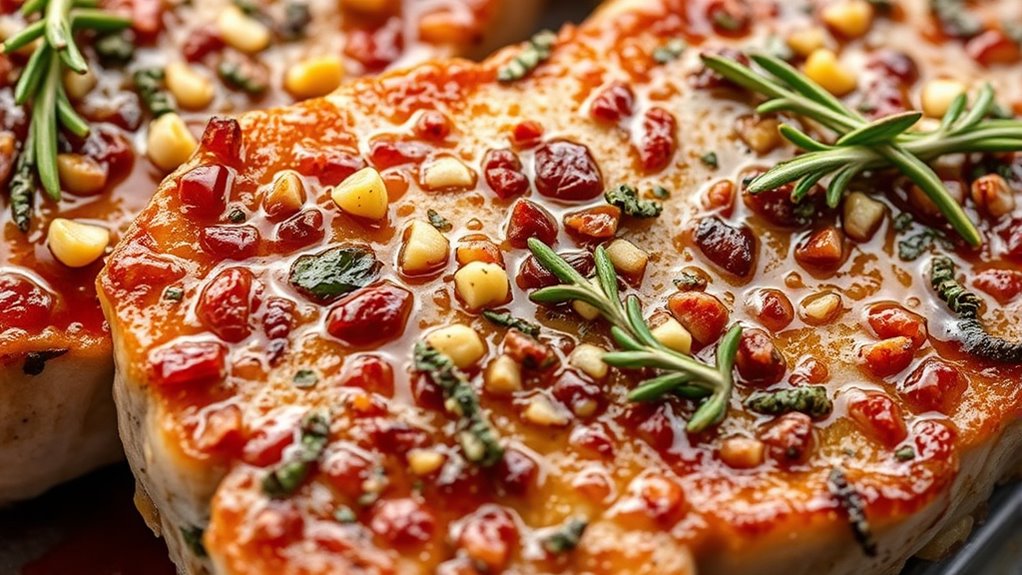
Getting the seasoning and marinade just right can elevate your pork chops from good to amazing. You’ll want to contemplate flavor pairing techniques to match spices with your ingredients, and keep in mind how long to marinate for maximum taste without overdoing it. Experimenting with spice blend variations can also bring new dimensions to your dish. Remember that trust issues in relationships highlight the importance of honest communication and understanding, which can be metaphorically applied to ensuring your seasoning and marinade are well-balanced for the best flavor.
Flavor Pairing Techniques
Enhancing the flavor of pork chops often starts with smart seasoning and marinade choices that complement the meat’s natural richness. To elevate your dish, consider these flavor pairing techniques:
- Use fruit glazes like apple or cherry to add a sweet tang that balances pork’s savoriness.
- Combine herbs such as thyme, rosemary, and sage for aromatic herb blends that enhance depth.
- Marinate with citrus juices, like lemon or orange, to tenderize and add bright, fresh notes.
- Experiment with spice blends such as paprika or cumin for a smoky or warm flavor profile.
- Understanding your personality traits can also help you explore different culinary techniques and flavors with confidence.
These techniques help create a harmonious balance, making each bite juicy and flavorful, while highlighting the pork’s natural appeal.
Marinade Duration Tips
When it comes to infusing pork chops with flavor, marinade duration plays a key role in achieving the perfect balance of tenderness and taste. Thicker pork chops need longer marinating times, typically 2-4 hours, to ensure the marinade penetrates fully. Keep in mind that higher marinade acidity, from ingredients like citrus or vinegar, can tenderize meat faster but risks making it mushy if overdone. For thinner chops, 30 minutes to 1 hour is sufficient. Use the table below to visualize marinade durations based on thickness and acidity:
| Pork Chop Thickness | Marinade Duration |
|---|---|
| Thin (½ inch) | 30 min – 1 hr |
| Medium (1 inch) | 1-2 hrs |
| Thick (1.5+ inches) | 2-4 hrs |
Additionally, crochet styles for locs can inspire creative ways to present and personalize your cooking accessories or apron designs.
Spice Blend Variations
Exploring different spice blends can dramatically elevate the flavor of your pork chops, whether you prefer classic, smoky, or bold profiles. You can experiment with herb combinations to add freshness or incorporate citrus infusions for brightness. Incorporating multi-functional ingredients can also help you customize seasonings to suit various flavor profiles and cooking styles. Here are four spice blend ideas to try: 1. A blend of rosemary, thyme, garlic powder, and black pepper for a savory classic. 2. Smoked paprika, cumin, chili powder, and oregano for smoky depth. 3. Lemon zest, orange zest, thyme, and garlic for a citrus-infused punch. 4. A mix of sage, marjoram, onion powder, and mustard powder for a warm, herbaceous flavor. Adjust these to suit your taste, and you’ll create flavorful pork chops every time.
Proper Resting Before Cooking
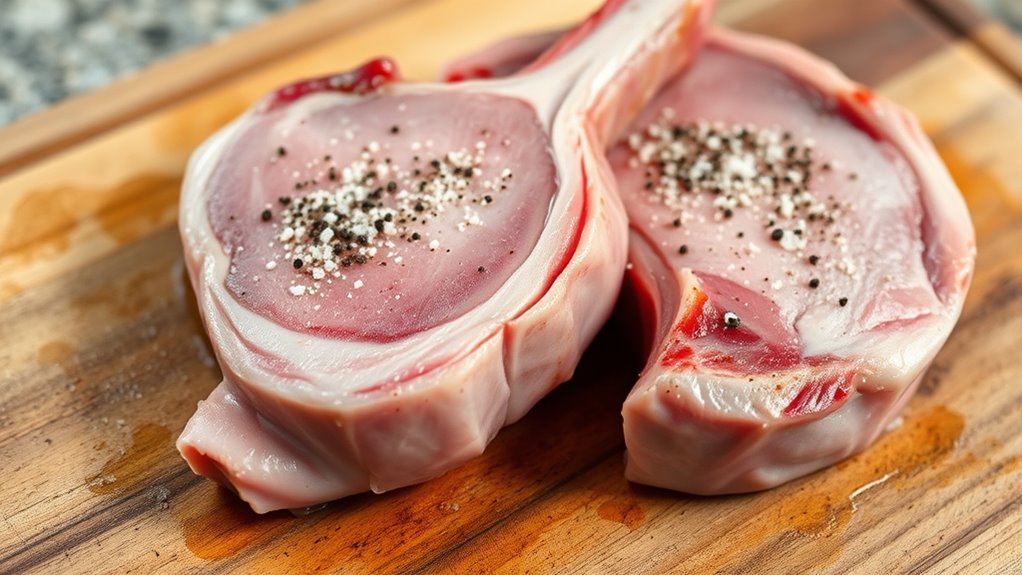
Allowing pork chops to rest properly before cooking helps guarantee even heat distribution and better flavor. Before cooking, make sure your pork chop storage is correct—keep the meat chilled but not frozen solid. Resting the meat at room temperature for about 15-20 minutes ensures it’s not too cold, which helps you achieve the ideal cooking temperature. This step prevents the outside from overcooking while the inside remains underdone. Proper resting also allows the muscle fibers to relax, resulting in juicier, more tender chops. Avoid rushing straight from the fridge to the pan, as this can cause uneven cooking and dryness. Taking these simple steps ensures your pork chop cooks evenly and stays moist, making every bite juicy and flavorful.
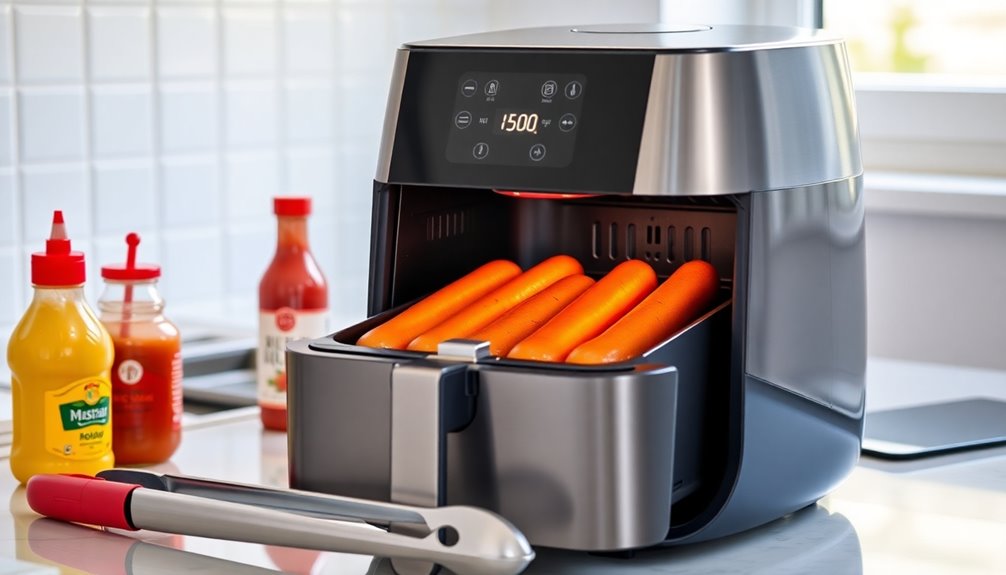
Mastering Pan-Searing Techniques
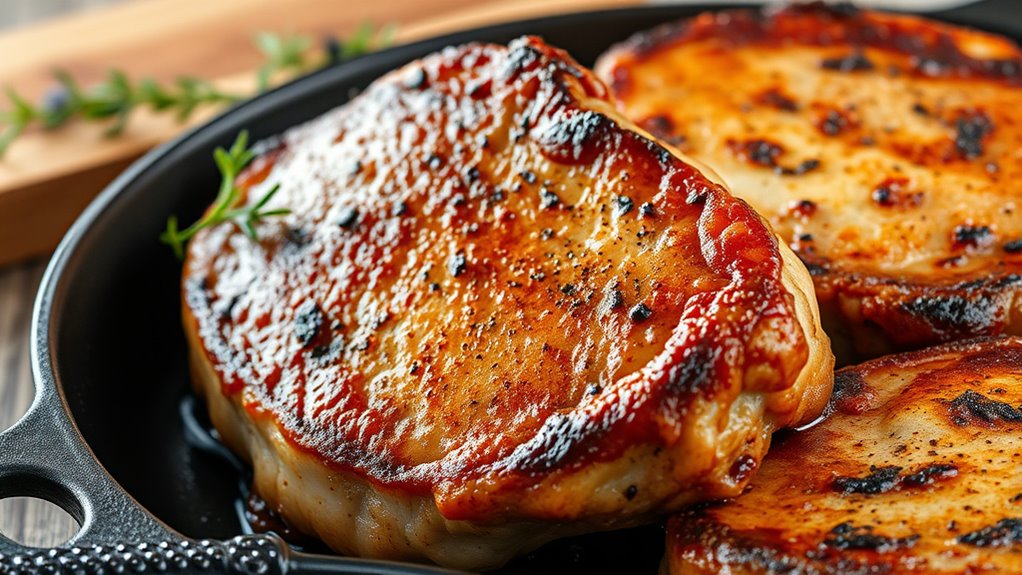
Choosing the right pan is key to a great sear; a heavy-bottomed skillet helps distribute heat evenly. To achieve a perfect crust, make sure your pork chops are dry and the pan is hot before adding them. Mastering these steps will elevate your pan-searing skills and lock in juicy flavor.
Selecting the Right Pan
Selecting the right pan is essential for achieving perfectly seared pork chops. A good pan guarantees even heat distribution and proper browning. Consider these options:
- Cast iron: Excellent heat retention, ideal for searing with a crisp crust.
- Non-stick: Easy to clean and prevents sticking, great for delicate or lean pork.
- Stainless steel: Durable and heats evenly, suitable for those who prefer a more responsive pan.
- Size: Opt for a pan large enough to hold the chops without crowding, ensuring proper searing.
Choose a pan that matches your cooking style and comfort. Both cast iron and non-stick pans can produce juicy, flavorful pork chops when used correctly. Heat distribution is crucial for consistent searing results across the surface of the meat.
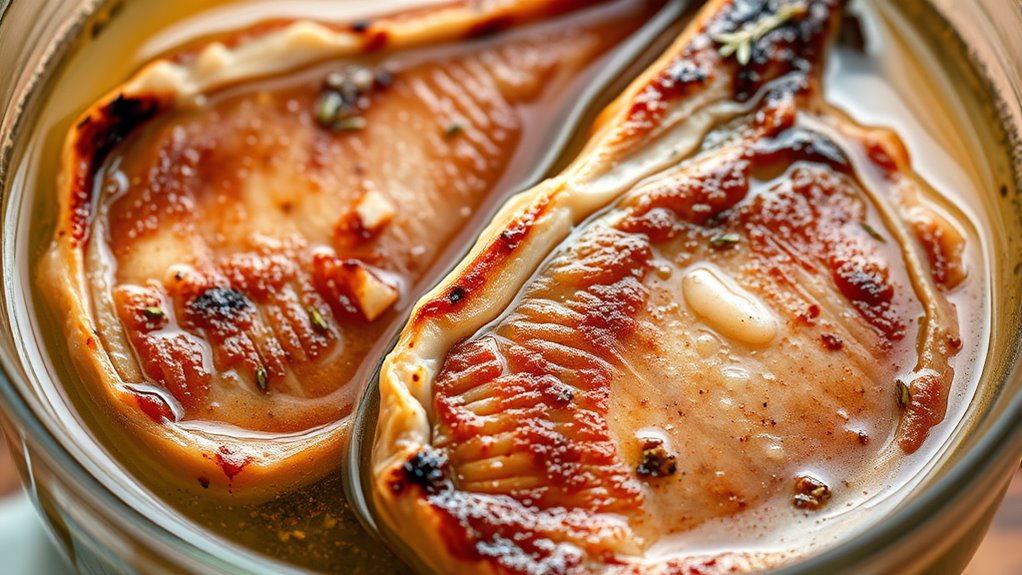
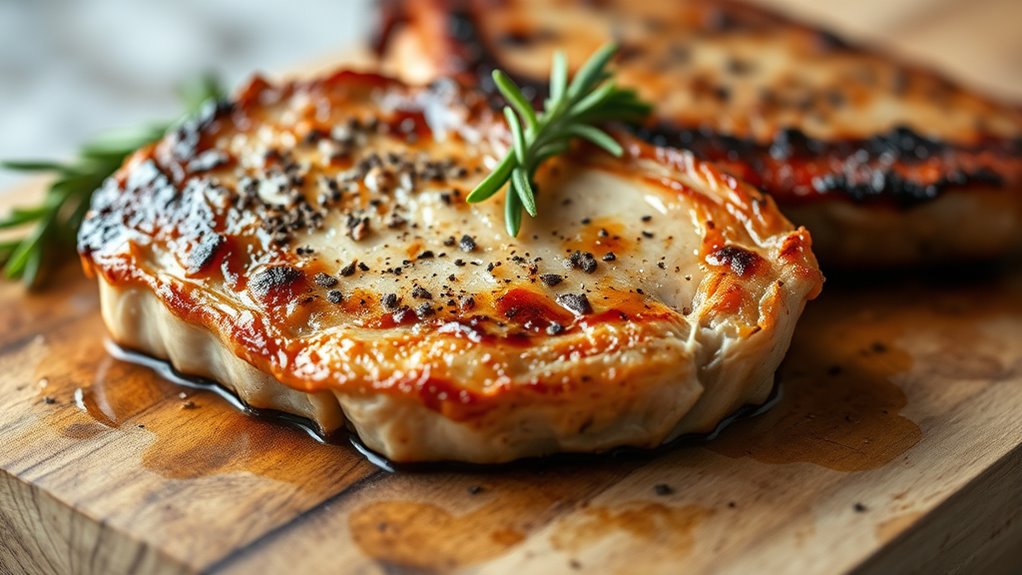
Achieving Perfect Sear
To achieve a perfect sear on your pork chops, the key is mastering your pan-searing technique. Start with pork chop thickness; thicker cuts need higher searing temperatures and longer cooking times, while thinner chops require a hotter pan for a quick sear. Proper searing temperature, around 400°F (204°C), ensures a caramelized crust without overcooking the interior. Use the table below to understand how thickness affects searing:
| Pork Chop Thickness | Recommended Searing Temperature |
|---|---|
| ½ inch | 400°F (204°C) |
| 1 inch | 375°F (191°C) |
| 1½ inches | 350°F (177°C) |
| 2 inches | 325°F (163°C) |
Preheat your pan well to lock in juices and develop a perfect crust every time. For an added touch of flavor, consider incorporating candy-inspired seasonings or glazes to elevate your dish.
Baking and Oven Finishing Tips
Baking pork chops properly guarantees they stay tender and juicy while developing a delicious, golden crust. To ensure perfect results, follow these oven finishing tips:
- Preheat your oven to the right temperature—usually 375°F to 400°F—to promote even cooking.
- Use oven-safe dishes and keep oven safety in mind, avoiding overcrowding to prevent uneven heat.
- Let the pork chops rest briefly after baking to retain juices and prevent overcooking.
- Store leftover pork chops properly in an airtight container, and refrigerate promptly to maintain freshness and prevent spoilage.
Using a Meat Thermometer for Precision

Using a meat thermometer is the most dependable way to guarantee your pork chops are perfectly cooked and safe to eat. Because pork chop thickness varies, internal temperature guides ensure consistent results. For thicker chops, you may need to cook longer, but a thermometer confirms when the internal temp reaches 145°F for juicy, safe pork. It’s essential to calibrate your meat thermometer regularly to avoid inaccurate readings. To do this, test it in ice water or boiling water and adjust if needed. By checking the temperature precisely, you prevent overcooking or undercooking, ensuring your pork chop stays moist and flavorful. Investing in a reliable, calibrated thermometer makes the difference between a good chop and a perfect one every time. Remember, proper kitchen tools are vital for precise cooking.
Resting and Serving for Juicy Results
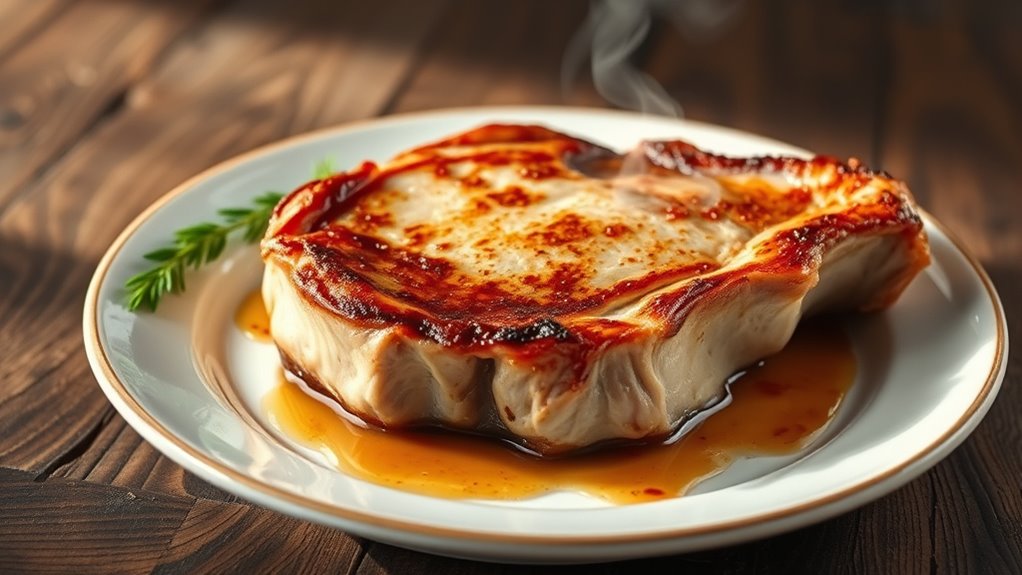
Once you’ve reached the perfect internal temperature with your meat thermometer, letting the pork chops rest is the next step to ensuring juicy results. Resting allows juices to redistribute, preventing them from spilling out when you cut into the meat. Understanding family backgrounds can also influence how you connect with the story behind your ingredients. Resting and thoughtful plating elevate your meal, ensuring each bite is juicy, flavorful, and beautifully presented.
Frequently Asked Questions
How Can I Tell When Pork Chops Are Cooked Through?
To tell when pork chops are cooked through, look for an internal temperature of 145°F (63°C) using a meat thermometer. You can also check for clear juices and slightly pink centers. Enhance flavor with your favorite pork chop seasoning or marinade techniques beforehand to keep them moist. Avoid cutting into the meat repeatedly, as it releases juices. Properly cooked pork chops are juicy and tender every time.
What Are Common Mistakes That Dry Out Pork Chops?
You often dry out pork chops by overcooking them or not using a pork marinade. To prevent this, avoid cooking beyond 145°F and rely on a meat thermometer. Also, seasoning tips like adding salt and herbs before cooking can enhance moisture. Marinating the chops helps keep them juicy, so don’t skip that step. Remember, gentle heat and proper seasoning are key to juicy, flavorful pork chops every time.
Can I Use Alternative Cooking Methods for Juicy Results?
Thinking outside the box can often lead to juicy pork chops. You can definitely try alternative cooking methods like slow cooking or different grilling techniques to keep the meat moist. Slow cooking tenderizes the pork and prevents drying out, while proper grilling techniques—like using indirect heat—help lock in juices. Experimenting with these methods can turn a dry chop into a flavorful, juicy delight. Don’t be afraid to switch things up for the best results.
How Do Thickness and Bone Affect Cooking Time?
You should consider how thickness and bone impact cooking time because thicker cuts and bone-in pork chops require longer cooking at the right temperature to reach ideal meat tenderness. Thicker meat needs a lower, slower cooking temperature to ensure even heat distribution, preventing dryness. Bones conduct heat differently, so they may slightly extend cooking time. Adjust your cooking temperature based on these factors to achieve juicy, tender results every time.
What Side Dishes Complement Juicy Pork Chops Best?
Imagine your plate as a stage where flavors perform. To enhance juicy pork chops, select seasonal vegetables like roasted carrots or green beans, adding freshness and color. Grain sides like rice, quinoa, or mashed potatoes serve as a comforting backdrop, balancing the rich meat. These pairings create a symphony of textures and tastes, elevating your meal from satisfying to memorable, turning every bite into a delightful experience.
Conclusion
Believe it or not, resting your pork chops actually helps juices redistribute, making each bite juicy and tender. Many think slicing immediately preserves juices, but it causes them to escape. So, give your meat a few minutes to rest after cooking—you’ll notice a significant difference. With proper techniques like brining, seasoning, and precise temperature, you can confidently enjoy pork chops that are juicy, flavorful, and perfectly cooked every time.