How-To Guides
How to Bake a Potato in an Air Fryer: Quick and Easy Guide
Unlock the secrets to perfectly baked potatoes in an air fryer with our quick and easy guide—discover tips that will elevate your potato game!
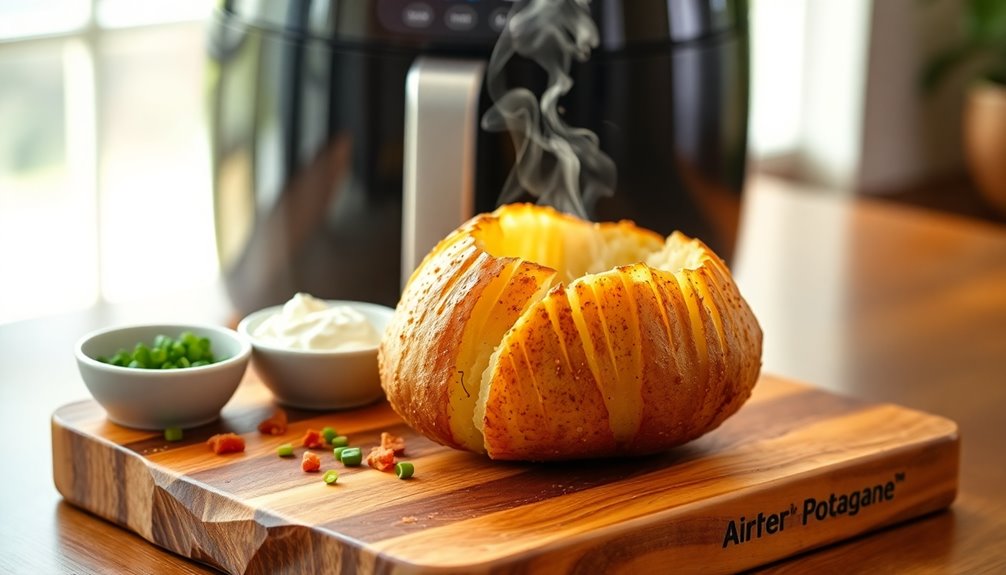
To bake a potato in an air fryer, start by preheating it to 400°F (200°C). Scrub russet or Yukon Gold potatoes, then poke holes in them to let steam escape. Rub the potatoes with olive oil and sprinkle with sea salt for added flavor. Place them in the air fryer basket, making sure they aren't overcrowded. Cook for 40-50 minutes, flipping halfway through. Check for doneness by piercing with a fork or using a thermometer to verify it's at 165°F. Let them rest for a few minutes before serving with your favorite toppings. There's more to explore on boosting flavor and creativity!
Key Takeaways
- Preheat your air fryer to 400°F (200°C) for optimal crispiness and even cooking of the potatoes.
- Scrub russet or Yukon Gold potatoes, poke holes for steam escape, and rub with olive oil and sea salt.
- Place seasoned potatoes in the air fryer basket, ensuring they are not overcrowded for proper airflow.
- Cook for 40-50 minutes, flipping halfway through, and check doneness with a fork or thermometer (target 165°F).
- Let the potatoes rest for a few minutes after cooking to maintain moisture and enhance flavor before serving.
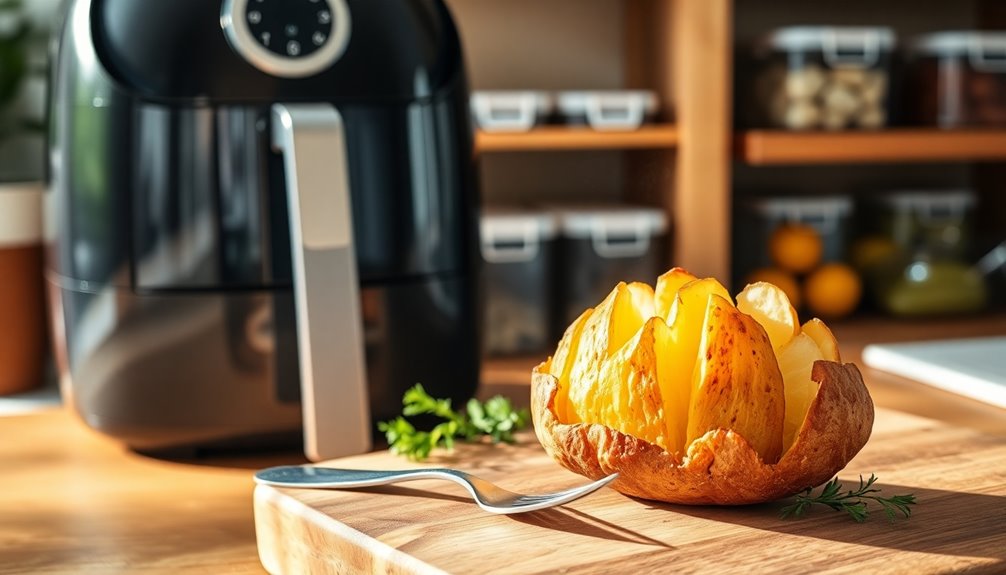
Benefits of Air Fryer Baked Potatoes
When you bake a potato in an air fryer, you reveal a world of benefits that elevate your culinary experience.
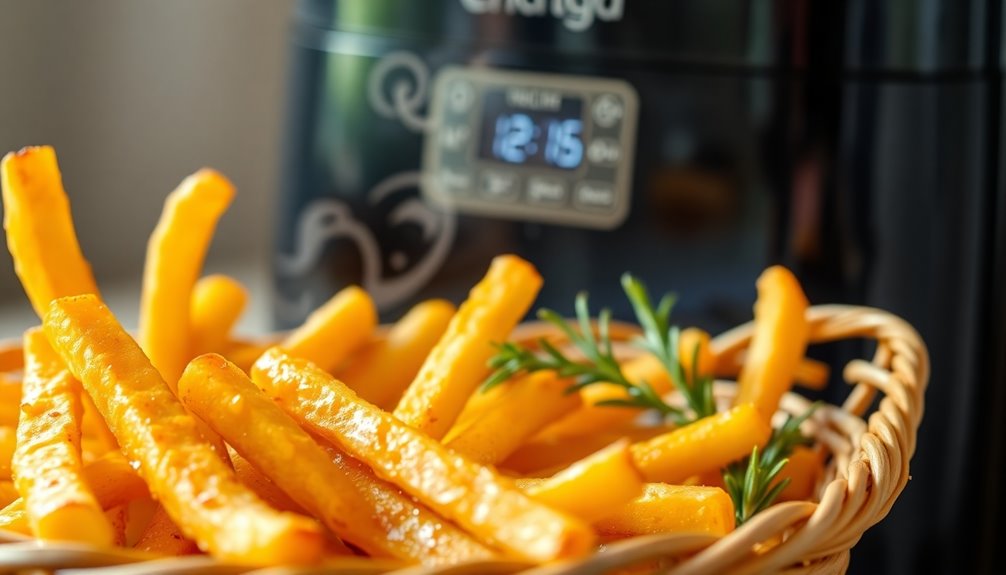
Air fryer baked potatoes cook considerably faster than traditional methods, cutting cooking time by up to 50%. In just 40 to 50 minutes, you can enjoy fluffy baked potatoes with ultra-crispy skin, thanks to the efficient hot air circulation.
Not only are these potatoes a nutritious side dish, rich in fiber, potassium, and vitamin C, but they also offer a healthier alternative to microwave options, retaining their delightful texture and flavor.
Plus, using an air fryer is energy-efficient, making it perfect for quick meals, especially during summer. Additionally, maintaining a healthy diet while enjoying delicious baked potatoes can enhance your overall wellness.
Embrace the benefits of air fryer baked potatoes for a delicious and convenient dining experience!
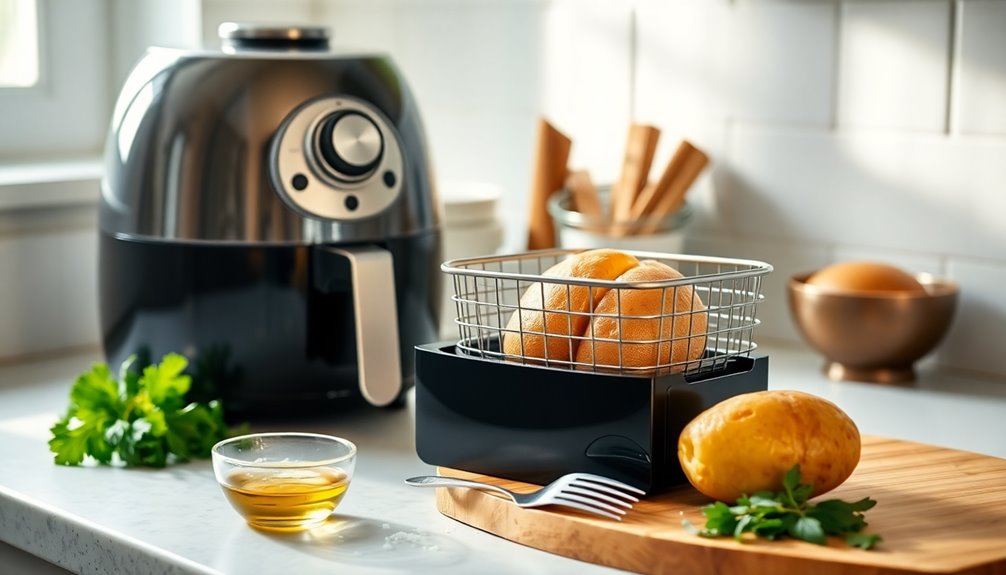
Essential Ingredients
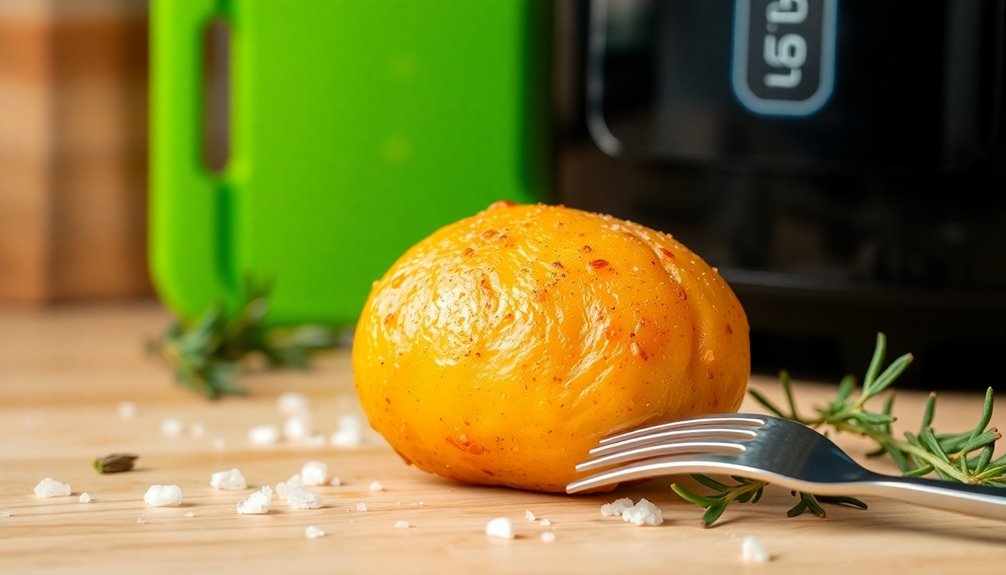
To achieve the perfect air-fried potato, start with the right variety, like russet, which gives you that fluffy texture you crave.
You'll want to enhance the flavor with olive oil and sea salt, plus any additional seasonings that suit your taste.
Using potatoes of equal size guarantees they cook evenly, leading to delicious results every time.
Best Potato Varieties
Choosing the right potato variety is essential for achieving that perfect baked texture in an air fryer. The best potato varieties for this task are the russet potato, known for its high starch content, which results in a fluffy interior and crispy skin.
Yukon Gold potatoes also make a great choice, offering a creamy texture and buttery flavor that enhances your baked potato experience. If you want something different, consider sweet potatoes; they provide a nutritious alternative with a naturally sweet flavor and vibrant color.
When selecting your potatoes, aim for those that are uniform in size to guarantee even cooking and avoid overcrowding the air fryer basket. Firm potatoes without blemishes or sprouts ensure the best quality for baking.
Essential Seasoning Options
While baking a potato in an air fryer, the right seasonings can elevate your dish from good to great. Start with a drizzle of olive oil to achieve that crispy, flavorful skin and help your seasonings stick.
For a savory kick, consider these seasoning options:
- Garlic powder for an aromatic touch
- Spices like paprika or chili powder for added heat
- Shredded cheese that melts beautifully into the fluffy interior
- Toppings such as chives or crispy bacon bits for extra flavor
Feel free to experiment with butter or vegan alternatives, which can melt into the potato, enhancing its richness. Additionally, pairing your seasoned potato with natural remedies can provide complementary flavors and health benefits.
With these essential seasonings, your air-fried potato will be a delicious masterpiece!
Oil and Flavor Enhancements
When you want to elevate your air-fried potato experience, incorporating oil and flavor enhancements is key.
Start by coating your potatoes with extra-virgin olive oil; this not only boosts flavor but also helps achieve that coveted crispy skin.
Don't forget to sprinkle sea salt before cooking, as it adds depth to the taste.
For an extra flavor kick, mix in garlic powder or fresh herbs like parsley or chives.
You can also customize your dish with various toppings—think shredded cheese, sour cream, or even bacon bits.
If you're feeling adventurous, add spices like paprika or chipotle sauce to the oil for a unique twist.
Enjoy your perfectly seasoned, deliciously crispy potatoes!
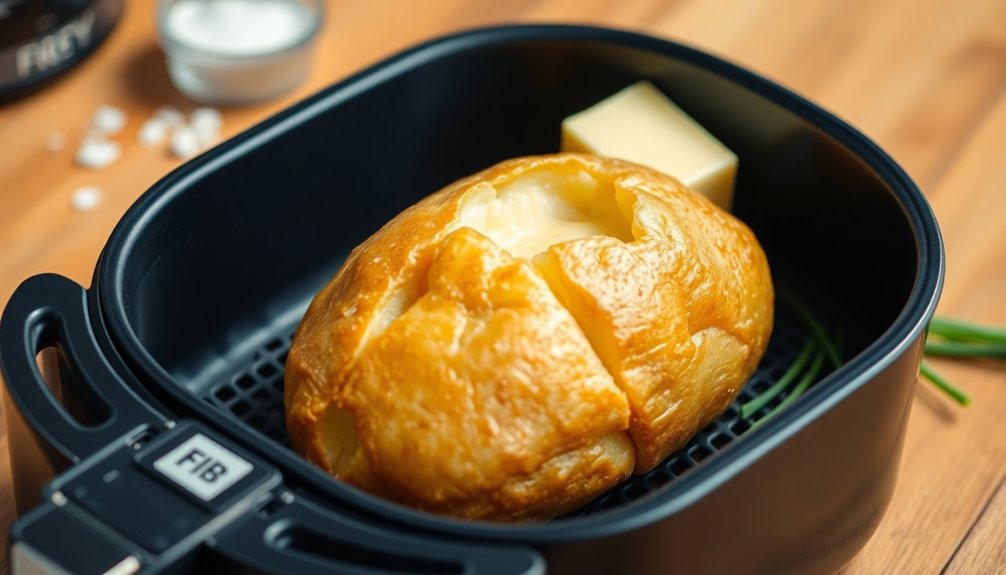
Cooking Process
Start by preheating your air fryer to 400°F (200°C) for the best results.
Next, rub the scrubbed russet potatoes with olive oil and season them generously with salt, pepper, and any optional spices you love.
Place the seasoned potatoes in the air fryer basket, ensuring they're not overcrowded to allow for proper air circulation.
Cook the potatoes for 40 to 50 minutes, flipping them halfway through to achieve that perfect crispy skin and fluffy interior.
- Feel the excitement as they cook!
- Enjoy the delicious aroma wafting through your kitchen.
- Anticipate that first bite of a perfectly baked potato.
- Revel in your culinary success with each crispy morsel.
Check for doneness by piercing them with a fork.
Serving Suggestions
Once your baked potato is ready, it's time to think about how you'll serve it.
You can stick with classic toppings like butter and cheese or get creative with options like crumbled bacon and fresh herbs.
Pairing your potato with a main dish can also enhance the meal, making it satisfying and delicious.
Classic Topping Combinations
What toppings can take your air-fried baked potato to the next level? The right toppings can transform your baked potatoes into a delicious meal. Here are some classic combinations to contemplate:
- Sour cream and chives for a creamy, fresh contrast.
- Cheddar cheese and crispy bacon for an indulgent, savory treat.
- Greek yogurt with steamed broccoli for a healthy twist.
- Fresh herbs like dill or parsley to brighten up the flavors.
These toppings not only enhance the taste but also add texture and color to your dish.
Whether you crave something hearty or healthier, there's a perfect topping for every craving. Get creative and enjoy every bite!
Creative Flavor Enhancements
While you can certainly enjoy a classic baked potato, elevating its flavor with creative enhancements can make your meal truly unforgettable.
Start by drizzling your air fryer baked potato with a rich cheese sauce for that melty goodness, or opt for vegan sour cream to keep it creamy and indulgent.
For a protein boost, top it with crumbled vegan bacon or shredded chicken, transforming your fluffy insides into a filling dish.
Don't forget to sprinkle fresh herbs like chives or dill, adding a pop of color and freshness.
If you're craving a bit of spice, a dash of chipotle sauce brings a smoky kick that perfectly complements the crispy on the outside texture of your potato.
Additionally, sharing a meal can strengthen emotional bonds and create lasting memories, enhancing your dining experience.
Enjoy experimenting!
Pairing With Main Dishes
Baked potatoes can elevate any meal when paired with the right main dishes. Their fluffy texture and ability to absorb flavors make them a versatile side dish. Consider these delicious pairings:
- Grilled meats like chicken, steak, or pork
- Hearty salads, such as Caesar or mixed greens
- Steamed or roasted vegetables like broccoli or asparagus
- Chili for a protein-rich topping
You can also top baked potatoes with a variety of toppings, like sour cream, shredded cheese, or bacon bits.
Don't forget to season with salt to enhance their natural flavors! With these pairings, your baked potatoes won't only complement your meal but also become a highlight on your plate.
Enjoy the delightful combination!
Storage and Reheating
To keep your leftover baked potatoes fresh and tasty, store them in airtight containers in the refrigerator for up to 3-4 days.
If you want to extend their shelf life, freeze them in freezer-safe bags for up to 3 months. Just make sure they're well-sealed to prevent freezer burn.
When it's time for reheating, the air fryer is your best bet; set it to 350°F and heat for 5-7 minutes. This method helps restore that crisp skin while ensuring the internal temperature reaches 165°F.
If you opt for the microwave, be aware that the skin might turn out softer. Remember, avoid refreezing baked potatoes after reheating, and always label containers with dates for effective storage tracking.
Tips for Success
Getting the perfect baked potato in your air fryer is easy with a few simple tips. Follow these guidelines to guarantee delicious results:
- Always poke a few holes in each potato to let steam escape.
- Preheat your air fryer to 400°F (200°C) for that crispy skin you crave.
- Rub each potato with olive oil and season well with sea salt for added flavor.
- Don't forget to flip the potatoes halfway through cooking for even crispiness.
Once done, allow the baked potatoes to rest for a few minutes. This helps maintain moisture and prevents burns when slicing.
With these tips, you'll enjoy perfectly baked potatoes every time from your air fryer basket!
Additional Potato Recipes
While you might love baked potatoes, there are plenty of other delicious ways to enjoy this versatile vegetable.
Try making crispy smashed potatoes! Boil small potatoes until tender, smash them flat, and season with potatoes with olive oil before air frying for a delightful crunch.
For a classic side, cut potatoes into wedges, toss with herbs and oil, and roast them in the oven.
If you're in a hurry, whip up Instant Pot mashed potatoes for creamy goodness.
Grill thick potato slices tossed in olive oil for a smoky flavor, or indulge in air fryer French fries for a healthier snack.
These additional potato recipes will surely satisfy your cravings!
Frequently Asked Questions
How Long Does It Take to Air Fry a Baked Potato?
To air fry a baked potato, it typically takes you about 40 to 50 minutes at 400°F, depending on the potato's size.
If you've got larger potatoes, expect them to take up to 60 minutes to become tender throughout.
Don't forget to flip them halfway for even crispiness.
Always test for doneness by piercing with a fork; they should be soft and easily pierced when they're fully cooked.
Is It Faster to Bake a Potato in the Oven or Air Fryer?
When you're deciding whether to bake a potato in the oven or an air fryer, you'll find the air fryer's definitely faster.
It typically cooks potatoes in 40 to 50 minutes, while an oven can take 60 to 90 minutes.
Plus, you won't need to preheat the air fryer, saving you even more time.
With its hot air circulation, you'll enjoy crispy skin and fluffy interiors quicker than in a traditional oven.
How Long Does It Take for Potatoes to Cook in an Air Fryer?
You might be surprised to learn that cooking potatoes in an air fryer usually takes about 40 to 50 minutes.
It really depends on the size of your potatoes. For large russets, aim for around 45 minutes, while smaller ones could be done in as little as 30.
Don't forget to flip them halfway through for even crispiness.
Always check for doneness by piercing with a fork or using a thermometer.
Do You Have to Poke Holes in Potatoes in the Air Fryer?
Yes, you've gotta poke holes in potatoes before cooking them in an air fryer.
This step's essential because it lets steam escape, preventing the potatoes from bursting. Just grab a fork and pierce the surface 5 to 10 times.
This creates small vents without losing too much moisture, keeping that fluffy interior intact. Skipping this can lead to uneven cooking and a less-than-desirable texture.
Conclusion
Baking a potato in an air fryer is a game changer—crispy on the outside yet fluffy on the inside. With minimal effort, you get a delicious side dish that rivals traditional methods. Whether you're enjoying it plain or loaded with toppings, the convenience and flavor make it a win-win. So, why stick to the oven's slow routine when you can whip up a perfect baked potato in a fraction of the time? Embrace the air fryer and savor every bite!
How-To Guides
How to Use an Air Fryer Like a Pro: Beginner’s Step-by-Step Guide
On your journey to mastering air frying, discover essential tips and tricks that will elevate your cooking game in ways you never imagined!
To use an air fryer like a pro, start by setting it up on a flat surface and familiarizing yourself with the controls. Prepare your ingredients by cutting them into uniform sizes for even cooking and marinating meats as needed. Preheat the air fryer to 350°F-400°F for about 3-5 minutes. When cooking, coat foods lightly with oil and avoid overcrowding the basket for optimal air circulation. Always monitor cooking times, as you'll need less time compared to traditional methods. Finally, remember to clean it after use for better performance. There's so much more to explore about perfecting your air frying skills!
Key Takeaways
- Set up your air fryer on a stable surface, ensuring all parts are properly assembled according to the manual for optimal performance.
- Prepare ingredients by cutting them into uniform sizes and marinating proteins to enhance flavor and ensure even cooking.
- Preheat the air fryer to the recommended temperature for even cooking and improved texture, monitoring the digital display for completion.
- Use proper cooking techniques, including shaking the basket, adjusting cooking times, and lightly coating fresh foods with oil for best results.
- Maintain safety by keeping the air fryer away from children, using oven mitts, and regularly cleaning to prevent grease buildup and ensure longevity.
Setting Up the Air Fryer
Setting up your air fryer is a straightforward process that lays the foundation for delicious meals.
First, plug the cord into a wall outlet and ensure your air fryer sits on a flat, stable surface. Check for any accessories, like the frying basket and grate, and make sure they're properly assembled.
Next, read the instruction manual to get familiar with the specific features and controls of your model. Pay particular attention to the control panel, noting the temperature and timer dials. A good understanding of temperature guidelines will help you select the right settings for different foods.
This knowledge will make your cooking experience smoother and more enjoyable. Remember, a well-set air fryer leads to perfectly cooked food, so take a moment to get everything ready before you dive into your recipe!
Preparing Ingredients
Now that your air fryer is set up and ready to go, it's time to prepare your ingredients for cooking.
Start by cutting your food into uniform sizes for even cooking; think fries or wedges for potatoes and bite-sized pieces for chicken. Remember to clean and prep shrimp, leaving them whole or cutting as per your recipe.
For seasoning, mix salt and spices with a bit of oil to keep them from blowing away. Marinate chicken in a buttermilk and hot sauce mix for at least 15 minutes. Cooking with an air fryer allows for a healthier cooking option as it requires minimal or no oil.
When coating, toss chicken in breadcrumbs or cornflakes, and don't forget to wrap jalapeño poppers with bacon.
Finally, arrange everything in an even layer in the air fryer basket, leaving space for hot air circulation.
Preheating and Settings
Preheating your air fryer is crucial for achieving perfectly cooked meals. Start by checking your manual for specific preheating instructions tailored to your model. If your air fryer has a preheat function, use it by selecting the appropriate setting or programming the cook time. Typically, you'll want to preheat between 350°F to 400°F for about 3-5 minutes. Keep an eye on the digital display—many models will beep when preheating is complete. Avoid overheating, as this can lead to burned food. Proper preheating ensures even cooking and enhances the overall texture and flavor of your air-fried dishes.
Cooking Techniques
To achieve deliciously crispy meals in your air fryer, it's essential to master various cooking techniques.
Start by cutting vegetables and potatoes into smaller pieces for even browning. Pat fresh foods dry and coat them lightly with oil—about one tablespoon per kilogram. For frozen foods, you can skip the oil.
When cooking meat, dry the skin and apply a thin layer of oil for crispiness. Use the perforated basket for airflow and shake it once or twice during cooking. This will help ensure that you achieve optimal cooking results by allowing the hot air to circulate effectively.
Adjust cooking times by reducing them by 20% compared to conventional recipes. Remember to check doneness and flip items midway for balanced crispness.
Lastly, lightly spritz oil for that extra-crispy exterior and ensure proper basket placement for airflow.
Safety Precautions
Mastering cooking techniques in your air fryer is only one part of the process; keeping safety in mind is just as important.
Always place your air fryer on a heat-resistant surface and maintain at least 5 inches of space from walls or other objects. While it's cooking, avoid touching anything except the handle—you can use oven mitts if needed. Be aware that certain air fryer parts can reach temperatures that cause burns within seconds, so always handle with care.
Keep it out of reach of kids and pets until it's cool. Always plug it into a grounded outlet and unplug it after use to prevent accidental start-ups.
Remember to avoid overcrowding the basket and never use metal utensils. If you notice strange smells or sounds, unplug the fryer immediately to check for issues.
Stay safe and enjoy your cooking!
Post-Cooking Maintenance
Once you've finished cooking with your air fryer, it's essential to prioritize maintenance to keep it in top shape.
First, unplug the air fryer and let it cool completely. Remove the basket, pan, or tray, and wash them with warm, soapy water. For tougher messes, soak them for 10-15 minutes.
Wipe the bottom chamber with a damp cloth and ensure all parts are dry before reassembling. For deep cleaning, fill the basket with a cup of water and run the fryer at a high setting for a few minutes. Regular cleaning is crucial to maintain appliance longevity and ensure optimal performance.
Don't forget to clean the heating element with a soft brush. Regularly clean the air fryer to prevent grease buildup and make your cooking experience smoother.
Frequently Asked Questions
Can I Use Aluminum Foil in the Air Fryer?
Yes, you can use aluminum foil in your air fryer, but with some precautions.
Make sure the foil doesn't cover all the holes in the basket to allow proper airflow. Weigh it down to prevent it from blowing around while cooking.
Avoid placing it at the bottom of the fryer, and be cautious with acidic foods, as they can react with the foil.
Using foil can help reduce sticking and make cleanup easier.
What Types of Food Are Best for Air Frying?
When you're air frying, focus on proteins like chicken, pork, and salmon for quick, flavorful meals.
Don't forget vegetables like potatoes, broccoli, and cauliflower; they turn out perfectly crispy.
Seafood like shrimp and crab works well too, as does tofu for a meat alternative.
You can even whip up omelets and muffins, maximizing versatility.
Experiment with different foods, and you'll discover just how delicious air frying can be!
How Do I Know When Food Is Done Cooking?
To know when your food's done cooking, rely on visual cues and cooking times. While a golden brown color might suggest doneness, it's not always reliable.
Use a food thermometer for accuracy, especially with meat; aim for 165°F for poultry and 145°F for fish.
Check halfway through cooking, and if it's not ready, continue in 5-minute increments.
Remember to shake or flip food as needed for even cooking!
Can I Cook Multiple Items at Once?
Yes, you can cook multiple items at once in your air fryer, but you'll need to choose foods with similar cooking times and temperatures.
Cut everything into uniform sizes and avoid overcrowding the basket to ensure even cooking.
You might need to adjust the cooking time and temperature slightly, so keep an eye on your food and shake the basket occasionally for even browning.
With practice, you'll master cooking a variety of dishes together!
Do I Need to Adjust Cooking Times for Different Air Fryer Models?
Yes, you absolutely need to adjust cooking times for different air fryer models.
Since wattage and size vary, higher wattage models will cook your food faster than lower wattage ones. Similarly, larger air fryers typically take longer than smaller, compact models.
Always check your specific model's guidelines, and feel free to reduce cooking time by 20-30% if adapting from traditional oven recipes.
Monitoring your food closely will help ensure it's cooked perfectly every time.
Conclusion
Now that you've mastered the basics of using an air fryer, you're ready to whip up delicious, healthier meals with confidence. Remember to set it up properly, prep your ingredients, and adjust the settings as needed. Experiment with different cooking techniques, and don't forget to follow safety precautions. With a little practice, you'll be air frying like a pro in no time. Enjoy the tasty results and the convenience that comes with this amazing kitchen gadget!
How-To Guides
How to Reheat Wings in Air Fryer: Crisp Up Leftovers in Minutes!
Learn the secret to reviving leftover wings in an air fryer for that perfect crispy texture—your taste buds will thank you!
To reheat wings in an air fryer, preheat it to 375°F (190°C). Arrange your wings in a single layer in the basket to avoid overcrowding. Heat them for about 5-6 minutes, flipping halfway through to guarantee even crisping. Use a food thermometer to check that the internal temperature reaches at least 165°F (74°C). For extra moisture, consider brushing the wings with oil or melted butter before cooking. This method brings back the delicious crispy texture and juicy flavor of your leftovers in just minutes. Stick around for more tips to make the most of your air-fried delights!
Key Takeaways
- Preheat the air fryer to 375°F (190°C) for optimal crispiness before adding wings.
- Arrange wings in a single layer to avoid overcrowding and ensure even heating.
- Heat wings for 5-6 minutes, flipping halfway to achieve a uniform crisp.
- Check the internal temperature with a thermometer; it should reach at least 165°F (74°C).
- Optionally, brush wings with oil or melted butter to enhance moisture and flavor.
Best Methods for Reheating Wings
When you want to enjoy leftover wings, using an air fryer is the best method to bring them back to life. This cooking technique preserves the crispy texture while ensuring your sauced chicken wings remain juicy.
Start by preheating your air fryer to 375°F (190°C) for ideal results. Arrange the wings in a single layer to avoid overcrowding, which helps with even reheating. The cooking time is about 5-6 minutes, and don't forget to flip or shake them halfway through.
For sauced wings, consider using a small air fryer pan or lining the basket with tin foil to prevent sticking. Always check the internal temperature, making sure it reaches at least 165°F (74°C) for safe consumption.
Enjoy your revitalized wings!
Steps to Reheat in Air Fryer
To reheat your wings in an air fryer effectively, start by preheating the appliance to 375°F (190°C). Next, arrange the wings in a single layer in the air fryer basket for even cooking. Avoid overcrowding; you might need to reheat chicken wings in batches. Cook for 5-6 minutes, flipping or shaking them halfway to achieve that crispy texture.
Check the internal temperature at the 5-minute mark with a food thermometer, confirming it reaches 165°F (74°C) for safety. For added moisture, consider lightly brushing the wings with oil or melted butter before reheating.
Step | Action |
---|---|
1. Preheat | Set to 375°F (190°C) |
2. Arrange | Place wings in a single layer |
3. Cook | Heat for 5-6 minutes |
4. Check temperature | Confirm it reaches 165°F (74°C) |
Tips for Moist and Crispy Wings
For perfectly moist and crispy wings, it's essential to start with a well-preheated air fryer at 360°F (182°C) for 3-5 minutes; this helps lock in moisture right from the beginning.
Brush your wings lightly with cooking oil or melted butter before reheating leftover wings to enhance moisture retention.
When you're ready, arrange the wings in a single layer in the air fryer basket to guarantee even cooking and prevent drying out.
While reheating, monitor the wings closely, aiming for an internal temperature of 165°F (74°C) to maintain juiciness.
If you notice the wings browning too quickly, consider using aluminum foil to cover them, helping to retain moisture while achieving that desirable crispiness. Additionally, hula hooping can be a fun way to burn off some calories after enjoying those wings, as it burns approximately 200-400 calories per hour.
Storing Leftover Chicken Wings
Properly storing leftover chicken wings is essential if you want to enjoy them later without sacrificing their flavor and texture.
First, let the wings cool to room temperature to prevent moisture buildup inside the container. Use an airtight container or a zippered plastic bag for ideal freshness, ensuring you don't stack wings tightly to avoid sogginess.
Label the container with the date of storage to easily track freshness. If you plan to keep them longer, consider freezing wings. They can last up to 3 months in a regular freezer and up to a year in a deep freezer.
Following these steps will help you crisp up leftovers and enjoy your wings at their best later on!
Serving Suggestions for Reheated Wings
While reheating wings is a great way to enjoy leftovers, pairing them with the right sides can elevate your meal even further.
Consider serving your reheated wings with classic celery and carrot sticks for a crisp crunch that complements their flavor. A variety of dipping sauces like ranch, blue cheese, or spicy buffalo will enhance your taste experience.
For something lighter, incorporate wings into salads or wraps, adding greens and fresh vegetables for a balanced meal. If you're in the mood for comfort food, mac and cheese or French fries make excellent accompaniments.
Don't forget to garnish your reheated wings with fresh herbs like parsley or cilantro for a pop of color and extra flavor!
Frequently Asked Questions
How Do I Make Leftover Wings Crispy in an Airfryer?
To make leftover wings crispy in an air fryer, start by preheating it to 360°F (182°C) for about 3-5 minutes.
Arrange the wings in a single layer, avoiding overcrowding. Lightly spray them with cooking oil to enhance crispiness.
Air fry at 375°F (190°C) for 5-6 minutes, flipping halfway through.
Check the internal temperature to guarantee they reach 165°F (74°C) for safe eating while keeping that delicious crunch.
Enjoy your wings!
How Do You Make Leftover Wings Crispy Again?
Did you know that air fryers can reduce fat content in food by up to 75%?
To make your leftover wings crispy again, start by preheating your air fryer to 375°F.
Arrange the wings in a single layer, lightly spray them with oil, and cook for 5-6 minutes, flipping halfway through.
This method not only revives their crunch but also guarantees they're heated evenly and safely to 165°F.
Enjoy your delicious wings!
How to Make Leftover Chicken Crispy in Air Fryer?
To make leftover chicken crispy in an air fryer, start by preheating it to 375°F (190°C).
Lightly spray the basket with cooking oil to prevent sticking and enhance crispiness.
Arrange your chicken in a single layer, ensuring not to overcrowd.
Cook for about 5-6 minutes, flipping halfway through for even crisping.
For extra flavor, you can brush the chicken with a little oil or melted butter before reheating.
Enjoy your deliciously crispy chicken!
How Long Should I Reheat Wings in the Air Fryer?
You've got those delicious wings, but they're not as crispy as you'd like.
To reheat them in the air fryer, set it to 375°F (190°C). Arrange your wings in a single layer, and cook for about 5-6 minutes.
Flip or shake them halfway through for even crispiness. Remember, if they're larger or smaller, you might need to adjust the time slightly.
Always check they reach 165°F (74°C) for safety!
Conclusion
To sum up, reheating wings in an air fryer is the ultimate game-changer for enjoying leftover chicken. You'll be amazed at how quickly you can transform soggy bites into crispy, mouthwatering delights. Just follow the steps, and don't forget those handy tips for keeping them moist. With your perfectly reheated wings, you'll feel like a culinary wizard, impressing everyone at the table. So go ahead, dig in, and relish every flavorful moment!
How-To Guides
Can You Put Wax Paper in an Air Fryer? What You Must Know
Wondering if wax paper is safe for your air fryer? Discover the surprising truth that could change your cooking game forever!
You shouldn't put wax paper in an air fryer. It melts at temperatures above 200°F, which means it can ignite or contaminate your food. This not only leads to a mess but also poses a fire hazard. Instead, opt for parchment paper, which withstands higher temperatures and is safe to use. Silicone mats or aluminum foil are also good alternatives, but be cautious with airflow. Always consult your air fryer manual for the best practices. If you're curious about the safest ways to cook with these materials, there's plenty more helpful info to uncover.
Key Takeaways
- Wax paper melts at temperatures above 200°F, posing a risk of food contamination and fire hazards in air fryers.
- Manufacturers strongly advise against using wax paper due to safety concerns and potential messy cleanup.
- Safe alternatives include parchment paper, aluminum foil, and silicone mats, designed to withstand high temperatures.
- Parchment paper can handle temperatures up to 420-450°F, making it ideal for air frying without risks.
- Always consult your air fryer manual for recommended materials and best practices to ensure safe cooking.
Risks of Using Wax Paper
When considering whether to use wax paper in an air fryer, you should be aware of the risks involved. Wax paper isn't suitable for high temperatures; it melts at temperatures above 200°F (94ºC).
This melting can lead to food contamination and create a fire hazard, as the wax coating can ignite when exposed to intense heat. Additionally, using wax paper may result in a messy cleanup, with melted wax potentially dripping onto the heating element.
Manufacturers strongly advise against its use due to these safety concerns. Ultimately, the degradation of wax paper can impart unwanted flavors to your food, making it an unsuitable option for air frying.
Avoiding these risks is essential for a safe cooking experience.
Safe Alternatives for Air Fryers
If you're looking for safe alternatives to use in your air fryer, consider options that can withstand higher temperatures without compromising your cooking experience.
Parchment paper is a great choice, as it can handle temperatures up to 400°F (205°C) and helps prevent sticking.
Aluminum foil works too, but make sure it doesn't block air circulation and is weighed down to avoid floating.
For a reusable option, silicone mats are heat resistant and effective at keeping food from sticking.
Pre-fitted air fryer liners, especially perforated parchment paper, enhance airflow and simplify cleanup.
Just remember to steer clear of wax paper, as its low heat tolerance can lead to melting and potential fire hazards. Additionally, using high-quality air purifiers in your cooking space can help reduce odors and improve overall indoor air quality.
Understanding Material Properties
Understanding the properties of various cooking materials is essential for achieving the best results in your air fryer.
Wax paper isn't suitable for high heat, as it melts above 200°F, risking food contamination and fire hazards. In contrast, parchment paper boasts impressive heat resistance, handling temperatures up to 420-450°F, making it perfect for air frying.
Aluminum foil, while efficient at conducting heat and non-flammable, should be used cautiously to prevent airflow blockage.
Silicone mats provide a reusable, non-stick surface that withstands high temperatures, making them a safe alternative to wax paper.
User Experiences and Recommendations
Why take unnecessary risks with your air fryer? Many users warn against using wax paper due to its low heat tolerance, which can lead to melting and even a fire hazard. Instead, you'll find a strong recommendation for parchment paper, designed for high-temperature cooking to effectively prevent sticking. Some air fryer enthusiasts also swear by silicone liners, which are heat-safe and serve as reusable alternatives. Here's a quick comparison:
Material | Heat Tolerance | Safety Level |
---|---|---|
Wax Paper | Low | Fire Hazard |
Parchment Paper | High | Food Safety |
Silicone Liner | High | Safe & Reusable |
Adhering to safe cooking practices guarantees your meals are delicious and your appliance lasts longer!
Best Practices for Air Frying
When it comes to air frying, following best practices can make a significant difference in your cooking results. Always consult your air fryer manual to verify you're using materials that are safe to use.
Opt for parchment paper instead of wax paper, as it withstands high temperatures and won't pose a fire hazard. To prevent food from sticking in the air fryer basket, weight down any liners with food, keeping them away from the heating element.
Avoid preheating with liners, as they can fly around and create a fire risk. Regularly monitor cooking times and temperatures for different foods, and steer clear of wet batters that obstruct air circulation. Additionally, be mindful of color accuracy as it can enhance your overall cooking experience by ensuring even browning and crispness.
These tips will make cleanup easier and enhance your air frying experience!
Frequently Asked Questions
Is Wax Paper Safe in an Air Fryer?
When you're wondering if wax paper is safe in an air fryer, it's important to know it isn't.
Wax paper can melt at high temperatures, potentially contaminating your food and damaging your appliance. The wax coating poses a fire hazard, and melted wax can create a mess on the heating element.
Instead, consider using parchment paper or silicone liners for safer and more effective cooking in your air fryer.
What Is the Best Thing to Put on the Bottom of an Air Fryer?
When you're looking for the best thing to put on the bottom of your air fryer, consider using parchment paper.
It's heat-resistant and prevents sticking, making cleanup a breeze. Aluminum foil works too, but make sure it doesn't block air circulation.
If you prefer a reusable option, silicone mats are perfect for non-stick surfaces.
You might also find pre-fitted liners convenient, as they simplify cleaning while allowing proper air flow.
What Can I Line My Air Fryer Basket With?
When it comes to lining your air fryer, the options are endless, like a culinary wonderland! You can use parchment paper, which withstands high temperatures and keeps your food from sticking.
Aluminum foil works too, but make sure it doesn't block air circulation. Silicone mats are reusable and perfect for easy cleanup.
Consider pre-fitted liners with perforations for ideal air flow. Just steer clear of wax paper; it's not safe for high heat!
What Kind of Paper Can I Put in the Air Fryer?
When you're looking for paper options for your air fryer, stick to parchment paper or aluminum foil.
Parchment paper can handle high temperatures without issues, while aluminum foil works as long as it doesn't block air circulation.
Silicone mats are also great, as they're heat-resistant and reusable.
Just remember to avoid wax paper; it's not safe due to its low heat tolerance and potential fire risks.
Always check your air fryer's manual for guidance.
Conclusion
In summary, while wax paper might seem like a simple solution, its risks outweigh the rewards in your air fryer. Instead, consider safe alternatives like parchment paper or silicone mats to guarantee a successful and safe cooking experience. By understanding material properties and following best practices, you'll whip up wonderful meals without worry. So, stay savvy, skip the wax paper, and savor the scrumptious sensations your air fryer can create!
-
User Stories and Tips1 week ago
I Tried These 5 Air Fryer Hacks—You Won’t Believe the Results!
-
User Stories and Tips7 days ago
The Secret to Perfectly Crispy Fries: Real Users Share Their Air Fryer Tips
-
User Stories and Tips7 days ago
You’ll Never Cook the Same Again: How an Air Fryer Changed My Life!
-
Recipes6 days ago
How to Make Fries in Air Fryer: The Ultimate Crisp Guide
-
User Stories and Tips1 week ago
I Cooked Every Meal in an Air Fryer for a Week—Here’s What I Learned!
-
Vetted6 days ago
15 Best Smart Air Fryers With App Connectivity for Effortless Cooking in 2025
-
Vetted6 days ago
15 Best Desk Speakers of 2025 – Elevate Your Audio Experience
-
Recipes6 days ago
How to Cook Wings in Air Fryer: The Ultimate Crispy Recipe