How-To Guides
How to Hard Boil Eggs in Air Fryer: A Surprising Method That Works!
Get ready to discover a surprisingly easy way to hard boil eggs in your air fryer—it’s a game changer you won’t want to miss!
You can easily hard boil eggs in your air fryer, and it's surprisingly simple! Start by preheating your air fryer to 250°F (121°C) and place cold large eggs inside. Cook them for about 15-17 minutes, depending on how firm you prefer the yolk. Once done, immediately transfer the eggs to an ice bath to stop the cooking process and make peeling easier. This method saves time and guarantees even cooking without the fuss of boiling water. With just a few more tips, you'll be whipping up perfect hard-boiled eggs in no time!
Key Takeaways
- Preheat the air fryer to 250°F (121°C) for even cooking of large eggs directly from the refrigerator.
- Cook the eggs for 15-17 minutes, adjusting time based on desired yolk firmness.
- Immediately transfer cooked eggs to an ice bath to halt cooking and make peeling easier.
- Store unpeeled eggs in the refrigerator for up to a week; peeled eggs need airtight containers or cold water.
- Experiment with cooking times, as variations in air fryer models may affect results.
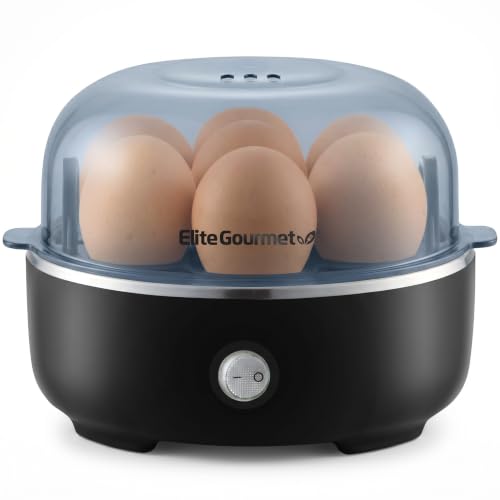
Benefits of Air Fryer Eggs
When you choose to cook hard boiled eggs in an air fryer, you're not just saving time; you're also ensuring a more consistent result.
Air fryer hard boiled eggs typically take only 15-17 minutes, eliminating the hassle of monitoring boiling water. The steady temperature in the air fryer means your eggs cook evenly, reducing the chances of cracking.
Plus, they're easy to peel once they're done, making your meal prep even simpler. This method also simplifies cleanup, as you won't need pots or extra utensils.
You can adjust the cooking time to achieve your preferred yolk texture, whether you like them soft or firm. With proper storage, these eggs can last up to a week, perfect for quick snacks!
Essential Ingredients
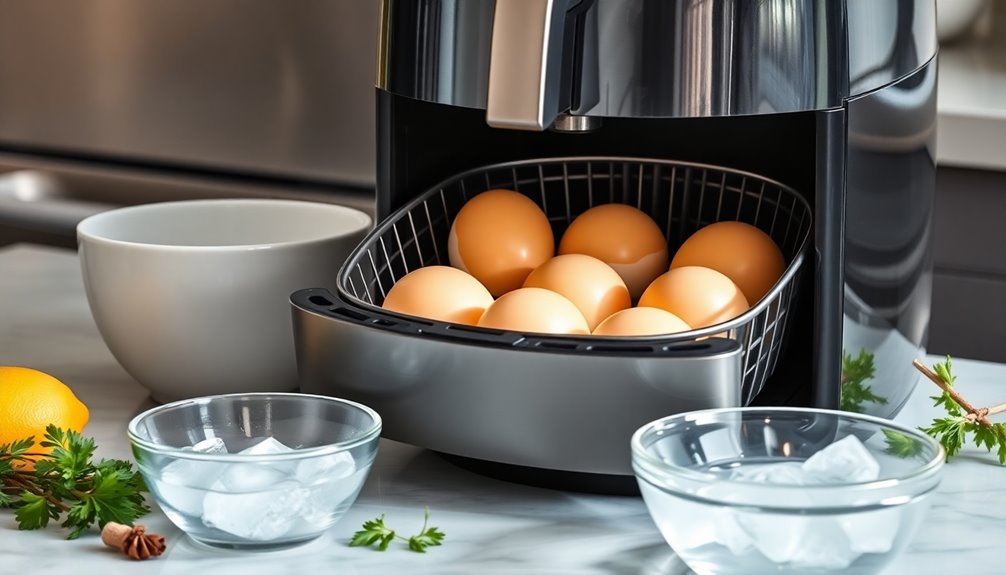
Cooking hard-boiled eggs in an air fryer is straightforward, and you only need a few key ingredients. The primary ingredient is large eggs, which you can use straight from the refrigerator—no need to bring them to room temperature.
An air fryer is vital for this method, ensuring even cooking without boiling water. After air frying, you'll want to prepare an ice bath. This step is significant as it halts the cooking process immediately, preventing overcooking and making the eggs easier to peel.
While you don't need any additional ingredients for basic air fryer hard-boiled eggs, feel free to add optional seasonings like Everything But the Bagel Seasoning to enhance the flavor if you like.
Enjoy your perfectly cooked eggs!
Cooking Instructions
To get the perfect hard-boiled eggs, you'll want to start by setting your air fryer to the ideal temperature of 250°F (121°C).
Cooking time can vary, so adjust it based on how firm you like your yolks.
Don't forget to transfer the eggs to an ice bath right after cooking—this is key for stopping the cooking process and makes peeling a breeze.
Ideal Temperature Settings
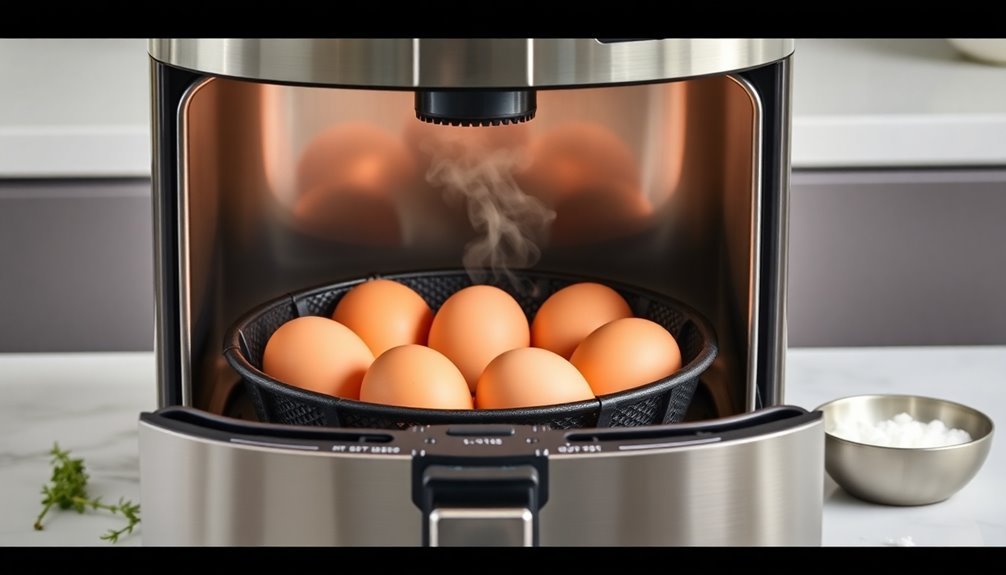
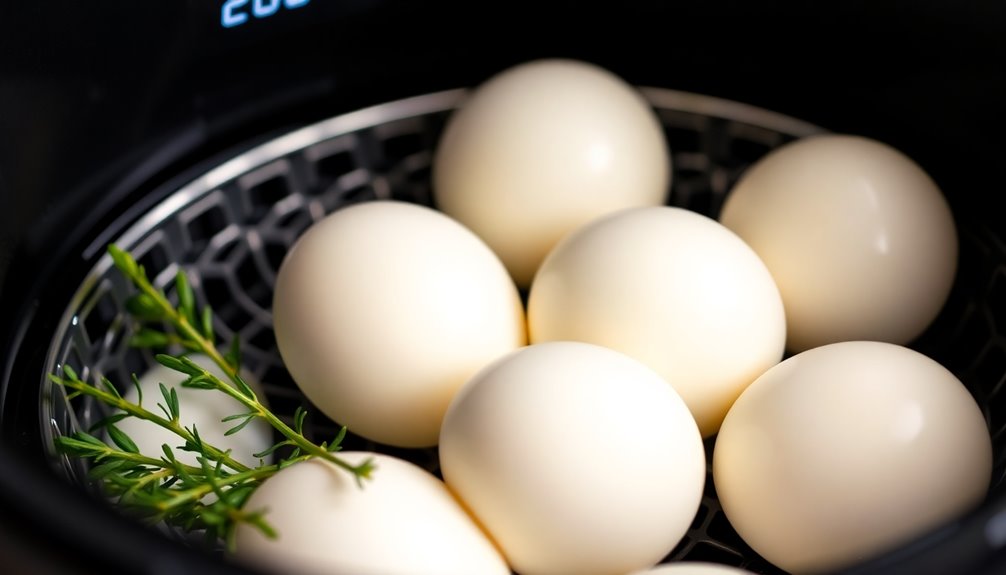
For best results in hard boiling eggs, preheat your air fryer to 250°F (120°C). This ideal temperature guarantees even cooking for large cold eggs placed in a single layer in the basket.
Cooking time is vital; aim for 15 minutes for slightly soft yolks or 17 minutes for firmer yolks. Remember, every air fryer is different, so you might need to adjust the cooking time and temperature based on your specific model. Some users have reported success at temperatures between 270°F and 300°F.
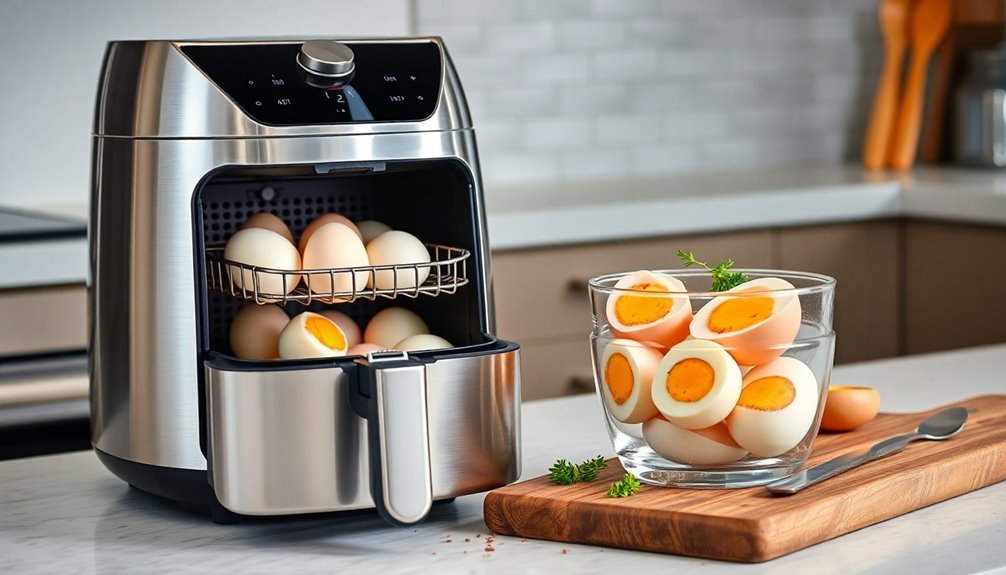
Once your eggs are done, immediately transfer them to an ice bath for 8-10 minutes. This stops the cooking process and makes peeling a breeze. Enjoy your perfectly hard-boiled eggs!
Cooking Time Adjustments
Once you've set your air fryer to the ideal temperature, it's important to fine-tune the cooking time based on your specific model and the size of the eggs.
For standard hard-boiled eggs, cook at 250°F (120°C) for 15-17 minutes, adjusting as needed. Some air fryer models might require a higher temperature of 275°F or 300°F, reducing the cooking time to 10-12 minutes.
If you're using extra-large eggs, extend the cooking time to about 23 minutes for perfect doneness.
Start with cold eggs straight from the refrigerator for consistency, but letting them sit at room temperature can help with peeling later.
Ice Bath Importance
The key to achieving perfect hard-boiled eggs lies in the essential step of using an ice bath after cooking. An ice water bath halts the cooking process, preventing overcooking and ensuring your yolks are just right. Immerse your cooked eggs fully for 5-10 minutes; this quick cooling makes it easier to peel the eggs. It also helps avoid that unsightly greenish ring around the yolk, a sign of overcooking.
Benefit | Method | Result |
---|---|---|
Stops cooking | Use ice water bath | Prevents overcooking |
Eases peeling | Immerse cooked eggs fully | Simplifies peeling process |
Maintains freshness | Store in ice water | Keeps eggs fresh longer |
Reduces discoloration | Quick temperature change | Avoids greenish yolk |
best results | Follow recommended timing | Perfect hard-boiled eggs |
Tips for Perfect Results
To achieve perfect hard-boiled eggs in your air fryer, preheating it to 250°F (120°C) is vital for even cooking.
Place the cold eggs in a single layer in the basket to guarantee proper air circulation. Cook the eggs for 15 to 17 minutes, depending on your desired yolk firmness. After cooking, transfer the eggs immediately to an ice water bath for at least 8–10 minutes.
Here are some tips for the best results:
- Experiment with cooking times and temperatures based on your air fryer model.
- Use slightly older eggs for easier peeling.
- Adjust cooking times: 15 minutes for softer yolks and 17 minutes for firmer ones.
These tips will help you master hard-boiled eggs in your air fryer!
User Experiences and Variability
When you start using your air fryer for hard boiling eggs, you might notice some variability based on your specific model.
Many users have adjusted cooking times to find what works best, often sharing tips about preheating and egg age for better results.
You'll likely encounter both successes and challenges, but experimenting is part of the fun!
Variability Between Air Fryers
Although air fryers are popular for boiling eggs, variability between different models can lead to varied results. Factors like wattage and air circulation greatly affect cooking times. You'll want to keep these points in mind:
- Wattage Matters: Most models work best between 1400-1700 watts.
- Preheat for Consistency: Some air fryers heat unevenly, so preheating is vital.
- Egg Age Counts: Older eggs are easier to peel compared to fresh ones.
Experimenting with your specific air fryer is essential. You might find success at lower temperatures like 250°F, while others may require higher settings. Additionally, understanding the contrast ratio in your air fryer's heating mechanism can help optimize your cooking results.
User Cooking Adjustments
How can you guarantee that your hard-boiled eggs turn out perfectly in an air fryer? Start by experimenting with cooking times, as users suggest anywhere from 15-17 minutes at 250°F for various yolk firmness levels.
Some have even found success at 275°F or 300°F, but keep in mind that lower-wattage models may require longer cooking times. To refine your approach, consider testing with just 1-2 eggs first.
Many users recommend using older eggs, as they tend to peel more easily than fresher ones. Finally, don't skip the ice bath! Plunging your eggs in ice water right after cooking can halt the process and improve peeling, ensuring you enjoy perfectly hard-boiled eggs every time.
Common Successes and Challenges
While many users celebrate their success with hard-boiled eggs in an air fryer, others face challenges that can make the process frustrating.
Here are some common experiences:
- Undercooked yolks: You might need to adjust cooking times or temperatures to achieve your desired doneness.
- Peeling difficulties: Despite using an ice bath, some find their eggs harder to peel, especially if they're fresh.
- Variability by model: Higher wattage air fryers often yield better results, leading to varied success rates among users.
Many have found that older eggs tend to peel easier, which can help mitigate some common challenges.
With a bit of experimentation, you can enjoy perfectly cooked air fryer hard boiled eggs that are easier to peel!
Storage and Meal Prep
When you hard boil eggs, knowing how to store them can make meal prep a breeze. You can keep hard boiled eggs in the refrigerator for up to a week, whether they're peeled or unpeeled.
For unpeeled eggs, any container will do, but peeled eggs need airtight storage to stay fresh. To maintain moisture, store peeled eggs in a container filled with cold water or wrapped in damp paper towels.
An ice bath right after cooking helps stop the cooking process, ensuring better quality for your meal prep. Incorporating hard boiled eggs into your meals provides quick snacks or protein boosts for salads and lunches throughout the week, making them a versatile addition to your storage routine.
Additional Recipe Ideas
Storing hard boiled eggs opens up a world of culinary possibilities. You can whip up delicious dishes that elevate your meals. Here are a few ideas to inspire you:
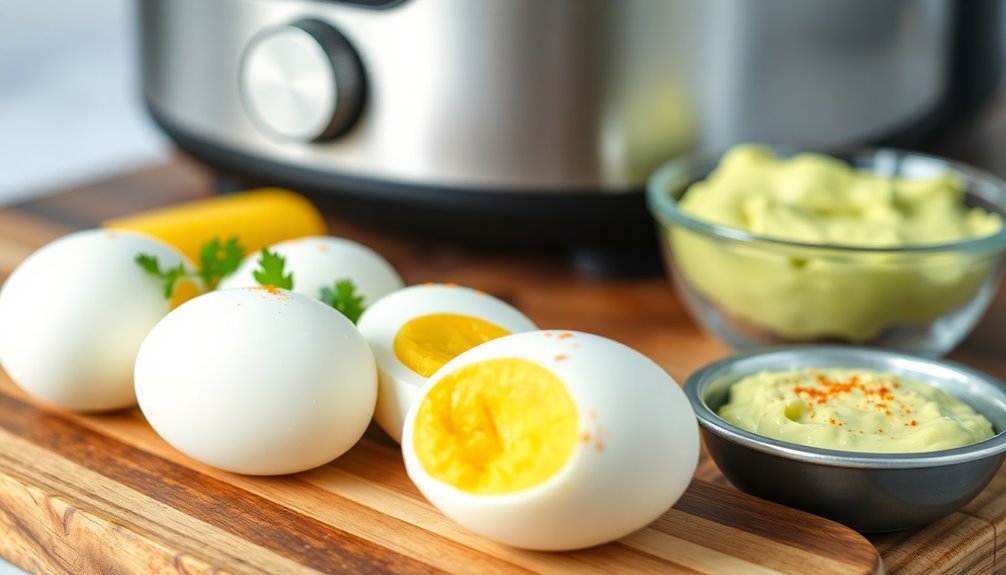
- Deviled Eggs: Mix yolks with mayonnaise, mustard, and spices for a tasty appetizer.
- Egg Salad Sandwiches: Combine chopped hard boiled eggs with mayo and seasonings for a creamy, satisfying lunch.
- Avocado Toast: Slice hard boiled eggs and top your avocado toast with salt and pepper or everything bagel seasoning for a nutritious breakfast.
These options not only enhance your meals but also make great use of your hard boiled eggs. Additionally, incorporating natural ingredients into your dishes can promote overall health and wellness for you and your pets.
Experiment with these recipes to keep your menu fresh and exciting!
Frequently Asked Questions
How Do I Do Hard Boiled Eggs in the Air Fryer?
To hard boil eggs in an air fryer, start by preheating it to 250°F (120°C).
Arrange your cold large eggs in a single layer in the basket. Cook them for about 15-17 minutes, depending on how firm you like the yolks.
Once done, immediately transfer the eggs to an ice water bath for 8-10 minutes. This stops the cooking and makes peeling easier.
Store them in the fridge for up to a week!
Why Are My Air Fryer Hard Boiled Eggs so Hard to Peel?
If your air fryer hard-boiled eggs are tough to peel, it might be due to using fresh eggs. Fresh eggs tend to stick to the shell more.
Try using older eggs instead. Cooking at a lower temperature, like 250°F, can also help.
After cooking, plunge the eggs into an ice water bath to stop the cooking process and shrink the egg inside the shell, which makes peeling easier.
Cracking the shell gently can help too!
How Do You Keep Eggs From Exploding in an Air Fryer?
To stop your eggs from exploding in the air fryer, start by selecting older eggs—those with a larger air cell.
Set your air fryer to a low temperature, around 250°F, for a gentle cook.
Arrange the eggs in a single layer for ideal airflow.
After cooking, swiftly shift them to an ice water bath to cool down quickly.
Keeping your air fryer clean also guarantees even heating, reducing risks of any messy mishaps.
What's the Trick to Boiling Hard Boiled Eggs?
The trick to boiling hard-boiled eggs is all about timing and temperature.
Start by ensuring your eggs are a few days old, as they'll peel easier. Preheat your air fryer to 250°F and cook the eggs for 15 to 17 minutes, depending on how firm you want the yolk.
Don't forget to transfer the eggs to an ice water bath right after cooking; it stops the cooking process and makes peeling a breeze!
Conclusion
To sum up, using an air fryer to hard boil eggs is not just efficient; it's also fun and rewarding. You'll enjoy the ease of preparation, the convenience of quick cooking, and the satisfaction of perfect results every time. So, embrace the air fryer, experiment with flavors, and share your delicious creations. With this surprising method, you'll transform your egg game, elevate your meals, and delight your taste buds. Happy cooking!
How-To Guides
How to Use an Air Fryer Like a Pro: Beginner’s Step-by-Step Guide
On your journey to mastering air frying, discover essential tips and tricks that will elevate your cooking game in ways you never imagined!
To use an air fryer like a pro, start by setting it up on a flat surface and familiarizing yourself with the controls. Prepare your ingredients by cutting them into uniform sizes for even cooking and marinating meats as needed. Preheat the air fryer to 350°F-400°F for about 3-5 minutes. When cooking, coat foods lightly with oil and avoid overcrowding the basket for optimal air circulation. Always monitor cooking times, as you'll need less time compared to traditional methods. Finally, remember to clean it after use for better performance. There's so much more to explore about perfecting your air frying skills!
Key Takeaways
- Set up your air fryer on a stable surface, ensuring all parts are properly assembled according to the manual for optimal performance.
- Prepare ingredients by cutting them into uniform sizes and marinating proteins to enhance flavor and ensure even cooking.
- Preheat the air fryer to the recommended temperature for even cooking and improved texture, monitoring the digital display for completion.
- Use proper cooking techniques, including shaking the basket, adjusting cooking times, and lightly coating fresh foods with oil for best results.
- Maintain safety by keeping the air fryer away from children, using oven mitts, and regularly cleaning to prevent grease buildup and ensure longevity.
Setting Up the Air Fryer
Setting up your air fryer is a straightforward process that lays the foundation for delicious meals.
First, plug the cord into a wall outlet and ensure your air fryer sits on a flat, stable surface. Check for any accessories, like the frying basket and grate, and make sure they're properly assembled.
Next, read the instruction manual to get familiar with the specific features and controls of your model. Pay particular attention to the control panel, noting the temperature and timer dials. A good understanding of temperature guidelines will help you select the right settings for different foods.
This knowledge will make your cooking experience smoother and more enjoyable. Remember, a well-set air fryer leads to perfectly cooked food, so take a moment to get everything ready before you dive into your recipe!
Preparing Ingredients
Now that your air fryer is set up and ready to go, it's time to prepare your ingredients for cooking.
Start by cutting your food into uniform sizes for even cooking; think fries or wedges for potatoes and bite-sized pieces for chicken. Remember to clean and prep shrimp, leaving them whole or cutting as per your recipe.
For seasoning, mix salt and spices with a bit of oil to keep them from blowing away. Marinate chicken in a buttermilk and hot sauce mix for at least 15 minutes. Cooking with an air fryer allows for a healthier cooking option as it requires minimal or no oil.
When coating, toss chicken in breadcrumbs or cornflakes, and don't forget to wrap jalapeño poppers with bacon.
Finally, arrange everything in an even layer in the air fryer basket, leaving space for hot air circulation.
Preheating and Settings
Preheating your air fryer is crucial for achieving perfectly cooked meals. Start by checking your manual for specific preheating instructions tailored to your model. If your air fryer has a preheat function, use it by selecting the appropriate setting or programming the cook time. Typically, you'll want to preheat between 350°F to 400°F for about 3-5 minutes. Keep an eye on the digital display—many models will beep when preheating is complete. Avoid overheating, as this can lead to burned food. Proper preheating ensures even cooking and enhances the overall texture and flavor of your air-fried dishes.
Cooking Techniques
To achieve deliciously crispy meals in your air fryer, it's essential to master various cooking techniques.
Start by cutting vegetables and potatoes into smaller pieces for even browning. Pat fresh foods dry and coat them lightly with oil—about one tablespoon per kilogram. For frozen foods, you can skip the oil.
When cooking meat, dry the skin and apply a thin layer of oil for crispiness. Use the perforated basket for airflow and shake it once or twice during cooking. This will help ensure that you achieve optimal cooking results by allowing the hot air to circulate effectively.
Adjust cooking times by reducing them by 20% compared to conventional recipes. Remember to check doneness and flip items midway for balanced crispness.
Lastly, lightly spritz oil for that extra-crispy exterior and ensure proper basket placement for airflow.
Safety Precautions
Mastering cooking techniques in your air fryer is only one part of the process; keeping safety in mind is just as important.
Always place your air fryer on a heat-resistant surface and maintain at least 5 inches of space from walls or other objects. While it's cooking, avoid touching anything except the handle—you can use oven mitts if needed. Be aware that certain air fryer parts can reach temperatures that cause burns within seconds, so always handle with care.
Keep it out of reach of kids and pets until it's cool. Always plug it into a grounded outlet and unplug it after use to prevent accidental start-ups.
Remember to avoid overcrowding the basket and never use metal utensils. If you notice strange smells or sounds, unplug the fryer immediately to check for issues.
Stay safe and enjoy your cooking!
Post-Cooking Maintenance
Once you've finished cooking with your air fryer, it's essential to prioritize maintenance to keep it in top shape.
First, unplug the air fryer and let it cool completely. Remove the basket, pan, or tray, and wash them with warm, soapy water. For tougher messes, soak them for 10-15 minutes.
Wipe the bottom chamber with a damp cloth and ensure all parts are dry before reassembling. For deep cleaning, fill the basket with a cup of water and run the fryer at a high setting for a few minutes. Regular cleaning is crucial to maintain appliance longevity and ensure optimal performance.
Don't forget to clean the heating element with a soft brush. Regularly clean the air fryer to prevent grease buildup and make your cooking experience smoother.
Frequently Asked Questions
Can I Use Aluminum Foil in the Air Fryer?
Yes, you can use aluminum foil in your air fryer, but with some precautions.
Make sure the foil doesn't cover all the holes in the basket to allow proper airflow. Weigh it down to prevent it from blowing around while cooking.
Avoid placing it at the bottom of the fryer, and be cautious with acidic foods, as they can react with the foil.
Using foil can help reduce sticking and make cleanup easier.
What Types of Food Are Best for Air Frying?
When you're air frying, focus on proteins like chicken, pork, and salmon for quick, flavorful meals.
Don't forget vegetables like potatoes, broccoli, and cauliflower; they turn out perfectly crispy.
Seafood like shrimp and crab works well too, as does tofu for a meat alternative.
You can even whip up omelets and muffins, maximizing versatility.
Experiment with different foods, and you'll discover just how delicious air frying can be!
How Do I Know When Food Is Done Cooking?
To know when your food's done cooking, rely on visual cues and cooking times. While a golden brown color might suggest doneness, it's not always reliable.
Use a food thermometer for accuracy, especially with meat; aim for 165°F for poultry and 145°F for fish.
Check halfway through cooking, and if it's not ready, continue in 5-minute increments.
Remember to shake or flip food as needed for even cooking!
Can I Cook Multiple Items at Once?
Yes, you can cook multiple items at once in your air fryer, but you'll need to choose foods with similar cooking times and temperatures.
Cut everything into uniform sizes and avoid overcrowding the basket to ensure even cooking.
You might need to adjust the cooking time and temperature slightly, so keep an eye on your food and shake the basket occasionally for even browning.
With practice, you'll master cooking a variety of dishes together!
Do I Need to Adjust Cooking Times for Different Air Fryer Models?
Yes, you absolutely need to adjust cooking times for different air fryer models.
Since wattage and size vary, higher wattage models will cook your food faster than lower wattage ones. Similarly, larger air fryers typically take longer than smaller, compact models.
Always check your specific model's guidelines, and feel free to reduce cooking time by 20-30% if adapting from traditional oven recipes.
Monitoring your food closely will help ensure it's cooked perfectly every time.
Conclusion
Now that you've mastered the basics of using an air fryer, you're ready to whip up delicious, healthier meals with confidence. Remember to set it up properly, prep your ingredients, and adjust the settings as needed. Experiment with different cooking techniques, and don't forget to follow safety precautions. With a little practice, you'll be air frying like a pro in no time. Enjoy the tasty results and the convenience that comes with this amazing kitchen gadget!
How-To Guides
How to Reheat Wings in Air Fryer: Crisp Up Leftovers in Minutes!
Learn the secret to reviving leftover wings in an air fryer for that perfect crispy texture—your taste buds will thank you!
To reheat wings in an air fryer, preheat it to 375°F (190°C). Arrange your wings in a single layer in the basket to avoid overcrowding. Heat them for about 5-6 minutes, flipping halfway through to guarantee even crisping. Use a food thermometer to check that the internal temperature reaches at least 165°F (74°C). For extra moisture, consider brushing the wings with oil or melted butter before cooking. This method brings back the delicious crispy texture and juicy flavor of your leftovers in just minutes. Stick around for more tips to make the most of your air-fried delights!
Key Takeaways
- Preheat the air fryer to 375°F (190°C) for optimal crispiness before adding wings.
- Arrange wings in a single layer to avoid overcrowding and ensure even heating.
- Heat wings for 5-6 minutes, flipping halfway to achieve a uniform crisp.
- Check the internal temperature with a thermometer; it should reach at least 165°F (74°C).
- Optionally, brush wings with oil or melted butter to enhance moisture and flavor.
Best Methods for Reheating Wings
When you want to enjoy leftover wings, using an air fryer is the best method to bring them back to life. This cooking technique preserves the crispy texture while ensuring your sauced chicken wings remain juicy.
Start by preheating your air fryer to 375°F (190°C) for ideal results. Arrange the wings in a single layer to avoid overcrowding, which helps with even reheating. The cooking time is about 5-6 minutes, and don't forget to flip or shake them halfway through.
For sauced wings, consider using a small air fryer pan or lining the basket with tin foil to prevent sticking. Always check the internal temperature, making sure it reaches at least 165°F (74°C) for safe consumption.
Enjoy your revitalized wings!
Steps to Reheat in Air Fryer
To reheat your wings in an air fryer effectively, start by preheating the appliance to 375°F (190°C). Next, arrange the wings in a single layer in the air fryer basket for even cooking. Avoid overcrowding; you might need to reheat chicken wings in batches. Cook for 5-6 minutes, flipping or shaking them halfway to achieve that crispy texture.
Check the internal temperature at the 5-minute mark with a food thermometer, confirming it reaches 165°F (74°C) for safety. For added moisture, consider lightly brushing the wings with oil or melted butter before reheating.
Step | Action |
---|---|
1. Preheat | Set to 375°F (190°C) |
2. Arrange | Place wings in a single layer |
3. Cook | Heat for 5-6 minutes |
4. Check temperature | Confirm it reaches 165°F (74°C) |
Tips for Moist and Crispy Wings
For perfectly moist and crispy wings, it's essential to start with a well-preheated air fryer at 360°F (182°C) for 3-5 minutes; this helps lock in moisture right from the beginning.
Brush your wings lightly with cooking oil or melted butter before reheating leftover wings to enhance moisture retention.
When you're ready, arrange the wings in a single layer in the air fryer basket to guarantee even cooking and prevent drying out.
While reheating, monitor the wings closely, aiming for an internal temperature of 165°F (74°C) to maintain juiciness.
If you notice the wings browning too quickly, consider using aluminum foil to cover them, helping to retain moisture while achieving that desirable crispiness. Additionally, hula hooping can be a fun way to burn off some calories after enjoying those wings, as it burns approximately 200-400 calories per hour.
Storing Leftover Chicken Wings
Properly storing leftover chicken wings is essential if you want to enjoy them later without sacrificing their flavor and texture.
First, let the wings cool to room temperature to prevent moisture buildup inside the container. Use an airtight container or a zippered plastic bag for ideal freshness, ensuring you don't stack wings tightly to avoid sogginess.
Label the container with the date of storage to easily track freshness. If you plan to keep them longer, consider freezing wings. They can last up to 3 months in a regular freezer and up to a year in a deep freezer.
Following these steps will help you crisp up leftovers and enjoy your wings at their best later on!
Serving Suggestions for Reheated Wings
While reheating wings is a great way to enjoy leftovers, pairing them with the right sides can elevate your meal even further.
Consider serving your reheated wings with classic celery and carrot sticks for a crisp crunch that complements their flavor. A variety of dipping sauces like ranch, blue cheese, or spicy buffalo will enhance your taste experience.
For something lighter, incorporate wings into salads or wraps, adding greens and fresh vegetables for a balanced meal. If you're in the mood for comfort food, mac and cheese or French fries make excellent accompaniments.
Don't forget to garnish your reheated wings with fresh herbs like parsley or cilantro for a pop of color and extra flavor!
Frequently Asked Questions
How Do I Make Leftover Wings Crispy in an Airfryer?
To make leftover wings crispy in an air fryer, start by preheating it to 360°F (182°C) for about 3-5 minutes.
Arrange the wings in a single layer, avoiding overcrowding. Lightly spray them with cooking oil to enhance crispiness.
Air fry at 375°F (190°C) for 5-6 minutes, flipping halfway through.
Check the internal temperature to guarantee they reach 165°F (74°C) for safe eating while keeping that delicious crunch.
Enjoy your wings!
How Do You Make Leftover Wings Crispy Again?
Did you know that air fryers can reduce fat content in food by up to 75%?
To make your leftover wings crispy again, start by preheating your air fryer to 375°F.
Arrange the wings in a single layer, lightly spray them with oil, and cook for 5-6 minutes, flipping halfway through.
This method not only revives their crunch but also guarantees they're heated evenly and safely to 165°F.
Enjoy your delicious wings!
How to Make Leftover Chicken Crispy in Air Fryer?
To make leftover chicken crispy in an air fryer, start by preheating it to 375°F (190°C).
Lightly spray the basket with cooking oil to prevent sticking and enhance crispiness.
Arrange your chicken in a single layer, ensuring not to overcrowd.
Cook for about 5-6 minutes, flipping halfway through for even crisping.
For extra flavor, you can brush the chicken with a little oil or melted butter before reheating.
Enjoy your deliciously crispy chicken!
How Long Should I Reheat Wings in the Air Fryer?
You've got those delicious wings, but they're not as crispy as you'd like.
To reheat them in the air fryer, set it to 375°F (190°C). Arrange your wings in a single layer, and cook for about 5-6 minutes.
Flip or shake them halfway through for even crispiness. Remember, if they're larger or smaller, you might need to adjust the time slightly.
Always check they reach 165°F (74°C) for safety!
Conclusion
To sum up, reheating wings in an air fryer is the ultimate game-changer for enjoying leftover chicken. You'll be amazed at how quickly you can transform soggy bites into crispy, mouthwatering delights. Just follow the steps, and don't forget those handy tips for keeping them moist. With your perfectly reheated wings, you'll feel like a culinary wizard, impressing everyone at the table. So go ahead, dig in, and relish every flavorful moment!
How-To Guides
Can You Put Wax Paper in an Air Fryer? What You Must Know
Wondering if wax paper is safe for your air fryer? Discover the surprising truth that could change your cooking game forever!
You shouldn't put wax paper in an air fryer. It melts at temperatures above 200°F, which means it can ignite or contaminate your food. This not only leads to a mess but also poses a fire hazard. Instead, opt for parchment paper, which withstands higher temperatures and is safe to use. Silicone mats or aluminum foil are also good alternatives, but be cautious with airflow. Always consult your air fryer manual for the best practices. If you're curious about the safest ways to cook with these materials, there's plenty more helpful info to uncover.
Key Takeaways
- Wax paper melts at temperatures above 200°F, posing a risk of food contamination and fire hazards in air fryers.
- Manufacturers strongly advise against using wax paper due to safety concerns and potential messy cleanup.
- Safe alternatives include parchment paper, aluminum foil, and silicone mats, designed to withstand high temperatures.
- Parchment paper can handle temperatures up to 420-450°F, making it ideal for air frying without risks.
- Always consult your air fryer manual for recommended materials and best practices to ensure safe cooking.
Risks of Using Wax Paper
When considering whether to use wax paper in an air fryer, you should be aware of the risks involved. Wax paper isn't suitable for high temperatures; it melts at temperatures above 200°F (94ºC).
This melting can lead to food contamination and create a fire hazard, as the wax coating can ignite when exposed to intense heat. Additionally, using wax paper may result in a messy cleanup, with melted wax potentially dripping onto the heating element.
Manufacturers strongly advise against its use due to these safety concerns. Ultimately, the degradation of wax paper can impart unwanted flavors to your food, making it an unsuitable option for air frying.
Avoiding these risks is essential for a safe cooking experience.
Safe Alternatives for Air Fryers
If you're looking for safe alternatives to use in your air fryer, consider options that can withstand higher temperatures without compromising your cooking experience.
Parchment paper is a great choice, as it can handle temperatures up to 400°F (205°C) and helps prevent sticking.
Aluminum foil works too, but make sure it doesn't block air circulation and is weighed down to avoid floating.
For a reusable option, silicone mats are heat resistant and effective at keeping food from sticking.
Pre-fitted air fryer liners, especially perforated parchment paper, enhance airflow and simplify cleanup.
Just remember to steer clear of wax paper, as its low heat tolerance can lead to melting and potential fire hazards. Additionally, using high-quality air purifiers in your cooking space can help reduce odors and improve overall indoor air quality.
Understanding Material Properties
Understanding the properties of various cooking materials is essential for achieving the best results in your air fryer.
Wax paper isn't suitable for high heat, as it melts above 200°F, risking food contamination and fire hazards. In contrast, parchment paper boasts impressive heat resistance, handling temperatures up to 420-450°F, making it perfect for air frying.
Aluminum foil, while efficient at conducting heat and non-flammable, should be used cautiously to prevent airflow blockage.
Silicone mats provide a reusable, non-stick surface that withstands high temperatures, making them a safe alternative to wax paper.
User Experiences and Recommendations
Why take unnecessary risks with your air fryer? Many users warn against using wax paper due to its low heat tolerance, which can lead to melting and even a fire hazard. Instead, you'll find a strong recommendation for parchment paper, designed for high-temperature cooking to effectively prevent sticking. Some air fryer enthusiasts also swear by silicone liners, which are heat-safe and serve as reusable alternatives. Here's a quick comparison:
Material | Heat Tolerance | Safety Level |
---|---|---|
Wax Paper | Low | Fire Hazard |
Parchment Paper | High | Food Safety |
Silicone Liner | High | Safe & Reusable |
Adhering to safe cooking practices guarantees your meals are delicious and your appliance lasts longer!
Best Practices for Air Frying
When it comes to air frying, following best practices can make a significant difference in your cooking results. Always consult your air fryer manual to verify you're using materials that are safe to use.
Opt for parchment paper instead of wax paper, as it withstands high temperatures and won't pose a fire hazard. To prevent food from sticking in the air fryer basket, weight down any liners with food, keeping them away from the heating element.
Avoid preheating with liners, as they can fly around and create a fire risk. Regularly monitor cooking times and temperatures for different foods, and steer clear of wet batters that obstruct air circulation. Additionally, be mindful of color accuracy as it can enhance your overall cooking experience by ensuring even browning and crispness.
These tips will make cleanup easier and enhance your air frying experience!
Frequently Asked Questions
Is Wax Paper Safe in an Air Fryer?
When you're wondering if wax paper is safe in an air fryer, it's important to know it isn't.
Wax paper can melt at high temperatures, potentially contaminating your food and damaging your appliance. The wax coating poses a fire hazard, and melted wax can create a mess on the heating element.
Instead, consider using parchment paper or silicone liners for safer and more effective cooking in your air fryer.
What Is the Best Thing to Put on the Bottom of an Air Fryer?
When you're looking for the best thing to put on the bottom of your air fryer, consider using parchment paper.
It's heat-resistant and prevents sticking, making cleanup a breeze. Aluminum foil works too, but make sure it doesn't block air circulation.
If you prefer a reusable option, silicone mats are perfect for non-stick surfaces.
You might also find pre-fitted liners convenient, as they simplify cleaning while allowing proper air flow.
What Can I Line My Air Fryer Basket With?
When it comes to lining your air fryer, the options are endless, like a culinary wonderland! You can use parchment paper, which withstands high temperatures and keeps your food from sticking.
Aluminum foil works too, but make sure it doesn't block air circulation. Silicone mats are reusable and perfect for easy cleanup.
Consider pre-fitted liners with perforations for ideal air flow. Just steer clear of wax paper; it's not safe for high heat!
What Kind of Paper Can I Put in the Air Fryer?
When you're looking for paper options for your air fryer, stick to parchment paper or aluminum foil.
Parchment paper can handle high temperatures without issues, while aluminum foil works as long as it doesn't block air circulation.
Silicone mats are also great, as they're heat-resistant and reusable.
Just remember to avoid wax paper; it's not safe due to its low heat tolerance and potential fire risks.
Always check your air fryer's manual for guidance.
Conclusion
In summary, while wax paper might seem like a simple solution, its risks outweigh the rewards in your air fryer. Instead, consider safe alternatives like parchment paper or silicone mats to guarantee a successful and safe cooking experience. By understanding material properties and following best practices, you'll whip up wonderful meals without worry. So, stay savvy, skip the wax paper, and savor the scrumptious sensations your air fryer can create!
-
User Stories and Tips1 week ago
I Tried These 5 Air Fryer Hacks—You Won’t Believe the Results!
-
User Stories and Tips7 days ago
The Secret to Perfectly Crispy Fries: Real Users Share Their Air Fryer Tips
-
User Stories and Tips7 days ago
You’ll Never Cook the Same Again: How an Air Fryer Changed My Life!
-
Recipes6 days ago
How to Make Fries in Air Fryer: The Ultimate Crisp Guide
-
User Stories and Tips1 week ago
I Cooked Every Meal in an Air Fryer for a Week—Here’s What I Learned!
-
Vetted6 days ago
15 Best Smart Air Fryers With App Connectivity for Effortless Cooking in 2025
-
Vetted6 days ago
15 Best Desk Speakers of 2025 – Elevate Your Audio Experience
-
Recipes6 days ago
How to Cook Wings in Air Fryer: The Ultimate Crispy Recipe