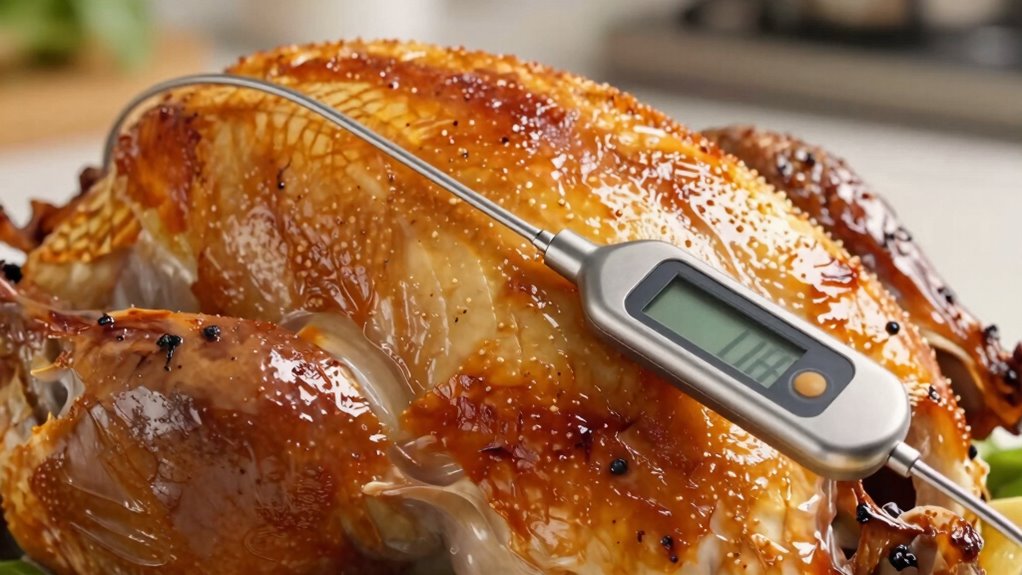
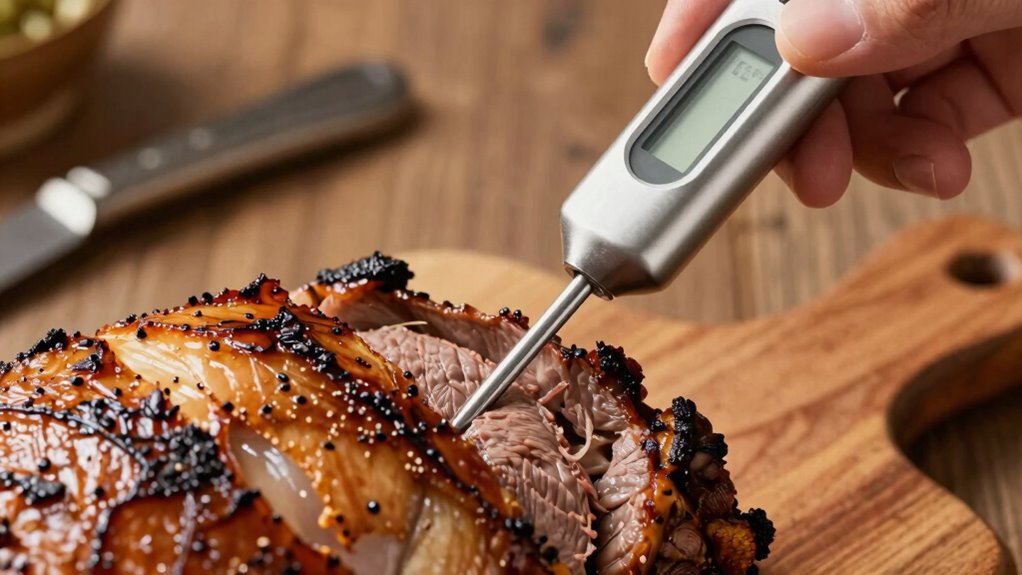
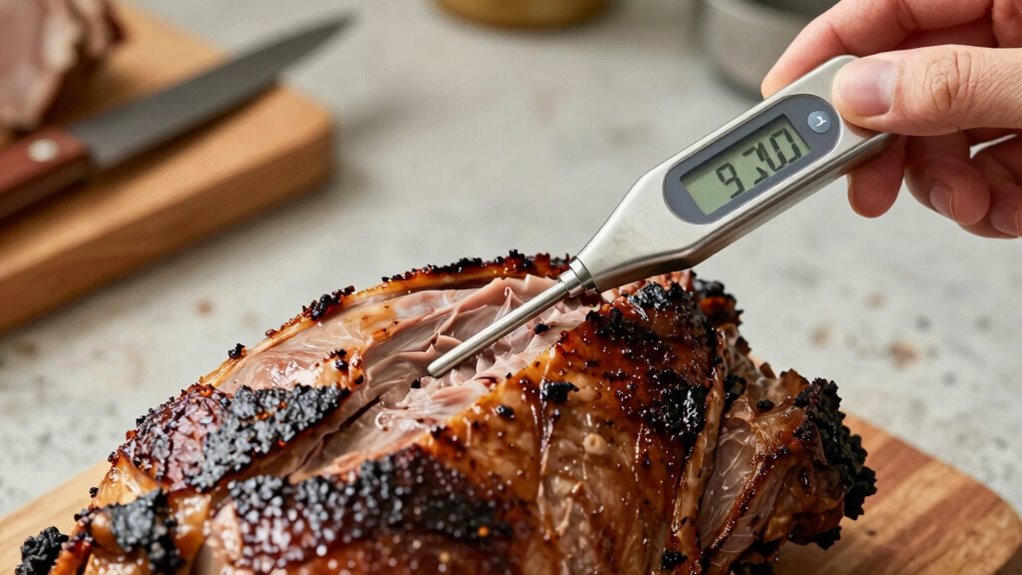
To get accurate results with your smart meat thermometer, make sure you insert the probe into the thickest part of the meat, away from bones, fat, or gristle. Fully embed the tip and keep it centered for the best measurement. Securing the probe with foil or a skewer helps prevent shifting during cooking. If you want to master proper technique and avoid common mistakes, keep reading for all the essential tips.
Key Takeaways
- Insert the probe into the meat’s thickest part, avoiding bones, fat, or gristle for accurate readings.
- Fully embed the probe tip into the core, ensuring it’s away from surfaces or contact with pans.
- Use a probe holder, foil wrap, or skewer to secure the probe and prevent shifting during cooking.
- Check and adjust the probe placement periodically to maintain accuracy throughout the process.
- Keep the probe clean and free of residue to ensure precise temperature measurements.

Temp Probe Clip 6 Pack – Four Holes Grill Temperature Probe Holder Clips for All Universal Probe, Work for Wireless Thermometer, Bluetooth, Grill Thermometer for Outside Grill
👌EASY TO INSTALL : Installing a grill grate thermometer grill clips about 1 inch above the barbecue grill…
As an affiliate, we earn on qualifying purchases.
As an affiliate, we earn on qualifying purchases.
Why Proper Probe Placement Is Key to Accurate Meat Temperatures
Proper probe placement is vital for getting an accurate reading of your meat’s internal temperature. Different types of thermometers, like instant-read and digital probe models, rely on correct placement to give reliable results. To ensure accuracy, you need to target the meat’s thickest part, especially in the meat temperature zones—such as the center of roasts or the thickest part of a steak. Inserting the probe too close to fat or bone can give misleading readings, making it seem undercooked or overdone. Proper placement guarantees you’re measuring the core temperature, which is essential for food safety and perfect doneness. Understanding the proper placement techniques can make all the difference in achieving consistent cooking results and ensuring food safety. By understanding the right spots to insert your thermometer, you’ll prevent guesswork and enjoy perfectly cooked meat every time. Additionally, knowing how to avoid common placement mistakes can help improve the accuracy of your readings, especially when considering factors like thermometer calibration and ambient temperature. Being aware of proper insertion depth ensures your readings are truly representative of the meat’s internal temperature. Paying attention to meat thickness can also help you determine the optimal insertion point for the most accurate measurement.

Alpha Grillers Meat Thermometer Digital – Instant Read Food Thermometer for Cooking & Grilling – Professional Kitchen Gifts for Men, Dad & Mom
Instant Read Food Thermometer | Our instant read thermometer features a temperature probe and advanced, highly accurate technology…
As an affiliate, we earn on qualifying purchases.
As an affiliate, we earn on qualifying purchases.
Common Mistakes When Positioning Your Thermometer Probe
One common mistake is placing the probe incorrectly, which can give you false readings. Ignoring the internal temperature of the meat might lead to undercooked or overcooked results. To get accurate measurements, make sure you position the probe correctly and check the meat’s true internal temperature. Proper probe placement is essential for capturing the accurate internal temperature, ensuring safe and perfectly cooked meat. Additionally, understanding the science of heat transfer can help you better interpret your thermometer readings and achieve optimal results. Being aware of thermal conductivity can improve your understanding of how heat moves through different types of meat and materials, which is crucial for precise cooking. Recognizing how heat transfer mechanisms vary with temperature and material type can further enhance your cooking accuracy.
Incorrect Probe Placement
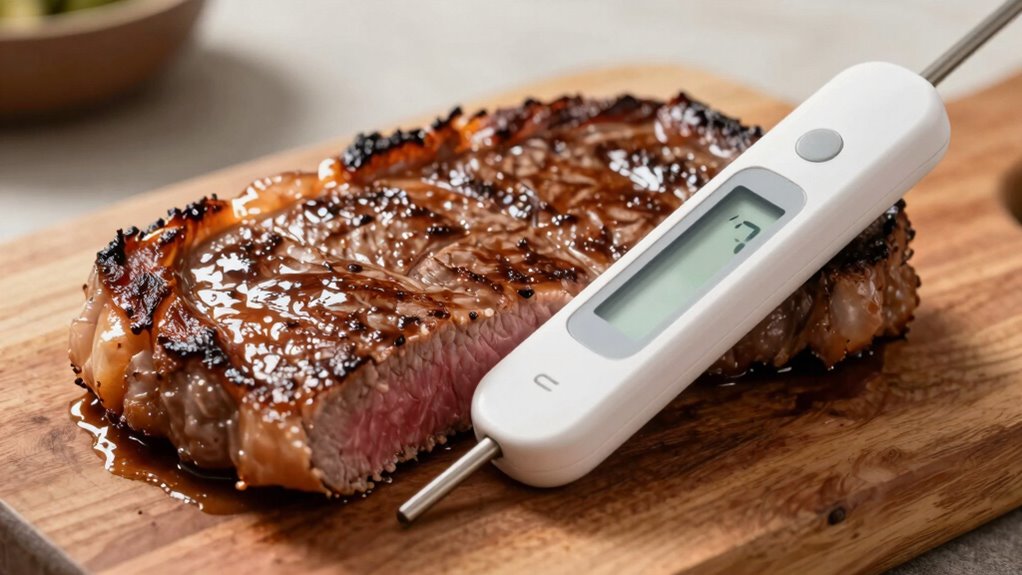
Even when you have the right thermometer, placing the probe incorrectly can lead to inaccurate readings and undercooked or overcooked meat. To guarantee probe accuracy, focus on proper placement techniques. Avoid inserting the probe into fat, bone, or gristle, as these areas can give false readings. Instead, stick to the thickest part of the meat, away from the bone, for an accurate internal temperature. Make sure the tip is fully embedded and not touching the pan, grill, or cooking surface. Proper placement ensures you get a true measure of the meat’s internal temperature. Remember, consistent probe placement is key to reliable readings and perfectly cooked meat. Even small errors in positioning can compromise the thermometer’s accuracy and your cooking results. Additionally, understanding the ethnicity of your meat can help determine the best temperature for cooking. Using a proper thermometer and correct placement techniques will help you achieve consistently great results every time. Proper piercing technique also minimizes tissue damage, which can affect temperature readings and healing if applicable.
Ignoring Internal Temperature
Have you ever overlooked the importance of checking the internal temperature while cooking? Many people fall for cooking myths that suggest visual cues alone are enough, but that’s a mistake. Ignoring the internal temperature can lead to undercooked or overcooked meat, compromising safety and flavor. Relying solely on external appearance doesn’t assure temperature accuracy. When you skip measuring the internal temp, you risk serving food that’s either unsafe or dry. Smart thermometers are designed to give precise readings, but only if you actually check the internal temperature regularly. Remember, proper placement isn’t enough; actively monitoring internal temperature ensures your meat reaches the perfect doneness every time, avoiding common mistakes that can ruin your meal.
Alpha Grillers Meat Thermometer Digital – Instant Read Food Thermometer for Cooking & Grilling – Professional Kitchen Gift for Men, Dad & Mom
Instant Read Food Thermometer | Our instant read thermometer features a temperature probe and advanced, highly accurate technology…
As an affiliate, we earn on qualifying purchases.
As an affiliate, we earn on qualifying purchases.
How to Find the Best Spot Inside Different Types of Meat
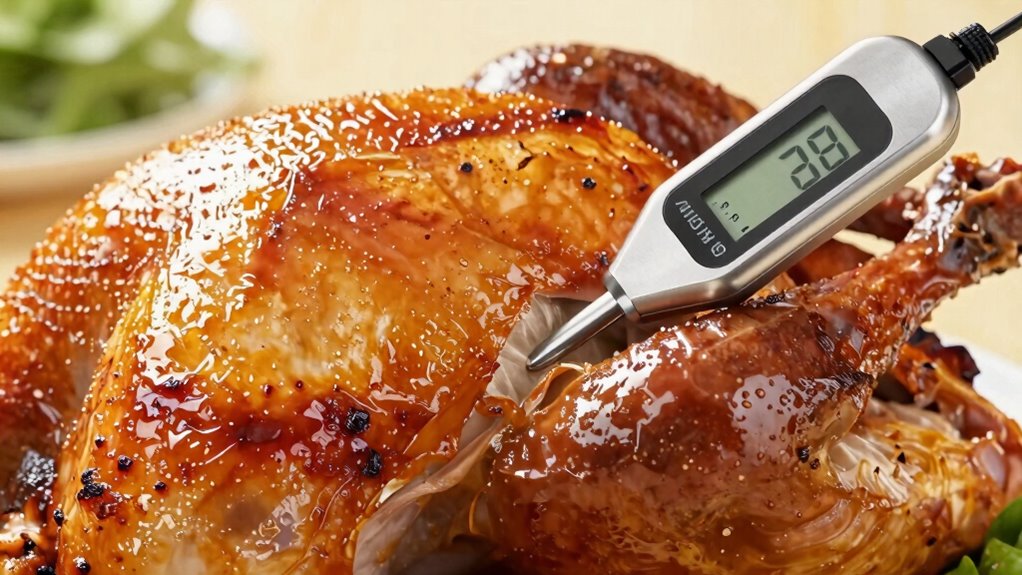
To guarantee accurate readings, it’s vital to locate the thickest part of the meat when using a smart meat thermometer. For cuts like steak or roast, aim for the center where meat marbling is most abundant, as this area reflects overall doneness. When cooking poultry, find the thickest portion of the breast or thigh, avoiding the bone, which can distort temperature readings. For thicker cuts like pork shoulder, target the core, not the surface. Keep in mind that the ideal spot also depends on the grill temperature; a higher heat may cause uneven cooking, so choose a spot that’s representative of the entire piece. Proper placement ensures your thermometer measures the true internal temperature, guiding you to perfect doneness every time. Understanding the thermal conductivity of different meats can also help optimize placement for the most accurate readings. Additionally, being aware of the meat’s structure can aid in selecting the best insertion point for consistent results. Knowing how meat density varies across cuts can further improve your thermometer placement for consistent and reliable measurements. Recognizing the distribution of fat and marbling within the meat can also assist in choosing the optimal insertion site for accurate temperature readings. Being mindful of the restructuring of muscle fibers during cooking can help determine the best spot for temperature measurement, ensuring even doneness.
ThermoMaven Smart Bluetooth Wireless Meat Thermometer, 10X Enhanced Sub-1G Signal and Stability, Standalone Display Base, Certified Accuracy ±0.5°F, WiFi Unlimited Range for BBQ, Oven, Smoker, Grill
Smart Display Base with Control: The ThermoMaven G1 wireless meat thermometer features a versatile smart display base that…
As an affiliate, we earn on qualifying purchases.
As an affiliate, we earn on qualifying purchases.
A Step-by-Step Guide to Correctly Insert Your Meat Thermometer

Properly inserting your meat thermometer guarantees you get an accurate reading of the internal temperature. First, identify the correct spot, usually the thickest part of the meat, avoiding bones or fat. Insert the probe vertically, ensuring the sensing area is fully immersed in the meat’s center. Keep the probe steady to prevent false readings and maintain cooking safety. If using a digital thermometer, wait for the display to stabilize before recording the temperature. For consistent flavor, avoid touching the thermometer to the pan or grill surface. Calibrating your thermometer ensures ongoing accuracy and reliable measurements. By placing the probe correctly, you ensure precise results, helping you cook meat to the right doneness. This step is essential for both maintaining cooking safety and achieving flavor consistency throughout your meal.
Tips for Keeping the Probe in Place During Cooking
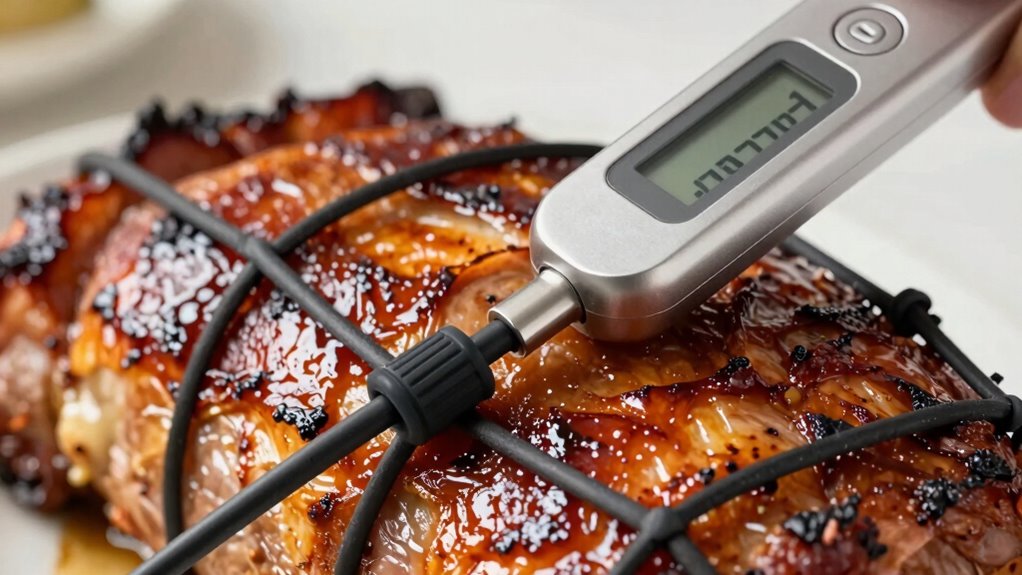
Keeping your meat thermometer probe securely in place is essential for accurate readings throughout cooking. To guarantee precision, use proper cooking techniques that prevent probe movement. For example, inserting the probe into areas with good meat marbling helps maintain consistent contact. You can also stabilize the probe by wrapping it with aluminum foil or securing it with a skewer. Avoid letting the probe shift, as this can lead to incorrect temperature readings. Additionally, understanding the importance of proper probe placement can significantly improve measurement accuracy. Here’s a quick guide:
| Tip | Method | Benefit |
|---|---|---|
| Use a probe holder | Attach to the meat surface | Keeps probe steady during flipping |
| Insert into thickest part | Find the center of the cut | Accurate core temperature |
| Avoid fatty areas | Steer clear of meat marbling | Prevents false readings |
| Stabilize with foil | Wrap around the probe | Secures in place |
| Check periodically | Adjust as needed | Ensures ongoing accuracy |
| Consider temperature zones | Different parts of meat may require different probe placements for best results. Understanding thermal conduction can also help in choosing the right placement for consistent readings. Proper probe calibration ensures your thermometer remains accurate over time. |
What to Do When Your Thermometer Gives Inconsistent Readings?
When your meat thermometer shows inconsistent readings, it can be frustrating and confusing. Many meat temperature myths lead cooks to doubt their devices or rely on guesswork. To troubleshoot, first verify your thermometer is properly calibrated, following the manufacturer’s instructions. Avoid common mistakes, like placing the probe in the wrong part of the meat or near bone, which can cause false readings. Remember, understanding cooking temperature zones helps you interpret your thermometer’s data accurately. If you notice fluctuations, remove and clean the probe, then reinsert it firmly into the thickest part of the meat. Switching to a different spot or adjusting placement can improve accuracy. Consistent testing and proper placement are key to dispelling myths and achieving perfect doneness.
Best Practices for Probe Placement With Different Meat Cuts

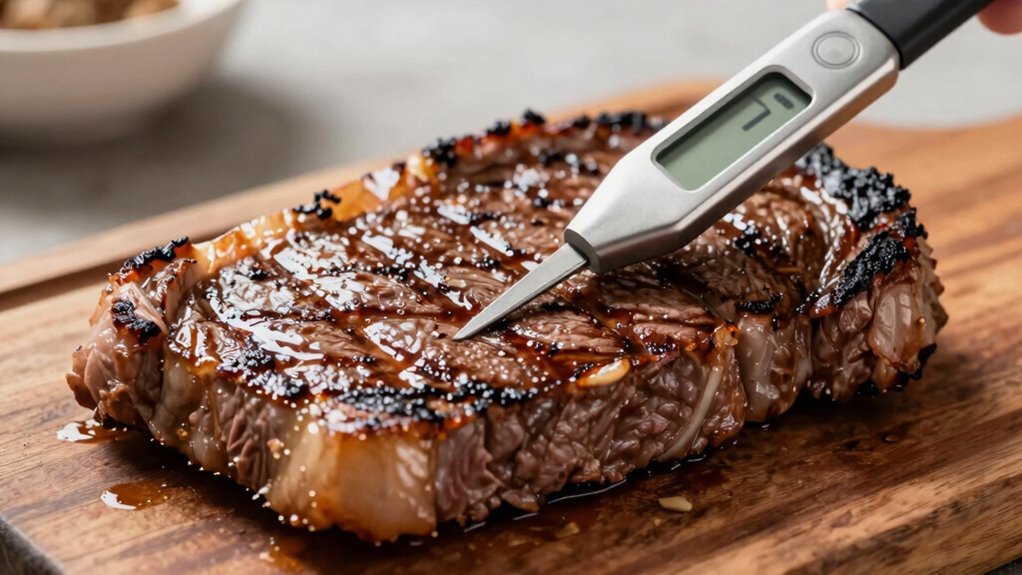
To get accurate readings, you need to pay attention to how you insert your probe. Make sure you’re reaching the right depth and aiming for the center of the muscle for best results. Also, avoid touching bones, which can give false readings and throw off your cooking times. Proper probe placement ensures you get consistent and reliable temperature measurements every time. Additionally, practicing proper knifing techniques helps maintain the integrity of the meat and improves overall cooking accuracy. Remember, a well-placed probe is essential for consistent cooking results and food safety.
Proper Insertion Depth Matters
Proper insertion depth is crucial for accurate temperature readings, especially since different cuts of meat require specific probe placements. If you insert the probe too shallow, you might get an inaccurate reading that doesn’t reflect the true cooking temperature, risking undercooking or overcooking. Conversely, inserting it too deep can lead to misleading results, affecting your ability to reach the desired meat tenderness. To guarantee precision, place the probe into the thickest part of the cut, avoiding bones or fat, which can skew the temperature. This helps you monitor the right cooking temperature, ensuring your meat is cooked safely and attains ideal tenderness. Adjusting the depth based on the meat’s structure guarantees a more reliable reading and a perfectly cooked meal. Additionally, understanding the concept of Free Floating can assist in maintaining consistent probe placement during different cooking methods.
Target Muscle for Accuracy
Targeting the correct muscle or muscle group is vital for accurate temperature readings, especially since different cuts contain varying muscle structures. Proper probe placement ensures you measure the core temperature, reflecting the meat’s doneness accurately. Focus on the largest, thickest part of the muscle for consistent results. This is important during different cooking techniques, as uneven heat distribution can hide undercooked areas. When preparing your meat, identify the primary muscle to avoid misleading readings from surrounding tissues or fat pockets. Use the table below to match meat cuts with their target muscles for better accuracy:
| Meat Cut | Target Muscle |
|---|---|
| Beef roast | Longissimus dorsi |
| Chicken breast | Pectoralis major |
| Pork loin | Longissimus thoracis |
This approach ensures precise meat preparation and best results.
Avoid Bone Contact
When placing your meat thermometer probe, be careful to avoid bone contact, as it can give misleading temperature readings. Bone contact conducts heat differently than meat, leading to inaccurate assessments of the internal temperature. To guarantee accurate readings, keep the probe centered in the thickest part of the cut, away from bones.
- Insert the probe into the meat’s thickest area, avoiding any contact with bones or cartilage.
- For bone-in cuts, position the probe parallel to the bone, not touching it.
- When grilling or roasting, aim for the middle of the meat to gauge true internal temperature.
- Always double-check that the probe isn’t pressing against bones, which can skew your temperature readings.
Following these tips helps you get precise readings, ensuring your meat reaches the perfect doneness.
How Proper Probe Placement Ensures Food Safety and Perfect Results
To guarantee your meat cooks evenly and reaches a safe temperature, it’s crucial to place the probe correctly. Proper probe placement ensures accurate readings, which is essential for food safety and achieving perfect results. When monitoring, insert the probe into the thickest part of the meat, avoiding fat, bone, or gristle, as these can skew the temperature. This placement supports your preferred cooking techniques, whether you’re slow roasting or grilling. Accurate temperature readings also help you optimize flavor pairing, ensuring your meat is cooked just right to enhance taste without overcooking. Proper probe placement minimizes the risk of undercooking, which can be unsafe, or overcooking, which ruins texture and flavor. Mastering this simple step guarantees both safety and culinary excellence with every meal.
Expert Tips to Avoid Common Probe Placement Pitfalls
Even with the right technique, common mistakes can still happen if you’re not careful with probe placement. To avoid issues, consider these expert tips:
- Insert the probe into the thickest part of the meat, avoiding bones or fat, which can skew readings.
- Make sure the meat isn’t overly marinated, as excess liquid can interfere with temperature accuracy.
- Regularly clean your probe to prevent buildup that affects readings, especially after grill maintenance.
- Use consistent placement for repeated measurements to track doneness accurately.
Proper probe placement helps ensure precise temperature readings, avoiding undercooking or overcooking. It also supports better meat marination absorption and extends your grill’s lifespan by preventing unnecessary wear. Pay attention to placement details, and you’ll get the most reliable results every time.
Frequently Asked Questions
How Often Should I Calibrate My Meat Thermometer?
You should calibrate your meat thermometer at least once a year to ensure ideal thermometer accuracy. Additionally, it’s wise to check calibration if you notice inconsistent readings or after dropping the device. Regular calibration helps maintain precise temperature readings, ensuring your meat is cooked safely and perfectly. By keeping your thermometer calibrated, you guarantee consistent results and avoid undercooking or overcooking your food.
Can the Thermometer Probe Affect Cooking Time?
The probe placement can definitely influence cooking time, so don’t put all your eggs in one basket. If you don’t position the thermometer correctly, you might think your food is done when it’s not, or vice versa. Proper probe placement guarantees thermometer accuracy, allowing you to cook to perfection. Remember, a well-placed probe is like a trusted guide, helping you avoid surprises and achieve consistent results every time.
Is It Safe to Reuse the Thermometer Probe Between Different Meats?
Yes, it’s safe to reuse the thermometer probe between different meats if you follow proper probe sanitation. To prevent cross contamination, always clean the probe thoroughly with hot, soapy water or disinfectant before switching meats. This simple step guarantees germs don’t transfer, keeping your food safe. Regular sanitation is key to maintaining hygiene and preventing any health risks when using your meat thermometer across various types of meat.
What Type of Thermometer Is Best for Thick Versus Thin Cuts?
For thick cuts, opt for a digital instant-read thermometer that quickly measures internal temperature without needing to pierce deeply. Thin cuts benefit from a probe thermometer with a thin, flexible tip, allowing precise readings without damaging the meat. Thick cut considerations include avoiding over-penetration, while thin cut techniques focus on quick, accurate readings. Choose the right thermometer type based on these factors to guarantee perfect doneness every time.
How Do Ambient Temperatures Influence Probe Readings?
Ambient temperature can affect your thermometer readings if it’s not calibrated properly. When the surrounding environment is hot or cold, it may cause your thermometer to give slightly inaccurate results. To guarantee accuracy, you should calibrate your thermometer regularly, especially if you notice inconsistent readings. Keep the probe away from direct heat or cold drafts, and let it stabilize in the ambient temperature before taking a measurement for the most reliable results.
Conclusion
Think of your meat thermometer as a trusted compass guiding you through the cooking journey. When you place the probe correctly, it’s like hitting the bullseye on a dartboard, ensuring perfect results every time. Avoiding common mistakes keeps your culinary ship steady, steering you toward juicy, safe, and flavorful meat. With proper placement, you’re the captain confidently steering through delicious waters, turning each meal into a masterpiece that’s both safe and sublime.