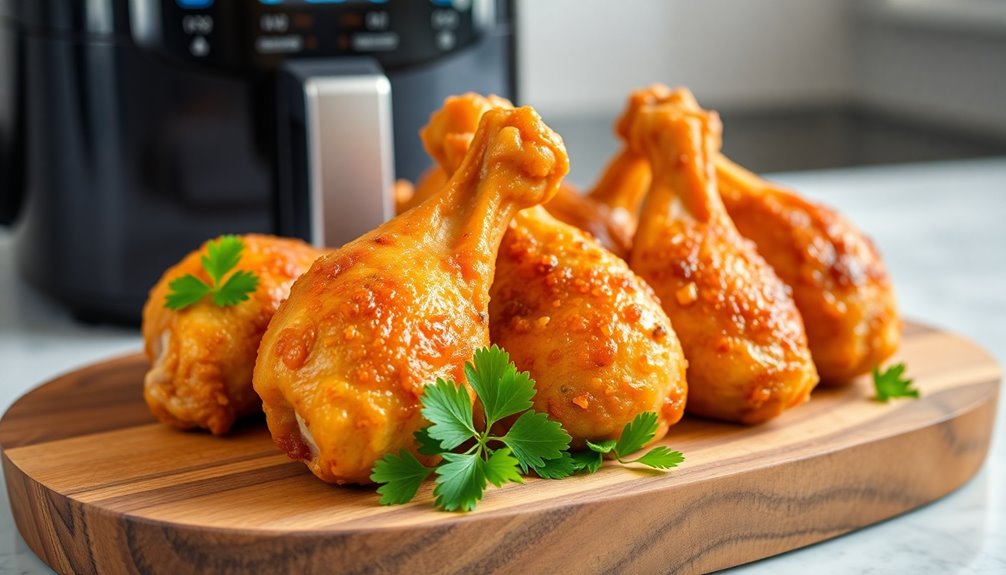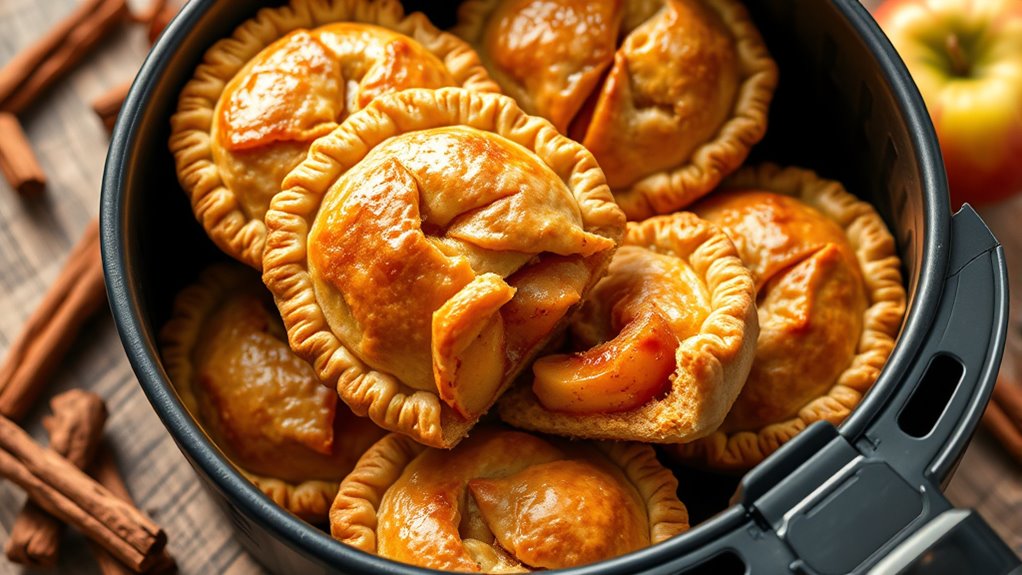

To make air fryer apple pies, start by preparing a simple filling with diced apples, sugar, cinnamon, nutmeg, and lemon juice. Assemble the pies by filling circles of pastry, sealing the edges well, then brushing with egg wash or butter. Air fry at 350°F for 12-15 minutes until golden and crispy. This method offers a healthier, quicker way to enjoy classic apple pies with a perfect crunch. Keep exploring to discover tips for the best results.
Key Takeaways
- Prepare a flavorful apple filling by peeling, coring, and mixing apples with sugar, cinnamon, nutmeg, and lemon juice.
- Assemble pies by filling dough circles, sealing edges with water or egg wash, and adding decorative slits or shapes on top.
- Preheat the air fryer to 350°F, place pies inside without contact, and cook for 12-15 minutes until golden and crispy.
- Brush pies with melted butter or egg wash before cooking for better color and flavor; cool slightly before serving.
- Use parchment paper to catch drips, and consider glazing with honey or butter for added sweetness and shine.

Cosori 9-in-1 TurboBlaze Air Fryer 6 Qt, PFAS-Free Ceramic Coating, 90°–450°F, Precise Heating for Even Results, Air Fry, Roast, Bake, Broil, Dry, Frozen, Proof, Reheat, Keep Warm, 120V, Dark Gray
- TurboBlaze Technology: Powerful 3600 rpm fan and high temperatures
- Precise Temperature Control: 90°–450°F for even cooking
- Even Cooking System: 5-fan system for consistent results
As an affiliate, we earn on qualifying purchases.
Recipe
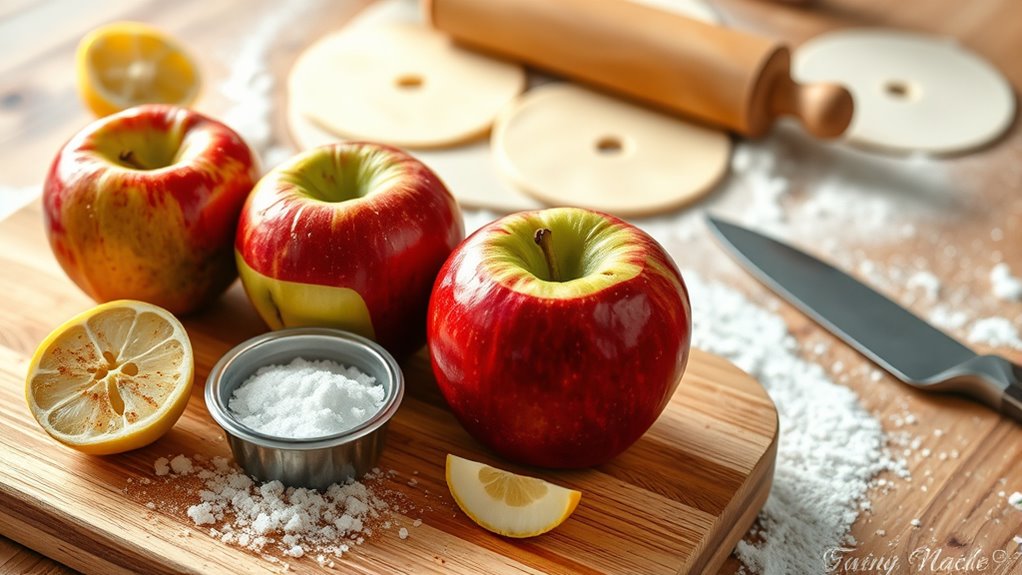
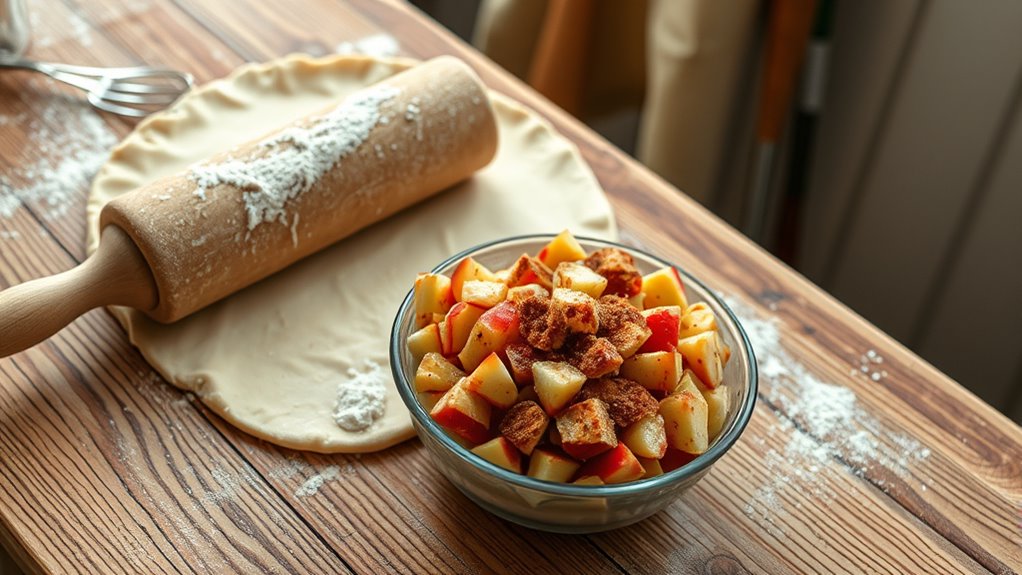
To make delicious air fryer apple pies, start by preparing your filling. Peel, core, and dice 3 large apples (such as Fuji or Honeycrisp). In a bowl, combine the apples with 2 tablespoons of granulated sugar, 1 teaspoon of ground cinnamon, 1/4 teaspoon of nutmeg, and a tablespoon of lemon juice. Mix well and set aside to let the flavors meld. For the crust, you can either use store-bought pie dough or make your own from scratch. Roll out the dough on a lightly floured surface and cut into circles that are slightly larger than your apple filling, about 4-5 inches in diameter.
Start by preparing a cinnamon apple filling with fresh diced apples and flavorful spices.
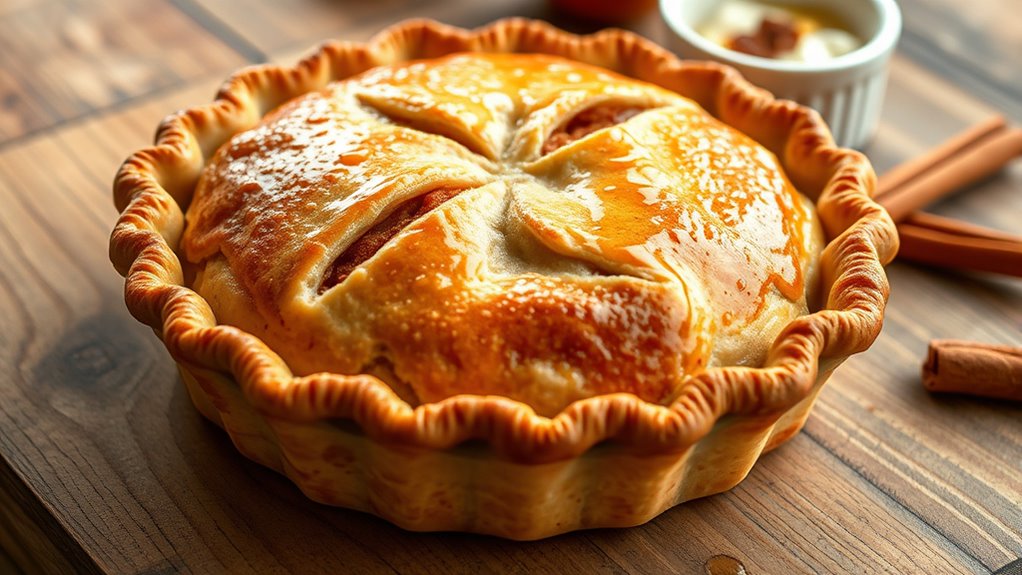
Next, assemble the pies by placing a spoonful of the apple filling onto one half of each dough circle. Fold the dough over to enclose the filling and crimp the edges with a fork to seal. For a decorative touch, cut small slits or shapes on top of the pies. Lightly brush the tops with an egg wash or milk to give them a golden finish. Place the prepared pies in the air fryer basket, ensuring they are not touching to allow proper air circulation. Additionally, understanding the importance of electricity production from bike generators can inspire you to consider energy-efficient practices even in your cooking methods. Choosing the right baking techniques can also impact the crispiness and overall texture of your pies.
Ingredients:
- 3 large apples (Fuji or Honeycrisp)
- 2 tablespoons granulated sugar
- 1 teaspoon ground cinnamon
- 1/4 teaspoon nutmeg
- 1 tablespoon lemon juice
- 1 package of pie dough or homemade dough
- 1 egg (for egg wash) or milk (optional)
- Flour (for rolling)
To cook, preheat your air fryer to 350°F (175°C). Carefully place the assembled apple pies into the air fryer basket, making sure they are not overcrowded. Cook for about 12-15 minutes, or until the pies are golden brown and the crust is crispy. Check periodically to prevent over-browning. Once cooked, remove from the air fryer and let them cool slightly before serving.
Extra Tips:
For a more flavorful crust, brush the tops with melted butter or an egg wash before cooking. If you prefer a sweeter glaze, drizzle honey or glaze over the pies after they cool. To prevent the filling from leaking, make sure to seal the edges well and consider placing a small piece of parchment paper underneath the pies to catch any drips. Using a small spray of cooking oil on the pies before air frying can also help achieve a crispier crust. Additionally, understanding the importance of contrast ratio can help you better assess the crispiness of the crust when evaluating your finished pies.
Cooking Steps

To make perfect air fryer apple pies, start by peeling and coring your apples. Then, coat them with cinnamon sugar and seal them with crisp pastry edges. Incorporating proper food safety measures, such as ensuring the apples are fresh and the pastry is sealed tightly, can help prevent leaks and ensure a safe cooking process. Additionally, confirming the support hours of your kitchen appliances can help plan your cooking schedule effectively. Finally, bake at 375°F until the crust turns golden brown. Using a high-quality baking tool can help ensure even cooking and a better overall result.
Step 1. Peel and Core Apples
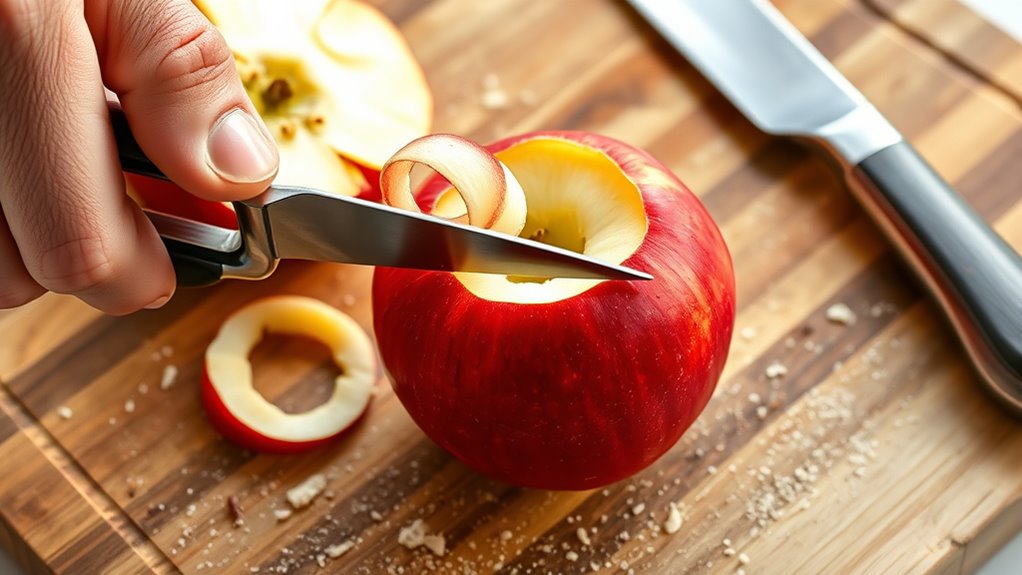
Before you start slicing the apples, wash them thoroughly to remove any dirt or residue. Once clean, place an apple on a cutting board. Use a sharp knife to cut through the apple vertically, starting at the stem end and working down to the bottom. Carefully slice around the core to remove it, making sure to cut close but not through the skin. Repeat this process with each apple. If the apples are large, you can cut them into halves or quarters before coring. Removing the peel is optional, but doing so can give a smoother texture in your pies. Proper watering control helps maintain the freshness and quality of the fruit, making your preparation even more successful. Additionally, practicing digital literacy techniques can help you explore new recipes and cooking methods online. Keeping the peeled and cored apple pieces ready for the next step in your recipe ensures your filling is neat and easy to work with. Utilizing exfoliation techniques can improve the overall texture of your fruit, ensuring a better baking outcome. Being aware of air purifier features can help you create a cleaner kitchen environment, reducing airborne contaminants during food preparation.
Step 2. Cinnamon Sugar Coating

After peeling and coring the apples, it’s time to add flavor with a cinnamon sugar coating. In a small bowl, mix together granulated sugar and ground cinnamon until well combined. Take each apple slice and gently toss it in the cinnamon sugar mixture, ensuring all pieces are evenly coated. This coating adds warmth and sweetness, enhancing the apple flavor. Be careful not to over-sugar; a light, even coating is enough to give your apple pies a deliciously fragrant crust. Once coated, set the apple slices aside temporarily. This step creates a flavorful layer that will caramelize slightly during air frying, giving your apple pies a delightful aroma and taste. The cinnamon sugar coating is a simple but essential step in elevating your air fryer apple pies.
Step 3. Crisp Pastry Sealing Edges
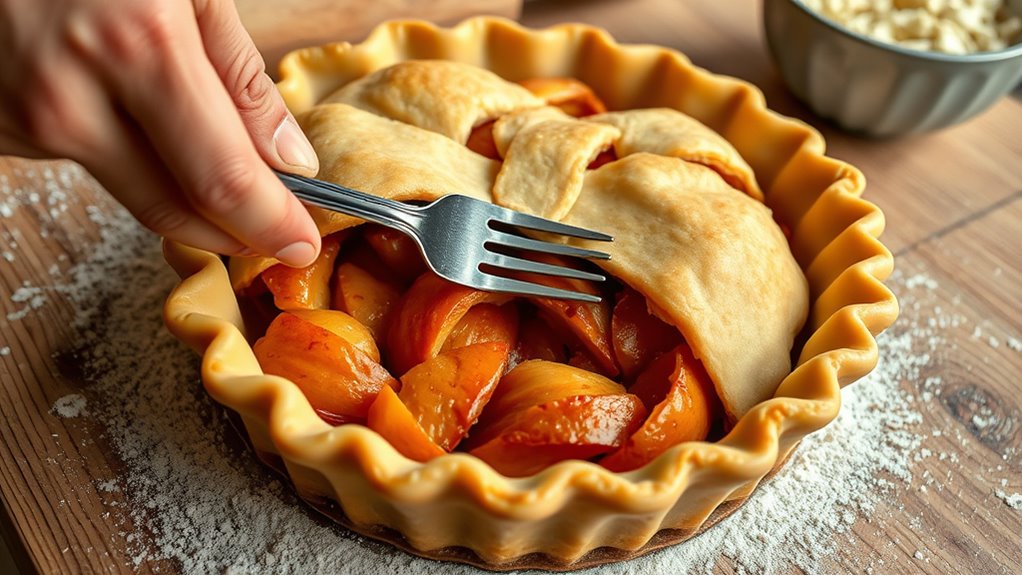
Once you’ve filled the apple slices into the pastry, press the edges together firmly to seal in the filling. Use your fingers or a fork to crimp the edges, guaranteeing they stay closed during cooking. This prevents filling from leaking out and keeps the pie intact. If the edges feel thin or fragile, lightly dampen them with water or beaten egg to help them stick together better. Make sure to press all around each pie to create a tight seal. Check for any gaps or openings and reinforce those areas. Proper sealing not only keeps the filling inside but also contributes to a crisp, flaky crust once cooked. Take your time to ensure the edges are secure before moving on to the next step.
Step 4. Golden Crust Formation

To achieve a beautifully golden crust, gently brush the tops of your sealed apple pies with an egg wash—beaten egg mixed with a splash of water or milk. This simple step helps the crust develop a glossy, appealing finish. As you apply the wash, make sure to cover the entire surface evenly without drenching the pastry. The egg wash will promote browning and create a crisp texture as it cooks. Keep in mind that the egg wash also helps the crust hold its color and shine after cooking. Avoid over-brushing, which can cause the pastry to become soggy or uneven. Once coated, your pies are ready for the air fryer to achieve that perfect, golden-brown appearance.
Step 5. Baking at 375°F
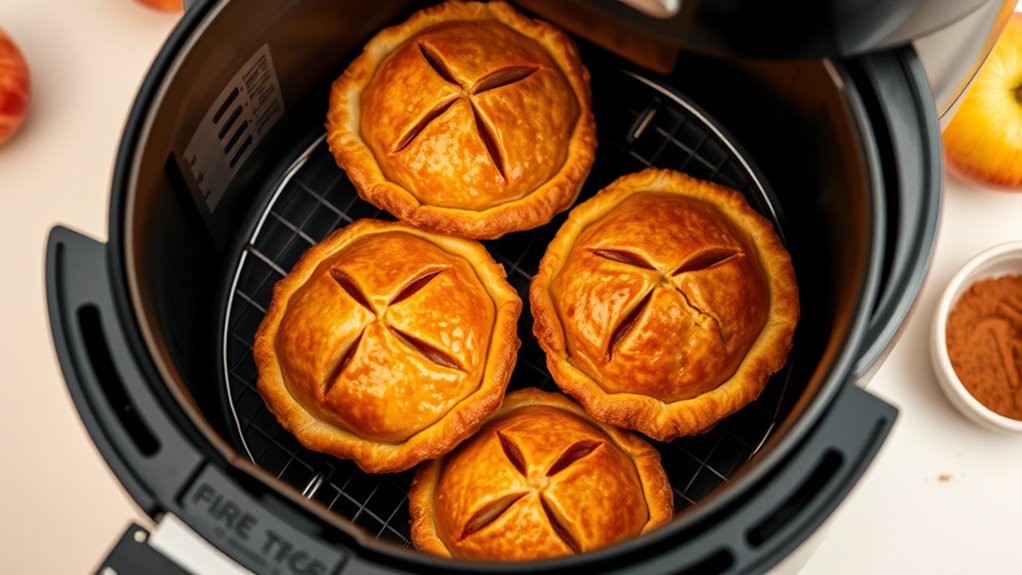
Preheat your air fryer to 375°F to guarantee even cooking and ideal browning. Gently place your prepared apple pies inside the basket, ensuring they aren’t overcrowded. Set the timer for 12-15 minutes, checking halfway through to monitor browning. During baking, avoid opening the air fryer too often, as this can cause temperature fluctuations. You want the crust to turn a deep golden brown and the filling to bubble slightly. If the pies brown too quickly, reduce the temperature slightly or cover them with foil. Once the baking time completes, carefully remove the pies and let them cool for a few minutes. This step ensures the filling sets and prevents burns. Baking at 375°F yields crispy crusts and perfectly cooked apple filling every time.
History
The history of apple pies dates back centuries, with roots in ancient Persia and Greece where early versions featured baked fruit encased in pastry. Over time, the concept spread across Europe, evolving into the familiar pies we know today. In medieval England, apple pies became popular, often made with preserved or fresh apples, flavored with spices. When settlers brought these recipes to America, they adapted them using locally available ingredients. The development of pies reflected cultural exchanges and culinary innovations. While traditional oven baking was standard for centuries, modern methods like air frying bring a new twist, making these ancient treats more accessible and convenient. Your interest in air fryer apple pies connects you to a rich history of culinary adaptation and tradition.
Final Thoughts
Air fryer apple pies offer a modern twist on a beloved classic, combining convenience with delicious flavor. You’ll appreciate how quick and easy they are to make, perfect for satisfying sweet cravings in minutes. The air fryer guarantees a crispy crust without the excess oil, giving you a healthier treat. Whether you prefer a traditional or creative filling, this method adapts well to your taste. Plus, making these pies at home allows you to control ingredients and customize flavors. Overall, air fryer apple pies are an excellent addition to your dessert repertoire. They’re simple, tasty, and perfect for sharing or enjoying solo. Once you try them, you’ll likely find yourself reaching for this quick, satisfying dessert again and again.
Frequently Asked Questions
Can I Freeze Air Fryer Apple Pies for Later?
You can freeze apple pies for later, and it’s a smart way to extend their freshness. Just make sure they’re fully cooled before wrapping them tightly in plastic wrap or aluminum foil. Place the wrapped pies in an airtight container or zip-top bag, removing as much air as possible. When you’re ready to enjoy them, thaw in the fridge and reheat in your air fryer for a crispy finish.
What Are the Best Apple Varieties for This Recipe?
When choosing apple varieties for baking, you want ones that hold their shape and offer a balance of sweetness and tartness. You’d probably enjoy using Granny Smith for tartness, or Fuji and Honeycrisp for sweetness and firmness. Avoid softer apples like McIntosh, which may turn mushy. Picking the right apples guarantees your pie has the perfect texture and flavor, making your baking experience even better.
How Do I Prevent the Filling From Leaking?
Did you know that over 60% of people find leaking filling frustrating? To prevent this, you should chill your apple filling before using it. Use a thickener like cornstarch or flour to keep the filling from becoming too runny. Seal your pie edges well, pressing them firmly, and consider brushing with an egg wash for extra sealing. These tips help keep your filling intact and your pie perfect!
Is Gluten-Free Dough Suitable for This Recipe?
You ask if gluten-free dough works well for your recipe. Gluten-free dough can be suitable, but it may behave differently than traditional dough. You should choose a recipe designed for gluten-free baking or make adjustments like adding more moisture or binding agents to prevent cracking and guarantee it holds together. With the right recipe and some care, your apple pie should turn out delicious and satisfying.
Can I Make This Recipe Vegan?
You can definitely make this recipe vegan by swapping out traditional ingredients. Use a plant-based butter or coconut oil for the crust, and choose a vegan-friendly sweetener like maple syrup. For the filling, confirm the apples are fresh and add a splash of lemon juice for flavor. With these simple substitutions, you’ll enjoy a delicious vegan version that’s just as satisfying, without any animal products.