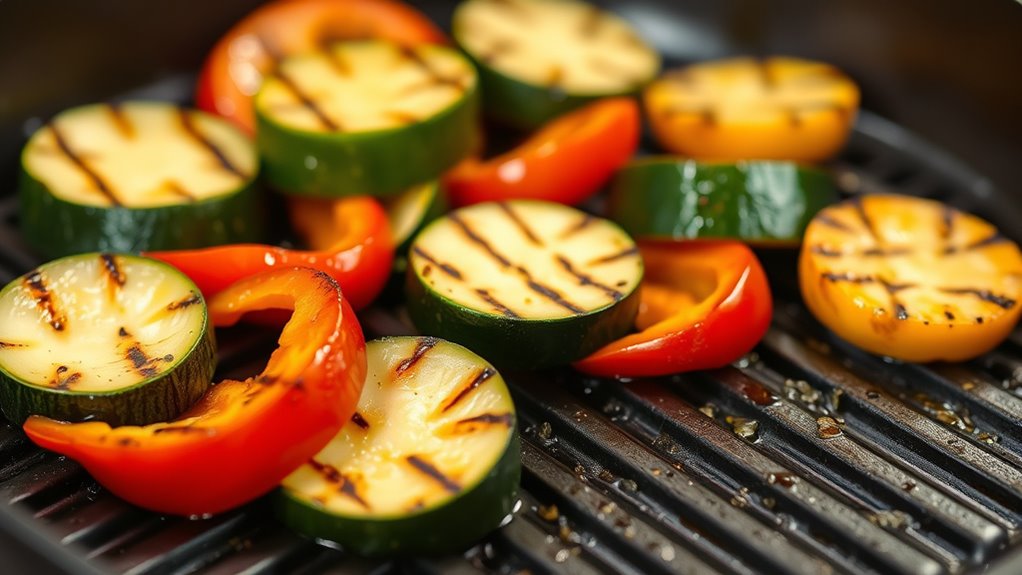
To get perfect char marks without an outdoor grill, start by selecting the right grill pan insert that fits your stove and is made from durable material like cast iron or stainless steel. Preheat it thoroughly over high heat, then lightly oil the surface and your ingredients. Cook without moving food to develop distinct lines, turning 45 or 90 degrees for crosshatch patterns. For more tips on achieving restaurant-quality results indoors, continue exploring these helpful secrets.
Key Takeaways
- Preheat your grill pan insert thoroughly over high heat until it’s hot enough to sizzle water instantly.
- Use a light coating of high-smoke-point oil to promote searing and develop distinct grill marks.
- Cook ingredients without moving them initially to allow proper contact and clear char lines to form.
- Turn food at a 45- to 90-degree angle during cooking to create crosshatch grill marks.
- Keep ingredients dry, avoid overcrowding, and maintain high heat for even searing and optimal char lines.

OLESBUR Air Fryer Liners Disposable, 200Pcs 8 Inch Airfryer Paper Liners, Unbleached Parchment Paper for Air Fryer Basket, Non-Stick Air Fryer Accessories, Liners for Baking, Parchment Paper Sheets
- Premium Food-Grade Materials: Unbleached, BPA-free, non-stick, heat-resistant
- Mess-Free Cooking: Catches grease and crumbs, keeps air fryer clean
- Versatile Usage: Suitable for ovens, microwaves, baking, and frying
As an affiliate, we earn on qualifying purchases.
Choosing the Right Grill Pan Insert for Your Stove

Selecting the right grill pan insert begins with understanding your stove’s type and size. Different stoves require specific insert materials to guarantee proper fit and heat distribution. Material options like cast iron, stainless steel, and non-stick coatings each have pros and cons—cast iron offers excellent heat retention, while stainless steel is durable and easy to clean. When choosing, also consider handle compatibility; some inserts come with handles that won’t fit certain stove types or may require extra accessories. Make sure the handle is heat-resistant and securely attached to prevent accidents. Additionally, material durability plays a key role in ensuring your grill pan insert lasts through frequent use. By evaluating your stove’s dimensions and the material qualities, you’ll select a grill pan insert that delivers even heat, durability, and safe handling, helping you achieve perfect grill marks every time.
Preparing Your Ingredients for Perfect Grill Marks
Start by choosing the right ingredients that respond well to grill marks, like firm vegetables and meats. Make certain to pat them dry so they make better contact with the grill pan insert. Finally, cut your ingredients to the right size to ensure even searing and clear grill lines. Using ingredients with a smooth surface can help achieve better grill mark results.
Choose Proper Ingredients
To achieve perfect grill marks, you need to choose the right ingredients that can handle high heat without falling apart or sticking. Focus on fresh ingredients, as their moisture and structure hold up better during grilling. When selecting proteins like steaks, chicken breasts, or vegetables, aim for those with firm textures and minimal moisture loss. Proper seasoning techniques also matter; applying salt or marinade beforehand enhances flavor without making the surface sticky. Avoid overly delicate or watery ingredients that won’t develop clear grill marks or may fall apart. Instead, opt for ingredients that maintain their integrity under high heat. Ensuring proper ingredient preparation also involves using quality cuts that are suitable for high-temperature cooking. This careful selection ensures your ingredients stay intact and develop those desirable char lines, elevating your grilling results without an outdoor grill.
Pat Dry for Better Contact
Before placing ingredients on the grill, it is essential to pat them dry thoroughly. Excess moisture can prevent proper contact with the grill pan insert, resulting in uneven char marks. Use a clean towel or paper towels to gently remove surface water, ensuring the surface is as dry as possible. Proper drying also enhances your seasoning techniques, allowing spices and marinades to adhere better. If stored in the fridge, let ingredients sit at room temperature for a few minutes before drying to avoid excess moisture from condensation. Consider storage solutions that keep ingredients dry and prevent moisture buildup, such as airtight containers with paper towels inside. This simple step improves heat transfer, producing those perfect grill marks and a better sear.
Cut to Optimal Sizes
Cutting ingredients to the right size guarantees they cook evenly and develop attractive grill marks. For best results, aim for size consistency so each piece heats uniformly, preventing overcooking or undercooking. When selecting ingredients, choose firm, fresh produce or meats that can be sliced into uniform portions. Uniform sizes ensure even contact with the grill pan insert, leading to consistent searing and distinct char marks. Avoid oversized pieces that won’t cook through or tiny bits that burn quickly. Use a sharp knife to create clean, precise cuts, and consider pre-measuring or stacking ingredients for uniformity. Properly sized ingredients not only improve cooking efficiency but also enhance presentation, giving your dishes a professional look with perfect grill marks and consistent texture. Additionally, selecting ingredients with size consistency helps ensure your cooking process is more predictable and efficient.
Properly Heating the Grill Pan for Optimal Searing

Getting your grill pan hot enough is crucial for achieving that perfect sear. A properly heated pan creates those desirable char marks and locks in flavor. Before heating, make sure your grill pan is well-seasoned; this enhances non-stick properties and prevents sticking. Pay attention to the handle material—if it’s metal, it can tolerate high heat, but plastic handles need lower temperatures or a heat diffuser. To heat effectively, preheat your pan over medium-high heat for a few minutes, allowing it to reach the right temperature. Use an infrared thermometer if you want precision. Remember, a hot pan is key to searing, but always handle it with care to avoid burns or damage. Proper heating sets the foundation for perfectly seared, flavorful dishes. Additionally, understanding the contrast ratio of your cooking surface can help you gauge heat distribution and achieve more consistent results.
Techniques for Achieving Authentic Char Lines

To get those authentic grill marks, start by preheating your pan properly so it’s hot enough. Turn the heat to high and apply a light coating of oil to prevent sticking and enhance searing. With these techniques, you’ll create perfect char lines every time. Incorporating sound vibrations in cooking techniques can also influence heat distribution for more even searing.
Preheat Properly First
Preheating your grill pan insert is essential for creating those crisp, authentic char lines. When you start with a properly heated pan, food sears quickly, locking in juices and forming distinct grill marks. To guarantee even heat distribution, give your pan enough time to reach the right temperature. This step also helps with seasoning techniques, as a hot surface enhances the development of a natural non-stick layer. Additionally, consider your storage solutions—keeping your insert in a dry, heat-safe place prevents rust and maintains peak performance. Before cooking, test the heat by lightly sprinkling water; if it sizzles immediately, you’re ready to go. Proper preheating maximizes flavor, reduces sticking, and assures those professional-looking char lines every time.
Use High Heat Setting
Using a high heat setting is key to achieving those signature grill marks and smoky flavors. When you crank up the heat, the grill pan sears the food quickly, creating distinct lines and caramelization that mimic outdoor grilling. However, safety precautions are essential—avoid overheating to prevent oil splatters or burns. Ensure proper ventilation and handle the pan with heat-resistant tools. If your stove or pan can’t reach high temperatures, consider alternative cooking methods like broiling or using a stovetop flame torch to develop char marks safely. Always monitor your food closely to prevent burning. High heat not only enhances flavor but also helps you replicate authentic grill lines without an outdoor grill, making your indoor cooking experience more satisfying and flavorful.
Apply Light Oil Coating
Ever wonder how a light oil coating can transform your grill pan results? Applying a thin layer of seasoned oils creates a natural non-stick coating that helps achieve perfect char marks. This step guarantees food releases easily and prevents sticking, giving your dishes those authentic grill lines. When you lightly oil the surface, it heats evenly and enhances the Maillard reaction, intensifying flavors. Use a high-smoke-point oil like avocado or canola for best results. Remember, too much oil can cause flare-ups and uneven marks. Proper application is key—just a quick wipe or spray is enough to create a smooth, even coating that mimics the non-stick properties of seasoned cookware. Additionally, protective styling benefits from using the right oil application can help maintain your grill pan’s surface over time. This simple step makes all the difference in crafting those beautiful, restaurant-quality grill marks.
Managing Temperature for Even Cooking and Searing

To achieve even cooking and perfect searing, managing the grill pan’s temperature is essential. Proper temperature control ensures your food cooks evenly and develops those desirable char marks. Start by preheating your pan over medium heat, allowing heat to distribute evenly across the surface. Use a thermometer if needed to monitor the temperature accurately; ideally, aim for around 375-400°F for searing. Adjust the heat as you cook, lowering it for gentle cooking or increasing it for searing. Consistent heat distribution prevents hot spots that can burn your food or cause uneven cooking. By maintaining steady, controlled heat, you’ll create a balanced environment that produces beautifully cooked, flavorful results every time.
Tips for Preventing Food Sticking and Flare-Ups

Proper temperature management helps prevent food from sticking and reduces flare-ups during grilling. To keep your food intact and avoid dangerous flare-ups, focus on oil management—use just enough oil to coat your ingredients without excess. Properly preheat your grill pan insert; this helps form a natural barrier, reducing sticking. Keep a spray bottle handy for quick oil adjustments and avoid pouring oil directly onto hot surfaces. Additionally, manage flare-up prevention by trimming excess fat from meats and removing debris that can ignite. Using a high-smoke point oil like canola or avocado oil is recommended, and oil absorption and retention can vary depending on the type of oil used. Regularly check for and remove grease buildup.
Cleaning and Maintaining Your Grill Pan Insert
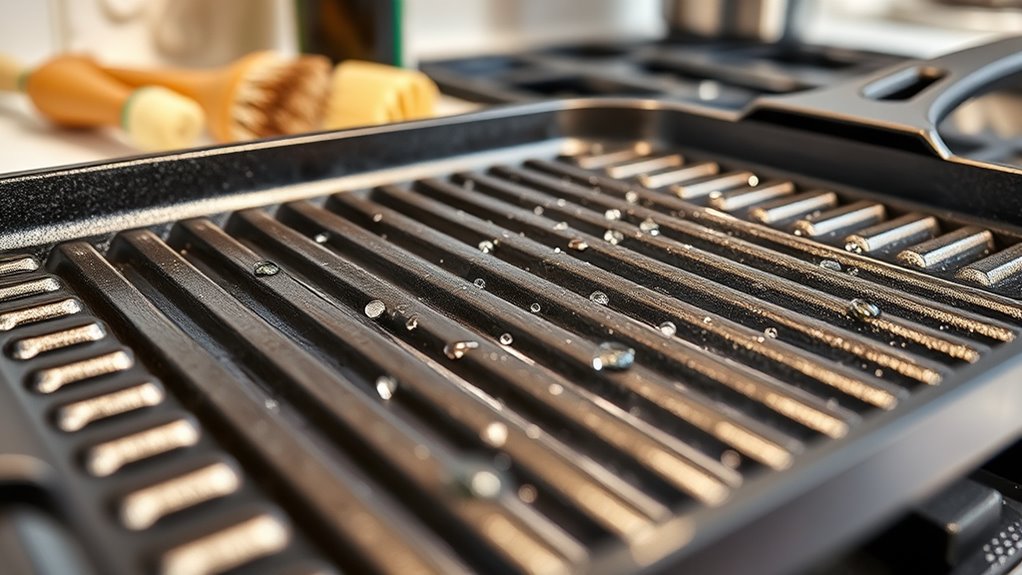
Regular cleaning is essential to keep your grill pan insert in top condition and guarantee it performs well over time. Start by removing food debris and residue after each use, using warm water and a gentle brush or sponge. Avoid harsh abrasives that can damage the surface. For stubborn stains, soak the insert in warm, soapy water to loosen grime. Proper grill pan seasoning helps create a natural non-stick layer, making cleaning easier and preventing rust. Use a specialized grill pan cleaner or a mixture of baking soda and water for deep cleaning if needed. Always dry your insert thoroughly to prevent rust and preserve the seasoning. Regular maintenance ensures your grill pan insert stays flavorful, non-stick, and in excellent shape for many uses ahead. Additionally, consulting best vacuum options can help you efficiently clean around your grill area and keep your outdoor space tidy.
Creative Recipes to Make the Most of Indoor Grilling

Indoor grilling opens up a world of flavorful possibilities beyond traditional burgers and steaks. You can experiment with creative recipes that elevate your meals and impress your family or friends. Use flavored marinades to infuse meats with bold tastes or try vegetarian options like veggie skewers or grilled portobellos. The grill pan insert allows you to achieve those desirable char marks indoors, adding visual appeal and smoky flavor. Consider recipes such as spicy chicken fajitas, grilled shrimp salads, vegetable quesadillas, or tofu stir-fries. These dishes benefit from the high heat and grill marks that enhance texture and flavor. With a little inspiration, you’ll discover endless ways to make indoor grilling both delicious and versatile.
Frequently Asked Questions
Can I Use a Grill Pan Insert on an Induction Stove?
You might wonder if a grill pan insert works on an induction stove. The key is induction compatibility; guarantee the insert has a magnetic base, like cast iron or certain stainless steel. Proper heat distribution is essential for even cooking and achieving those grill marks. If your insert is compatible, it’ll heat efficiently and evenly on your induction stove, letting you enjoy grilled flavors indoors without sacrificing performance.
How Do I Store My Grill Pan Insert to Prevent Rust?
Like a trusty knight storing his armor, you should keep your grill pan insert dry and well-ventilated to prevent rust. After cleaning, make certain you thoroughly dry it and apply a light coat of oil for rust prevention. Store it in a dry, cool place, avoiding damp areas. Proper cleaning tips and rust prevention techniques protect your insert, keeping it in top shape for those perfect char marks every time.
Are There Specific Foods That Shouldn’T Be Cooked With a Grill Pan Insert?
You should avoid cooking highly delicate foods like eggs or pancakes on a grill pan insert, as they may stick despite non-stick coating care. Marinade compatibility is also key; acidic marinades can damage the non-stick surface over time. For best results, use the insert for meats and vegetables, and clean it properly after each use to maintain its non-stick properties and prevent rust.
How Long Does It Take to Achieve Perfect Grill Marks?
Imagine your perfect grill marks as a dance partner—timing tips are your secret steps. To achieve mark precision, preheat your pan thoroughly, then cook each side for about 2-3 minutes. For thicker cuts, add an extra minute. Keep an eye on the marks, and avoid flipping too often. With patience and practice, you’ll master that beautiful, restaurant-quality sear in just a few minutes.
Can I Use a Grill Pan Insert for Grilling Seafood?
Absolutely, you can use a grill pan insert for seafood grilling. It’s perfect for searing seafood and adding those appealing grill marks. The insert helps maintain seafood flavor while preventing sticking, especially with delicate items like shrimp or fish fillets. Just preheat the pan, brush with oil, and cook your seafood until it’s perfectly charred. This method gives you that smoky flavor and beautiful grill marks without needing an outdoor grill.
Conclusion
Mastering your grill pan insert is like wielding a sword in a medieval quest—practice, patience, and care reveal its true power. By choosing the right insert, prepping ingredients, and controlling heat, you’ll achieve restaurant-quality char marks right in your kitchen. Remember, even the greatest chefs once relied on humble tools to create magic. So, keep experimenting, stay persistent, and soon you’ll be turning your stovetop into a veritable banquet hall—without ever needing to leave your castle.