
To caramelize onions without stirring for 30 minutes, choose firm, evenly sliced onions like yellow, sweet, or red varieties. Use a heavy-bottomed pan on very low heat, adding a tablespoon of butter or oil along with a pinch of salt. Spread the onions evenly and leave them undisturbed, checking occasionally to guarantee they don’t burn. This hands-free method yields rich, deep flavor—if you want to master every step, there’s more to uncover here.
Key Takeaways
- Use a heavy-bottomed, evenly heating pan like cast iron or enameled Dutch oven for consistent caramelization without stirring.
- Keep the stove at low, steady heat and monitor the temperature to prevent burning and ensure even browning.
- Spread onions evenly in the pan and avoid overcrowding to promote uniform caramelization without stirring.
- Pat onions dry and use sufficient fat (butter or oil) to facilitate browning and prevent sticking during the process.
- Check the onions every 10-15 minutes, adjusting heat if necessary, until they reach deep golden or dark caramel color at 30 minutes.
Selecting the Right Onions for Caramelization

Choosing the right onions is essential for achieving perfectly caramelized results. Different onion varieties, like yellow, sweet, or red onions, each bring unique flavors and moisture levels that affect caramelization. Yellow onions are a popular choice because they develop a rich, sweet flavor when cooked slowly. Sweet onions, such as Vidalia or Walla Walla, are even milder and sweeter, making them ideal for caramelization. Red onions add a vibrant color and a slightly sharper taste, but they still caramelize well. Proper storage tips are also important—keep onions in a cool, dark, well-ventilated place to preserve their flavor and prevent spoilage. Using fresh, well-stored onions guarantees your caramelized results are flavorful, tender, and perfectly golden every time. Additionally, understanding the moisture content of onions can help you select the best variety for slow cooking and achieving that desired caramelized texture.
Preparing Your Onions for Slow Cooking

Before slow cooking, make sure to select the right onion—yellow or sweet onions work best for caramelization. Peel and slice them evenly to guarantee consistent cooking and flavor development. Proper preparation helps your onions caramelize evenly and achieve that rich, sweet taste. Using the correct watering system can help keep the onions moist during the cooking process.
Choose the Right Onion
Have you ever wondered which onion works best for caramelizing? The answer depends on your preferred flavor and texture. Different onion varieties, like yellow, sweet, or red onions, each bring unique qualities to the caramelization process. Yellow onions are versatile and develop a rich, deep sweetness with slow cooking, making them ideal for caramelizing without stirring. Sweet onions, such as Vidalia, become exceptionally tender and flavorful, but their higher water content can make caramelization slower. Red onions offer a slightly sharper taste and vibrant color, which can add visual appeal. When choosing onions, consider how their natural sugars and moisture levels will influence your caramelization techniques. Picking the right variety ensures your slow-cooked onions turn out perfectly, with deep, sweet flavor every time.
Prepare Properly for Slow Cooking
To guarantee your onions caramelize evenly and develop rich sweetness, it’s essential to prepare them properly before slow cooking. Start with proper onion storage—keep onions in a cool, dark, well-ventilated place to maintain freshness. Before cooking, peel and slice the onions uniformly to ensure consistent caramelization. Using the right caramelization techniques, such as starting with low heat and avoiding overcrowding the pan, helps create even browning. Pat the onions dry to remove excess moisture, which can hinder browning. Make sure your pan is clean and dry before adding onions to prevent steaming. Proper preparation sets the foundation for perfectly caramelized onions, allowing you to achieve deep, sweet flavors with minimal stirring. Incorporating vocal techniques like consistent heat and patience ensures the onions develop a rich, caramelized flavor without sticking or burning.
Choosing the Ideal Cookware for Hands-Free Caramelizing
Choosing the right cookware is essential for hands-free caramelizing, as it guarantees even heat distribution and prevents burning. Your best cookware options include heavy-bottomed pans like stainless steel, cast iron, or enameled Dutch ovens, which retain heat well and promote consistent cooking. Material considerations are vital: cast iron offers excellent heat retention but can be heavy and may require seasoning; stainless steel heats evenly and is easy to clean; enameled options combine the benefits of cast iron with easier maintenance. Avoid thin or lightweight pans, as they can heat unevenly and cause hot spots that burn the onions. Select a pan that distributes heat smoothly, ensuring your onions caramelize evenly without the need for constant stirring. Proper cookware makes the process more reliable and effortless. Additionally, choosing cookware designed for tuning can optimize heat management during the caramelization process.
Setting the Temperature for Low and Slow Cooking
To caramelize onions properly, you need to set your stove to a low, steady heat. Maintaining a consistent temperature helps prevent burning and guarantees even cooking. Focus on finding the right heat level and controlling it carefully throughout the process. Using a consistent finish ensures a smooth and professional result.
Ideal Heat Level
Achieving perfectly caramelized onions requires setting your stove to a low and steady heat. The key is maintaining a consistent pan temperature that prevents burning while allowing the sugars to develop slowly. To do this effectively, focus on heat distribution, ensuring even warmth across the surface. Here are three tips to dial in the ideal heat level:
- Use a heavy-bottomed pan to promote uniform heat and avoid hot spots.
- Keep the burner on the lowest setting, monitoring the pan’s temperature regularly.
- Adjust the heat slightly if you notice the onions sizzling too vigorously or not cooking at all.
- Regularly check the pan’s temperature to ensure consistent heat throughout the caramelization process.
Staying attentive to pan temperature and heat distribution helps you achieve beautifully caramelized onions without overcooking or burning.
Consistent Temperature Control
Maintaining a consistent temperature is essential for slow-cooking onions to develop their natural sweetness without burning. To achieve this, start with properly stored onions—keep them in a cool, dry place to preserve freshness and prevent uneven cooking. When setting your stove, choose a low heat and adjust as needed to keep the onions gently simmering. Using a heavy-bottomed pan helps distribute heat evenly, vital for reliable caramelization techniques. Keep an eye on the heat, ensuring it stays steady throughout the 30-minute process. Consistent temperature control prevents scorching and promotes the gradual browning that enhances flavor. Remember, patience and careful adjustment are key—maintaining steady heat helps you achieve perfectly caramelized onions without stirring. Additionally, monitoring the heat with a reliable cooking thermometer can help ensure precise temperature control during the process.
Preventing Burning
Setting the right temperature is essential for preventing burning while caramelizing onions. If the heat is too high, you risk scorching the onion flavor and ruining the caramel texture. To get perfect results, follow these steps:
- Use low heat — gentle warmth allows onions to develop their sweet, rich flavor without burning.
- Keep the heat steady — fluctuating temps can cause uneven cooking and bitter spots.
- Watch the process closely — patience ensures you avoid overcooking and preserve that deep, sweet onion flavor.
- Adjust the temperature settings as needed — since many stovetops have variations, monitoring heat helps maintain consistent low and slow cooking.
Adding the Perfect Amount of Fat and Seasonings
Adding the right amount of fat and seasonings is key to enhancing the flavor of caramelized onions. Start with balanced fat ratios—too little, and the onions may stick or burn; too much, and they become greasy. Typically, a tablespoon of butter or oil suffices for a large onion. When it comes to seasoning blends, keep it simple at first—salt brings out sweetness, while a pinch of pepper adds depth. You can also experiment with thyme or garlic powder, but avoid over-seasoning early on. Stirring isn’t necessary at this stage, so focus on evenly distributing the fat and seasonings initially. Properly measuring and adding the right amount guarantees your onions develop rich flavor without overpowering or losing their natural sweetness. Additionally, understanding best cooking techniques can help ensure your onions caramelize evenly and develop a rich, complex flavor.
How to Use a Timer to Monitor the Cooking Process
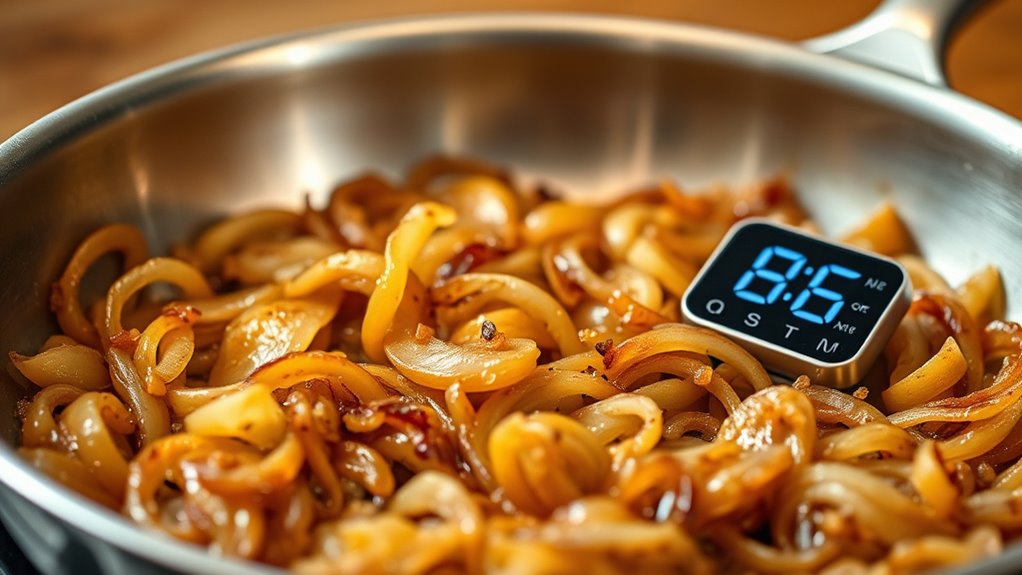
Using a timer helps you keep track of each stage in caramelizing onions, ensuring they don’t burn or stay undercooked. Set accurate timers based on your stove’s heat and the onion’s thickness, so you know when to stir or adjust the heat. Monitoring your progress with a timer makes the process more reliable and results consistently delicious.
Setting Accurate Timers
To guarantee your caramelized onions turn out perfectly, it’s essential to monitor the cooking process carefully with a timer. Ensuring timer accuracy is key to preventing burning or undercooking. Set your timer based on the recommended 30-minute caramelization time, but remember that minor adjustments may be needed. Use alert notifications to stay aware without constantly checking the stove, freeing you to focus on other tasks. To optimize your experience:
- Double-check your timer’s settings for precise countdown.
- Choose a timer with clear, loud alert notifications so you won’t miss the signal.
- Place the timer where you can see or hear it easily, ensuring it remains in your awareness.
- Regularly understanding creative storytelling techniques can help you better plan and execute your cooking narratives, making your culinary process more engaging and memorable.
Accurate timing keeps your onions perfectly caramelized, making the process stress-free and rewarding.
Monitoring Cooking Progress
Once your timer is set, keep a close eye on the onions’ progress by regularly checking in on the cooking process. Use caramelization tools like a wooden spatula or silicone scraper to gently lift and observe the onions without disrupting the process. Proper onion storage beforehand guarantees freshness, which affects caramelization quality. To stay organized, track your progress:
| Time Interval | Observation | Action Needed |
|---|---|---|
| 10 minutes | Onions start to soften and turn translucent | Stir gently if sticking occurs |
| 15 minutes | Onions develop light golden color | Reduce heat if browning too fast |
| 20 minutes | Onions deepen in color | Continue monitoring; avoid overcooking |
| 30 minutes | Onions are rich, dark caramel color | Remove from heat immediately |
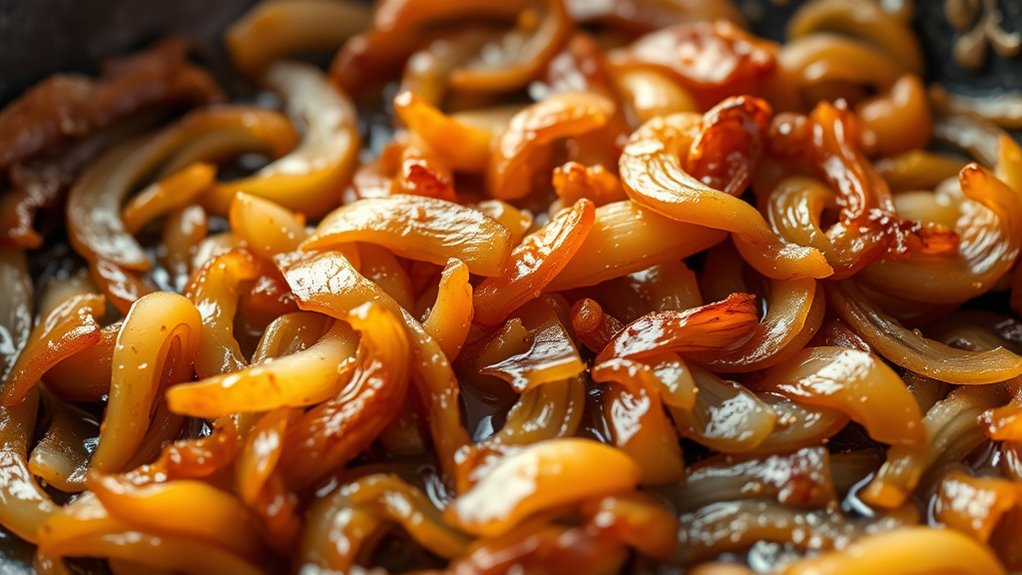
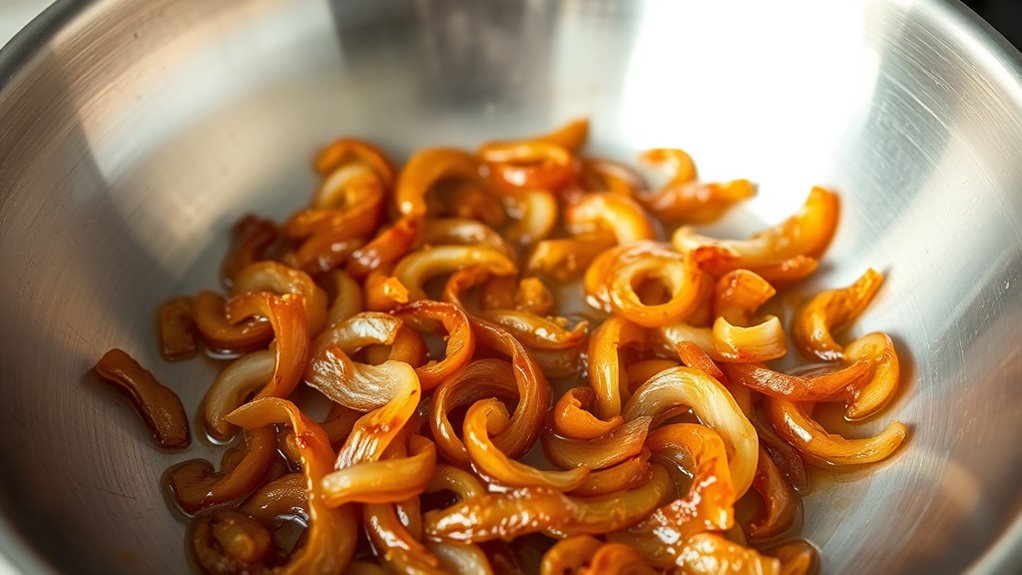
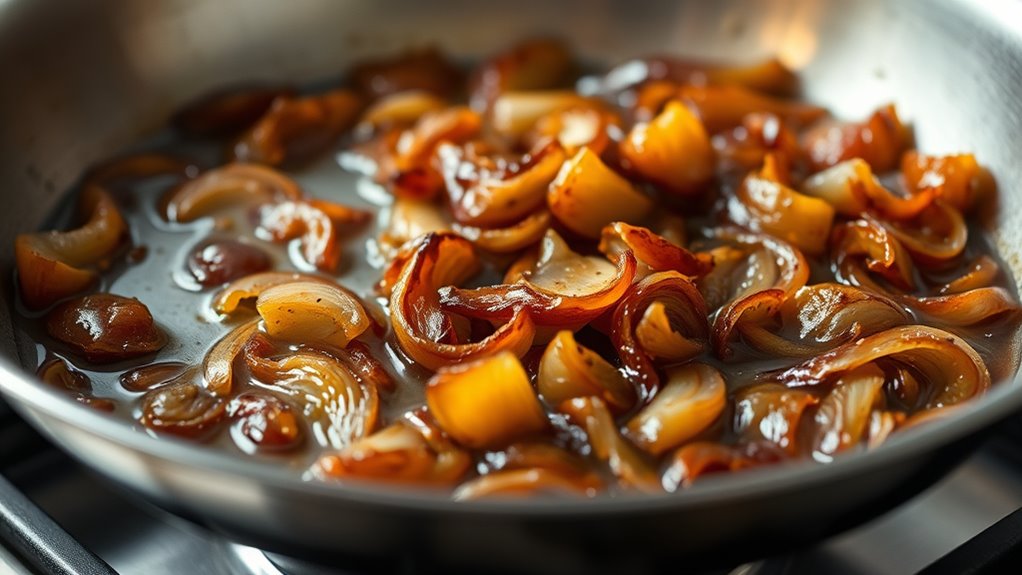
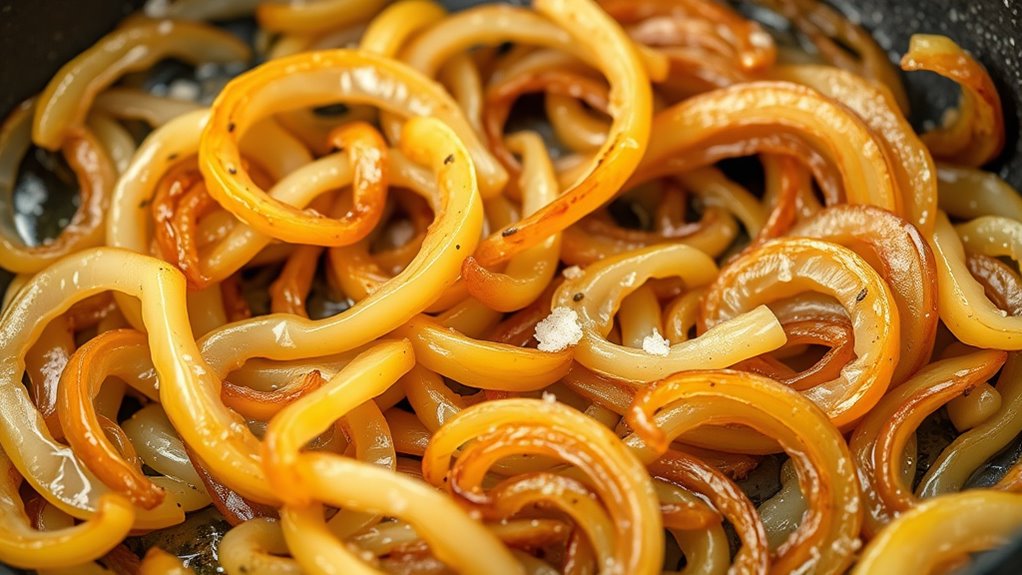
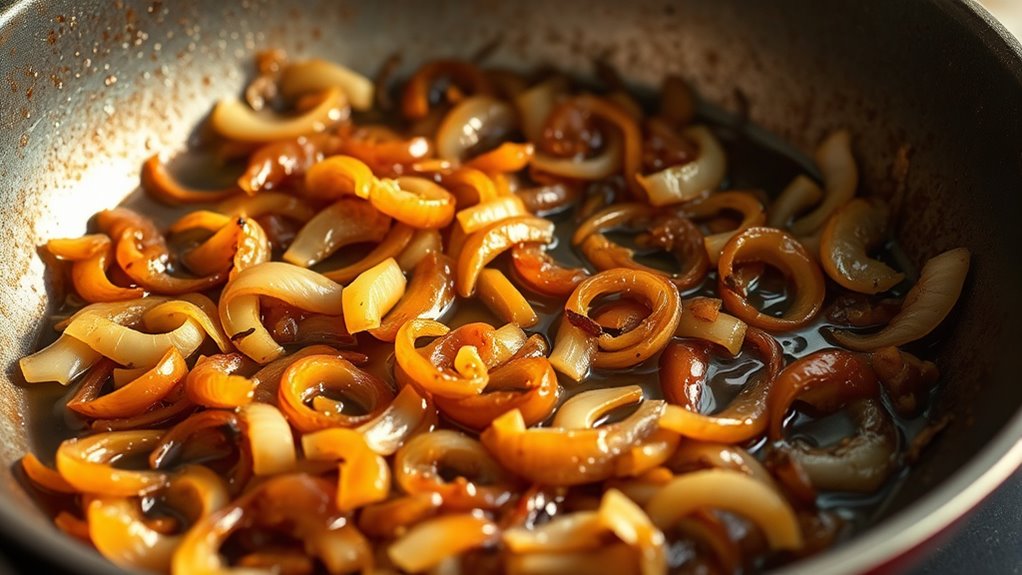
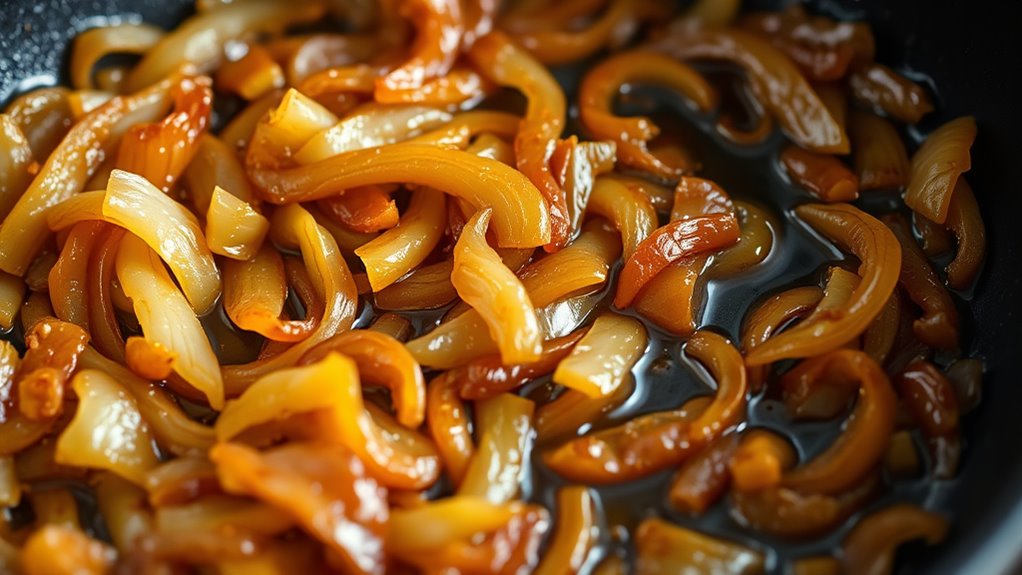
What to Expect During the 30-Minute Caramelization
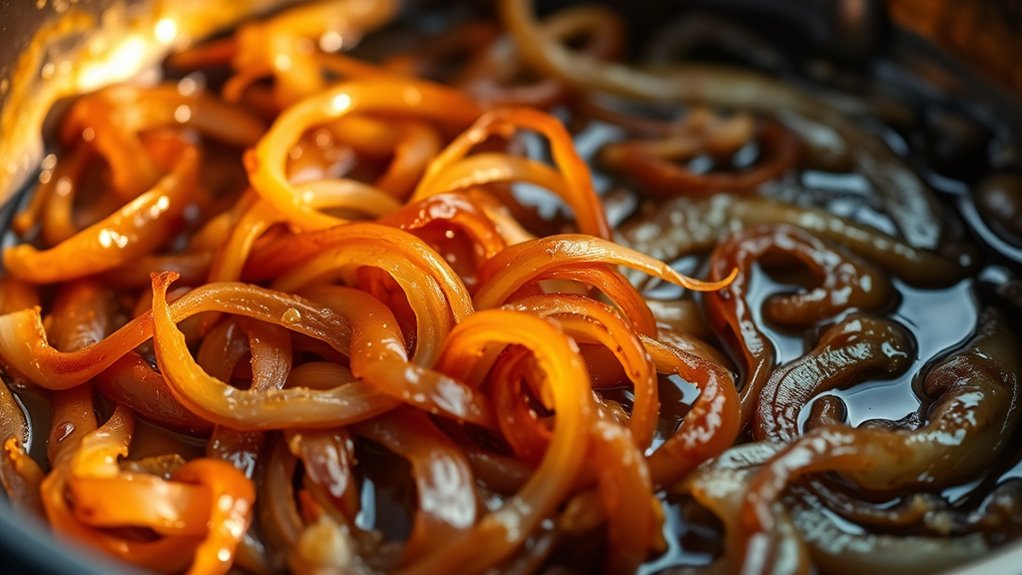
As you begin the 30-minute caramelization process, you’ll notice the onions gradually soften and turn a deep golden brown. During this time, the caramelization science kicks in, transforming sugars into rich, complex flavors. Expect to see:
Slowly caramelized onions develop rich flavor and a beautiful deep golden hue.
- A sweet aroma filling your kitchen, signaling progress.
- The onions developing a glossy, sticky texture as natural sugars break down.
- A gradual color change from translucent to deep amber, indicating they’re nearing perfection.
Keep in mind, proper onion storage beforehand guarantees freshness, which impacts caramelization quality. As the sugars caramelize, you’ll understand how patience enhances flavor depth without stirring. This slow process allows the natural sweetness to shine, making your onions irresistibly savory and perfect for any dish.
Troubleshooting Common Issues Without Stirring

Even without stirring, caramelizing onions can sometimes lead to issues like uneven browning or burning. To troubleshoot, start with proper onion storage—use fresh, dry onions stored in a cool, dark place to guarantee even cooking. If you notice uneven color, it might be due to inconsistent heat or moisture content. Adjust your heat to a low, steady level to promote uniform caramelization. Using the right caramelization techniques, such as spreading onions evenly in the pan and avoiding overcrowding, helps prevent hotspots that cause burning. Keep an eye on the edges, which tend to brown faster. If burning occurs, lower the heat immediately and add a splash of water or broth to deglaze and loosen any caramelized bits. These steps help manage issues without stirring.
Tips for Enhancing Flavor During the Resting Period
Allowing caramelized onions to rest after cooking enhances their flavor by letting the natural sugars settle and deepen. During this period, you can boost their richness with simple techniques. First, consider experimenting with different onion varieties—sweet Vidalia or yellow onions can offer unique sweetness that intensifies as it rests. Second, add flavor enhancers like a splash of balsamic vinegar or a pinch of salt to elevate their taste profile. Third, cover the onions loosely with foil to trap steam, allowing flavors to meld further. Resting time allows these subtle adjustments to develop fully, transforming a basic caramelized onion into a complex, flavorful addition to any dish. Use these tips to maximize the depth and richness of your onions effortlessly.
Using Your Caramelized Onions in Delicious Recipes
Once your caramelized onions have rested and developed their rich flavors, it’s time to put them to good use in a variety of tasty recipes. Proper onion storage ensures they stay fresh and flavorful for future dishes. Use your caramelized onions in burgers, sandwiches, pizzas, or stirred into soups and stews for added sweetness and depth. Understanding caramelization science helps you appreciate how heat transforms the onions’ sugars into complex flavors, making them a versatile ingredient. Incorporate them into salads, pasta, or quesadillas for a savory punch. Keep a jar in your fridge for quick flavor boosts, or freeze small portions for later use. With these tips, your caramelized onions will elevate countless recipes and delight your taste buds.
Frequently Asked Questions
Can I Caramelize Onions Without Any Oil or Fat?
You can achieve oil-free caramelization by using non-stick cookware, which helps prevent onions from sticking without added fats. While oil enhances flavor and browning, it’s not essential for caramelizing onions. Keep the heat low and cook slowly, stirring occasionally to prevent burning and ensure even browning. This method allows for healthier, oil-free caramelization, giving you sweet, tender onions perfect for any dish.
What Type of Cookware Prevents Sticking Without Stirring?
Ever wondered which cookware keeps your onions from sticking without constant stirring? Non-stick pans are your best bet—they prevent food from clinging, making caramelization easier. But if you prefer stainless steel, be prepared for a bit more technique; with proper heat and patience, it can work beautifully. Both options have their secrets, but choosing the right pan can make your caramelizing process smoother and more satisfying.
Is It Necessary to Cover the Pan During Caramelization?
You don’t need to cover the pan during caramelization, but doing so can help retain steam, making onions cook more evenly. Covering the pan traps moisture, which can slow down browning, so if you want deep caramelization, leave it uncovered. However, if you prefer softer, less crisp onions, covering can speed up the process and keep them moist. Adjust based on your desired texture and flavor.
How Do I Know When the Onions Are Perfectly Caramelized?
You’ll know your onions are perfectly caramelized when they turn a deep, rich brown color, and their sugar content has fully developed, giving them a sweet, complex flavor. Keep an eye on the color and aroma, which should smell sweet and toasty. Different onion varieties caramelize at different rates, so adjust your cooking time accordingly. Trust your senses—your onions should be tender, sweet, and beautifully browned.
Can I Reuse Caramelized Onions in Multiple Recipes?
Yes, you can reuse caramelized onions in multiple recipes, enhancing their flavor and making your dishes more versatile. Store leftovers in an airtight container in the fridge for up to a week or freeze them for longer storage. Use them to add depth to soups, sandwiches, or pasta. Proper storage tips guarantee they stay fresh and flavorful, maximizing your recipe versatility and saving you time in future meals.
Conclusion
Now that you know how to caramelize onions without stirring, you’re ready to save time and effort. Did you know that slow-cooked, unstirred onions develop a deeper flavor profile, making them perfect for gourmet dishes? With just a little patience, you’ll achieve rich, sweet onions effortlessly. So go ahead, experiment with your favorite recipes—your taste buds will thank you for the delicious results!