How-To Guides
How to Clean an Air Fryer: Keep It Sparkling and Efficient
Discover essential tips for cleaning your air fryer effectively and keeping it in prime condition—your cooking results will thank you!
To clean your air fryer and keep it sparkling and efficient, start by unplugging it and letting it cool. Remove the basket and tray, then wash them with warm, soapy water. For stubborn residue, use a baking soda paste or lemon juice. Wipe down the interior with a damp cloth and clean the heating element carefully. Make sure all parts are dry before reassembling. Regularly using disposable liners can simplify cleanup, too. A deep clean each month helps maintain performance and extends your air fryer's lifespan. Discover even more effective tricks and methods to keep your air fryer in top shape!
Key Takeaways
- Unplug and allow the air fryer to cool before cleaning to ensure safety and prevent burns.
- Use warm, soapy water for removable parts, rinsing thoroughly and air drying to maintain their integrity.
- For tough residues, apply a baking soda paste or use vinegar and lemon juice for effective grease removal.
- Regularly clean the heating element and interior surfaces to prevent smoke and ensure optimal performance.
- Consider using disposable liners to simplify cleanup and avoid grease buildup in the air fryer.
Importance of Regular Cleaning
Cleaning your air fryer regularly isn't just a chore; it's essential for maintaining its performance and ensuring food safety. By committing to regular cleaning, you're preventing grease buildup and avoiding potential malfunctions.
After each use, take a moment to eliminate odors and food residue, ensuring your next meal tastes fresh and untainted. Regular maintenance not only enhances hygiene but also simplifies future cleanings, making it easier to keep your air fryer in top shape.
If you're a heavy user, don't forget the importance of monthly deep cleaning to prevent any residue from becoming caked on and difficult to remove. A well-maintained air fryer can last longer, ultimately saving you time and money in the long run.
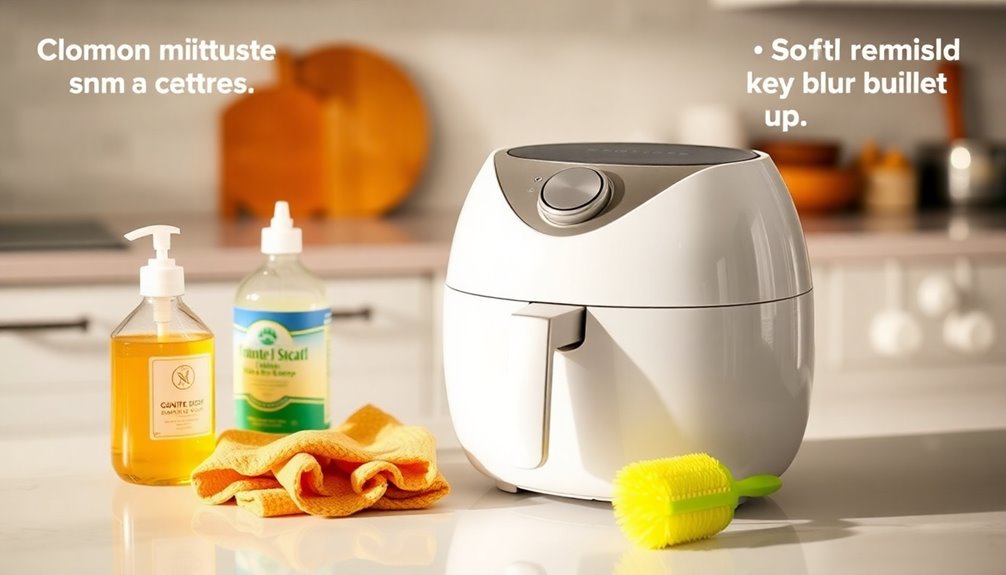
Best Cleaning Methods
To keep your air fryer in prime condition, using the right cleaning methods is essential. Start by cleaning your air fryer with warm soapy water for the removable parts, followed by rinsing and air drying to prevent buildup. For tougher residues, a baking soda paste with lemon juice works wonders. You can also steam your air fryer using vinegar and lemon juice to dissolve grease, although this method takes longer. Don't forget, referring to the manufacturers instructions guarantees you're using safe methods. To make cleanup easier, consider using disposable aluminum foil or parchment liners.
Method | Time Required | Effectiveness |
---|---|---|
Warm Soapy Water | 10 minutes | Moderate |
Baking Soda Paste | 5 minutes | High |
Vinegar & Lemon | 42 minutes | Very High |
Powerwash Mixture | 3 minutes | Extremely High |
Liners | Ongoing | Low (prevents mess) |
Quick Cleaning Steps
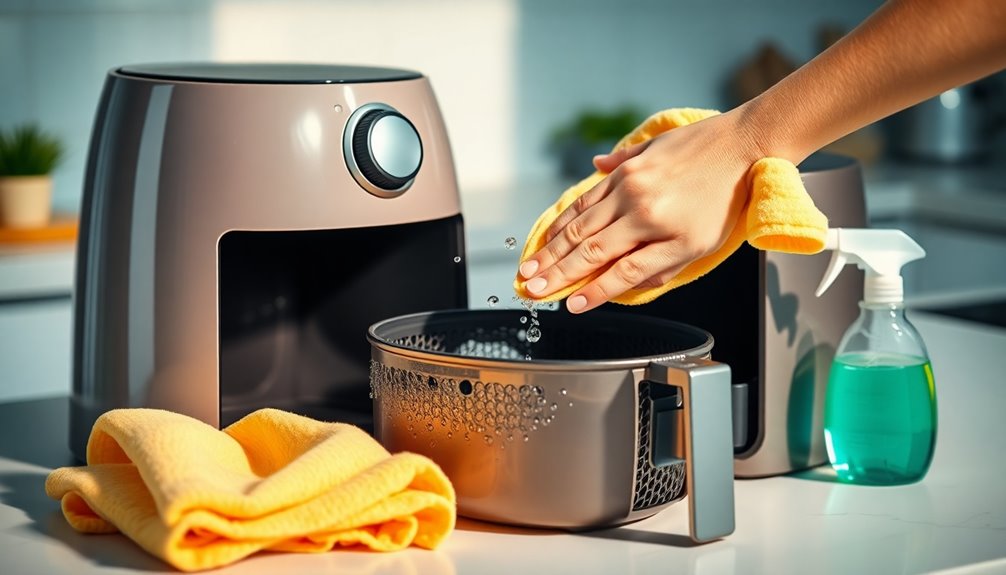
After using your air fryer, it's essential to clean it right away to keep grease and food particles from building up.
You don't need many tools—just some warm, soapy water and a damp cloth will do the trick.
With a quick routine, you'll have your air fryer ready for the next use in no time.
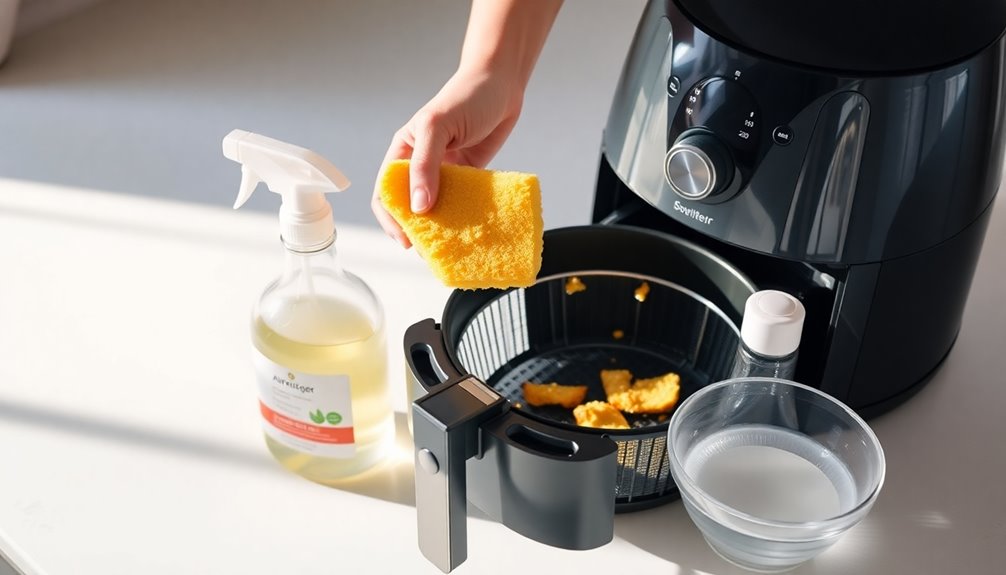
Immediate Post-Use Cleaning
Once you've finished cooking, it's crucial to clean your air fryer promptly to prevent stubborn grease and residue from setting in.
Here's a quick cleaning process to keep your air fryer in prime shape:
- Unplug the air fryer and let it cool down completely.
- Remove the basket and tray, then wash them with warm, soapy water for effective grease removal.
- Wipe down the interior surfaces, including the heating element, with a damp cloth to eliminate crumbs and oil.
- Ensure all removable components are thoroughly dried before reassembling to avoid moisture-related issues or odors.
For ideal maintenance, tackle this quick clean, especially after messy meals, and keep your air fryer sparkling and efficient!
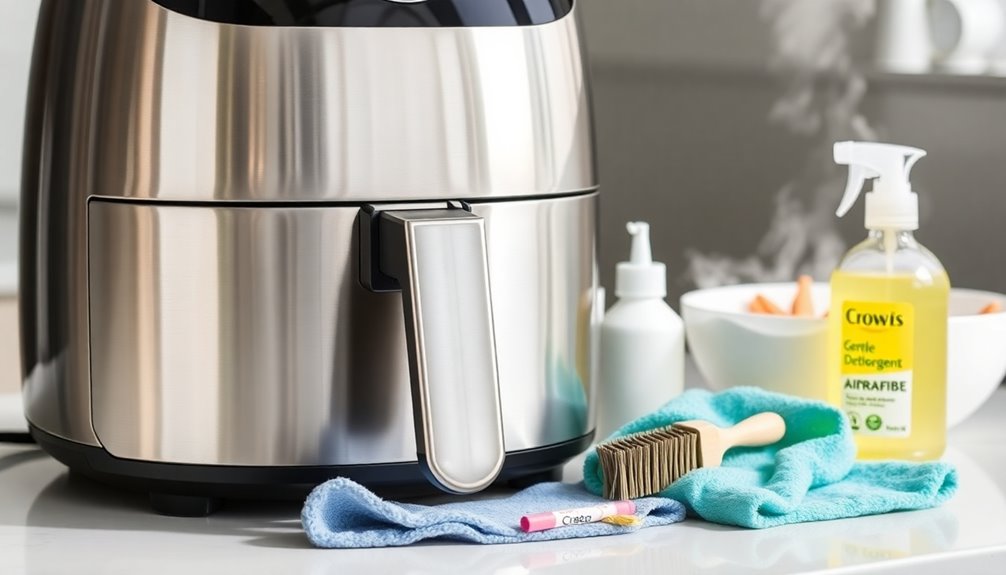
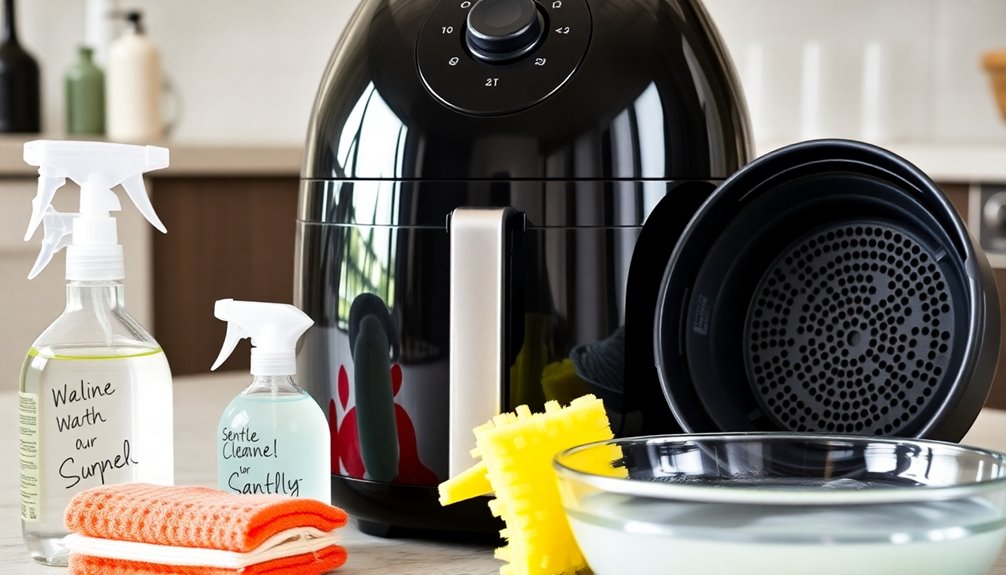
Essential Tools Needed
Keeping your air fryer clean doesn't just rely on prompt post-use cleaning; having the right tools makes the job easier and more effective. Here's a quick list of essentials:
Tool | Purpose | Tips |
---|---|---|
Soft Sponge | Remove grease and food residue | Use with warm water and dish soap |
Soft-Bristled Brush | Scrub hard-to-reach areas | Perfect for stuck-on food |
Baking Soda | Tackle tough stains | Mix with water for a paste |
Vinegar or Lemon | Eliminate odors | Use in steaming for better results |
Disposable Liners | Catch grease | Reduce extensive cleaning afterward |
With these tools, you'll keep your air fryer's nonstick coating intact and maintain its efficiency. Regular cleaning is essential for optimal performance, similar to how air purifiers require consistent maintenance to function effectively.
Deep Cleaning Techniques
To maintain your air fryer's performance, deep cleaning is essential, especially if you use it frequently.
Follow these steps to effectively clean your air fryer:
- Add a cup of water to the basket, set it on high for a few minutes to loosen caked-on food.
- Submerge the basket and tray in hot, soapy water for 30 minutes, then use a soft-bristled brush to scrub away residue.
- Use a toothpick to reach hard-to-clean areas, ensuring all food particles are removed.
- Wipe the interior surfaces with a damp cloth after cleaning.
Common Mistakes to Avoid
While it might seem simple to clean an air fryer, there are several common mistakes that can compromise its efficiency and longevity.
First, avoid using abrasive cleaners or sponges; they can damage the non-stick coating of your air fryer basket and shorten its lifespan.
Don't forget to clean the heating element, as accumulated grease can lead to smoke or a potential fire hazard.
Also, make certain all parts are completely dry before reassembling to prevent malfunctions or mold growth.
Overcrowding your air fryer can create a bigger mess, making cleaning more challenging.
Finally, regularly use dishwasher safe liners, like disposable aluminum foil or parchment paper, to minimize mess and simplify your cleaning routine.
Safety Precautions
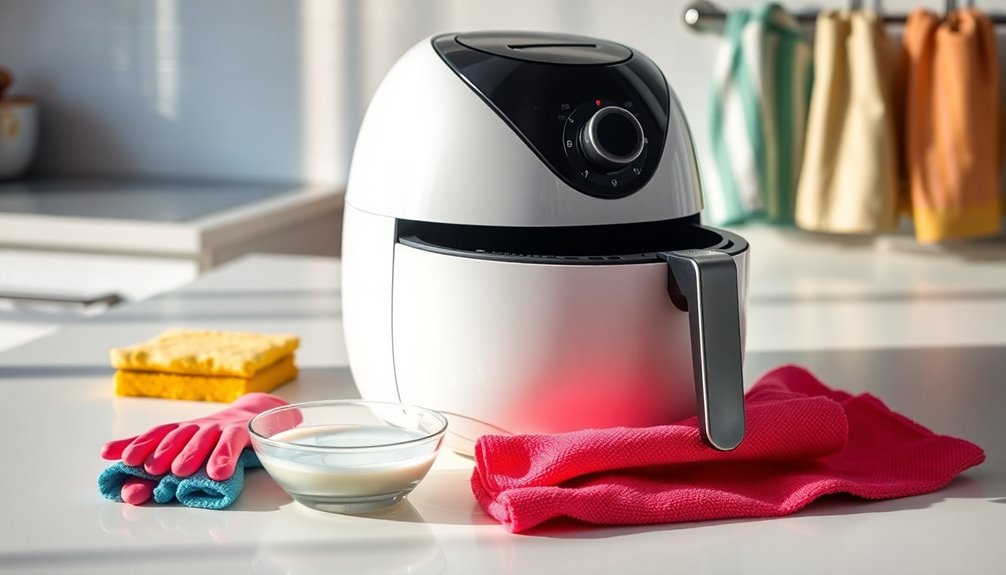
Before you start cleaning your air fryer, it's crucial to take some safety precautions to protect yourself and your appliance.
Follow these steps to guarantee a safe cleaning process:
- Unplug the air fryer: This prevents electrical shock and keeps you safe during maintenance.
- Allow it to cool: Make sure your air fryer is completely cool to avoid burns and make cleaning easier.
- Avoid submerging electrical parts: Keep any electrical components out of water to prevent damage or malfunction.
- Use non-abrasive cleaning tools: Protect the nonstick coating and maintain the appliance's integrity by sticking to gentle cleaning tools.
Lastly, always follow the manufacturer's guidelines to guarantee safe and effective air fryer maintenance.
Removing Sticky Residue
When you notice sticky residue in your air fryer, don't worry—there are easy ways to tackle it.
A simple baking soda paste can work wonders, and for tougher messes, soaking the parts in soapy water can help loosen the grime.
Let's explore these effective methods to keep your air fryer clean and functional.
Baking Soda Paste Method
To effectively tackle sticky residue in your air fryer, creating a baking soda paste is a simple yet powerful solution. Here's how you can do it:
- Mix baking soda with water until you get a thick consistency.
- Apply the baking soda paste directly to the sticky areas.
- Let it sit for several minutes to break down the residue.
- Gently scrub with a non-abrasive sponge or soft-bristled toothbrush.
After scrubbing, wipe the area with a damp cloth to remove the paste, then follow up with a clean damp cloth for extra cleanliness. Regularly using this method not only helps you maintain your air fryer's efficiency but also prevents sticky messes from becoming a hassle! Additionally, maintaining a clean cooking environment can contribute to better indoor air quality, as air purifiers reduce allergens that may accumulate during cooking.
Soaking for Stubborn Residue
For stubborn residues that resist scrubbing, soaking your air fryer's removable parts can be a game changer. Fill a basin with hot water and add a few drops of soap. Place the basket and tray in the solution and let them soak for about 30 minutes. This process helps dissolve sticky residue, making it easier to clean afterward.
Soaking Steps | Purpose |
---|---|
Fill basin with hot water | Loosens residue |
Add dish soap | Enhances cleaning power |
Soak for 30 minutes | Breaks down stubborn grime |
Gently scrub after | Removes remaining residue |
Rinse and dry | Prepares for next use |
After soaking, you'll find it's much easier to scrub away any remaining residue.
Degreasing Your Air Fryer
Keeping your air fryer in prime condition requires regular degreasing to maintain performance and prevent grease buildup.
To clean the air fryer effectively, follow these steps:
- Mix warm water with a few drops of dish soap, preferably a grease-fighting soap like Dawn Ultra.
- Use a soft cloth or sponge to scrub the basket and interior, focusing on areas with grease buildup.
- For strong odors, rub a lemon over the basket and let it sit for 30 minutes before washing.
- Don't forget to check and clean the fan and internal surfaces to guarantee maximum airflow.
With these simple steps, your air fryer will stay sparkling clean, guaranteeing delicious results every time!
Dishwasher vs. Hand Washing
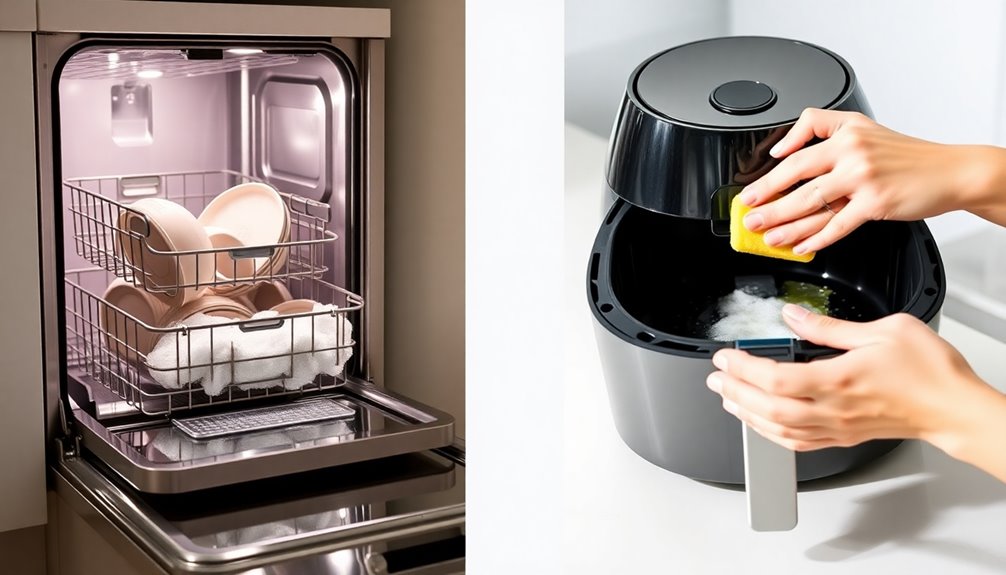
After degreasing your air fryer, you might wonder about the best cleaning method: dishwasher or hand washing. Many air fryer baskets are dishwasher safe, but always check your owner's manual. While dishwashers can handle normal cleaning cycles, they may not be suitable for all models, particularly when it comes to non-stick coatings.
Method | Pros | Cons |
---|---|---|
Dishwasher | Convenient, less effort | Can damage non-stick coatings |
Hand Wash | Gentle on coatings, thorough | Takes more time and effort |
Prevents buildup | Must scrape off food residues |
Hand washing with warm, soapy water often guarantees better longevity for your air fryer, especially after messy recipes.
TikTok Cleaning Hacks Explained
You've probably seen the viral TikTok hack where you fill your air fryer with soap and water, then air fry it to tackle tough stains.
While many users claim it works, you might still need to scrub or soak for those stubborn spots.
Let's explore how effective these hacks really are and consider some alternative cleaning techniques for your air fryer.
Viral Cleaning Methods Overview
As viral cleaning hacks gain traction on social media, one TikTok method for cleaning air fryers has captured attention with its promise of effortless maintenance.
This cleaning method involves filling your air fryer with a mixture of soap and water, then air frying at 350°F for five minutes. Users rave about the results, but you might still need some extra effort.
Here's why you might want to contemplate this hack:
- It's quick and convenient.
- You can multitask while it cleans.
- You'll see brown water, indicating dirt removal.
- It's a fun way to engage with your air fryer.
However, remember that traditional methods may be more effective for stubborn stains and tough residue.
Effectiveness of TikTok Hacks
How effective are TikTok cleaning hacks for your air fryer? While the viral method of filling the chamber with soap and water and air frying at 350°F for five minutes can help, it often only removes some residue.
You might find that tough stains remain, requiring you to soak your air fryer parts in soapy water afterward. Users commonly report needing a thorough scrubbing with a sponge or cloth to achieve that like-new look after using the hack.
Although it's a convenient approach, you shouldn't rely solely on this method. For best results, combine TikTok hacks with traditional cleaning techniques, especially if you use your air fryer frequently and want it to stay in top shape.
Alternative Cleaning Techniques Suggested
What're some effective alternatives to TikTok cleaning hacks for your air fryer?
While the TikTok method with soap and water can help, you might find it insufficient for stubborn stains.
Here are four alternative cleaning methods that really work:
- Baking Soda Paste: Mix baking soda with a bit of water to create a paste. Apply it to stains and let it sit before scrubbing.
- Hydrogen Peroxide: Combine with baking soda for a powerful stain-fighting duo.
- Soak in Warm Water: Let the components soak in hot, soapy water for easier cleaning.
- Scrubbing Tools: Use non-abrasive scrubbers to tackle tough spots without damaging your air fryer.
These techniques can effectively keep your air fryer sparkling and efficient!
Frequently Asked Questions
How Do You Clean an Air Fryer Efficiently?
To clean your air fryer efficiently, start by unplugging it and letting it cool down completely.
Remove the basket and tray, washing them with warm, soapy water right after use.
For quick cleaning, wipe the interior with a damp cloth.
If you encounter tough stains, use a baking soda and vinegar paste, letting it sit before scrubbing.
Remember to deep clean your air fryer monthly to keep it in top shape and extend its lifespan.
Can I Put Foil in My Air Fryer to Keep It Clean?
Yes, you can put foil in your air fryer, but you've gotta use it wisely.
Make sure it doesn't block air circulation, as that's essential for even cooking. Place it below your food instead of wrapping it, so it stays put.
Check your air fryer's manual for any specific rules on foil use.
What Can You Line an Air Fryer With to Keep It Clean?
You can line your air fryer with disposable aluminum foil or parchment paper to keep it clean.
Just make sure the liners are compatible with your model to avoid any issues. Always leave some space around the edges for proper air circulation, which is key for even cooking.
Using perforated liners can help maintain airflow while protecting against messes. This simple step can save you time on deep cleaning later!
How Do I Keep Moisture in My Air Fryer?
To keep moisture in your air fryer, start by using marinades or a light oil coating on your food.
Cooking at slightly lower temperatures helps retain moisture, too. You can add a small amount of water or broth to the basket for steam, which works well for veggies and meats.
Avoid overcrowding the basket; cook in smaller batches for even cooking and better moisture retention.
This way, you'll enjoy juicier, flavorful dishes!
Conclusion
Keeping your air fryer clean isn't just about aesthetics; it's essential for maintaining its efficiency and lifespan. Did you know that regular cleaning can boost your appliance's performance by up to 30%? By incorporating simple cleaning routines and avoiding common mistakes, you'll enjoy healthier meals and a longer-lasting device. So, take a few moments after each use to keep your air fryer sparkling, and you'll reap the benefits in both flavor and functionality!
How-To Guides
How to Use an Air Fryer Like a Pro: Beginner’s Step-by-Step Guide
On your journey to mastering air frying, discover essential tips and tricks that will elevate your cooking game in ways you never imagined!
To use an air fryer like a pro, start by setting it up on a flat surface and familiarizing yourself with the controls. Prepare your ingredients by cutting them into uniform sizes for even cooking and marinating meats as needed. Preheat the air fryer to 350°F-400°F for about 3-5 minutes. When cooking, coat foods lightly with oil and avoid overcrowding the basket for optimal air circulation. Always monitor cooking times, as you'll need less time compared to traditional methods. Finally, remember to clean it after use for better performance. There's so much more to explore about perfecting your air frying skills!
Key Takeaways
- Set up your air fryer on a stable surface, ensuring all parts are properly assembled according to the manual for optimal performance.
- Prepare ingredients by cutting them into uniform sizes and marinating proteins to enhance flavor and ensure even cooking.
- Preheat the air fryer to the recommended temperature for even cooking and improved texture, monitoring the digital display for completion.
- Use proper cooking techniques, including shaking the basket, adjusting cooking times, and lightly coating fresh foods with oil for best results.
- Maintain safety by keeping the air fryer away from children, using oven mitts, and regularly cleaning to prevent grease buildup and ensure longevity.
Setting Up the Air Fryer
Setting up your air fryer is a straightforward process that lays the foundation for delicious meals.
First, plug the cord into a wall outlet and ensure your air fryer sits on a flat, stable surface. Check for any accessories, like the frying basket and grate, and make sure they're properly assembled.
Next, read the instruction manual to get familiar with the specific features and controls of your model. Pay particular attention to the control panel, noting the temperature and timer dials. A good understanding of temperature guidelines will help you select the right settings for different foods.
This knowledge will make your cooking experience smoother and more enjoyable. Remember, a well-set air fryer leads to perfectly cooked food, so take a moment to get everything ready before you dive into your recipe!
Preparing Ingredients
Now that your air fryer is set up and ready to go, it's time to prepare your ingredients for cooking.
Start by cutting your food into uniform sizes for even cooking; think fries or wedges for potatoes and bite-sized pieces for chicken. Remember to clean and prep shrimp, leaving them whole or cutting as per your recipe.
For seasoning, mix salt and spices with a bit of oil to keep them from blowing away. Marinate chicken in a buttermilk and hot sauce mix for at least 15 minutes. Cooking with an air fryer allows for a healthier cooking option as it requires minimal or no oil.
When coating, toss chicken in breadcrumbs or cornflakes, and don't forget to wrap jalapeño poppers with bacon.
Finally, arrange everything in an even layer in the air fryer basket, leaving space for hot air circulation.
Preheating and Settings
Preheating your air fryer is crucial for achieving perfectly cooked meals. Start by checking your manual for specific preheating instructions tailored to your model. If your air fryer has a preheat function, use it by selecting the appropriate setting or programming the cook time. Typically, you'll want to preheat between 350°F to 400°F for about 3-5 minutes. Keep an eye on the digital display—many models will beep when preheating is complete. Avoid overheating, as this can lead to burned food. Proper preheating ensures even cooking and enhances the overall texture and flavor of your air-fried dishes.
Cooking Techniques
To achieve deliciously crispy meals in your air fryer, it's essential to master various cooking techniques.
Start by cutting vegetables and potatoes into smaller pieces for even browning. Pat fresh foods dry and coat them lightly with oil—about one tablespoon per kilogram. For frozen foods, you can skip the oil.
When cooking meat, dry the skin and apply a thin layer of oil for crispiness. Use the perforated basket for airflow and shake it once or twice during cooking. This will help ensure that you achieve optimal cooking results by allowing the hot air to circulate effectively.
Adjust cooking times by reducing them by 20% compared to conventional recipes. Remember to check doneness and flip items midway for balanced crispness.
Lastly, lightly spritz oil for that extra-crispy exterior and ensure proper basket placement for airflow.
Safety Precautions
Mastering cooking techniques in your air fryer is only one part of the process; keeping safety in mind is just as important.
Always place your air fryer on a heat-resistant surface and maintain at least 5 inches of space from walls or other objects. While it's cooking, avoid touching anything except the handle—you can use oven mitts if needed. Be aware that certain air fryer parts can reach temperatures that cause burns within seconds, so always handle with care.
Keep it out of reach of kids and pets until it's cool. Always plug it into a grounded outlet and unplug it after use to prevent accidental start-ups.
Remember to avoid overcrowding the basket and never use metal utensils. If you notice strange smells or sounds, unplug the fryer immediately to check for issues.
Stay safe and enjoy your cooking!
Post-Cooking Maintenance
Once you've finished cooking with your air fryer, it's essential to prioritize maintenance to keep it in top shape.
First, unplug the air fryer and let it cool completely. Remove the basket, pan, or tray, and wash them with warm, soapy water. For tougher messes, soak them for 10-15 minutes.
Wipe the bottom chamber with a damp cloth and ensure all parts are dry before reassembling. For deep cleaning, fill the basket with a cup of water and run the fryer at a high setting for a few minutes. Regular cleaning is crucial to maintain appliance longevity and ensure optimal performance.
Don't forget to clean the heating element with a soft brush. Regularly clean the air fryer to prevent grease buildup and make your cooking experience smoother.
Frequently Asked Questions
Can I Use Aluminum Foil in the Air Fryer?
Yes, you can use aluminum foil in your air fryer, but with some precautions.
Make sure the foil doesn't cover all the holes in the basket to allow proper airflow. Weigh it down to prevent it from blowing around while cooking.
Avoid placing it at the bottom of the fryer, and be cautious with acidic foods, as they can react with the foil.
Using foil can help reduce sticking and make cleanup easier.
What Types of Food Are Best for Air Frying?
When you're air frying, focus on proteins like chicken, pork, and salmon for quick, flavorful meals.
Don't forget vegetables like potatoes, broccoli, and cauliflower; they turn out perfectly crispy.
Seafood like shrimp and crab works well too, as does tofu for a meat alternative.
You can even whip up omelets and muffins, maximizing versatility.
Experiment with different foods, and you'll discover just how delicious air frying can be!
How Do I Know When Food Is Done Cooking?
To know when your food's done cooking, rely on visual cues and cooking times. While a golden brown color might suggest doneness, it's not always reliable.
Use a food thermometer for accuracy, especially with meat; aim for 165°F for poultry and 145°F for fish.
Check halfway through cooking, and if it's not ready, continue in 5-minute increments.
Remember to shake or flip food as needed for even cooking!
Can I Cook Multiple Items at Once?
Yes, you can cook multiple items at once in your air fryer, but you'll need to choose foods with similar cooking times and temperatures.
Cut everything into uniform sizes and avoid overcrowding the basket to ensure even cooking.
You might need to adjust the cooking time and temperature slightly, so keep an eye on your food and shake the basket occasionally for even browning.
With practice, you'll master cooking a variety of dishes together!
Do I Need to Adjust Cooking Times for Different Air Fryer Models?
Yes, you absolutely need to adjust cooking times for different air fryer models.
Since wattage and size vary, higher wattage models will cook your food faster than lower wattage ones. Similarly, larger air fryers typically take longer than smaller, compact models.
Always check your specific model's guidelines, and feel free to reduce cooking time by 20-30% if adapting from traditional oven recipes.
Monitoring your food closely will help ensure it's cooked perfectly every time.
Conclusion
Now that you've mastered the basics of using an air fryer, you're ready to whip up delicious, healthier meals with confidence. Remember to set it up properly, prep your ingredients, and adjust the settings as needed. Experiment with different cooking techniques, and don't forget to follow safety precautions. With a little practice, you'll be air frying like a pro in no time. Enjoy the tasty results and the convenience that comes with this amazing kitchen gadget!
How-To Guides
How to Reheat Wings in Air Fryer: Crisp Up Leftovers in Minutes!
Learn the secret to reviving leftover wings in an air fryer for that perfect crispy texture—your taste buds will thank you!
To reheat wings in an air fryer, preheat it to 375°F (190°C). Arrange your wings in a single layer in the basket to avoid overcrowding. Heat them for about 5-6 minutes, flipping halfway through to guarantee even crisping. Use a food thermometer to check that the internal temperature reaches at least 165°F (74°C). For extra moisture, consider brushing the wings with oil or melted butter before cooking. This method brings back the delicious crispy texture and juicy flavor of your leftovers in just minutes. Stick around for more tips to make the most of your air-fried delights!
Key Takeaways
- Preheat the air fryer to 375°F (190°C) for optimal crispiness before adding wings.
- Arrange wings in a single layer to avoid overcrowding and ensure even heating.
- Heat wings for 5-6 minutes, flipping halfway to achieve a uniform crisp.
- Check the internal temperature with a thermometer; it should reach at least 165°F (74°C).
- Optionally, brush wings with oil or melted butter to enhance moisture and flavor.
Best Methods for Reheating Wings
When you want to enjoy leftover wings, using an air fryer is the best method to bring them back to life. This cooking technique preserves the crispy texture while ensuring your sauced chicken wings remain juicy.
Start by preheating your air fryer to 375°F (190°C) for ideal results. Arrange the wings in a single layer to avoid overcrowding, which helps with even reheating. The cooking time is about 5-6 minutes, and don't forget to flip or shake them halfway through.
For sauced wings, consider using a small air fryer pan or lining the basket with tin foil to prevent sticking. Always check the internal temperature, making sure it reaches at least 165°F (74°C) for safe consumption.
Enjoy your revitalized wings!
Steps to Reheat in Air Fryer
To reheat your wings in an air fryer effectively, start by preheating the appliance to 375°F (190°C). Next, arrange the wings in a single layer in the air fryer basket for even cooking. Avoid overcrowding; you might need to reheat chicken wings in batches. Cook for 5-6 minutes, flipping or shaking them halfway to achieve that crispy texture.
Check the internal temperature at the 5-minute mark with a food thermometer, confirming it reaches 165°F (74°C) for safety. For added moisture, consider lightly brushing the wings with oil or melted butter before reheating.
Step | Action |
---|---|
1. Preheat | Set to 375°F (190°C) |
2. Arrange | Place wings in a single layer |
3. Cook | Heat for 5-6 minutes |
4. Check temperature | Confirm it reaches 165°F (74°C) |
Tips for Moist and Crispy Wings
For perfectly moist and crispy wings, it's essential to start with a well-preheated air fryer at 360°F (182°C) for 3-5 minutes; this helps lock in moisture right from the beginning.
Brush your wings lightly with cooking oil or melted butter before reheating leftover wings to enhance moisture retention.
When you're ready, arrange the wings in a single layer in the air fryer basket to guarantee even cooking and prevent drying out.
While reheating, monitor the wings closely, aiming for an internal temperature of 165°F (74°C) to maintain juiciness.
If you notice the wings browning too quickly, consider using aluminum foil to cover them, helping to retain moisture while achieving that desirable crispiness. Additionally, hula hooping can be a fun way to burn off some calories after enjoying those wings, as it burns approximately 200-400 calories per hour.
Storing Leftover Chicken Wings
Properly storing leftover chicken wings is essential if you want to enjoy them later without sacrificing their flavor and texture.
First, let the wings cool to room temperature to prevent moisture buildup inside the container. Use an airtight container or a zippered plastic bag for ideal freshness, ensuring you don't stack wings tightly to avoid sogginess.
Label the container with the date of storage to easily track freshness. If you plan to keep them longer, consider freezing wings. They can last up to 3 months in a regular freezer and up to a year in a deep freezer.
Following these steps will help you crisp up leftovers and enjoy your wings at their best later on!
Serving Suggestions for Reheated Wings
While reheating wings is a great way to enjoy leftovers, pairing them with the right sides can elevate your meal even further.
Consider serving your reheated wings with classic celery and carrot sticks for a crisp crunch that complements their flavor. A variety of dipping sauces like ranch, blue cheese, or spicy buffalo will enhance your taste experience.
For something lighter, incorporate wings into salads or wraps, adding greens and fresh vegetables for a balanced meal. If you're in the mood for comfort food, mac and cheese or French fries make excellent accompaniments.
Don't forget to garnish your reheated wings with fresh herbs like parsley or cilantro for a pop of color and extra flavor!
Frequently Asked Questions
How Do I Make Leftover Wings Crispy in an Airfryer?
To make leftover wings crispy in an air fryer, start by preheating it to 360°F (182°C) for about 3-5 minutes.
Arrange the wings in a single layer, avoiding overcrowding. Lightly spray them with cooking oil to enhance crispiness.
Air fry at 375°F (190°C) for 5-6 minutes, flipping halfway through.
Check the internal temperature to guarantee they reach 165°F (74°C) for safe eating while keeping that delicious crunch.
Enjoy your wings!
How Do You Make Leftover Wings Crispy Again?
Did you know that air fryers can reduce fat content in food by up to 75%?
To make your leftover wings crispy again, start by preheating your air fryer to 375°F.
Arrange the wings in a single layer, lightly spray them with oil, and cook for 5-6 minutes, flipping halfway through.
This method not only revives their crunch but also guarantees they're heated evenly and safely to 165°F.
Enjoy your delicious wings!
How to Make Leftover Chicken Crispy in Air Fryer?
To make leftover chicken crispy in an air fryer, start by preheating it to 375°F (190°C).
Lightly spray the basket with cooking oil to prevent sticking and enhance crispiness.
Arrange your chicken in a single layer, ensuring not to overcrowd.
Cook for about 5-6 minutes, flipping halfway through for even crisping.
For extra flavor, you can brush the chicken with a little oil or melted butter before reheating.
Enjoy your deliciously crispy chicken!
How Long Should I Reheat Wings in the Air Fryer?
You've got those delicious wings, but they're not as crispy as you'd like.
To reheat them in the air fryer, set it to 375°F (190°C). Arrange your wings in a single layer, and cook for about 5-6 minutes.
Flip or shake them halfway through for even crispiness. Remember, if they're larger or smaller, you might need to adjust the time slightly.
Always check they reach 165°F (74°C) for safety!
Conclusion
To sum up, reheating wings in an air fryer is the ultimate game-changer for enjoying leftover chicken. You'll be amazed at how quickly you can transform soggy bites into crispy, mouthwatering delights. Just follow the steps, and don't forget those handy tips for keeping them moist. With your perfectly reheated wings, you'll feel like a culinary wizard, impressing everyone at the table. So go ahead, dig in, and relish every flavorful moment!
How-To Guides
Can You Put Wax Paper in an Air Fryer? What You Must Know
Wondering if wax paper is safe for your air fryer? Discover the surprising truth that could change your cooking game forever!
You shouldn't put wax paper in an air fryer. It melts at temperatures above 200°F, which means it can ignite or contaminate your food. This not only leads to a mess but also poses a fire hazard. Instead, opt for parchment paper, which withstands higher temperatures and is safe to use. Silicone mats or aluminum foil are also good alternatives, but be cautious with airflow. Always consult your air fryer manual for the best practices. If you're curious about the safest ways to cook with these materials, there's plenty more helpful info to uncover.
Key Takeaways
- Wax paper melts at temperatures above 200°F, posing a risk of food contamination and fire hazards in air fryers.
- Manufacturers strongly advise against using wax paper due to safety concerns and potential messy cleanup.
- Safe alternatives include parchment paper, aluminum foil, and silicone mats, designed to withstand high temperatures.
- Parchment paper can handle temperatures up to 420-450°F, making it ideal for air frying without risks.
- Always consult your air fryer manual for recommended materials and best practices to ensure safe cooking.
Risks of Using Wax Paper
When considering whether to use wax paper in an air fryer, you should be aware of the risks involved. Wax paper isn't suitable for high temperatures; it melts at temperatures above 200°F (94ºC).
This melting can lead to food contamination and create a fire hazard, as the wax coating can ignite when exposed to intense heat. Additionally, using wax paper may result in a messy cleanup, with melted wax potentially dripping onto the heating element.
Manufacturers strongly advise against its use due to these safety concerns. Ultimately, the degradation of wax paper can impart unwanted flavors to your food, making it an unsuitable option for air frying.
Avoiding these risks is essential for a safe cooking experience.
Safe Alternatives for Air Fryers
If you're looking for safe alternatives to use in your air fryer, consider options that can withstand higher temperatures without compromising your cooking experience.
Parchment paper is a great choice, as it can handle temperatures up to 400°F (205°C) and helps prevent sticking.
Aluminum foil works too, but make sure it doesn't block air circulation and is weighed down to avoid floating.
For a reusable option, silicone mats are heat resistant and effective at keeping food from sticking.
Pre-fitted air fryer liners, especially perforated parchment paper, enhance airflow and simplify cleanup.
Just remember to steer clear of wax paper, as its low heat tolerance can lead to melting and potential fire hazards. Additionally, using high-quality air purifiers in your cooking space can help reduce odors and improve overall indoor air quality.
Understanding Material Properties
Understanding the properties of various cooking materials is essential for achieving the best results in your air fryer.
Wax paper isn't suitable for high heat, as it melts above 200°F, risking food contamination and fire hazards. In contrast, parchment paper boasts impressive heat resistance, handling temperatures up to 420-450°F, making it perfect for air frying.
Aluminum foil, while efficient at conducting heat and non-flammable, should be used cautiously to prevent airflow blockage.
Silicone mats provide a reusable, non-stick surface that withstands high temperatures, making them a safe alternative to wax paper.
User Experiences and Recommendations
Why take unnecessary risks with your air fryer? Many users warn against using wax paper due to its low heat tolerance, which can lead to melting and even a fire hazard. Instead, you'll find a strong recommendation for parchment paper, designed for high-temperature cooking to effectively prevent sticking. Some air fryer enthusiasts also swear by silicone liners, which are heat-safe and serve as reusable alternatives. Here's a quick comparison:
Material | Heat Tolerance | Safety Level |
---|---|---|
Wax Paper | Low | Fire Hazard |
Parchment Paper | High | Food Safety |
Silicone Liner | High | Safe & Reusable |
Adhering to safe cooking practices guarantees your meals are delicious and your appliance lasts longer!
Best Practices for Air Frying
When it comes to air frying, following best practices can make a significant difference in your cooking results. Always consult your air fryer manual to verify you're using materials that are safe to use.
Opt for parchment paper instead of wax paper, as it withstands high temperatures and won't pose a fire hazard. To prevent food from sticking in the air fryer basket, weight down any liners with food, keeping them away from the heating element.
Avoid preheating with liners, as they can fly around and create a fire risk. Regularly monitor cooking times and temperatures for different foods, and steer clear of wet batters that obstruct air circulation. Additionally, be mindful of color accuracy as it can enhance your overall cooking experience by ensuring even browning and crispness.
These tips will make cleanup easier and enhance your air frying experience!
Frequently Asked Questions
Is Wax Paper Safe in an Air Fryer?
When you're wondering if wax paper is safe in an air fryer, it's important to know it isn't.
Wax paper can melt at high temperatures, potentially contaminating your food and damaging your appliance. The wax coating poses a fire hazard, and melted wax can create a mess on the heating element.
Instead, consider using parchment paper or silicone liners for safer and more effective cooking in your air fryer.
What Is the Best Thing to Put on the Bottom of an Air Fryer?
When you're looking for the best thing to put on the bottom of your air fryer, consider using parchment paper.
It's heat-resistant and prevents sticking, making cleanup a breeze. Aluminum foil works too, but make sure it doesn't block air circulation.
If you prefer a reusable option, silicone mats are perfect for non-stick surfaces.
You might also find pre-fitted liners convenient, as they simplify cleaning while allowing proper air flow.
What Can I Line My Air Fryer Basket With?
When it comes to lining your air fryer, the options are endless, like a culinary wonderland! You can use parchment paper, which withstands high temperatures and keeps your food from sticking.
Aluminum foil works too, but make sure it doesn't block air circulation. Silicone mats are reusable and perfect for easy cleanup.
Consider pre-fitted liners with perforations for ideal air flow. Just steer clear of wax paper; it's not safe for high heat!
What Kind of Paper Can I Put in the Air Fryer?
When you're looking for paper options for your air fryer, stick to parchment paper or aluminum foil.
Parchment paper can handle high temperatures without issues, while aluminum foil works as long as it doesn't block air circulation.
Silicone mats are also great, as they're heat-resistant and reusable.
Just remember to avoid wax paper; it's not safe due to its low heat tolerance and potential fire risks.
Always check your air fryer's manual for guidance.
Conclusion
In summary, while wax paper might seem like a simple solution, its risks outweigh the rewards in your air fryer. Instead, consider safe alternatives like parchment paper or silicone mats to guarantee a successful and safe cooking experience. By understanding material properties and following best practices, you'll whip up wonderful meals without worry. So, stay savvy, skip the wax paper, and savor the scrumptious sensations your air fryer can create!
-
User Stories and Tips1 week ago
I Tried These 5 Air Fryer Hacks—You Won’t Believe the Results!
-
User Stories and Tips7 days ago
The Secret to Perfectly Crispy Fries: Real Users Share Their Air Fryer Tips
-
User Stories and Tips7 days ago
You’ll Never Cook the Same Again: How an Air Fryer Changed My Life!
-
Recipes6 days ago
How to Make Fries in Air Fryer: The Ultimate Crisp Guide
-
User Stories and Tips1 week ago
I Cooked Every Meal in an Air Fryer for a Week—Here’s What I Learned!
-
Vetted6 days ago
15 Best Smart Air Fryers With App Connectivity for Effortless Cooking in 2025
-
Vetted6 days ago
15 Best Desk Speakers of 2025 – Elevate Your Audio Experience
-
Recipes6 days ago
How Long to Cook Chicken Wings in Air Fryer: Ultimate Crispy Guide!