To make an air fryer baked potato topped with Greek yogurt, start by selecting a large Russet potato, pierce it several times, and rub with oil and salt. Preheat your air fryer to 400°F, then cook the foil-wrapped potato for about 40-45 minutes, checking for tenderness. Once done, reveal and top with a dollop of Greek yogurt, along with your favorite toppings. For simple tips and flavorful ideas, continue exploring the full process.
Key Takeaways
- Preheat the air fryer to 400°F and prepare large Russet potatoes by piercing, oiling, and salting.
- Wrap potatoes in foil, then air fry for about 35-40 minutes until tender and skin is crispy.
- Open the cooked potato, fluff inside, and top with Greek yogurt for added creaminess and protein.
- Customize with additional toppings like cheese, herbs, or bacon bits for flavor variations.
- Serve immediately while hot for the best texture, pairing with fresh vegetables or salads if desired.

Cosori TurboBlaze Air Fryer 6 Qt, PFAS-Free Ceramic Coating, Dark Gray
- TurboBlaze Technology: Powerful 3600 rpm fan and high temperatures
- Precise Temperature Control: 90°–450°F for even cooking
- Even Cooking System: 5-fan system for consistent results
As an affiliate, we earn on qualifying purchases.
As an affiliate, we earn on qualifying purchases.
Recipe
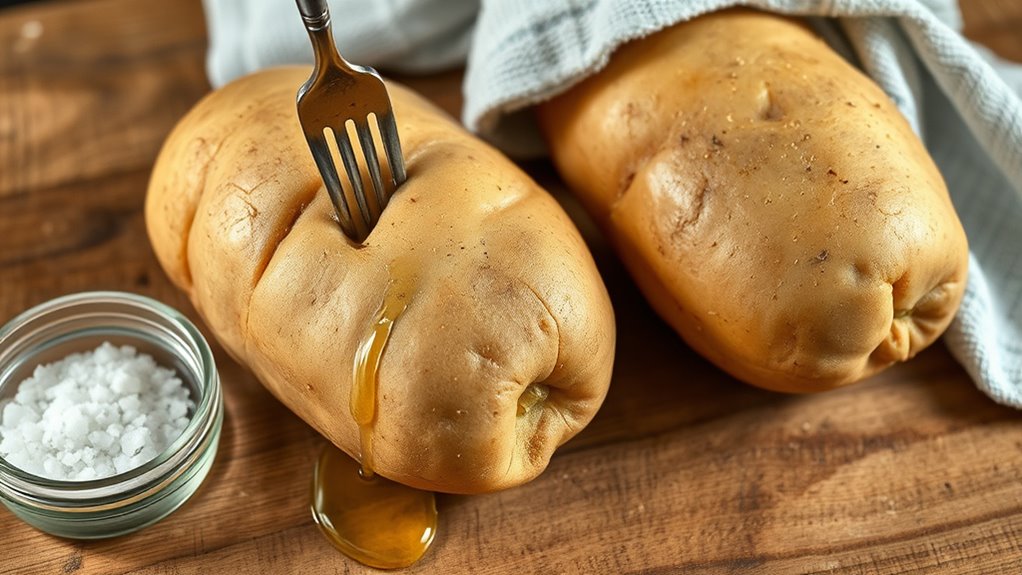
To make a perfectly cooked air fryer baked potato, start by selecting large, firm Russet potatoes. Rinse them thoroughly under cold water to remove any dirt and pat them dry with a clean towel. Using a fork, poke several holes all over each potato to allow steam to escape during cooking. For added flavor and crispness, you can rub the potatoes with a little olive oil and sprinkle them with coarse sea salt. Preheat your air fryer to 400°F (200°C), which guarantees an even cooking temperature and crispy skin. Incorporating food safety practices ensures the potatoes are cooked thoroughly and safely. Applying proper food handling techniques, such as washing your hands and utensils, helps prevent cross-contamination.
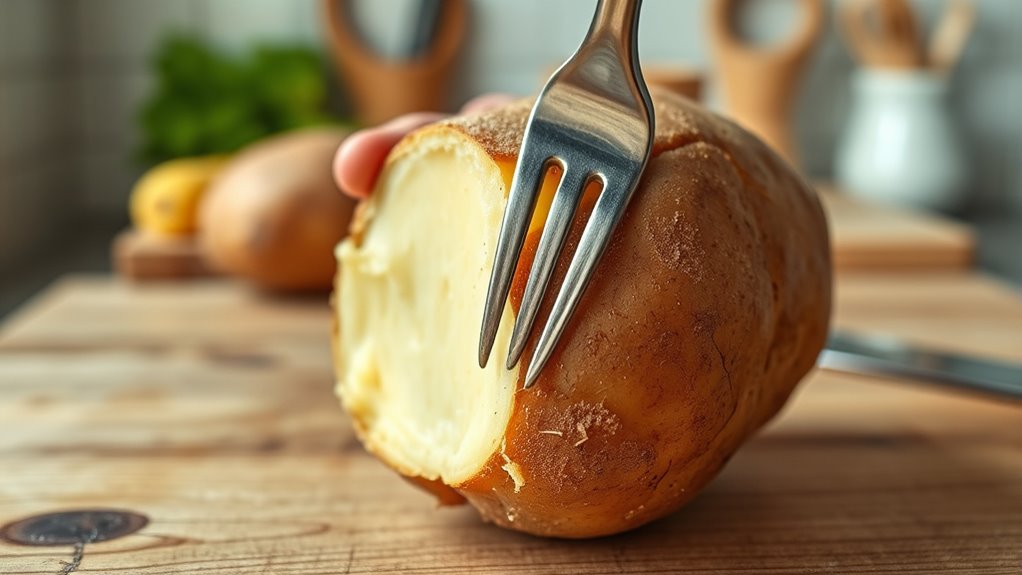
Once preheated, place the prepared potatoes in the air fryer basket, making sure they are not overcrowded to allow hot air to circulate freely. Cook for about 35-40 minutes, flipping them halfway through, until the potatoes are tender when pierced with a fork and the skin is crispy. Let the potatoes cool for a few minutes before slicing open and adding your favorite toppings like butter, sour cream, cheese, chives, or bacon bits. Serve hot for a delicious and easy side dish or meal.
Cooking Steps

To get started, you’ll want to preheat your air fryer so it’s ready to cook. Next, pierce the potato with a fork to create vents, which helps steam escape during cooking. Finally, wrapping the potato in foil guarantees it cooks evenly and stays moist.
Step 1. Preheat Air Fryer
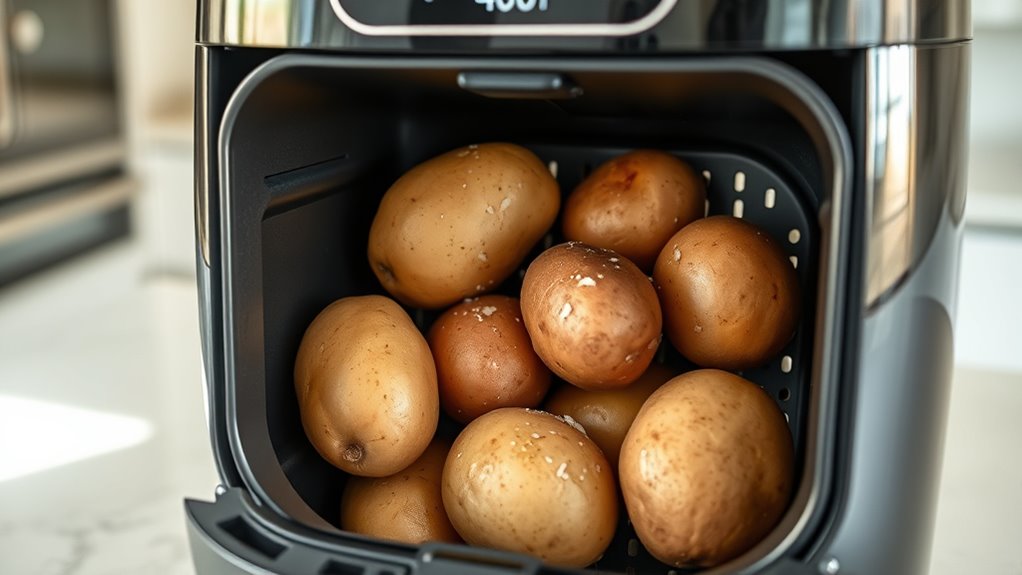
Preheating your air fryer guarantees the potato cooks evenly and develops a crispy outside. To do this, turn on your air fryer and set the temperature to 400°F (200°C). Allow it to run empty for about 3-5 minutes. Preheating ensures the hot air circulates properly, which results in a uniformly cooked potato with a satisfying crisp exterior. Skipping this step can lead to uneven cooking or a softer crust. Once preheated, carefully place your prepared potato into the basket, making sure it’s centered and not overcrowded. Proper preheating helps achieve the ideal texture and flavor, giving you that perfect baked potato with a crispy skin and fluffy interior. Always preheat your air fryer before placing the food inside for best results. Additionally, cooking techniques like preheating are essential for consistent results in air frying. Using a proper temperature setting is key to achieving the perfect balance between crispy skin and tender inside. Incorporating temperature control can further optimize the cooking process and ensure your potato turns out just right. Proper maintenance and cleaning routines also contribute to the longevity and optimal performance of your air fryer.
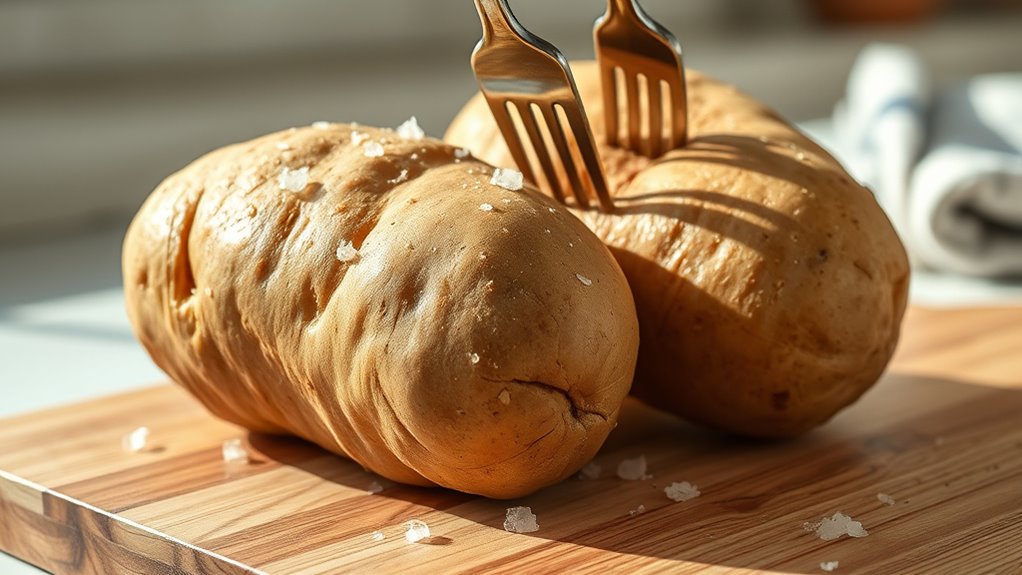
Step 2. Pierce Potato With Fork
Before placing the potato in the air fryer, you should pierce it with a fork. This step allows steam to escape during cooking, preventing the potato from bursting. Insert the fork into the potato at least 6-8 times, spacing the punctures evenly around the surface. Keep your hand steady and apply gentle pressure to create small holes without tearing the skin. Piercing also helps guarantee the potato cooks evenly by allowing heat to penetrate more effectively. Proper venting is especially important for pressure release during cooking to ensure safety. Be thorough but gentle—don’t push too hard, or you might break the skin. Once you’ve pierced the potato all over, you’re ready to move on to the next step. Properly venting the potato enhances safety and assures a safe, perfectly cooked baked potato in your air fryer. Piercing techniques are essential for achieving consistent results and preventing accidents during cooking.
Step 3. Pierce With Fork to Vent

Piercing the potato with a fork to vent is a quick and easy step that guarantees safe and even cooking. When you insert the fork into the potato, make sure to create several small holes across its surface. This allows steam to escape during cooking, preventing the potato from bursting or bursting open unexpectedly. Keep the fork steady and avoid pushing too hard; gentle, consistent punctures are enough. The venting process also helps the heat distribute evenly inside the potato, resulting in a fluffy interior. Once you’ve pierced the potato, you’re ready to place it in the air fryer. This simple step ensures your baked potato cooks thoroughly without any mishaps, giving you a perfectly cooked, tender result every time.
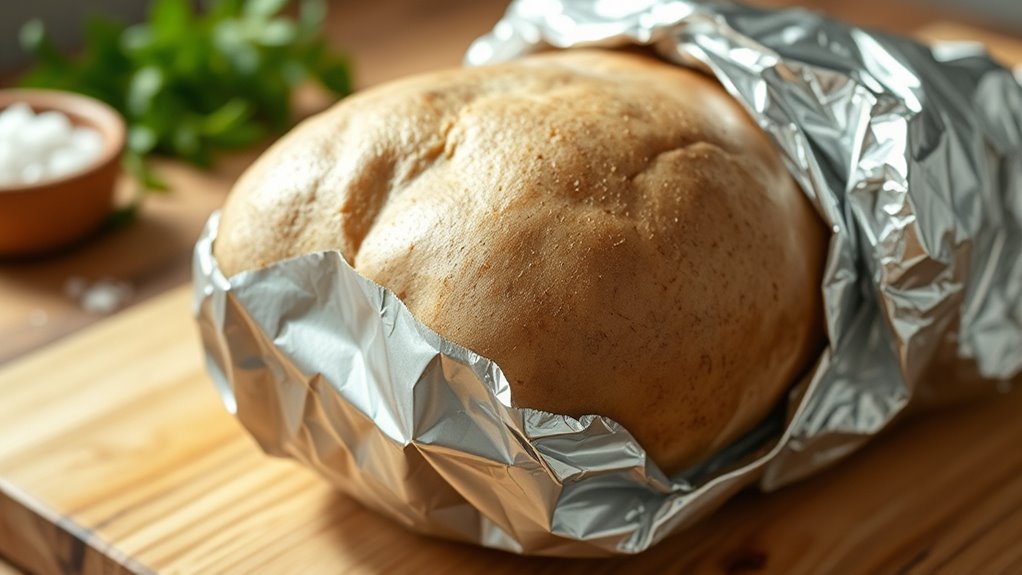
Step 4. Wrap Potato in Foil

Once you’ve pierced the potato to vent steam, the next step is to wrap it in foil. Lay out a sheet of aluminum foil large enough to fully encase the potato. Place the potato in the center of the foil, then fold the edges over, ensuring it’s completely wrapped. Tuck in the foil tightly to hold in moisture and create a barrier that promotes even cooking. Wrapping in foil helps the potato steam inside, resulting in a tender interior. Avoid leaving gaps or loose folds, as this can cause uneven heat distribution. Once wrapped, you’re ready to place the potato in the air fryer. This simple step guarantees your baked potato turns out soft, fluffy, and perfectly cooked.
Step 5. Wrap Potato in Foil
After piercing the potato to release steam, you should wrap it tightly in foil. This helps retain moisture and ensures even cooking. Place the potato on a sheet of aluminum foil, then fold the edges over, pressing firmly to seal completely. Make sure there are no gaps, so steam and heat stay inside. Wrapping in foil also keeps the skin soft and prevents it from drying out in the air fryer. If you prefer a crisper skin, you can skip the foil during the final minutes of cooking, but for a tender interior, this step is essential. Once wrapped, gently place the potato in the air fryer basket, ready for cooking. Proper wrapping guarantees a delicious, evenly cooked baked potato.
History
Have you ever wondered how baked potatoes became a popular comfort food? Their history dates back thousands of years, with origins in South America, where indigenous peoples cultivated potatoes long before Europeans arrived. When explorers like Ferdinand Magellan returned to Europe, they brought potatoes with them, initially treated with suspicion. Over time, potatoes gained popularity because they were affordable, nutritious, and versatile. In the 19th century, baked potatoes became a staple in American cuisine, especially in roadside diners and casual eateries. The method of baking, whether in an open flame or modern ovens, evolved to suit available technology. Today, with tools like air fryers, you can enjoy this comfort food quickly, maintaining its rich history while embracing modern convenience.
Final Thoughts
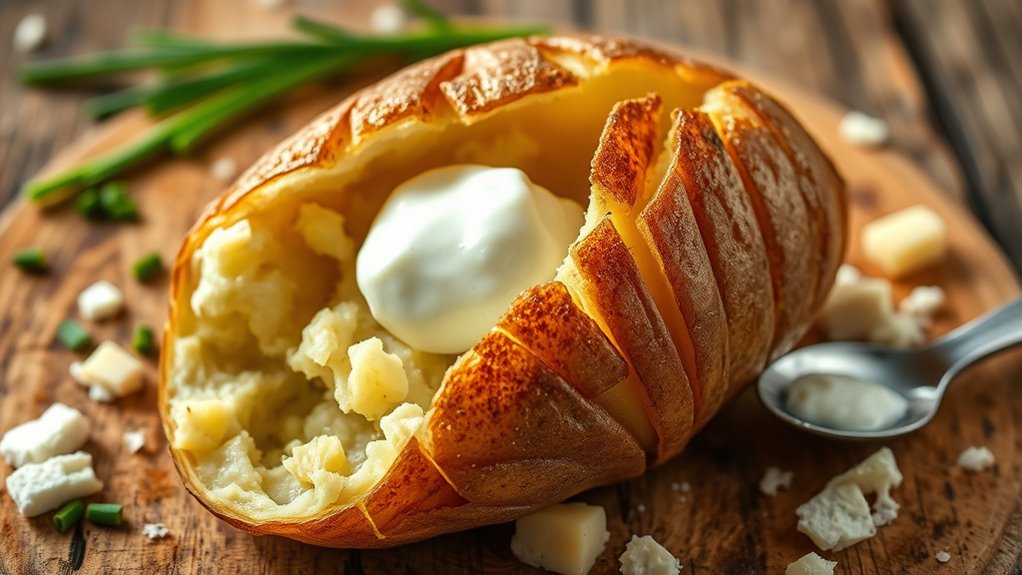
The evolution of baked potatoes from ancient South American staples to modern comfort foods highlights their enduring appeal. You can enjoy this versatility in a simple, wholesome way with an air fryer. It’s quick, easy, and produces a perfectly crispy outside while keeping the inside soft and fluffy. Pairing your baked potato with Greek yogurt adds a nutritious, creamy touch that balances flavors beautifully. Whether you prefer toppings like chives, cheese, or chili, this method lets you customize easily. Making baked potatoes in your air fryer is a smart choice for busy days or when you want a satisfying, healthy meal without much fuss. So go ahead, experiment with toppings, and enjoy a comforting, flavorful dish right at home.
Frequently Asked Questions
Can I Use Sweet Potatoes Instead of Regular Potatoes?
You can definitely use sweet potatoes instead of regular potatoes. They cook well in the air fryer and give a slightly different flavor and sweetness. Just keep in mind that sweet potatoes may take a bit less time to cook, so check for doneness sooner. Slice or pierce them to release steam, then proceed with your usual seasoning and toppings. Enjoy your healthier, tasty alternative!
What Are Some Vegan Toppings for This Dish?
When considering vegan toppings for your baked potato, think beyond traditional options. You can add sautéed mushrooms, caramelized onions, or roasted peppers for flavor. Nutritional yeast provides a cheesy taste, while guacamole adds creaminess. Fresh herbs like chives or cilantro brighten the dish, and a drizzle of tahini or hot sauce can give it a tasty kick. These options keep your dish plant-based and delicious.
How Do I Store Leftovers Safely?
It’s funny how leftovers sometimes seem to disappear faster than expected. To store your baked potato safely, let it cool slightly, then wrap it tightly in foil or place it in an airtight container. Keep it in the refrigerator within two hours of cooking. When you’re ready to eat again, reheat thoroughly to make certain of safety. This way, your leftovers stay fresh and delicious.
Can I Prepare This in a Standard Oven?
Yes, you can prepare a baked potato in a standard oven. Preheat your oven to 400°F (200°C), prick the potato with a fork, and place it directly on the oven rack or a baking sheet. Roast for about 45-60 minutes, flipping halfway through, until it’s tender. Once done, top it with Greek yogurt or your favorite toppings. This method yields a crispy skin and fluffy interior.
Is There a Gluten-Free Alternative to Greek Yogurt?
You might wonder if there’s a gluten-free alternative to Greek yogurt. Yes, there are several options like coconut yogurt, almond yogurt, or cashew yogurt. These plant-based options are naturally gluten-free and can provide a similar creamy texture. Just check the labels to guarantee they’re free from gluten cross-contamination. You can substitute Greek yogurt with these alternatives in your recipes without sacrificing flavor or texture.