
Deciding whether to replace a heating element yourself or hire a professional depends on your electrical skills and comfort with appliance repairs. If you have basic tools, follow safety precautions, and understand wiring, you can try a DIY fix. However, complex systems or lack of experience may require professional help to avoid safety hazards or further damage. Keep in mind, learning more about the process assists you in making an informed choice that ensures safety and proper function.
Key Takeaways
- DIY replacement is suitable for simple, accessible heating elements with basic electrical knowledge and proper safety precautions.
- Complex or hard-to-reach appliances may require a professional to ensure correct installation and safety.
- Incorrect wiring or handling can cause safety hazards, making professional help advisable for inexperienced DIYers.
- Evaluate your skills, tools, and confidence before attempting, and consider professional repair for complex systems.
- Prioritize safety and proper functioning over cost savings by consulting a professional when unsure.
Understanding the Role of a Heating Element

Have you ever wondered what exactly a heating element does in your appliance? It’s the core component that produces heat, enabling your device to cook, warm, or dry. Understanding its role helps you grasp how your appliance functions. Heating elements come in different types, such as coil, ribbon, or tubular, each designed for specific applications. When replacing one, check for thermostat compatibility to guarantee it works seamlessly with your appliance’s temperature controls. Choosing the right heating element type is vital for efficient operation and safety. Remember, a properly matched heating element not only heats effectively but also integrates smoothly with your appliance’s existing systems. Knowing these basics helps you make smarter choices when maintaining or replacing your heating element. Additionally, understanding AI in Business can provide insights into innovative tools that might assist in troubleshooting or improving appliance efficiency.
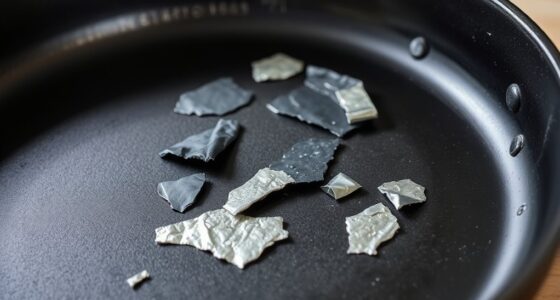
Signs That You Need to Replace Your Heating Element

When your appliance isn’t heating as it should, it’s a strong sign that your heating element might be failing. You may notice uneven heating, longer cook times, or a complete lack of heat. These issues directly impact heating efficiency, making your appliance less effective. A sudden increase in energy bills suggests a faulty element consuming more power. To visualize, consider this table:
| Symptom | Effect on Heating Efficiency | Cost Analysis Impact |
|---|---|---|
| Inconsistent heating | Reduced performance | Higher electricity bills |
| No heat at all | Complete failure | Repair or replacement costs |
| Longer cooking times | Inefficient energy use | Potential appliance damage |
| Visible damage or breaks | Immediate replacement needed | Cost of new element |
Recognizing these signs helps determine if replacement is necessary, saving both time and money. Additionally, understanding the contrast ratio of your appliance can help evaluate its overall performance.
Tools and Skills Required for DIY Replacement

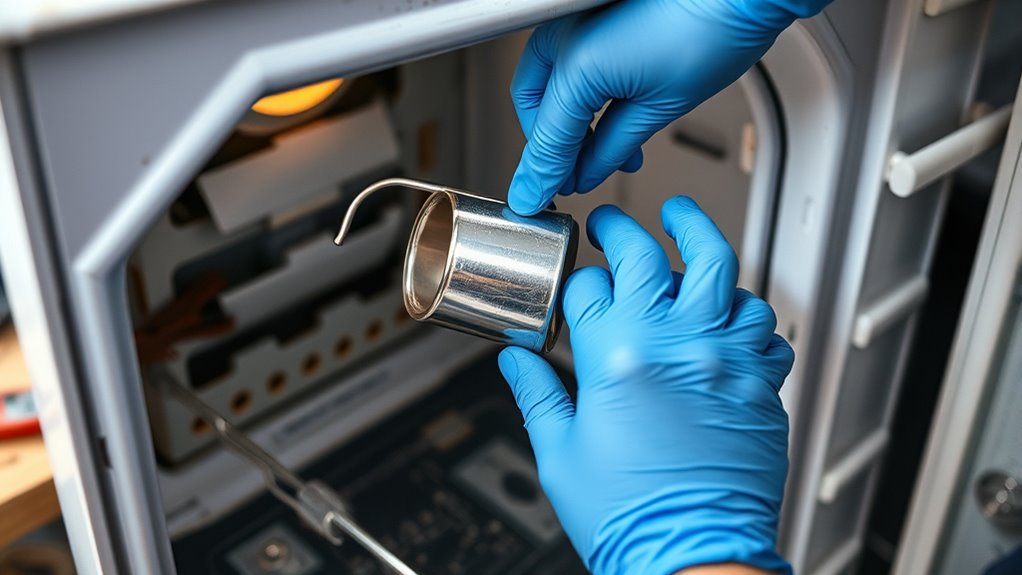
To replace a heating element yourself, you need specific tools like screwdrivers, a multimeter, and possibly pliers. You should also understand basic electrical skills and how to safely disconnect power before starting. Following safety precautions is essential to avoid shocks or injuries during the process. Additionally, ensuring your workspace is ergonomically organized can help streamline the replacement process and enhance safety.
Tools Needed for Replacement
Replacing a heating element requires a few essential tools and some basic skills. You’ll need the right equipment to guarantee proper installation, which directly impacts temperature regulation and energy efficiency. Here are the key tools you’ll need:
- Screwdriver (flathead and Phillips)
- Multimeter for testing continuity
- Pliers for gripping and removing components
- Insulated gloves for safety
- Replacement heating element
Having these tools on hand helps you work safely and efficiently. Properly installed heating elements improve temperature regulation, making your appliance more energy-efficient. Before starting, ensure the power is off to prevent accidents. Additionally, understanding the material range of heating elements can help you select the most durable option. With the right tools, you can confidently perform the replacement, potentially saving money and guaranteeing your system maintains optimal energy efficiency.
Essential Skills to Know
Having the right tools is just the start; knowing how to use them effectively is equally important. You need basic electrical knowledge to ensure proper connections and avoid damaging the heating element or your appliance. Skills in troubleshooting can help identify if the issue stems from a faulty element or other components, saving you time and energy. Understanding maintenance routines improves energy efficiency, making sure your appliance runs smoothly and consumes less power. Precise removal and installation techniques prevent future problems and extend the lifespan of your heating element. Familiarity with how to test electrical circuits ensures safety and confirms your replacement is successful. Proper maintenance can also help prevent future heating element failures. Developing these skills boosts confidence, reduces errors, and can save you money by avoiding unnecessary professional repairs.
Safety Precautions to Follow
Before starting your DIY heating element replacement, taking safety seriously by understanding the necessary precautions is essential. Electrical safety should be your top priority to prevent shocks or fires. Always disconnect power before working on the appliance. Wearing protective gear like gloves and safety goggles shields you from potential burns and debris. Keep these safety tips in mind:
- Turn off and unplug the appliance completely
- Use insulated tools to prevent electrical shocks
- Wear protective gear at all times
- Test for residual voltage before handling components
- Work in a well-ventilated area to avoid inhaling dust or fumes
- Be aware of electrical safety guidelines to prevent accidents
Following these precautions ensures you stay safe during the repair. Remember, safety isn’t worth risking, especially when dealing with electrical safety issues or hot components.
Step-by-Step Guide to Replacing a Heating Element

To successfully replace a heating element, start by unplugging the appliance and turning off the power supply to guarantee your safety. Next, locate the heating element, usually at the back or bottom of the unit, and remove any panels or covers. Disconnect the wiring carefully, noting where each connector goes. Remove the screws or clips holding the old element in place. Take out the faulty element and compare it with the new one to verify compatibility. Install the new element, secure it with screws or clips, and reconnect the wiring. Once everything is back in place, plug in the appliance and turn on the power. A properly replaced element enhances heating efficiency, prolongs the appliance’s lifespan, and ensures you stay within the recommended replacement timeline for peak performance. Additionally, verifying the correct installation procedure helps prevent issues like leaks or poor heating performance.
Common Challenges and Mistakes to Avoid

When replacing a heating element, wiring mistakes are a common pitfall that can cause safety hazards or malfunction. Skipping the right tools or rushing through the process increases the risk of damage or errors. Always follow safety precautions to protect yourself and make sure the job gets done correctly. Using performance cookies to monitor your progress can help ensure that all steps are completed properly.
Identifying Wiring Errors
Wiring errors are a common challenge when replacing a heating element, and they can lead to malfunction or even safety hazards if not identified early. During electrical troubleshooting, pay close attention to how wires are connected. Miswired components can cause the element not to heat or create electrical shorts. To avoid mistakes, double-check your wiring against the manufacturer’s diagram. Keep these tips in mind:
- Ensure power is off before starting
- Confirm wire connections match the diagram
- Look for loose or frayed wires
- Avoid crossing wires or creating short circuits
- Use proper connectors and secure all connections
Identifying wiring errors early prevents damage and safety issues. Taking your time during electrical troubleshooting helps ensure the heating element functions correctly and safely.
Overlooking Proper Tools
Overlooking the importance of using proper tools can lead to mistakes that complicate the repair process or cause damage. Without the right tools, you might struggle to remove the heating element or risk damaging nearby components. Always gather essential proper tools like screwdrivers, pliers, and a multimeter before starting. Using the correct tools makes the job smoother and safer. Don’t forget safety equipment—gloves and safety glasses—to protect yourself from burns or electrical shocks. Skipping proper tools can lead to slips or damage that require additional repairs. Investing in quality tools not only speeds up the process but also minimizes the risk of mistakes. Remember, using the right tools and safety gear is vital for a safe, effective heating element replacement. Additionally, understanding Soul Sanctuaries can provide valuable insight into wellness practices that promote overall safety and well-being during home repairs.
Ignoring Safety Precautions
Neglecting safety precautions during a heating element replacement can lead to serious injuries or damage. Electrical safety is essential—always disconnect power before starting. Failing to follow proper procedures can result in electric shocks or fires. Use proper tools designed for electrical work to avoid slips or damage. Keep these tips in mind:
- Always turn off and unplug the appliance before working.
- Wear insulated gloves and safety goggles.
- Test for residual voltage with a multimeter.
- Keep your workspace dry and free of clutter.
- Follow manufacturer instructions carefully.
- Additionally, understanding electrical safety is crucial to prevent hazards during repairs.
Ignoring these safety measures increases risk. Don’t rush—taking shortcuts with electrical safety or improper tools can have dangerous consequences. Prioritize safety to protect yourself and ensure a successful, damage-free repair.
When to Call a Professional for Help

Wondering when it’s time to call a professional? If you’re unsure about electrical safety or feel uncomfortable working with wiring, it’s best to seek expert help. Handling electrical components without proper knowledge can lead to shocks, fire hazards, or further damage. Additionally, if your repair involves complex wiring or requires specialized tools, a professional can guarantee the job is done correctly and safely. Consider the cost analysis: trying to fix it yourself might save money initially, but mistakes could result in costly repairs later. When in doubt, prioritize safety and quality. If you encounter persistent issues, or if the heating element is integrated into a complex system, calling an HVAC or electrical professional is the smart choice. Your safety and long-term savings depend on it.
Costs and Benefits of DIY vs. Professional Replacement

Deciding between DIY and professional replacement of a heating element involves weighing the costs against the benefits. A thorough cost comparison considers parts, tools, and potential repairs. DIY can save money upfront but requires a honest skill assessment—if you’re comfortable with basic electrical work, you might succeed. However, mistakes could lead to costly damage or safety hazards. Benefits of hiring a pro include expertise, proper diagnostics, and warranty support. Consider these points:
- Lower risk of mishandling electrical components
- Faster, more reliable repair
- Professional troubleshooting skills
- Warranty on parts and labor
- Potentially higher upfront cost
Ultimately, your decision hinges on your skill assessment and how much you’re willing to invest for peace of mind and safety. Weigh these factors carefully before proceeding.
Ensuring Safety During and After the Replacement Process

Safety should be your top priority both during and after replacing a heating element. Before starting, disconnect the power supply and guarantee the appliance is completely off. Wear insulated gloves and eye protection to prevent shocks or burns. During installation, handle the new heating element carefully, avoiding damage to thermal insulation around the unit, which helps maintain energy efficiency. Properly secure all connections to prevent electrical hazards or overheating. After completing the replacement, double-check that all wiring is tight and correctly installed. Clear the area of tools and debris. Restoring thermal insulation correctly ensures the appliance operates efficiently, reducing energy waste and preventing future safety issues. Prioritizing safety safeguards you from potential hazards and helps your system perform at its best over time.
Frequently Asked Questions
How Long Does a Typical Heating Element Last?
A typical heating element lasts about 8 to 10 years, depending on usage and maintenance. You should consider its energy efficiency; a worn-out element can increase energy consumption. Regularly check for signs of wear, like discoloration or failure to heat properly. Comparing lifespan and energy efficiency helps you decide when it’s time to replace it, whether doing it yourself or calling a professional. Proper care ensures peak performance and longer-lasting efficiency.
Can I Upgrade to a More Efficient Heating Element?
Think of your heating system like a car engine—upgrading parts can boost performance. You can upgrade to a more efficient heating element for better energy savings, but watch out for compatibility concerns. Confirm the new element fits your system’s specifications to avoid issues. While DIY might seem tempting, consulting a pro guarantees the upgrade runs smoothly, saving you time and money in the long run.
What Are the Environmental Impacts of Replacing a Heating Element?
When you replace a heating element, it can impact the environment through energy use and waste. You should explore recycling options for old parts, reducing landfill waste. Plus, guarantee your replacement complies with environmental regulations to minimize pollution. By choosing eco-friendly options and proper disposal methods, you help lower your carbon footprint and support sustainability efforts. Being mindful of these factors makes your upgrade more environmentally responsible.
How Do I Dispose of the Old Heating Element Properly?
So, you’ve got an old heating element and wonder how to part ways with it? First, don’t toss it in the trash like yesterday’s pizza. Instead, take it to an electronics recycling center—because it’s basically hazardous waste, not just scrap metal. Proper disposal guarantees hazardous substances don’t pollute our planet. Skip the landfill drama, and give that old part a responsible send-off—Mother Earth will thank you!
Are There Any Warranty Considerations When Replacing a Heating Element?
When you’re replacing a heating element, it’s important to ensure warranty coverage, as it might cover the part or labor if something goes wrong. Keep your receipt and follow the manufacturer’s instructions to avoid affecting your warranty. If you do it yourself, be aware that improper installation could void warranty coverage, leading to higher replacement costs. Always check your warranty terms before starting the job to save money and ensure proper coverage.
Conclusion
Whether you choose to replace your heating element yourself or call in a pro, safety and proper knowledge are your guiding stars. Think of it like steering a ship—you need the right tools and skills to steer clear of trouble. If you’re comfortable with DIY tasks, you can save money and learn something new. But if you’re unsure, don’t hesitate to seek expert help. Ultimately, ensuring your heater runs smoothly is worth sailing safely into professional waters.