

If your power button is unresponsive, start by unplugging the device and checking the button for any visible damage or corrosion. Use a multimeter set to continuity mode to test the switch—press the button and see if the meter beeps. Next, verify the voltage at the power input terminals. If everything checks out but the device still won’t turn on, further testing of wiring and power supply might be needed. Keep exploring to learn more troubleshooting steps.
Key Takeaways
- Use a multimeter in continuity mode to test the power button for proper connection.
- Verify voltage at the power input terminals to ensure the power supply functions correctly.
- Visually inspect the button and wiring for damage, corrosion, or loose connections.
- Press and hold the power button while testing for continuity between its terminals.
- Check the circuit path from the power button to the motherboard or power supply for faults.
Gather Necessary Tools and Safety Precautions

Before attempting to troubleshoot a power button that’s unresponsive, you should gather the essential tools and take proper safety precautions. Start with a multimeter for voltage testing, which helps you identify if power is reaching the circuit properly. You’ll also need screwdrivers to open the device safely and possibly replacement components if you discover a faulty part. Wear anti-static wristbands to prevent static damage to sensitive parts. Disconnect the device from the power source before inspecting or testing. Carefully check the voltage at the power button circuit to pinpoint issues; if a component is faulty, you may need to replace it. Being aware of electrical safety best practices is crucial to prevent injury or further damage. Taking these precautions ensures your safety and increases the chances of accurately diagnosing the problem without causing further damage.
Locate and Access the Power Button Circuit

Start by finding the power button location on your device, usually on the front or top panel. Carefully open the casing, making sure not to damage any components. Once inside, identify the circuit path connected to the power button to understand how it controls the system. Understanding device hardware is essential for effective troubleshooting.
Find Power Button Location
To find the power button location, you need to carefully examine the device’s exterior and internal components. Start by inspecting the button placement on the outside—look for any labels, symbols, or markings indicating the power switch. Once inside, trace the internal wiring connected to the button; these wires lead to the circuit board or power supply. Understanding how the internal wiring connects helps you identify the exact circuit path. Pay attention to how the power button is mounted and connected, as this can vary between devices. Noticing the placement and wiring layout ensures you know precisely where to test or disconnect during troubleshooting. Accurate identification of the power button location prevents unnecessary disassembly and saves time during your circuit testing process. Additionally, knowing the circuit path can help in diagnosing potential issues with the device’s power supply or wiring.
Open Device Casing Carefully
Careful handling is essential when opening the device casing to access the power button circuit. Depending on the casing material—plastic, metal, or composite—you’ll need appropriate tools to avoid damage. Use a plastic pry tool or screwdriver to gently remove the casing panels, taking care not to crack or bend them. Once open, you’ll see the internal components, including the circuit connected to the power button. Avoid applying excessive force, which could dislodge or damage delicate parts. Keep track of screws and small components as you work. Opening the casing correctly guarantees safe access to the circuit, reducing the risk of further damage. Proper circuit inspection can help identify potential issues with the power button connection. Take your time, proceed carefully, and handle internal components with steadiness and caution.
Identify Circuit Path
Once you’ve opened the device casing, the next step is to locate the circuit connected to the power button. Refer to the circuit diagram or wiring schematic to identify the correct pathway. Look for the small, often labeled, traces or connectors leading from the power button to the motherboard or power supply. Following the schematic helps you understand how the circuit is wired and where to test for continuity. Carefully trace the wiring from the button to the rest of the circuitry, ensuring you don’t accidentally disconnect or damage any components. Accessing this circuit path allows you to verify if the power button is properly wired and functioning. Using the diagram as a guide keeps your inspection organized and effective. Incorporating power button testing techniques can further diagnose potential issues in the circuit.
Check the Physical Condition of the Button and Circuit Path

Start by inspecting the power button for signs of wear or damage, like cracks or sticking. Then, check the circuit connections to verify they’re secure and free of corrosion. Finally, test the circuit path for any visible damage or broken components that could be causing the issue. Additionally, assessing the circuit path’s integrity helps ensure all electrical connections are functioning correctly.
Inspect Button Wear
To determine if button wear is causing the power button issue, you should visually inspect both the button itself and the surrounding circuit path. Over time, repeated pressing can reduce button durability, leading to wear and tear that prevents proper contact. Look for signs like cracks, chips, or corrosion on the button surface, which can hinder electrical connection. Also, check for any visible deformation or looseness in the button mechanism. In the circuit path, examine for any discoloration or damage that might indicate corrosion or overheating. These physical issues can compromise the button’s ability to complete the circuit reliably. Additionally, understanding the physical health of electronic components can help diagnose potential issues more accurately. If the button shows significant wear or damage, replacing it may resolve the unresponsiveness and restore proper function.
Examine Circuit Connections
Inspecting the circuit connections involves carefully examining both the button itself and the surrounding wiring for any physical issues. Look for broken or frayed wires that could disrupt power or wireless connectivity. Check if the solder joints are cracked or loose, which can cause intermittent contact. Ensure the circuit path isn’t obstructed by dust, corrosion, or debris, which can interfere with signal flow. Also, verify that the circuit connections match the device’s wiring diagram, especially after firmware updates that might alter wiring requirements. Finally, test the continuity of the wires using a multimeter to confirm there are no breaks. Addressing these physical issues helps guarantee a reliable connection and prevents power button malfunctions caused by simple circuit faults. Additionally, understanding the importance of circuit integrity can aid in diagnosing underlying issues more effectively.
Test for Damage
When testing for damage, you should first examine the physical condition of the power button and the surrounding circuit path for signs of wear or harm. Look for visible damage like cracks, burns, or corrosion issues that could interfere with proper contact. Faulty soldering may appear as cold joints or loose connections around the button’s terminals, which can prevent the circuit from completing. Check for corrosion, especially on metal contacts, as this can cause poor conductivity or complete failure. Clean off any corrosion with a suitable contact cleaner, and re-solder any suspect joints. Ensuring the button and circuit path are free of damage and corrosion helps confirm whether physical issues are causing the unresponsiveness. If damage is evident, replacing or repairing the affected parts is necessary. Additionally, understanding the circuit path and how it connects to the power source can help identify potential issues that might not be immediately visible.
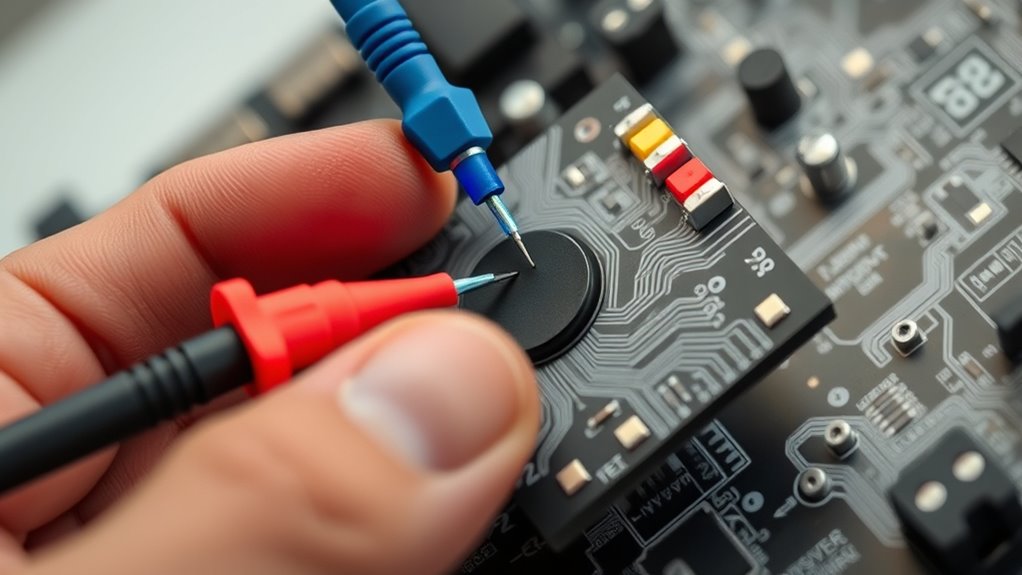
Test the Continuity of the Power Button Switch

Testing the continuity of the power button switch helps determine if it’s functioning properly or needs replacing. To do this, follow these steps:
- Set your multimeter to the continuity mode, which emits a sound when circuits are complete.
- Locate the power button, paying attention to its button design and how it fits comfortably in your hand.
- Press and hold the button, then place one probe on each terminal of the switch.
- If the multimeter beeps, the switch is good; if not, it’s likely faulty and needs replacing.
- Remember that AI vulnerabilities in electronic components can sometimes affect the reliability of diagnostic tests.
Verify Power Supply to the Circuit

To guarantee your device powers on properly, you need to verify that the power supply is delivering the correct voltage to the circuit. Use a multimeter to measure the voltage at the power input terminals. Ensure that the power source has proper voltage regulation, preventing fluctuations that could disrupt current flow. If the voltage is too low or unstable, the circuit won’t receive sufficient power, causing the power button to appear unresponsive. Confirm that the power supply matches the device’s specifications. If the voltage isn’t reaching the circuit as expected, check for loose connections or faulty power adapters. Maintaining proper voltage regulation and ensuring consistent current flow are essential steps to rule out power supply issues before proceeding further.
Analyze Test Results and Determine Next Steps
Reviewing the test results from your multimeter measurements helps identify whether the power supply is functioning properly or if issues persist elsewhere in the circuit. If voltage readings are within expected ranges, the problem might be a circuit malfunction unrelated to power failure. If readings are low or zero, you may face a power failure. To analyze your results:
- Confirm the voltage matches the device specifications.
- Check for inconsistent or fluctuating readings indicating a loose connection.
- Identify any broken or damaged wires causing an open circuit.
- Determine if components like fuses or switches are faulty, leading to circuit malfunction.
Frequently Asked Questions
Can Software Issues Cause the Power Button to Be Unresponsive?
Software glitches or outdated firmware updates can cause your power button to become unresponsive. When the software fails or firmware isn’t current, it may not properly communicate with the hardware, leading to issues like a non-working power button. You should check for software glitches or pending firmware updates, and apply updates if necessary. Restarting your device after updates can often resolve unresponsiveness caused by these software-related problems.
What Are Common Signs of a Faulty Power Button Circuit?
You’ll notice a faulty switch or circuit failure if your power button doesn’t respond when pressed, or if it feels loose or stuck. Sometimes, you might hear a clicking sound without turning on the device. Visual signs like burnt or damaged components around the switch also indicate a circuit failure. These issues point to a faulty switch or broken circuit, which prevents proper power delivery and needs inspection or replacement.
Is It Safe to Perform Circuit Testing on All Devices?
Think of circuit testing as traversing a minefield—you need to proceed carefully. While it’s often safe if you follow proper procedures, electrical hazards can lurk if you’re careless. Always unplug the device first and understand your warranty terms; opening it might void coverage. If unsure, consult a professional. Safety first keeps your device protected and your fingers intact, turning a risky task into a confident, controlled check.
How Often Should I Check My Device’S Power Button Circuit?
You should verify your device’s power button circuit during your regular maintenance schedule, ideally every few months or as recommended by the manufacturer. This helps catch potential issues early and ensures smooth troubleshooting if problems arise. Frequent inspections aren’t necessary unless you notice irregularities. Staying consistent with your troubleshooting frequency keeps your device reliable and prevents unexpected power failures.
What Alternatives Exist if the Power Button Circuit Is Irreparable?
Think of your device as a ship stranded at sea; if the power button’s broken beyond repair, you need a new compass. When hardware repair isn’t possible, explore replacement options like installing a remote power switch or replacing internal components. These alternatives serve as your device’s new guiding star, helping you regain control. Sometimes, choosing hardware repair isn’t feasible, but these options keep your device sailing smoothly.
Conclusion
If your power button isn’t responding, following these simple circuit test steps can save you time and money. Did you know that over 80% of device failures are due to simple connection issues? By checking the physical condition, testing continuity, and verifying the power supply, you can often identify the problem yourself. Don’t overlook these easy diagnostics—they might just get your device back up and running without needing professional help.